If you’ve ever been in the middle of a stick welding project and suddenly blown a hole through your metal, you know the frustration of burn through. It’s one of those welding defects that can stop you in your tracks, whether you’re a DIYer fixing a trailer in your garage, a hobbyist crafting a custom gate, or a pro welder on a job site. I’ve been there—early in my welding days, I melted through a thin piece of square tubing and had to start over.
Learning how to prevent burn through when stick welding is a game-changer for saving time, materials, and your pride. In this guide, I’ll walk you through practical tips, machine settings, and techniques to keep your welds strong and hole-free, no matter your skill level.
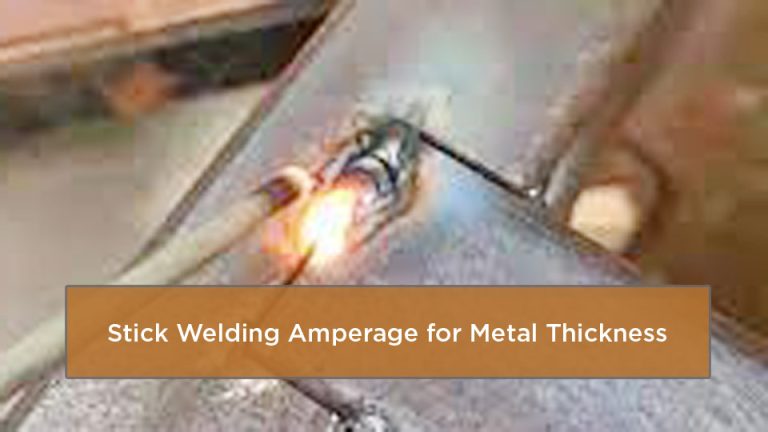
Burn through happens when too much heat melts the base metal completely, leaving a hole or weak spot. It’s a common issue, especially with thinner metals or when your settings are off. Why does it matter? A bad weld can compromise safety, weaken joints, or lead to costly rework.
Image by millerwelds
Whether you’re welding for structural integrity on a construction site or aiming for a clean finish on a custom project, avoiding burn through ensures your work holds up under pressure. Let’s dive into the causes, fixes, and pro tips to keep your welds solid.
What Is Burn Through and Why Does It Happen?
Burn through, sometimes called melt-through, occurs when the welding arc generates so much heat that it melts right through the base metal, creating a hole or thinning the material. It’s most common when stick welding thin metals (under 1/4 inch) or when your technique or machine settings aren’t dialed in.
You’re welding 16-gauge steel tubing with a 6010 rod, and the arc lingers too long in one spot. Before you know it, there’s a hole staring back at you. I’ve made that mistake, and it’s a quick way to ruin a workpiece.
The main culprits are excessive heat input, improper travel speed, or incorrect electrode angles. High amperage settings, slow torch movement, or a steep electrode angle can focus too much heat into the weld pool. Thin metals or materials with low thermal conductivity, like stainless steel, are especially prone.
Gaps in the joint or poor fit-up also increase the risk, as the arc has less material to work with. Understanding these causes is the first step to preventing burn through, and it starts with your setup and technique.
Choosing the Right Electrode for Stick Welding
Your electrode choice is critical for preventing burn through. Stick welding electrodes (or rods) come in different types, each with unique characteristics. For thinner metals, you need a rod that delivers a stable arc without excessive penetration. Let’s break down the common rods and when to use them.
E6013: The Beginner’s Friend
The E6013 rod is a go-to for DIYers and students because it’s forgiving and produces a smooth, stable arc. Its shallow penetration makes it ideal for thin metals like sheet metal or light-gauge steel. I remember using E6013 when I was learning to weld 18-gauge steel for a custom toolbox. It gave me clean beads without blowing through, even when my technique wasn’t perfect. Use it at 50–90 amps for 3/32-inch rods on thin stock.
E7018: Deep Penetration for Thicker Work
The E7018 rod is a favorite for structural welding because it deposits strong welds with deeper penetration. However, it’s not ideal for super-thin metals unless you’re skilled at controlling the arc. I’ve used E7018 on 1/4-inch plate with great results, but on thinner stock, it can burn through if you’re not careful. Run it at 90–120 amps for 3/32-inch rods, and keep your travel speed steady.
E6010 and E6011: High Penetration, High Risk
E6010 and E6011 rods are aggressive, designed for deep penetration on dirty or rusty metal. They’re great for root passes in pipe welding but tricky on thin materials. I once tried E6010 on 1/8-inch tubing and ended up with a hole because I didn’t adjust my amperage low enough. Stick to 40–70 amps for 3/32-inch rods, and use these only if you’re confident in your control.
Electrode Size Matters
Smaller rods, like 3/32-inch, are better for thin metals because they require less amperage, reducing heat input. Larger rods (1/8-inch or bigger) are for thicker materials. Always check the rod manufacturer’s recommended amperage range, and start at the lower end when working with thin stock.
Setting Up Your Welding Machine to Avoid Burn Through
Your welding machine settings are make-or-break for preventing burn through. Stick welders typically use a constant current (CC) power supply, and getting the amperage right is key. Here’s how to dial it in.
Amperage: Start Low, Adjust Up
High amperage is the number-one cause of burn through. For example, a 3/32-inch E6013 rod on 16-gauge steel might need only 50–70 amps. I always start at the low end of the rod’s range and make test welds on scrap metal. If the arc feels weak or the weld doesn’t penetrate, I bump it up in small increments (5–10 amps). Too high, and you’ll melt through; too low, and you’ll get poor fusion.
Polarity: Know Your Setup
Most stick welding rods (like E6013 and E7018) run on Direct Current Electrode Positive (DCEP), where the electrode is positive, and the ground clamp is negative. This setup provides good penetration but can increase burn-through risk on thin metals. For less penetration, try Direct Current Electrode Negative (DCEN) with rods like E6010. I’ve found DCEN helpful when welding thin tubing, as it keeps the heat more manageable.
Test Your Settings
Before tackling your project, weld a few beads on scrap metal of the same thickness. This lets you fine-tune your amperage and get a feel for the rod’s behavior. I keep a pile of scrap in my shop for this exact reason—it’s saved me from ruining plenty of workpieces.
Mastering Your Welding Technique
Technique is where the rubber meets the road. Even with the right rod and settings, poor technique can lead to burn through. Here’s how to refine your skills.
Travel Speed: Keep It Moving
Slow travel speed is a rookie mistake I’ve made more times than I’d like to admit. Lingering too long in one spot builds up heat, melting through the metal. Aim for a steady pace—about 4–10 inches per minute for thin metals. Practice moving the electrode in a smooth, consistent motion, like writing cursive. If you see the weld pool getting too large or fluid, you’re moving too slowly.
Electrode Angle: Find the Sweet Spot
The angle at which you hold the electrode affects heat distribution. A steep angle (close to 90 degrees) focuses heat directly into the weld pool, increasing burn-through risk. Instead, tilt the rod 20–30 degrees in the direction of travel (dragging or pulling). This spreads the heat and reduces penetration. I learned this the hard way when welding a thin exhaust pipe—switching to a shallower angle saved the day.
Avoid Dragging the Weld
Dragging (pulling the rod toward you) preheats the metal ahead, which can lead to burn through on thin stock. Instead, try a slight push technique, where the rod points slightly away from the weld pool. This reduces heat buildup and gives you better control.
Weaving vs Stringer Beads
Weaving (moving the electrode side to side) looks cool but can cause burn through on thin metals because it increases heat input. Stick to stringer beads (straight lines) for thin stock. I use a slight zigzag on thicker materials, but for anything under 1/8 inch, straight and fast is the way to go.
Preparing Your Workpiece Properly
Good prep work is half the battle. A clean, well-fitted joint reduces the chances of burn through and improves weld quality.
Clean the Metal
Dirt, rust, paint, or oil can cause uneven heating and increase burn-through risk. I always grind or wire-brush the weld area until it’s shiny. For example, when I welded a rusty trailer frame, I spent extra time cleaning it with a flap disc. The result? No burn through and a strong weld.
Tight Fit-Up
Gaps in the joint are a burn-through magnet. If the gap is wider than the electrode diameter, you’re asking for trouble. I aim for a tight fit-up, with gaps no larger than 1/16 inch. For butt joints, tack weld every inch or so to hold the pieces together before running your bead.
Use a Backing or Heat Sink
For thin metals, a copper or aluminum backing plate can absorb excess heat, preventing burn through. I’ve used a copper pipe as a heat sink when welding thin exhaust tubing—it worked like a charm. You can also clamp a piece of scrap metal behind the weld to act as a heat sink.
Stick Welding Thin Metals Without Burn Through
Welding thin metals (under 1/8 inch) is where burn through loves to rear its ugly head. Here’s how to tackle it like a pro.
Lower the Heat
Use the smallest electrode (3/32-inch) and the lowest amperage that still gives a stable arc. For 16-gauge steel, I’d start with an E6013 at 50 amps and adjust from there. Test on scrap to find the sweet spot.
Stitch Welding
Instead of running a continuous bead, try stitch welding—short bursts of welding followed by pauses to let the metal cool. I use this technique on thin sheet metal, welding for 1–2 seconds, then pausing for a few seconds. It keeps the heat down and prevents warping or burn through.
Skip Welding
For long seams, skip weld by laying down short beads at intervals, then going back to fill in the gaps. This spreads the heat and reduces the chance of burn through. I used skip welding on a thin steel gate, and it kept the metal flat and hole-free.
Common Mistakes and How to Fix Them
Even experienced welders mess up sometimes. Here are the mistakes I’ve made (and seen others make) and how to fix them.
Mistake: Too Much Amperage
Running your welder too hot is a surefire way to burn through. If you see holes forming, turn down the amperage by 5–10 amps and try again. Always test on scrap first.
Mistake: Lingering Too Long
If you pause or move too slowly, the arc will dig a hole. Practice a consistent travel speed, and don’t stop moving until you break the arc. A metronome app can help you keep a steady rhythm.
Mistake: Poor Fit-Up
Gaps wider than the electrode diameter invite burn through. If you can’t get a tight fit, use a backing plate or fill the gap with a small rod before welding.
Mistake: Wrong Rod Choice
Using a high-penetration rod like E6010 on thin metal is asking for trouble. Switch to E6013 or a smaller rod, and lower the amperage.
Safety Considerations to Prevent Burn Through
Burn through isn’t just bad for your project—it can create safety hazards. A hole in a structural weld could lead to failure under load, endangering lives. Plus, excessive heat can cause sparks and spatter, increasing fire risk. Always wear flame-resistant clothing, gloves, and a welding helmet with a proper shade (10–12 for stick welding). Keep a fire extinguisher nearby, and clear the area of flammable materials. I once had a spark ignite some shop rags—luckily, I caught it quickly. Don’t let that be you.
Electrode Choices for Thin Metals
| Electrode | Best For | Amperage (3/32-inch) | Pros | Cons |
|---|---|---|---|---|
| E6013 | Thin metals, sheet metal | 50–90 amps | Stable arc, shallow penetration | Less strength for thick materials |
| E7018 | Structural welds | 90–120 amps | Strong welds, deep penetration | Tricky on thin metals |
| E6010/E6011 | Dirty/rusty metal, pipe | 40–70 amps | Deep penetration, versatile | High burn-through risk on thin stock |
Step-by-Step Guide to Prevent Burn Through
- Choose the Right Rod: Select a low-penetration rod like E6013 for thin metals. Use 3/32-inch for materials under 1/8 inch.
- Set Up Your Machine: Start with low amperage (e.g., 50 amps for 16-gauge steel). Use DCEP for most rods, but consider DCEN for less penetration.
- Clean the Metal: Grind or wire-brush the weld area to remove rust, paint, or oil.
- Ensure Tight Fit-Up: Keep gaps smaller than the electrode diameter. Tack weld to secure the joint.
- Use a Heat Sink: Place a copper or aluminum backing behind thin metals to absorb heat.
- Practice Technique: Maintain a 20–30-degree electrode angle, use stringer beads, and keep a steady travel speed (4–10 inches per minute).
- Test on Scrap: Run beads on similar-thickness scrap to dial in settings and technique.
- Stitch or Skip Weld: For thin metals, use short welds or skip welding to control heat.
- Monitor the Weld Pool: If it gets too large or fluid, speed up or lower the amperage.
- Cool and Inspect: Let the weld cool, then check for holes or thinning. Grind and reweld if needed.
Conclusion
Preventing burn through when stick welding comes down to preparation, technique, and understanding your materials. By choosing the right electrode, dialing in your machine settings, and mastering your travel speed and angle, you can avoid those frustrating holes and create strong, clean welds.
Whether you’re a DIYer building a workbench, a student practicing for certification, or a pro welder on a critical job, these tips will help you work smarter and safer. You’re now equipped to tackle thin metals with confidence, save materials, and produce welds you’re proud of.
FAQ
What causes burn through in stick welding?
Burn through happens when excessive heat melts through the base metal, creating a hole. Common causes include high amperage, slow travel speed, steep electrode angles, or poor fit-up. Use lower amps, faster travel, and a shallow angle to prevent it.
Can I weld thin metal with a stick welder?
Yes, but it’s tricky. Use a 3/32-inch E6013 rod, low amperage (50–70 amps), and stitch welding to control heat. A tight fit-up and a heat sink like copper backing help, too.
What’s the best electrode for thin metals?
E6013 is ideal for thin metals due to its shallow penetration and stable arc. Run it at 50–90 amps for 3/32-inch rods, and keep your travel speed steady.
How do I fix burn through if it happens?
Grind out the hole, clean the area, and reweld with a lower amperage and faster travel speed. For thin metals, use a backing plate to support the weld and prevent further burn through.
Is burn through a safety concern?
Yes, burn through weakens welds, which can lead to structural failure. It also increases spatter and fire risk. Always wear proper PPE and keep a fire extinguisher nearby.