I burned through a thin sheet of stainless because I didn’t fully understand how gauge thickness worked. I had my MIG dialed in, filler wire ready, but the arc control was all over the place — and that one mistake taught me real quick that knowing metal thickness is just as important as joint prep or choosing between MIG vs TIG. A lot of new welders (and even some seasoned fabricators) get tripped up by gauge charts, because the numbers feel backwards: the higher the gauge, the thinner the steel.
This isn’t just a trivia detail — it affects penetration, weld strength, safety, and even cost when you’re buying sheets for a project. Whether you’re welding mild steel, stainless, or aluminum, understanding gauge thickness can mean the difference between a clean, strong bead and a wasted piece of material. Stick around, because in this guide I’ll break down how gauge thickness really works and how to use it to your advantage in the shop.
Image by directindustry
What Is Gauge Thickness in Welding
Gauge thickness refers to the standard way we measure the thickness of sheet metal, wire, and even some electrodes in welding. It’s rooted in an old British wire-drawing system from way back when they were pulling metal through dies to make strands. The “gauge” number comes from how many times that wire got drawn—more draws, thinner it gets, higher the number.
But here’s the kicker that gets everyone: It’s inverse. A 10-gauge sheet is thicker than a 20-gauge one. For steel, 10-gauge is about 0.1345 inches thick—plenty stout for structural work. Jump to 20-gauge, and you’re down to 0.0359 inches, which is more like fender material on your truck. This isn’t just trivia; it’s crucial for matching your welder’s output to the material so you avoid blow-through on thin stuff or lack of fusion on thicker pieces.
Why do we even bother with gauges instead of decimals? Tradition, mostly, but it sticks because suppliers label everything this way in the US—from Home Depot sheets to the rolls at your local metal yard. As a hobbyist fabbing a gate or a pro running pipe, knowing your gauge means you’re prepped for the right amperage, gas flow, and even joint prep. I’ve botched a few jobs early on by assuming a “medium” sheet was universal—lesson learned the hard way with a warped bracket and some choice words.
And don’t get me started on variations. Steel gauges differ from aluminum or stainless, so always double-check your chart. It’s that attention to detail that keeps your welds code-compliant under AWS standards and your projects lasting years.
History Behind Gauge Thickness
You know, every time I pull out my micrometer, I think about how this gauge nonsense started. Back in the 1800s, British wire makers were cranking out telegraph lines and such by drawing metal rods through progressively smaller holes.
Each pass thinned it out a bit, and they counted the “gauges” or dies used. By the time it hit sheet metal, the system stuck as a weight-based measure—thicker sheets weighed more per square foot, so lower numbers for heavier stuff.
Fast-forward to American manufacturing in the early 1900s, and factories adopted it for everything from auto bodies to boiler plates. The Manufacturers’ Standard Gauge for sheet steel got locked in around 1893, basing thicknesses on pounds per square foot.
It’s not perfect—aluminum uses the Brown & Sharpe scale from wire gauges, which runs different numbers—but it’s what we’ve got. In my early days as a trainee at a fab shop in Ohio, the old-timers swore by it, saying, “Kid, gauges built the railroads; don’t fight ’em.”
Today, with CNC plasma tables and laser cutters, we could switch to metrics easy, but inertia wins. Understanding this history helps when you’re sourcing material—tell your supplier “18-gauge mild steel,” and they know exactly what you’re after without fumbling conversions. It’s a nod to the craft, reminding us welding’s as much art as science.
Gauge Thickness Charts for Common Welding Materials
Nothing beats a good chart when you’re in the thick of a build. I’ve got one laminated and taped to my welding cart—saves me from digging through apps mid-weld. Let’s lay out some basics here for the metals you’ll run into most: mild steel, stainless, aluminum, and galvanized. These are pulled from standard US tables, so they’re spot-on for what you’ll find at Metal Supermarkets or your local supplier.
For mild steel (your go-to for frames and brackets):
| Gauge | Thickness (inches) | Thickness (mm) | Typical Use in Welding |
|---|---|---|---|
| 10 | 0.1345 | 3.42 | Structural beams, heavy fab |
| 12 | 0.1046 | 2.66 | Trailer sides, machine guards |
| 14 | 0.0747 | 1.90 | Automotive panels, light frames |
| 16 | 0.0598 | 1.52 | Fenders, ductwork |
| 18 | 0.0478 | 1.21 | Thin enclosures, repairs |
| 20 | 0.0359 | 0.91 | HVAC flashing, decorative trim |
Stainless steel runs a hair thicker for the same gauge—great for corrosion resistance in food-grade or marine work:
| Gauge | Thickness (inches) | Thickness (mm) |
|---|---|---|
| 10 | 0.1406 | 3.57 |
| 14 | 0.0781 | 1.98 |
| 16 | 0.0625 | 1.59 |
| 18 | 0.0500 | 1.27 |
Aluminum’s lighter, so gauges skew thinner—perfect for aircraft or boat hull patches, but watch for oxide buildup:
| Gauge | Thickness (inches) | Thickness (mm) |
|---|---|---|
| 10 | 0.1019 | 2.59 |
| 14 | 0.0641 | 1.63 |
| 16 | 0.0508 | 1.29 |
| 18 | 0.0403 | 1.02 |
Galvanized steel (zinc-coated for rust protection) mirrors mild but sheds coating when you weld, so ventilate well.
Pro tip from the shop floor: Print this out and keep it handy. I once grabbed what I thought was 14-gauge for a toolbox, but it was aluminum—ended up with weak bends. Cross-reference always.
Why Gauge Thickness Matters in Welding Projects
Look, I’ve learned the hard way that ignoring gauge isn’t just sloppy—it’s risky. Take safety first: Thin gauges like 22 or 24 heat up fast under MIG or TIG, leading to burn-through that weakens your joint. On a job site, that could mean a guardrail failing under weight, or in your garage, a workbench leg buckling mid-lift. Thicker gauges demand more penetration to avoid cold laps, which crack under vibration like on a dirt bike frame.
Weld integrity ties right in. The right gauge ensures proper fusion—your filler metal bonds fully without excess heat affecting the heat-affected zone (HAZ), which can embrittle the base. Material compatibility? Huge. Mismatching gauges in a lap joint leads to distortion; I’ve seen entire assemblies warp because someone welded 10-gauge to 18 without beveling.
Cost efficiency seals it. Thinner gauges save on material weight for shipping or portability—think lightweight trailers—but overdo it, and you’re re-welding failures. Pros like us aim for the sweet spot: Enough thickness for strength without overkill that jacks up your consumables. In my fabrication side gigs, nailing gauge selection cut my scrap rate by half. It’s about working smarter, not harder.
How to Measure Gauge Thickness Accurately
Measuring gauge isn’t rocket science, but do it wrong, and your settings are toast. Start with the basics: Grab a digital caliper—mine’s a cheap Harbor Freight one that reads to 0.001 inch. Clean your metal, clamp the jaws gently on the edge, and read the decimal. Then flip to your chart for the gauge equivalent. For quick checks, a sheet metal gauge tool slips over the edge with notches labeled 8 through 24—super handy for shop grime.
Common mistake? Measuring rusty or painted stock—always strip a spot first. I once dialed in for 16-gauge on what was actually 14 because of mill scale; resulted in pinholes everywhere. Fix: Use a wire brush or grinder lightly pre-measure.
For wire or rod electrodes, it’s similar—calipers or a dedicated wire gauge. And for weld beads themselves? That’s fillet gauges we’ll hit later. Step-by-step: 1) Select your tool (caliper for precision, slip gauge for speed). 2) Prep the surface. 3) Measure at three spots to average. 4) Convert via chart. 5) Verify with a test weld on scrap. Boom—accuracy that keeps you code-ready per ASME Section IX.
Choosing the Right Gauge for Your Welding Application
Picking gauge is like choosing shoes for a hike—fit the terrain. For DIYers building a fire pit, 14- or 16-gauge mild steel gives that sturdy feel without being back-breaking to cut. Hobby fabbers on trailers? Drop to 12-gauge for hitches where torque matters. Pros welding pressure vessels stick to 10-gauge or thicker, compliant with API codes.
When/why: Use thinner (higher gauge) for formability—bending ducts or artistic sculptures. Thicker for load-bearing, like bridge repairs. Practical know-how: Factor in process. MIG loves 18-22 for auto body; stick welding shines on 1/4-inch plates (around 3-gauge).
Personal story: Early on, I cheaped out on 20-gauge for a gate—fine for looks, but it flexed like foil under wind. Switched to 14, added stiffeners, and it’s still hanging after 10 years. Tip: For joints, match gauges within two numbers to avoid distortion; bevel thicker ones 30 degrees for V-grooves.
Welding Techniques for Different Gauge Thicknesses
Your technique shifts with the gauge—it’s all about controlling heat input. For thin stuff (18+ gauge), go low and slow. On my Hobart Handler, I drop to 80-100 amps with 0.023 wire, short-circuit transfer mode. Stitch welds: 1-inch on, 1-inch off, to let it cool. Why? Prevents warping on that fender patch.
Thicker gauges (under 14)? Crank it up—150-200 amps, spray transfer, weave your bead for full penetration. For 10-gauge plates, preheat to 150°F if it’s carbon steel to dodge cracking. Step-by-step for a lap joint on 16-gauge: 1) Clamp flat. 2) Tack three sides. 3) Run forehand passes at 120 amps, 20 cfh argon/CO2. 4) Back-step to even heat. 5) Grind high spots.
Common fix: If thin metal bubbles, your gas is too hot—drop voltage by 1-2 volts. For thick, if it’s not penetrating, up the travel speed or add a root pass. I’ve tuned countless Miller charts this way; apps like Weld.com help starters dial in.
Common Mistakes with Gauge Thickness and How to Avoid Them
We’ve all been there—sparks flying, but the weld’s a mess. Top blunder: Assuming all metals gauge the same. Aluminum 16 is half the steel version—burned through a boat panel once before learning that. Avoid: Label your stock and use type-specific charts.
Another: Overlooking expansion. Thin gauges warp easy; I fixed a toolbox lid by tack-welding diagonally first. Fix: Alternate sides, use heat sinks like copper bars.
Settings mismatch kills too—high amps on 22-gauge equals holes. Pro hack: Start 20% under chart amps, creep up with test strips. And prep? Mill scale on “thick” 12-gauge fools you into thinking it’s thinner. Grind it off. These slips cost time, but catching ’em early builds bulletproof work.
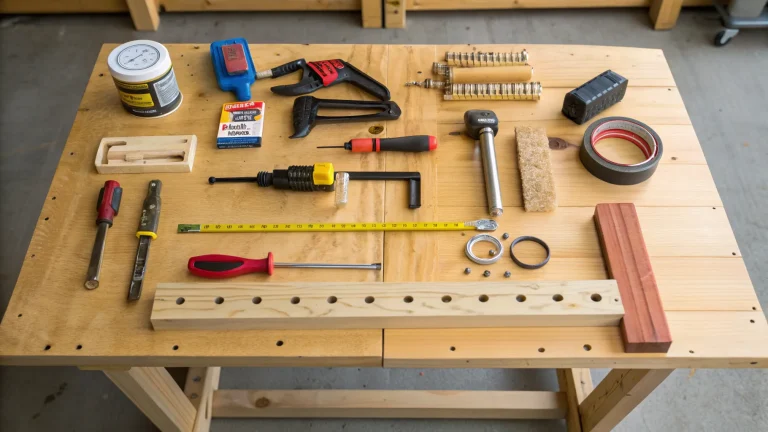
Tools and Equipment for Working with Various Gauges
Your toolkit evolves with gauges. For measuring, calipers are king—digital for $20 beats eyeballing. Fillet weld gauges (Newman WG-1 style) check bead size on thicker joints. For cutting, plasma torches like Hypertherm Powermax handle 1/4-inch (6-gauge) easy; shears for thin.
Welders: Multimode like Lincoln Power MIG 210 for 24 down to 3/8-inch. Electrodes? 6010 rods for deep penetration on thick; ER70S-6 wire for thin MIG. Safety gear—leather gloves for hot thick plates, lighter for thin to avoid burns.
Prep tools: Bevelers for 10-gauge edges, files for smoothing thin burrs. My setup? A vise with soft jaws for thin sheets—no dents. Invest smart; a good gauge tool pays off in zero rework.
Safety Considerations When Welding Different Gauges
Safety’s non-negotiable—gauges amp up the risks. Thin material means more fumes from zinc in galvanized; ventilate or use a respirator per OSHA 1910.191. Heat’s sneaky—22-gauge can ignite oils, so degrease with acetone.
Thick stuff? Flying slag from high amps—full face shield, FR clothing. Eyeball your setup: Ground clamp tight to avoid arcs jumping to thin edges. I’ve singed eyebrows ignoring preheat on cold thick plates—now I IR thermometer everything.
Ergo tip: For overhead thick welds, use a positioner to save your back. And always: Fire watch post-weld, especially thin that cools hot. It’s these habits that keep you welding, not sidelined.
Step-by-Step Guide to Preparing Joints Based on Gauge
Joint prep’s where pros shine—tailor to gauge for flawless beads. For thin (18+): Butt joints flat, no bevel; clean with 80-grit disc.
Step-by-step for 16-gauge lap:
- Measure and mark overlap—1.5x thickness.
- Clamp square, tack ends.
- Wire brush to bright metal.
- Set welder: 110 amps, 75/25 gas.
- Stitch 2-inch runs, peen between.
For thick (10-gauge) T-joint:
- Bevel edges 22.5 degrees each for 45° included.
- Set root gap 1/16-inch.
- Preheat 200°F.
- Root pass with 7018 at 160 amps.
- Fill with weave, interpass grind.
Fix if gap’s off: Shim thin with 0.030 wire. This method’s saved my bacon on code jobs—clean prep, clean weld.
Machine Settings and Filler Material Compatibility
Settings are your recipe—gauge dictates the mix. For MIG on 14-gauge steel: 0.030 wire, 18 volts, 150 IPM feed, 20 cfh gas. Too hot? Dial voltage down; watch for ropy beads.
Fillers: Match alloy—ER308 for stainless, 4043 for aluminum. On thin, use 0.023 wire to limit heat; thick, 0.045 for deposition. Anecdote: Matched wrong filler on galvanized 18-gauge once—porous mess. Now, I flux-core for galvy.
Pros/cons table for fillers:
| Filler Type | Best For Gauge | Pros | Cons |
|---|---|---|---|
| ER70S-6 MIG | 14-22 | Versatile, clean | Needs gas shield |
| E6013 Stick | 16+ thin | Forgiving arc | Shallow penetration |
| E7018 | Under 12 | Strong, low H | Slag cleanup |
Tune via test: Weld, bend, inspect. Apps help, but feel’s key.
Pros and Cons of Thin vs Thick Gauge Materials
Thin gauges (18-24): Pros—light, cheap, easy form/bend for custom racks. Cons—warps quick, needs finesse to weld without holes; not for heavy loads.
Thick (under 14): Pros—durable, takes abuse like off-road bumpers. Cons—heavier to haul, higher power draw, more prep time.
In practice, hybrid: Thin skins over thick frames for trailers. My go-to? 16-gauge for most fab—balances all. Weigh your project’s stress points.
Real-World Examples from US Welding Shops
In Detroit auto shops, 20-gauge rules for door panels—MIG stitch to avoid oil canning. Out in Texas oil fields, 1/2-inch plate (no gauge, but thick) gets submerged arc for pipes per API 1104.
DIY example: Patching a 14-gauge mower deck—bevel the hole, fill with 6011 rod at 100 amps. Shop practice: Always soapstone your gauge before cutting. These keep US builds tough.
Advanced Tips for Precision Welding Across Gauges
For multi-gauge assemblies, back-step welds to equalize heat. On thin-to-thick transitions, use a run-off tab to suck excess heat.
Pro trick: For aluminum 12-gauge, pulse TIG at 100-150 Hz—reduces spatter. Monitor with a pyrometer for interpass temps under 300°F.
I’ve finessed a 10-to-18 transition on a tank by grinding a taper—seamless now.
Conclusion
We’ve covered a lot of ground here—from the quirky inverse of gauge numbers to dialing in those perfect beads on everything from fender tin to beam stock. The big takeaways? Always measure twice, match your settings to the material’s thickness, and prep like your project’s life depends on it—because sometimes it does. Understanding how gauge thickness works arms you with the confidence to tackle any fab job, whether you’re a student sparking your first arc or a grizzled vet troubleshooting a rig.
You’re more prepared now because you know the why behind the numbers: Safety in avoiding failures, integrity in strong bonds, and efficiency in smart choices. So grab that caliper, print a chart, and fire up the welder. Your next weld’s gonna be cleaner, stronger, and way less frustrating. When in doubt on thin gauges, err low on amps and use a cheater bar for better control—it’s saved more parts than I can count.
What Gauge Thickness Should I Use for a DIY Trailer Frame?
For a basic utility trailer frame in mild steel, go with 12- to 14-gauge—about 0.105 to 0.075 inches thick. It’s stout enough for 2,000-pound loads without overkill weight. Weld with MIG at 140-160 amps, and reinforce corners with gussets.
How Do I Convert Gauge to Inches for Aluminum Welding?
Use a dedicated aluminum chart: 16-gauge is roughly 0.051 inches. Measure with calipers for precision, then set your TIG to 100-120 amps with 1/16-inch tungsten for clean penetration without distorting the soft metal.
What’s the Difference Between Steel and Stainless Gauge Thickness?
Stainless runs thicker for the same gauge number—18-gauge stainless is 0.050 inches vs. 0.048 for mild steel. This means slightly higher amps for stainless to fuse properly, and always use tri-mix gas to cut chromium fumes.
Can I Weld Thin Gauge Metal Without Burning Through?
Absolutely, but keep heat low: Use 0.023-inch wire at 80-100 amps on MIG, stitch short beads, and let cool between. A heat sink like aluminum tape on the back helps draw heat away for flawless repairs on 22-gauge HVAC duct.
Why Does My Weld Look Good But Fail on Thick Gauge?
Likely shallow penetration—up your amps 20% and add a bevel for root access. Preheat to 150°F on carbon steel over 1/4-inch, and use 7018 rods for low-hydrogen strength. Test with a bend sample to confirm.