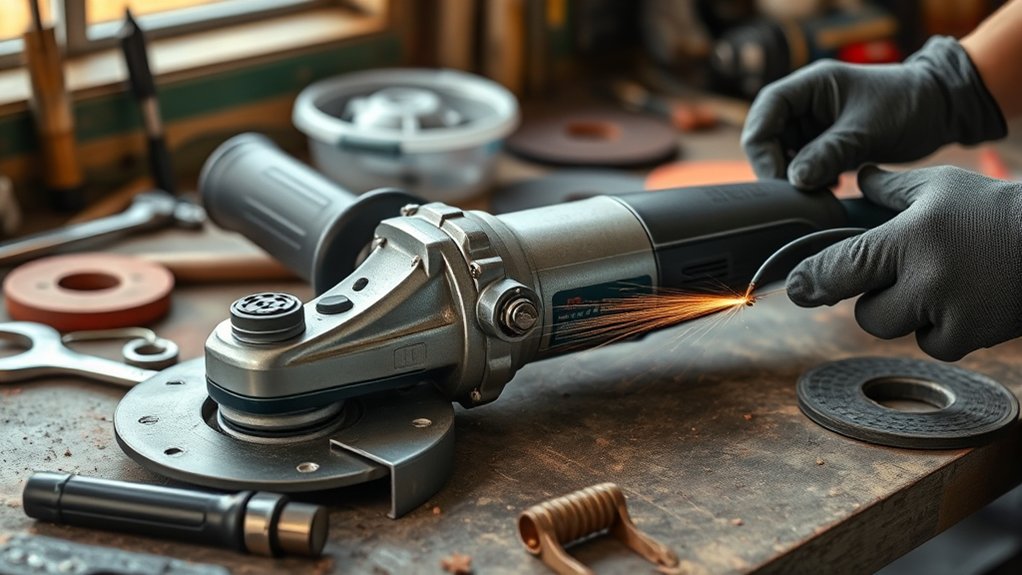
To inspect an angle grinder before use, first unplug it or remove the battery. Check the housing, vents, switch, side handle, guard, spindle, flanges, cord or battery, and the accessory itself. Confirm that the accessory matches the grinder’s approved size, mounting system, material, task, and maximum no-load speed. Secure the workpiece, clear the spark path, put on suitable PPE, and only then run a brief no-load test while standing outside the accessory’s plane. Stop and remove the tool from service if any part is cracked, loose, damaged, incompatible, or behaves abnormally.
Last updated: July 23, 2026. Reviewed against current OSHA, NIOSH, CCOHS, and manufacturer guidance.
Quick Answer
Before every use, disconnect the grinder, inspect the tool, guard, handle, mounting hardware, power system, and accessory, and verify the accessory’s size, mounting interface, task rating, material rating, and maximum RPM. Secure the workpiece, control sparks and dust, wear suitable PPE, then perform the model-specific no-load test from outside the accessory’s plane.
Key Takeaways
- Unplug a corded grinder or remove the battery before touching the wheel, guard, flange, spindle, or switch.
- The accessory’s maximum RPM must be equal to or greater than the grinder’s rated no-load speed.
- Use the correct accessory, guard, flange, and mounting system for the task. A part that fits physically is not automatically safe.
- Prepare the work area by securing the workpiece, controlling dust, moving combustibles, and directing sparks away from people and property.
- Remove the grinder from service if you find a crack, loose part, damaged electrical component, abnormal vibration, smoke, or a switch problem.
At a Glance
| Time Required | Usually a few minutes; allow longer when mounting or replacing an accessory |
| Difficulty | Easy, but requires careful attention |
| Tools Needed | Owner’s manual, clean cloth, inspection tag or log, and a light nonmetallic tapping tool only when a ring test applies |
| Cost | Usually $0 if the required PPE and inspection supplies are already available |
Warning: Disconnect the plug or remove the battery before inspecting, adjusting, mounting, or removing an accessory. Never depend on the switch alone to prevent an accidental startup.
Immediate stop-use rule: Do not connect power if the accessory is damaged, the guard or side handle is loose, speed or mounting compatibility is uncertain, the cord or battery is damaged, the switch behaves incorrectly, the workpiece cannot be secured, or the spark and dust path cannot be controlled.
Why Your Angle Grinder Pre-Use Inspection Matters
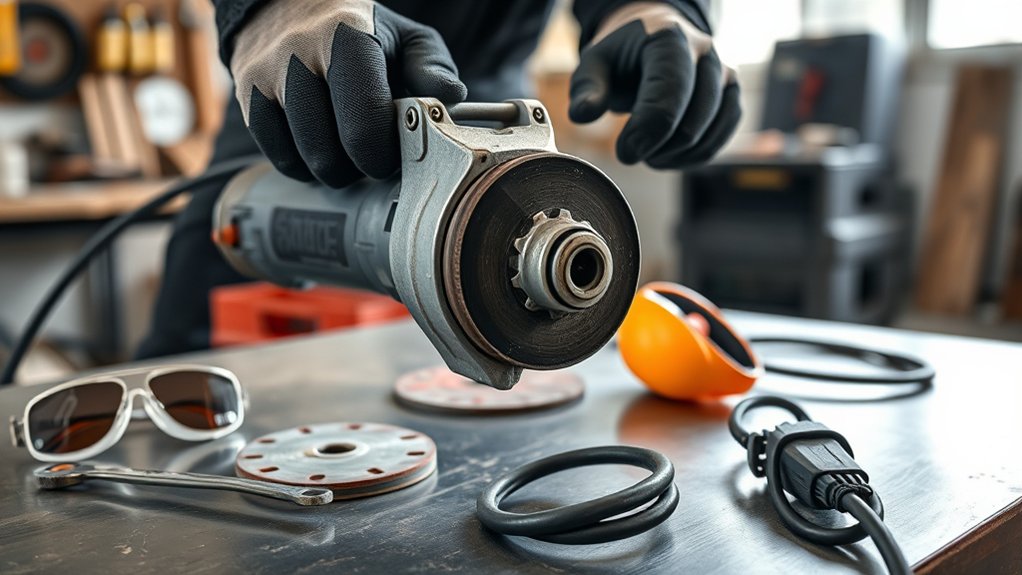
An angle grinder spins a wheel, disc, brush, or blade at high speed. A damaged or mismatched accessory can break apart, while a loose handle or poorly positioned guard can make kickback harder to control.
A pre-use inspection helps you find hazards such as:
- Cracks, chips, tears, missing segments, or loose wires on the accessory
- A wheel with a maximum RPM below the grinder’s rated speed
- An incorrect guard, flange, nut, arbor, or accessory size
- A damaged cord, plug, battery, housing, or switch
- Blocked ventilation slots or signs of previous overheating
- Combustible materials, flammable vapors, or people in the spark path
Under OSHA’s portable abrasive-wheel requirements, covered abrasive wheels must be guarded, inspected before mounting, and matched to a grinder whose spindle speed does not exceed the wheel’s marked maximum operating speed.
The accessory’s marked maximum RPM must be equal to or higher than the grinder’s rated no-load speed.
Essential Components to Check for Safe Grinder Use
Start the inspection only after the grinder is disconnected. Read the tool nameplate and the accessory label so you know the grinder’s speed, capacity, and approved accessory range.
Products Worth Considering

Premium metal construction for durability: Our angle grinder stand holder is made of high-quality metal material, ensuring strong hardness and long-lasting durability
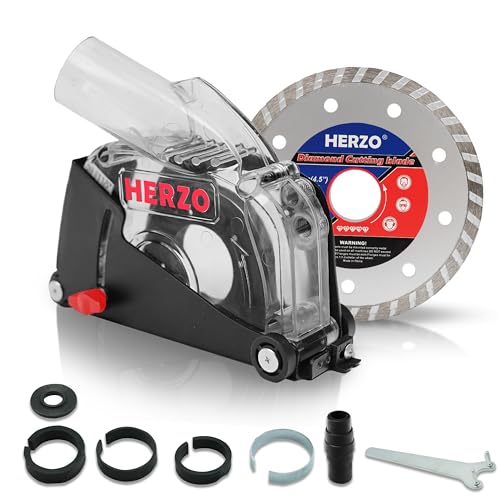
Widely Adapt:Suitable for 80% Main Brand 4-1/2 and 5 inch Angle Grinder
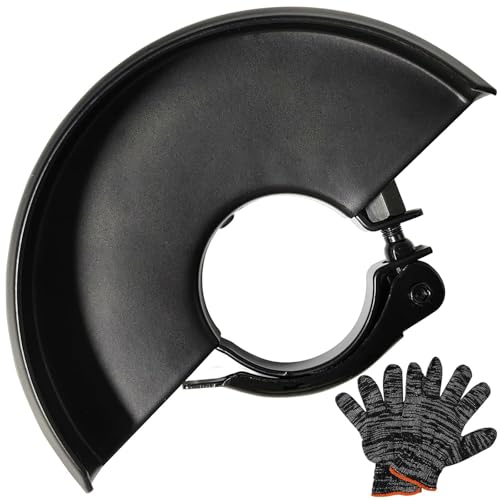
397661-01 Grinder Guard Size - The angle grinder guard measures 5.3" / 135mm in diameter, and fits for angle grinder blades with a diameter of 5" / 125mm or smaller, including sizes such as 4-1/2" / 115mm and 4" / 100mm
Operator Readiness and Tool Selection
Use the grinder only if you are trained, authorized where required, and able to follow the model-specific manual. Choose another tool or work method when the task would force you to overreach, work from an unstable surface, cut above shoulder height without approved controls, or use an accessory outside the grinder’s rated purpose.
Before the inspection, confirm that you know how the switch, lock-off, brake, speed control, restart protection, and accessory mounting system are intended to work on that model.
Housing and Ventilation Slots
Check the housing for cracks, missing screws, loose covers, impact damage, or melted areas. Make sure the ventilation slots are open and free of packed dust. Use a dry brush, clean cloth, or the cleaning method approved by the manufacturer.
Do not open the housing unless you are trained and authorized to service the tool. Internal repairs, electrical testing, bearing replacement, and carbon-brush limits are model-specific.
Side Handle
Make sure the side handle is installed in an approved position and threaded or locked fully into place. Look for cracks, stripped threads, looseness, or damaged vibration-control parts.
Plan to hold the grinder with two hands whenever the tool is designed for two-hand use. One hand should control the main grip and switch while the other holds the side handle.
Guard
Confirm that the guard is the correct type for the accessory and task. A grinding guard and a cutting guard may not provide the same coverage. The guard should:
- Lock securely without shifting under light hand pressure
- Have no cracks, deep bends, missing fasteners, or unauthorized modifications
- Clear the accessory without rubbing
- Be positioned between your body and the wheel
- Deflect fragments and sparks away from you
Never remove a guard simply to fit a larger wheel. Replace a damaged guard before using the grinder. For a deeper rule-by-rule explanation, see the site’s portable grinder guard requirements guide.
Spindle Lock, Flanges, and Mounting Hardware
Inspect the spindle, flange, nut, and contact surfaces for damage, dirt, burrs, or distortion. The accessory should fit the spindle or approved mounting system without being forced.
The spindle-lock button is used only for accessory changes as directed by the manual. It is not the part that holds the wheel during operation. Never press it while the accessory is moving. The site’s flange and backing-nut guide explains why flange orientation and bearing surfaces are model- and wheel-specific.
Accessory
Inspect the specific accessory before each use. If you are unsure which attachment belongs on the tool, compare the choices in the angle grinder wheel types and uses guide before mounting anything:
- Bonded grinding or cutting wheel: Check for cracks, chips, edge damage, moisture damage, contamination, and an expired use-by code where the manufacturer provides one.
- Flap disc: Look for missing, loose, torn, burned, or badly worn abrasive flaps.
- Wire wheel or cup brush: Check for loose, cracked, bent, or missing wires and a damaged hub.
- Backing pad and sanding disc: Look for cracks, tears, excessive wear, poor adhesion, or an incorrect pad size.
- Diamond blade: Check for cracks, missing segments, a warped core, damaged arbor, and the required rotation direction.
Bosch’s angle-grinder guidance also recommends inspecting the accessory after a tool or accessory has been dropped. When damage is uncertain, replace the accessory rather than test it under power.
Accessory Compatibility
Confirm all of the following before mounting or using an accessory. Bore size alone does not prove compatibility; the full mounting system must match, as explained in the angle grinder wheel bore-size guide:
- The accessory is approved for an angle grinder and the intended task.
- Its outside diameter and thickness are within the grinder’s capacity.
- Its arbor or mounting interface matches the tool and approved flanges.
- Its maximum RPM is equal to or greater than the grinder’s rated no-load speed.
- The guard and mounting hardware are approved for that accessory.
- The accessory is intended for the material being cut, ground, brushed, or sanded.
- Any marked rotation arrow is aligned with the grinder’s rotation.
Pro Tip: Photograph the grinder nameplate and keep the manual on your phone. You can then compare the accessory’s size, arbor, and maximum RPM before installing it.
How to Conduct a Visual Inspection of Your Angle Grinder
Use the following 10-step process before every work session and again after a drop, jam, hard impact, or suspected overload.
- Disconnect the energy source. Unplug a corded grinder or remove the battery. Confirm that the switch is off.
- Identify the task. Decide whether you are grinding, cutting, sanding, brushing, polishing, or using a diamond accessory.
- Check the housing and vents. Look for cracks, loose parts, blocked airflow, or heat damage.
- Inspect the side handle. Confirm that it is tight, undamaged, and installed in an approved position.
- Inspect and position the guard. Verify the correct guard type, secure locking, adequate clearance, and safe orientation.
- Check mounting parts. Inspect the spindle, flanges, nut, and mounting surfaces. Do not force an accessory onto the spindle.
- Inspect and match the accessory. Check condition, size, arbor, task rating, material rating, maximum RPM, direction, and expiry code where applicable.
- Inspect the power system and controls. With power disconnected, check the cord, plug, battery, switch movement, lock-off, brake, speed control, and restart protection as equipped. Confirm shutdown behavior during the no-load test.
- Prepare the work area and PPE. Secure the workpiece, control dust, clear combustibles, protect bystanders, and put on the required PPE.
- Perform a controlled no-load test. Reconnect power only after all checks pass. Keep clear of the wheel’s plane and stop immediately for wobble, vibration, unusual noise, smoke, or switch failure.
| Component | What to Look For | Pass Condition |
|---|---|---|
| Grinder housing | Cracks, loose covers, missing screws, melted areas | Housing is complete, secure, and undamaged |
| Accessory | Cracks, chips, tears, missing segments, loose wires, wear | No damage and correct for the tool, speed, material, and task |
| Guard | Cracks, bends, looseness, wrong type, poor position | Correct guard locks securely and sits between the user and wheel |
| Side handle | Cracks, looseness, damaged threads | Handle is secure and supports two-hand control |
| Cord or battery | Cuts, exposed conductors, missing pin, cracks, swelling, leakage | Power system is clean, dry, intact, and locks securely |
| Controls | Binding or damaged switch, failed lock-off, damaged speed selector, or failure to stop during the test | Controls move as designed while disconnected and shut the tool off correctly during the no-load test |
How to Perform a Ring Test on Your Grinding Wheel
A ring test can help reveal cracks in certain abrasive wheels before mounting, but it is not a universal test for every grinder accessory. Flap discs, wire brushes, backing pads, and many diamond or thin resin-bonded products require the inspection method stated by their manufacturer.
For a wheel covered by the ring-test requirement, follow the wheel manufacturer’s directions and the method described in OSHA 29 CFR 1910.215(d):
- Make sure the wheel is dry, clean, and free of sawdust or other material that could deaden the sound.
- Support the wheel in the manner approved for its type and size without damping its vibration.
- Use a light, nonmetallic implement, such as a screwdriver handle for a light wheel or a wooden mallet for a heavier wheel.
- Tap gently about 45 degrees to each side of the vertical centerline and about 1–2 inches from the wheel’s edge.
- Rotate the wheel approximately 45 degrees and repeat the taps.
- Reject a wheel that produces a dead, cracked, or clearly inconsistent sound, or when the result is uncertain.
Note: Organic-bonded wheels do not produce the same clear metallic ring as vitrified or silicate wheels. A ring test does not replace a visual inspection, label check, expiry check, or the accessory manufacturer’s instructions.
Never mount a wheel that is cracked, chipped, wet, contaminated, expired, forced onto the spindle, or rated below the grinder’s speed.
How to Check Power Supply and Cords for Safety
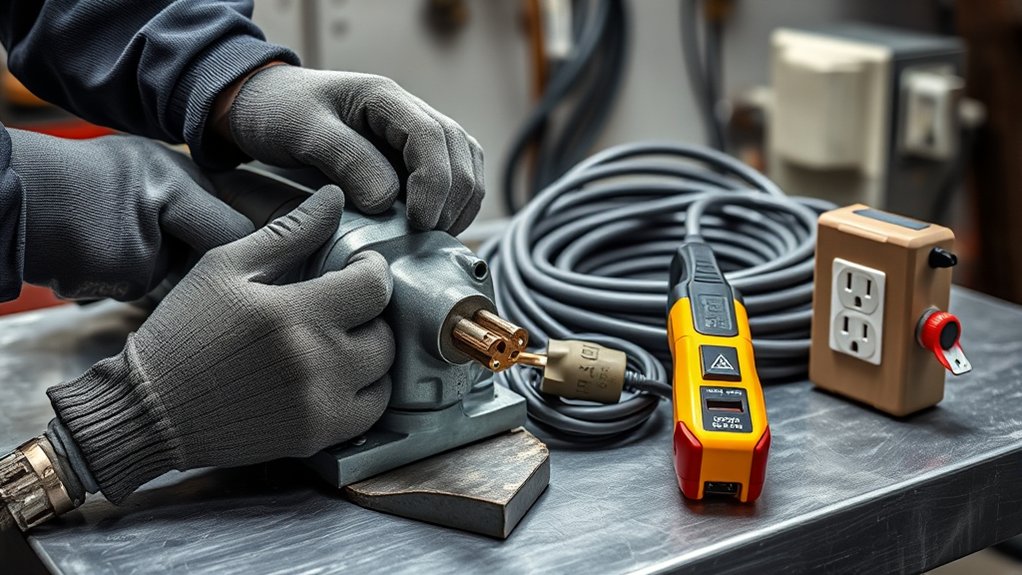
Corded Grinder Checks
Inspect the full cord and plug before connecting the grinder:
- Look for cuts, fraying, crushed sections, heat damage, exposed conductors, or taped temporary repairs.
- Check the plug body and pins for cracks, looseness, scorching, deformation, or a missing grounding pin where one is required.
- Check the strain relief where the cord enters the grinder and plug.
- Confirm the cord is not pinched, stretched, wrapped around a sharp edge, or routed through the spark path.
- Inspect any extension cord and confirm that its type, conductor size, length, and current rating are suitable for the grinder and work area.
- Use GFCI or RCD protection when required by the environment, site rules, tool instructions, or applicable electrical code, and use an outlet suitable for the tool.
OSHA 29 CFR 1910.334 requires damaged cord-and-plug equipment to be removed from service until repairs and tests have made it safe.
Cordless Grinder Checks
Remove the battery before inspecting the tool or accessory. Check the battery for:
- Cracks, punctures, swelling, leakage, melted areas, or impact damage
- Wet, dirty, corroded, burned, bent, or recessed terminals
- A damaged latch or a battery that does not lock firmly into the grinder
- Unusual heat, odor, smoke, or repeated fault indications
Use only batteries and chargers approved for the grinder system. Do not use a damaged battery, place it near sparks or heat, or attempt an unauthorized repair.
Scope: This operator check does not replace a formal electrical inspection, scheduled preventive maintenance, repair diagnosis, or employer-required documented inspection. Use a qualified person for work beyond the visual and functional checks described here.
Warning: Do not perform energized voltage tests unless you are qualified and using properly rated test equipment. A grinder operator’s pre-use check is primarily visual and functional.
Prepare the Work Area Before the Test Run
The grinder may pass its mechanical inspection while the work area still presents a serious hazard. CCOHS portable-grinder guidance also emphasizes training, secure footing, two-hand control, a secured workpiece, and keeping clear of the wheel during startup. Before connecting power:
- Stand on a stable surface with balanced footing and a clear escape path. Do not use a ladder or unstable platform.
- Choose another tool, position, or approved work platform if the task forces overreaching, poor visibility, or work above shoulder height.
- Clamp or otherwise secure the workpiece unless its weight and support make movement impossible.
- Support long or large material so it cannot pinch the cutting wheel.
- Remove flammable liquids, gases, combustible dust, paper, fabric, fuel containers, and other ignition hazards.
- Never grind on a tank, drum, pipe, or closed container that may contain flammable residue or pressure.
- Direct sparks away from people, vehicles, glass, cords, hoses, finished surfaces, and combustible materials.
- Use screens or barriers to protect nearby workers while maintaining ventilation.
- Confirm that dust extraction, ventilation, and fire-protection measures are ready.
- Keep the cord and vacuum hose out of the accessory’s path.
OSHA identifies grinding as spark-producing hot work in environments where ignition hazards are present. Follow required permits, fire-watch procedures, atmosphere testing, and employer rules. See OSHA’s hot-work safety guidance.
How to Perform the Angle Grinder No-Load Test
Test the grinder only after the disconnected inspection, accessory check, work-area preparation, and PPE check are complete. Follow the no-load test duration and procedure in the grinder and accessory manuals.
- Confirm the switch is off before inserting the battery or plugging in the tool.
- Hold the grinder with both hands and keep the guard between your body and the accessory.
- Keep yourself and other people out of the accessory’s plane.
- Start the grinder without allowing the accessory to touch the workpiece.
- Observe the tool during the brief no-load test.
- Release the switch and confirm that the motor turns off normally.
- Wait for the accessory to stop completely before setting the grinder down.
What Sounds Require an Immediate Stop?
Listen for a sudden change from the grinder’s normal sound. Stop immediately if you hear:
- Rattling, knocking, scraping, or grinding from inside the tool
- A repeating sound that matches wheel rotation
- A loose-part sound from the guard, handle, flange, or accessory
- Electrical arcing, popping, or an abnormal buzzing sound
A sound-level meter is not normally required for the mechanical pre-use check. Workplace noise exposure should instead be assessed for the actual grinder, accessory, material, duration, and environment.
NIOSH hearing-protection guidance recommends choosing protection that reduces exposure to an appropriate level without excessive overprotection. NIOSH recommends double hearing protection for exposures of 100 dBA or greater or for impulse noise.
What Do Heat, Smoke, or Burning Odors Mean?
Do not judge motor condition by touching the housing immediately after operation. Stop and disconnect the grinder if you notice:
- Smoke or a burning odor
- Discoloration, melting, or sparks coming from ventilation openings
- A rapid loss of power
- Repeated overload or thermal shutdown
- Heat that develops unusually fast compared with normal operation
Let the tool cool in a safe location and check the ventilation openings for blockage. If overheating returns, remove the grinder from service. Carbon brushes, bearings, wiring, electronic controls, and internal cooling parts should be inspected according to the model manual by a qualified service person.
What Do Power Interruptions During the Test Mean?
During the no-load test, stop if the grinder cuts in and out, loses power, trips protection repeatedly, or changes speed without an expected load. Possible causes include a damaged cord, poor connection, undersized extension cord, weak battery, faulty switch, overloaded circuit, or an internal tool fault.
Do not repeatedly reset a breaker, reconnect a faulting battery, or continue running a tool that behaves unpredictably. Remove it from service until the cause is identified.
PPE Essentials for Angle Grinder Safety
Select PPE for the accessory, material, spark path, dust, noise, and work environment. At minimum, most grinding operations require suitable eye protection, hearing protection, fitted clothing, gloves appropriate for the task, and protective footwear. The site’s angle grinder PPE guide covers task-specific choices in more detail.
Products Worth Considering

SUPERIOR PROTECTION — Experience all-around face protection thanks to the curved design of this faceshield. The visor of this face guard is ANSI Z87+ certified, and up to 2x thicker for increased durability. Plus, you can comfortably wear your grinding face shield over prescription glasses.

COMPLETE PROTECTION — Pairing anti-fog and scratch-resistant goggles with a tough polycarbonate torch face shield, this unbeatable duo has you covered from splashes, dust, and debris. And they are built to resist high-speed impacts, even in extreme temperatures.

HIGH IMPACT FACE SHIELD - Sellstrom's Advantage Face Shield is ideal for various types of machinery, welding, cutting, grinding, woodworking, and other types of work that present potential hazards to the face
Eye and Face Protection
Wear impact-rated safety glasses with side protection. Add a face shield when fragments, sparks, or high-velocity particles could strike the face. A face shield supplements safety glasses or goggles; it does not replace them.
OSHA 29 CFR 1910.133 requires appropriate eye or face protection for flying-particle hazards. ANSI/ISEA Z87.1-2025 is the current voluntary consensus standard for occupational eye and face protectors.
Hearing Protection
Use properly fitted earplugs, earmuffs, or both when the noise assessment requires them. Choose protection compatible with your eye protection, face shield, hard hat, and respirator.
Gloves, Clothing, and Footwear
- Use snug-fitting gloves suited to heat, abrasion, sharp edges, and the material being handled.
- Avoid loose cuffs or damaged gloves that can reduce grip or catch on nearby objects.
- Wear fitted clothing made from material suitable for sparks and heat. Avoid loose sleeves and easily melted fabric in the spark path.
- Tie back long hair and remove hanging jewelry, drawstrings, and lanyards.
- Use impact-, compression-, puncture-, or heat-resistant footwear when the hazard assessment calls for it.
Dust and Respiratory Protection
Identify the material before grinding or cutting it. Paints, coatings, concrete, mortar, stone, stainless steel, galvanized metal, and other materials may create hazardous dust or fumes.
Use source controls first, such as an approved shroud, local exhaust ventilation, or a compatible HEPA-filtered dust extractor. Use wet methods only when both the power tool and accessory manufacturer permit them.
For concrete, mortar, granite, and engineered or natural stone, follow current NIOSH silica-control guidance and applicable OSHA rules. Respirator selection must be based on the contaminant and exposure. Workplace respirator use may also require medical evaluation, fit testing, training, and a written respiratory-protection program.
Note: PPE reduces remaining risk but does not correct a cracked wheel, missing guard, wrong RPM rating, unsecured workpiece, flammable atmosphere, or inadequate dust control.
What to Do After Your Grinder Inspection
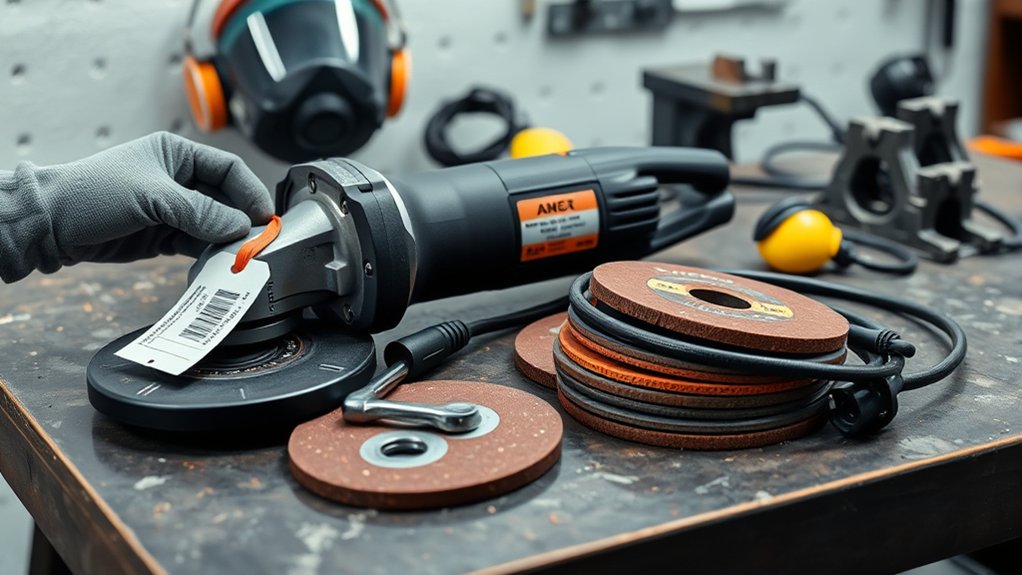
Use the inspection result to decide whether the grinder is ready, needs cleaning and another check, or must be removed from service.
| Result | Examples | Action |
|---|---|---|
| Pass | Correct accessory, secure guard and handle, intact power system, normal no-load test | Proceed while following the manual and safe operating procedures |
| Clean and recheck | Dry removable dust, dirty flange surfaces, or blocked external vents with no damage | Disconnect, clean by the approved method, and repeat the affected inspection steps |
| Remove from service | Crack, damaged guard, exposed wire, swollen battery, failed switch, abnormal vibration, smoke, or uncertain wheel condition | Disconnect, tag “Do Not Use,” report the defect, and arrange authorized repair or replacement |
For workplace equipment, record the grinder identification, date, inspector, defect, action taken, and return-to-service approval where your program requires it. Do not return a repaired grinder to service until required repairs and tests are complete.
After use, let the accessory stop fully, disconnect the power source, clean the tool as directed, inspect for damage caused during the job, and store wheels and batteries under the conditions specified by their manufacturers.
Frequently Asked Questions
What are 10 safety precautions before using a grinding machine?
Disconnect the power, identify the task, inspect the housing, secure the side handle, check the correct guard, inspect the mounting hardware, verify the accessory and RPM rating, inspect the cord or battery, prepare the work area and PPE, and complete a controlled no-load test.
What safety checks are there on an angle grinder?
Check the housing, vents, side handle, guard, spindle, flanges, mounting nut, accessory, RPM rating, cord or battery, switch, lock-off, workpiece support, dust controls, spark path, PPE, and no-load operation. Inspect the tool again after a drop, jam, or hard impact.
What are the OSHA requirements for angle grinders?
OSHA rules for covered portable abrasive wheels address guarding, wheel inspection, ring testing before mounting, spindle-speed compatibility, wheel fit, flanges, and eye protection. Electrical rules also require damaged cord-and-plug equipment to be removed from service. General-industry work commonly refers to 29 CFR 1910.243 and 1910.215, while construction work may also fall under 29 CFR 1926.303. Exact requirements depend on the industry, accessory, task, employer program, and applicable state plan.
How do you inspect an angle grinder?
Disconnect the grinder, inspect its body and controls, verify the handle and guard, check the mounting hardware, match and inspect the accessory, inspect the cord or battery, prepare the work area and PPE, then conduct a brief no-load test from outside the accessory’s plane.
Should every angle grinder disc receive a ring test?
No single test applies to every accessory. Ring testing is used for applicable abrasive wheels covered by the relevant rule and manufacturer instructions. Flap discs, wire brushes, backing pads, diamond products, and some resin-bonded accessories require different inspection methods.
How long should an angle grinder run during a no-load test?
Use the test duration specified in the grinder and accessory manuals. The purpose is to identify obvious wobble, vibration, unusual sound, smoke, or control failure while you remain clear of the accessory’s plane. Stop immediately if anything appears abnormal.
Conclusion
An angle grinder pre-use inspection takes only a few minutes, but every check has a specific purpose. Disconnect the tool, inspect its structure and power system, match the accessory and maximum RPM, secure the guard and handle, prepare the work area, wear suitable PPE, and complete a controlled no-load test.
Do not use the grinder when a defect, incompatible part, abnormal sound, vibration, smoke, or uncertain wheel condition remains. Tag it out and arrange an authorized repair or replacement instead of attempting to work around the problem. When installing a new cutting wheel, follow the site’s cut-off wheel installation guide and the exact grinder manual.
Sources
- OSHA 29 CFR 1910.243: Guarding of Portable Powered Tools and OSHA 29 CFR 1910.215: Abrasive Wheel Machinery — guard, wheel inspection, ring-test, speed, fit, and mounting requirements.
- OSHA 29 CFR 1910.334: Use of Electrical Equipment — cord, plug, extension-cord, and damaged-equipment checks.
- OSHA 29 CFR 1910.133: Eye and Face Protection — protection from flying particles and impact hazards.
- NIOSH: Provide Hearing Protection — exposure-based hearing-protector selection and use.
- NIOSH: Silica Safe Work Practices — dust prevention, engineering controls, and silica exposure guidance.
- Bosch Professional: Proper Use of Angle Grinders and OSHA Hot-Work Guidance — accessory compatibility, workpiece control, guards, sparks, and fire hazards.
- OSHA 29 CFR 1926.303: Abrasive Wheels and Tools — construction-industry guarding, inspection, ring testing, mounting, and PPE requirements.
- CCOHS: Abrasive Wheels — Use of Portable Grinders — training, pre-use checks, two-hand control, workpiece security, battery inspection, and startup position.
- ISEA: Eye and Face Protection — current ANSI/ISEA Z87.1-2025 standard information.