
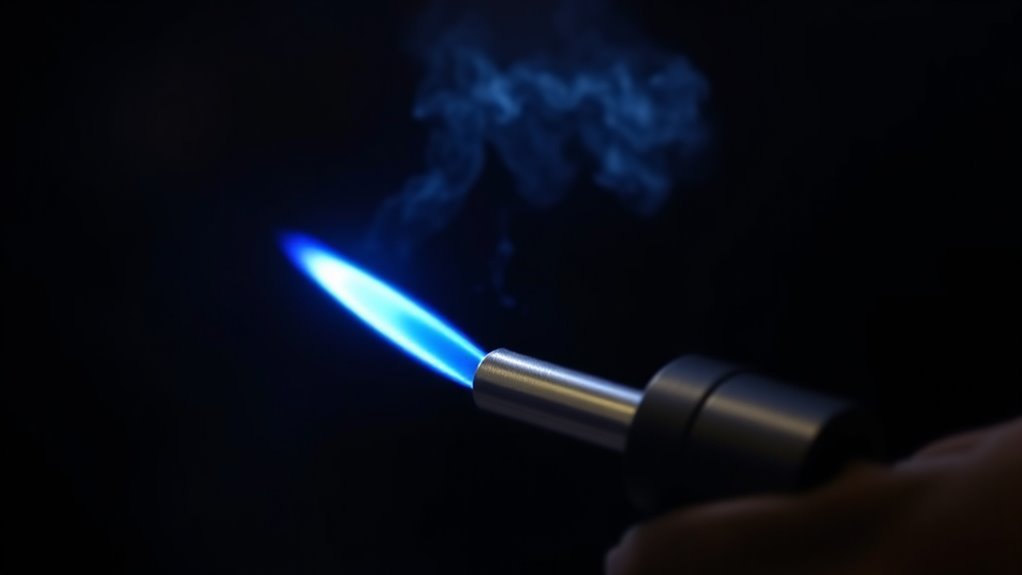
A neutral flame is the standard starting point for many oxyacetylene welding jobs because it provides concentrated heat without a strongly oxidizing or carbon-rich effect on the weld pool. Correct identification depends on the flame’s shape, sound, and stability—not color alone. This guide explains how the flame works, how to set it, when to use it, and when to stop and inspect the equipment.
Quick Answer
A neutral oxyacetylene flame has a sharp bluish-white inner cone, a steady light-blue outer envelope, and no visible acetylene feather. Set it by adding oxygen to a stable acetylene flame until the feather just disappears. Use only manufacturer-approved pressures, equipment, lighting steps, and safety controls.
Key Takeaways
- A neutral flame has a short, well-defined inner cone and no acetylene feather.
- The most useful heat is concentrated near the end of the inner cone, not deep inside the cone or far out in the envelope.
- Neutral is a common baseline for low-carbon steel and many general welding, brazing, and heating tasks, but the correct flame depends on the alloy and procedure.
- Excess acetylene creates a carburizing or reducing flame; excess oxygen creates an oxidizing flame.
- Set regulator pressure from the exact tip chart while gas is flowing—never by guessing or using a universal pressure value.
- Stop immediately for leaks, damaged equipment, persistent instability, sustained popping, hissing, squealing, or any suspected flashback.
At a Glance
| Time Required | About 5–10 minutes for inspection, leak checking, lighting, adjustment, and verification once properly trained |
| Difficulty | Intermediate; supervised hands-on training is required |
| Tools Needed | Complete oxyacetylene outfit, correct tip, approved striker, approved leak-detection solution, tip cleaner, fire extinguisher, and required PPE |
| Cost | Varies with equipment and gas use; creating a neutral flame requires no separate specialty tool |
What Is a Neutral Flame in Oxyacetylene Welding?
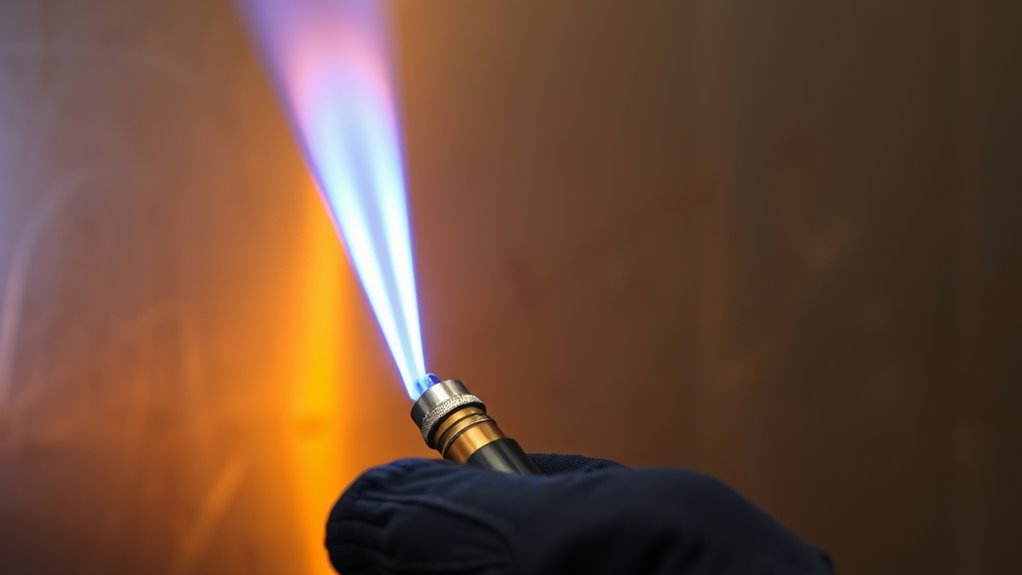
A neutral flame is an oxyacetylene flame adjusted so the torch has neither an obvious excess-acetylene feather nor the short, harsh appearance of excess oxygen. Welders commonly use it as the baseline setting for general gas welding because it has a stable shape and does not create a strongly carburizing or oxidizing atmosphere at the work.
The flame has two main visible regions. Primary combustion occurs around the bright inner cone. Secondary combustion continues in the larger outer envelope as the hot gases mix with oxygen from the surrounding air. For that reason, “balanced” does not mean that all oxygen needed for complete combustion comes through the torch.
A Harris Products Group technical guide places most oxyacetylene flames close to 5,400°F near the end of the inner cone. Exact temperature varies with the tip, flow, gas balance, test method, and measuring location.
The hottest and most useful region is near the end of the inner cone—not with the cone buried in the molten puddle.
Characteristics of a Neutral Flame
Do not identify a neutral flame by blue color alone. Several flame conditions look blue, so check the inner cone, surrounding envelope, sound, and stability together.
- Inner cone: Short, bright, sharply defined, and bluish-white.
- Acetylene feather: Not visible after the final oxygen adjustment.
- Outer envelope: Light blue, even, and stable.
- Sound: Smooth and steady rather than harsh, roaring, popping, hissing, or squealing.
- Operation: The flame remains attached to the tip without lifting, splitting, smoking, or repeatedly going out.
Note: Ambient light, tinted lenses, tip condition, gas purity, and nearby surfaces can change how the flame color appears. Shape and feather length are more dependable adjustment cues.
Why Use a Neutral Flame for Welding?
A properly adjusted neutral flame gives the operator a predictable heat source and a clear reference point at the inner cone. It is widely used for training and general work because it limits the strong chemical effects associated with excess acetylene or excess oxygen.
Warning: A neutral setting does not make oxyacetylene work inherently safe. The process still creates intense heat, infrared and visible radiation, fumes, hot metal, fire hazards, and compressed-gas risks. Use hands-on training, ventilation, fire controls, and proper PPE.
Controlled Heat Distribution
The clearly defined cone helps the operator judge flame-to-work distance and direct heat where it is needed. Correct tip size, travel speed, torch angle, joint preparation, and filler selection remain just as important as flame adjustment.
Practical benefits include:
- Predictable weld-pool size and movement
- Less risk of strong oxidation caused by excess oxygen
- Less risk of carbon pickup caused by excess acetylene
- A clear visual reference for torch position
- A repeatable starting point for procedure development and practice
Keep the end of the cone close enough to transfer heat efficiently, but do not force the cone into the puddle. Contact with the work can overheat the tip, disturb the molten metal, contaminate the tip, and contribute to backfire.
Clean Weld Quality
Flame balance supports weld quality, but it cannot correct dirty metal, poor fit-up, the wrong filler, excess heat, or an unsuitable joint design. Remove oil, paint, plating, rust, moisture, and other contamination using a method approved for the material.
A clean, stable flame makes it easier to read the puddle and hold a consistent torch position. Evaluate the finished joint by the applicable procedure and inspection criteria rather than judging quality from flame appearance alone.
Versatile Metal Applications
A neutral flame is versatile, but it is not automatically correct for every alloy. Use the welding procedure specification, filler-metal instructions, flux instructions, and torch manufacturer’s guidance whenever they differ from general practice.
| Material or Task | General Guidance | Important Qualification |
|---|---|---|
| Low-carbon or mild steel | Neutral is a common baseline for gas welding. | Use the correct tip, filler, joint design, and heat input. |
| Cast iron | Neutral is used in many repair procedures. | Preheat, filler selection, cooling rate, and the type of cast iron can control success. |
| Copper | Neutral is commonly used for suitable welding and heating work. | Copper conducts heat rapidly, so tip size and heat distribution matter. |
| Aluminum | A qualified procedure may specify neutral or slightly reducing conditions. | Use aluminum-specific cleaning, filler, flux when required, and careful heat control. |
| Stainless and alloy steels | Treat flame selection as procedure-specific. | Oxidation, alloy loss, sensitization, filler compatibility, and fume control can be critical. |
| Brass and bronze alloys | Required flame condition varies with the exact alloy and operation. | Do not assume neutral is correct; follow the filler and procedure instructions. |
| Oxy-fuel cutting | Neutral preheat flames are commonly used for suitable steel. | The separate cutting-oxygen stream performs the oxidation and removes material; the preheat flame alone does not make the cut. |
Neutral Flame vs. Carburizing and Oxidizing Flames
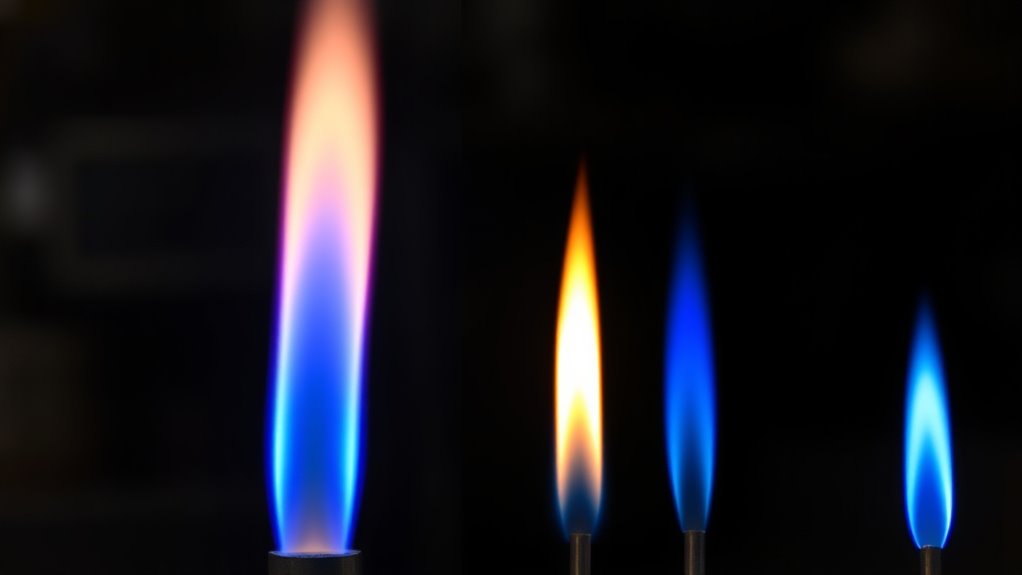
Neutral, carburizing, and oxidizing flames differ in torch-gas balance, appearance, sound, and effect on heated metal. The correct choice depends on the exact process and material.
| Flame Type | Torch-Gas Condition | Main Visual and Sound Cues | Typical Significance |
|---|---|---|---|
| Neutral | No obvious excess fuel or oxygen at the torch setting | Sharp inner cone, steady envelope, no acetylene feather, smooth sound | Common baseline for general welding and heating |
| Carburizing or reducing | Excess acetylene | Visible white acetylene feather extending beyond the inner cone | Used only where a reducing atmosphere is specified; may add carbon or soot in unsuitable work |
| Oxidizing | Excess oxygen | Shorter pointed cone and a sharper or more forceful sound | Used for selected procedures; can oxidize or damage metals when incorrectly applied |
A carburizing flame can create soot before enough oxygen is added and shows a distinct feather after ignition. An oxidizing flame has a shortened cone and a more aggressive sound. Neither condition should be treated as a defect by itself when an approved procedure specifically requires it.
Products Worth Considering
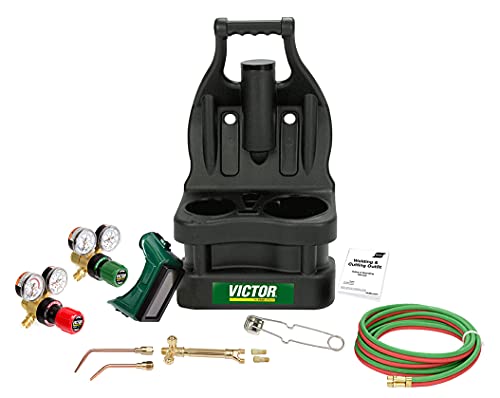
The Portable Tote from Victor features a molded, plastic carrying case with an ergonomic handle and balanced design for easy carrying.

Complete Kit: Ideal for HVAC & Light Duty Brazing - Designed specifically for light-duty brazing and welding jobs, this kit is your go-to tool for HVAC repairs, metal crafts, and other precision tasks. Its portable design is perfect for on-the-go professionals

Powerful Flame Temperature Heat up to 5252°F (2900°C)
Applications of a Neutral Flame
Neutral flames are used for suitable welding, brazing, soldering, preheating, straightening, and localized heating operations. The setting is especially useful when the goal is concentrated heat without a strong oxidizing or carburizing influence.
Common examples include:
- Low-carbon steel welding: A standard application when the joint, filler, thickness, and tip are suitable for gas welding.
- Cast-iron repair: Used in many procedures that also control preheat, filler choice, and cooling rate.
- Copper work: Provides controlled heat, although copper’s high thermal conductivity may require a larger heat input than steel of similar thickness.
- Aluminum practice and repair: Possible with the correct alloy-specific cleaning, filler, flux, technique, and flame specification.
- Brazing and heating: Useful when the consumable and base-metal instructions specify neutral heat.
- Training: Provides clear visual cues for learning torch distance, angle, travel, and puddle control.
Note: Do not use a generic flame recommendation in place of a welding procedure specification. Structural, pressure-retaining, vehicle, aerospace, code-regulated, or safety-critical work may require a qualified procedure and certified operator.
How to Achieve and Maintain a Neutral Flame
Use the following process only after hands-on instruction and after reading the manuals for the torch, regulators, tips, cylinders, check valves, and flashback-protection devices. Valve order and operating pressure can differ among manufacturers.
Warning: Under OSHA 29 CFR 1910.253, acetylene must not be generated, piped, or used above 15 psig. Never increase pressure beyond the torch, tip, regulator, cylinder-supplier, or workplace limit.
Products Worth Considering
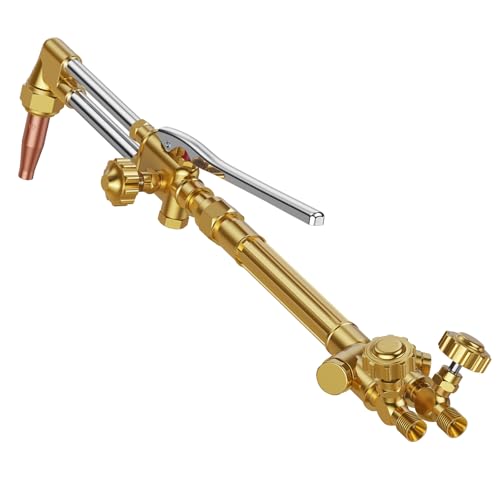
HIGH-QUALITY CUTTING TORCHES: ARCCAPTAIN oxy-acetylene cutting torches feature pure brass valves, stainless steel pressure handles, integrated adjusting handwheels, and stainless steel valve stems, offering durability and precision. They can cut metal with a thickness of 8" and weld metal up to 3.8" thick. Whether you are an amateur metalworker or a seasoned professional, this gas welding torch kit is easy to use and allows you to cut, weld with precision and efficiency

POWERFUL CUTTING: The lightweight oxy-acetylene cutting set, equipped with a 3-101 cutting nozzle, can easily cut 6" carbon steel and weld up to 2". It supports the use of multiple gases, These gas torch kits are all easy to use and allow you to cut, weld, braze and solder with precision and efficiency

Complete Kit: Medium-Duty Cutting & Welding - This versatile Oxy Acetylene Torch Kit is built for medium-duty projects. Achieve clean cuts up to 6 inches and precise welding/brazing on materials up to 1/2 inch thick with the appropriate tips
Pre-Light Safety Checklist
Complete these checks before opening a torch valve:
- Work only in an authorized hot-work area or under the required permit and fire-control system.
- Remove or protect combustibles and keep suitable fire-extinguishing equipment ready.
- Provide adequate general ventilation or local exhaust for the metal, coating, filler, flux, and work location.
- Secure oxygen and acetylene cylinders upright and protect them from impact and excess heat.
- Confirm that regulators, hoses, fittings, check valves, flashback arrestors, torch body, and tip are approved for the gases and are in serviceable condition.
- Keep oxygen equipment completely free of oil and grease.
- Select the correct tip for the operation and material thickness.
- Set pressures from the exact manufacturer chart; do not copy settings from an unrelated torch or tip.
- Leak-test connections with an approved solution. Never use a flame to find a leak.
- Purge each hose separately using the manufacturer’s procedure before lighting.
- Wear suitable eye protection, safety glasses with side protection, flame-resistant clothing, gloves, and protective footwear.
- Use an approved friction striker rather than matches, a cigarette lighter, or another open flame.
The ESAB oxy-fuel safety checklist provides additional manufacturer guidance on equipment inspection, leak testing, pressure adjustment, lighting, operation, and shutdown.
Step-by-Step Neutral Flame Adjustment
- Prepare the system. Complete the inspection, leak test, separate hose purging, and PPE checks. Make sure the torch valves are in the starting position required by the manufacturer.
- Set flowing pressure. Adjust each regulator only as the manufacturer directs for the installed tip. Pressure must be verified under the specified flow condition, not assumed from static gauge pressure.
- Start the fuel flow. Open the acetylene torch valve only enough for the specified lighting flow.
- Ignite with a striker. Light the fuel promptly using an approved friction striker. Keep the torch pointed into a clear, fire-safe area.
- Stabilize the acetylene flame. Adjust according to the torch manual until the flame is stable and smoke or soot is controlled. Do not let the flame detach from the tip.
- Add oxygen slowly. Open the torch oxygen valve gradually. Watch the long white acetylene feather shorten.
- Stop when the feather disappears. The neutral point is reached when the feather has just merged with the short, sharply defined inner cone.
- Confirm the full flame. Check for a steady light-blue envelope, smooth sound, firm attachment to the tip, and the absence of popping, lifting, splitting, or yellow smoke.
- Recheck under working conditions. Heat reflected from the work, tip contamination, flow restriction, and prolonged use can change flame behavior. Stop and correct any instability before continuing.
Pro Tip: Clean the orifices only with the correct tip-cleaning tool and method. An oversized cleaner, drill bit, wire, or aggressive filing can enlarge or distort an orifice and permanently change gas flow.
Visual and Audible Flame Indicators
| Characteristic | Neutral-Flame Appearance | What It Tells You |
|---|---|---|
| Inner cone | Short, bluish-white, and sharply defined | The flame is near the neutral adjustment point |
| Outer envelope | Light blue, even, and steady | Flow and combustion appear stable |
| Acetylene feather | No longer visible | The obvious excess-acetylene condition has been removed |
| Sound | Smooth and consistent | The torch is not showing an obvious harsh oxidizing condition or instability |
| Attachment | Flame remains attached to the tip | Flow is not visibly lifting or separating from the tip |
Common Mistakes to Avoid
- Adjusting by color alone: Use cone shape, feather, sound, and stability together.
- Guessing pressure: Match the exact tip chart and verify pressure under the specified flow.
- Using torch valves to compensate for the wrong tip: Change to the correct tip rather than forcing an unsuitable flame.
- Ignoring a dirty or damaged tip: A restricted, enlarged, or distorted orifice can split or destabilize the flame.
- Holding the cone against the puddle: Excess proximity can overheat the tip and disturb the weld pool.
- Continuing after repeated popping: Repeated backfire is a stop-work signal, not a normal operating condition.
- Using oil on oxygen equipment: Oil and grease can react violently in oxygen service.
- Relighting after a flashback without inspection: Heat or flame may have damaged internal torch parts, check valves, arrestors, or hoses.
Safe Shutdown and Depressurization
Valve-closing order can differ by torch manufacturer, so use the sequence printed in the equipment manual. A complete shutdown normally includes these actions:
- Close the torch valves in the manufacturer-specified order and confirm that the flame is out.
- Close both cylinder valves securely without overtightening them.
- Point the torch into a safe, ventilated area.
- Open and close each torch valve separately to bleed pressure from its hose and regulator.
- Confirm that both regulator gauges return to zero.
- Back out or release the regulator pressure-adjusting mechanisms until they are unloaded.
- Close the torch valves after the lines are depressurized.
- Inspect the work area for hot material, sparks, slag, or hidden fire before leaving.
- Store the equipment with cylinders secured and valve protection in place as required.
Troubleshooting Common Issues With Neutral Flames
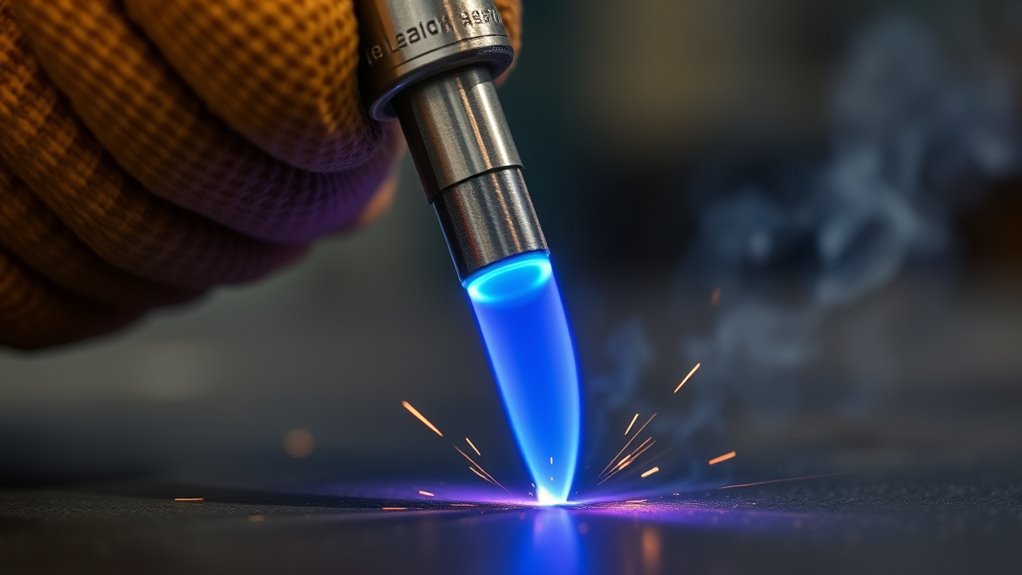
A stable neutral flame should not smoke, repeatedly pop, lift away from the tip, split into uneven jets, or change shape without a valve adjustment. Shut down before cleaning, tightening, changing a tip, or inspecting any gas-carrying component.
| Symptom | Possible Cause | Safe Response |
|---|---|---|
| Yellow, smoky, or sooty flame | Too much acetylene, insufficient oxygen, blocked tip, or incorrect flow | Adjust only by the approved procedure. If it will not clear, shut down and inspect the tip, pressures, and gas supply. |
| Long white feather | Carburizing condition with excess acetylene | Add oxygen slowly until the feather just disappears, unless the procedure specifically requires a reducing flame. |
| Very short cone and harsh sound | Oxidizing condition with excess oxygen | Reduce oxygen using the manufacturer’s adjustment method until the neutral cone returns. |
| Flame lifts away from the tip | Excess flow, wrong pressure, wrong tip, damaged seat, or restricted passage | Shut down and verify the tip, flowing pressure, installation, and equipment condition. |
| Split or uneven flame | Dirty, damaged, enlarged, or incorrectly seated tip | Shut down, cool the equipment, clean it correctly, and replace damaged parts. |
| Single pop and flame goes out | Backfire caused by tip contact, overheating, restricted flow, or incorrect pressure | Close the torch safely, allow it to cool, inspect the tip and settings, and correct the cause before relighting. |
| Repeated popping | Sustained backfire, overheated tip, damaged mixer, obstruction, or unstable flow | Stop immediately and inspect the outfit. Do not keep welding through repeated backfire. |
| Hissing, whistling, or squealing inside the torch | Possible flashback burning upstream inside the equipment | Use the manufacturer’s emergency shutdown procedure immediately. Remove the outfit from service until inspected. |
| Flame changes during a long weld | Tip heating, contamination, pressure drop, restricted gas supply, or cylinder-withdrawal problem | Stop, shut down safely, let the tip cool, and check the complete gas path before continuing. |
Backfire vs. Flashback
A backfire is a momentary pop in which the flame briefly travels into the tip and usually goes out. A sustained backfire produces repeated popping or burning near the tip or mixer. A flashback travels farther upstream and may create a hissing, whistling, or squealing sound inside the torch or hoses.
Warning: Treat any suspected flashback as an emergency equipment fault. Follow the manufacturer’s immediate shutdown sequence, close the gas supply when safe, and remove the outfit from service until a qualified person has inspected it.
Neutral Flame Safety Basics
Flame adjustment is only one part of oxy-fuel safety. Follow the equipment manuals, workplace hot-work program, applicable fire code, and the requirements in OSHA 29 CFR 1910.252 and OSHA 29 CFR 1910.253.
- Training: Do not learn oxyacetylene operation from written instructions alone. Practice under a qualified instructor.
- Fire control: Remove combustibles, protect openings and hidden spaces, keep suitable extinguishing equipment ready, and provide a fire watch when required.
- Ventilation: Control fumes from the base metal, filler, flux, paint, plating, cleaners, and coatings. Do not weld in a confined space without the required permit, atmospheric controls, rescue provisions, and ventilation.
- Eye and face protection: Use the correct gas-welding filter shade plus safety glasses with side protection. OSHA’s eye-protection guidance lists minimum gas-welding filter shades that increase with material thickness; use a darker shade when needed for comfortable viewing.
- Clothing: Wear clean, flame-resistant clothing, gloves, and footwear that prevent hot metal from entering pockets, cuffs, or shoes.
- Cylinders: Keep cylinders upright, secured, protected from damage, and handled by the approved method. Do not lift a cylinder by its valve-protection cap.
- Oxygen cleanliness: Never allow oil, grease, contaminated gloves, or oily tools to contact oxygen valves, regulators, fittings, or hoses.
- Acetylene pressure: Never use acetylene above 15 psig, and always obey any lower manufacturer or workplace limit.
- Leak response: Never operate leaking equipment or test for leaks with a flame. Move leaking cylinders or equipment only under the supplier’s and emergency plan’s instructions.
- Check valves and arrestors: Install, orient, inspect, and replace them as required by the equipment manufacturer, employer, and applicable rules. They do not replace correct pressures, maintenance, or operating technique.
- Containers: Never weld, cut, braze, or heat a drum, tank, pipe, wheel, vessel, or other closed or previously used container unless it has been properly prepared under an approved procedure.
Acetylene Cylinder Withdrawal Rate
The 1/7 rule means withdrawing no more than about one-seventh of a cylinder’s rated acetylene content per hour. It remains a common rule of thumb, but it is not the only limit.
An American Welding Society explanation of CGA guidance notes more conservative rates for some uses, including approximately 1/10 for intermittent applications where solvent carryover is a concern and 1/15 for permanent or continuous installations. The cylinder supplier, equipment manufacturer, workplace procedure, and applicable code control when they specify a lower rate.
A large tip, rosebud, or heating operation may demand more gas than one cylinder can safely deliver. Use an appropriately sized cylinder or an approved manifold system rather than increasing pressure or exceeding the permitted withdrawal rate.
Frequently Asked Questions
What is a neutral flame in oxyacetylene welding?
A neutral flame is adjusted until the visible acetylene feather just disappears, leaving a short, sharply defined bluish-white inner cone and a steady light-blue outer envelope. It is a common baseline for general gas welding and heating.
Where is the hottest part of a neutral oxyacetylene flame?
The greatest useful heat is concentrated near the end of the inner cone. Hold that region close to the work as the procedure requires, but do not bury the cone in the molten puddle or press it against the surface.
What is the 1/7 rule for acetylene?
The 1/7 rule limits hourly withdrawal to about one-seventh of a cylinder’s rated acetylene content. Current guidance may require lower rates, including 1/10 or 1/15 for certain applications. Follow the cylinder supplier, equipment maker, workplace procedure, and applicable code.
What are the three main oxyacetylene flame types?
The three main conditions are neutral, carburizing or reducing, and oxidizing. A neutral flame has no visible feather, a carburizing flame has excess acetylene and a feather, and an oxidizing flame has excess oxygen with a shorter cone and sharper sound.
How do you set a neutral flame?
After inspection, leak testing, separate hose purging, and manufacturer-approved pressure setup, light the acetylene with a striker. Add oxygen slowly until the acetylene feather just disappears and the inner cone is sharp. Follow the exact lighting sequence in the torch manual.
Can you weld aluminum with a neutral flame?
Some aluminum procedures use a neutral or slightly reducing flame, but aluminum requires alloy-specific cleaning, filler, flux when specified, and careful heat control. Follow a qualified procedure rather than applying a general steel technique.
What happens if the flame is not neutral?
Excess acetylene can create soot, a reducing atmosphere, or unwanted carbon pickup in unsuitable work. Excess oxygen can increase oxidation and change puddle behavior. Either condition may be correct only when the approved procedure specifically calls for it.
Can a neutral flame cut metal?
A cutting torch commonly uses neutral preheat flames to bring suitable steel to ignition temperature. The separate high-purity cutting-oxygen stream then oxidizes the steel and ejects the reaction products from the kerf. The preheat flame alone does not perform the cut.
What do popping, hissing, or squealing sounds mean?
A single pop may be a backfire caused by tip contact, overheating, obstruction, or incorrect flow. Repeated popping can indicate sustained backfire. Hissing, whistling, or squealing inside the equipment can indicate flashback. Shut down by the manufacturer’s emergency procedure and inspect the outfit before reuse.
Safety Disclaimer: This article is for general information and does not replace supervised hands-on training, an approved welding procedure, equipment manuals, workplace safety rules, hot-work permits, or applicable codes. Have damaged, leaking, or flashback-affected equipment inspected by a qualified service provider before use.
Conclusion
A neutral flame is identified by a sharp inner cone, a steady outer envelope, and the disappearance of the acetylene feather. It is a dependable baseline for many oxyacetylene welding and heating tasks, but the correct flame, filler, flux, tip, and technique must match the material and approved procedure.
Inspect and leak-test the outfit before lighting, use manufacturer-specified flowing pressures, keep acetylene below the permitted pressure and withdrawal limits, and shut the system down completely after work. Stop for unstable flame behavior, repeated popping, leaking equipment, or any sign of flashback rather than trying to weld through the problem.
Sources
- Harris Products Group, Turn Up the Brazing Heat — flame zones, neutral-flame balance, heat location, and approximate temperature
- OSHA 29 CFR 1910.253, Oxygen-Fuel Gas Welding and Cutting — acetylene pressure, cylinder handling, and oxygen-equipment safety
- OSHA 29 CFR 1910.252, General Welding, Cutting, and Brazing Requirements — fire prevention, ventilation, hot work, and protective equipment
- OSHA Eye Protection During Welding Fact Sheet — minimum filter-shade guidance for gas welding
- ESAB Oxy-Fuel Safety Checklist — inspection, leak testing, pressure adjustment, lighting, operation, and shutdown
- American Welding Society, Acetylene Withdrawal Guidance — 1/7, 1/10, and 1/15 withdrawal-rate context




