
A carburizing flame in gas welding is an acetylene-rich oxy-fuel flame with a visible white feather beyond the inner cone. It creates a less-oxidizing atmosphere and may transfer carbon to some molten metals. That effect can help in procedure-approved hardfacing, brazing, and alloy work, but an over-rich flame can cause soot, poor fusion, or brittle weld metal.
Quick Answer
A carburizing flame, also called a reducing flame, is an oxy-acetylene flame with excess fuel gas. Identify it by the white acetylene feather extending beyond the bright inner cone. Use only a slight feather when the material, filler, or written procedure calls for reduced oxidation or controlled carbon pickup.
Key Takeaways
- A carburizing flame contains more acetylene than a neutral flame and shows a visible acetylene feather.
- A correct slight carburizing flame should be stable and controlled; smoke or heavy soot means it is too fuel-rich.
- The flame is less oxidizing and generally cooler than a neutral flame, but it can change weld chemistry through carbon pickup.
- Use a neutral flame for general steel welding unless the filler manufacturer or welding procedure specifies a reducing flame.
- Set pressures, lighting order, shutdown order, and safety devices from the exact torch manufacturer’s instructions.
At a Glance
| Time Required | About 1 to 3 minutes to adjust after the torch has been inspected, leak-tested, purged, and set to the manufacturer’s pressure chart |
| Difficulty | Intermediate; hands-on oxy-fuel training and safe gas-handling habits are strongly recommended |
| Tools Needed | Oxy-acetylene torch outfit, correct tip, regulators, hoses, approved check valves or flashback arrestors as specified, spark lighter, PPE, tip cleaners, and approved leak-test solution |
| Cost | No special accessory is needed beyond a correctly equipped torch outfit; oxygen and acetylene use add a small variable operating cost |
Warning: Oxy-fuel welding can cause fire, explosion, backfire, flashback, burns, and toxic-fume exposure. OSHA states that acetylene must not be used above 15 psig and requires suitable eye protection for gas welding. Use approved equipment, ventilation, protective clothing, fire controls, and the exact setup and shutdown procedure in your torch manual. Review OSHA oxygen-fuel gas welding requirements before working.
What Is a Carburizing Flame in Gas Welding?
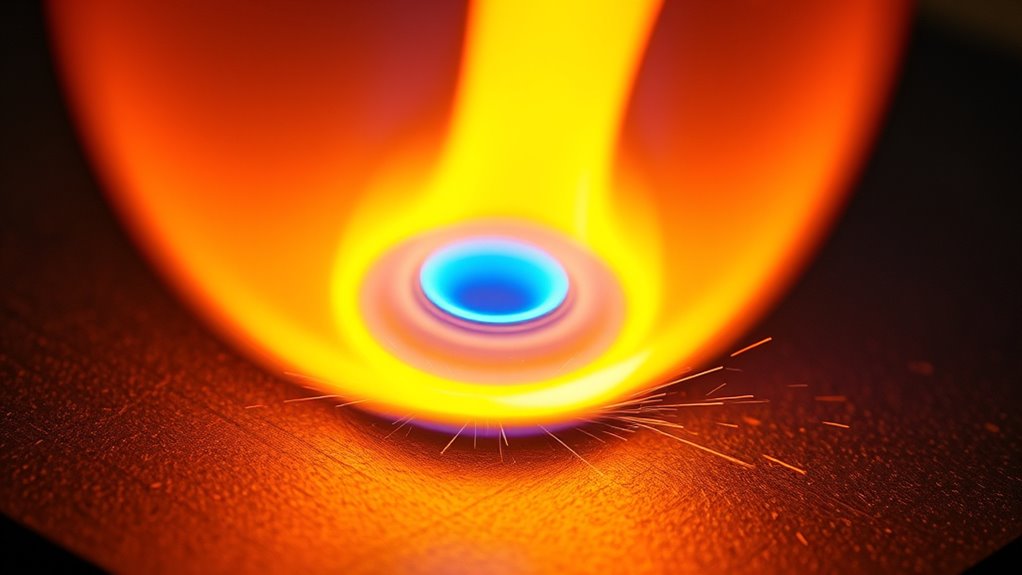
A carburizing flame is produced by supplying more acetylene than is needed for a neutral oxy-acetylene flame. Manufacturers also call it a reducing flame because the excess fuel makes the flame less oxidizing at the work surface.
It has three visible regions:
- Inner cone: the bright bluish-white cone nearest the torch tip.
- Acetylene feather: a pale white extension beyond the inner cone.
- Outer envelope: the softer blue flame surrounding the inner zones.
The acetylene feather is the key identifying feature. When oxygen is added to a fuel-rich flame, the feather becomes shorter. At a neutral adjustment, it disappears into the inner cone. Adding a small amount of fuel again produces a slight carburizing flame.
The useful effect is also the main risk. A reducing flame can limit surface oxidation, but prolonged exposure or an excessively rich adjustment can introduce carbon into susceptible weld metal. The result may be extra hardness, lower ductility, soot, porosity, poor wetting, or a dirty bead. The actual effect depends on the base metal, filler, flux, flame setting, exposure time, and written procedure.
A visible feather identifies a carburizing flame; smoke and heavy soot identify an over-rich flame that needs correction.
Note: A carburizing flame is not the default for general welding. Start with a neutral flame unless the base-metal specification, filler-metal instructions, or welding procedure specifically calls for a reducing flame.
Key Characteristics of a Carburizing Flame
To identify a carburizing flame, look at the gas balance, the feather, the sound, and the behavior of the molten puddle. A correct slight carburizing flame is stable and controlled. It should not roar, pop, produce a long bushy tail, or coat the work with black soot.
Flame Composition and Structure
The flame forms when excess acetylene remains after the first stage of combustion near the tip. That excess fuel creates the visible feather. The outer envelope continues burning with oxygen drawn from the surrounding air.
- A short, well-defined feather indicates a slight carburizing adjustment.
- A long or bushy feather indicates too much fuel for most welding work.
- Black soot before the puddle forms means the flame is over-rich.
- A short, pointed inner cone with a sharp hiss indicates an oxidizing adjustment, not a carburizing one.
Temperature and Heat Effects
A carburizing oxy-acetylene flame is hot enough for welding, brazing, heating, and hardfacing operations, but it is generally cooler and less oxidizing than a neutral flame. An oxidizing flame is sharper, noisier, and hotter. These relative characteristics are shown in the Miller Little Torch owner’s manual.
A single advertised flame-temperature number is not a reliable setting target. Actual heat at the work changes with the tip, gas flow, torch design, pressure, flame adjustment, distance, and the part’s heat conductivity. Use flame appearance, manufacturer charts, and puddle behavior instead of trying to match a temperature number.
| Characteristic | What It Means |
|---|---|
| Gas balance | Excess acetylene compared with a neutral setting |
| Flame appearance | Bright inner cone with a visible white acetylene feather and blue outer envelope |
| Sound | Soft and steady rather than sharply hissing or roaring |
| Heat effect | Generally cooler and less concentrated than neutral or oxidizing settings |
| Metallurgical effect | Reduces oxidation and may cause carbon pickup in susceptible molten metal |
Carburizing vs Neutral vs Oxidizing Flame
The three main oxy-acetylene adjustments are neutral, carburizing, and oxidizing. The difference is the balance of oxygen and acetylene. Choosing the correct gas-welding flame type matters because each setting changes the heat profile and chemical effect at the puddle.
| Flame Type | Gas Balance | Visual and Sound Clue | Typical Decision |
|---|---|---|---|
| Neutral | Fuel and oxygen adjusted until the feather disappears | Clean, defined inner cone with no feather | Normal starting point for general steel welding and many basic torch operations |
| Carburizing | Excess acetylene | White feather beyond the inner cone; softer sound | Use only for procedure-approved reducing-flame work, such as selected hardfacing, brazing, heating, or alloy operations |
| Oxidizing | Excess oxygen | Short, pointed cone with a sharper hiss | Use only where the base metal, filler, or written procedure specifically requires it |
A neutral flame is the safest reference point because it is easy to identify. From neutral, a small increase in fuel produces a carburizing feather. A small increase in oxygen produces an oxidizing flame. Do not use valve position or regulator pressure alone to name the flame; identify it at the tip while following the torch manual.
Products Worth Considering

POWERFUL CUTTING: The lightweight oxy-acetylene cutting set, equipped with a 3-101 cutting nozzle, can easily cut 6" carbon steel and weld up to 2". It supports the use of multiple gases, These gas torch kits are all easy to use and allow you to cut, weld, braze and solder with precision and efficiency

High quality medium duty cutting torch CA1350 cutting attachment, 100FC torch handle.
Where Can You Use a Carburizing Flame?
Use a carburizing flame only when the material, filler, flux, or approved procedure benefits from a reducing atmosphere. The goal is usually to limit oxidation or produce a controlled surface chemistry—not simply to make the flame look larger.
Procedure-dependent uses may include:
- Hardfacing: certain oxy-fuel hardfacing consumables use a reducing flame to control oxidation and deposit behavior.
- Brazing or bronze-welding: some filler and flux systems call for a soft neutral-to-slightly-reducing flame.
- Selected alloy work: a written procedure may call for a reducing flame to protect an oxidation-sensitive puddle.
- Heating and localized surface work: a slight reducing adjustment may be specified when oxidation must be limited.
The correct feather length is procedure-specific. A long feather is not automatically better for hardfacing or brazing. Too much fuel can cool the working zone, contaminate the filler, and leave carbon or soot where it is not wanted.
| Use It When | Avoid It When |
|---|---|
| The filler manufacturer or welding procedure calls for a reducing flame | The procedure calls for a neutral or oxidizing flame |
| A compatible alloy needs oxidation control | The metal is sensitive to carbon pickup or loss of ductility |
| You are performing a qualified hardfacing or wear-surface operation | You see soot, a dirty puddle, poor wetting, popping, or unstable fusion |
| You can verify the base metal and filler compatibility | The metal, coating, or previous contents are unknown |
Surface condition matters. Remove oil, paint, heavy rust, plating, and coatings using a method that does not create a new hazard. Zinc, lead, cadmium, chromium-containing paint, and contaminated metal can produce hazardous fumes. Review OSHA’s ventilation and coating requirements and safe preparation methods such as removing zinc coating from galvanized steel before hot work.
Risks and Weld Defects From a Carburizing Flame
Control is the main challenge. A slight feather may be correct for a specific operation, while a long, smoky feather can contaminate the joint and change the weld metal more than intended.
- Soot and carbon deposits: an over-rich flame can coat the workpiece, filler rod, and flux.
- Excess carbon pickup: susceptible steels may become harder and less ductile.
- Poor fusion: a soft, over-rich flame may not put enough useful heat into the joint.
- Porosity or inclusions: contamination and poor puddle protection can trap gas or residue.
- Inconsistent bead shape: unstable gas flow, a dirty tip, or the wrong angle can make the puddle wander.
- Backfire risk: holding the tip too close, overheating it, or using a partly blocked nozzle can make the flame burn back into the torch.
Some defects appear only after cooling. Warning signs include a dull or dirty bead, uneven wetting, excessive grinding, poor bend behavior, or an edge that becomes unusually hard to file. If these signs appear, stop, return to a verified neutral flame, clean the joint, and confirm the filler, tip, pressure, and procedure.
Understanding lack of fusion and other weld defects can also help you separate a flame-adjustment problem from joint fit-up, contamination, travel speed, or heat-input problems.
How to Set a Slight Carburizing Flame
Start from a safe, leak-free torch setup and make small adjustments. The goal is not a large feather. It is a stable flame with the shortest feather that satisfies the procedure.
Products Worth Considering

Complete Kit: Ideal for HVAC & Light Duty Brazing - Designed specifically for light-duty brazing and welding jobs, this kit is your go-to tool for HVAC repairs, metal crafts, and other precision tasks. Its portable design is perfect for on-the-go professionals

Complete Kit: Medium-Duty Cutting & Welding - This versatile Oxy Acetylene Torch Kit is built for medium-duty projects. Achieve clean cuts up to 6 inches and precise welding/brazing on materials up to 1/2 inch thick with the appropriate tips

High-Quality:The Oxygen Acetylene Torch Welding and Cutting Kit is made of high quality stainless steel and brass for durability. This oxygen & acetylene torch kit comes complete with hoses, welding and cutting torches, goggles, tip cleaner and spark igniter, and more A 17-piece professional-grade portable oxygen acetylene oxy welding cutting torch kit that includes everything you need to weld or cut accurately,allowing you to cut, weld, braze, and fuse accurately and efficiently!
Before You Adjust the Flame
Inspect the work area, cylinders, regulators, hoses, check valves, arrestors, torch, and tip before lighting. Keep oil and grease away from oxygen equipment. Secure cylinders upright, remove combustibles, provide suitable eye protection and protective clothing, and use ventilation that keeps fumes away from your breathing zone.
Use the pressure chart for the exact torch and tip. Do not copy regulator settings from a different tip or torch. OSHA limits acetylene use to 15 psig, but many welding tips operate well below that limit. Never increase pressure to compensate for a clogged tip, damaged hose, or incorrect tip size.
Lighting and shutdown sequences can differ by torch design. For example, combination torches and cutting attachments may have different valve positions than a simple welding torch. Follow the current manual for your equipment. The Smith oxy-fuel setup guide shows leak testing, purging, pressure adjustment, flame identification, and shutdown for its equipment.
If you are working in a confined or poorly ventilated space, do not use oxygen to “freshen” the air. OSHA states that oxygen must never be used for ventilation. Cylinders must remain outside confined spaces, and the job requires proper ventilation, atmospheric controls, and rescue planning.
Flame Adjustment Steps
- Select and inspect the correct tip. Match the tip to the operation and material thickness. Clean blocked orifices only with the proper tip-cleaning tools.
- Secure and inspect the cylinders. Keep them upright, away from heat, and free from oil or grease. Confirm that regulators and hoses match the gases.
- Leak-test the system. Use an approved leak-detecting solution. Never use a flame to search for leaks.
- Set delivery pressures from the manufacturer’s chart. Make pressure adjustments with gas flowing when the manual requires it.
- Purge each hose separately. Follow the torch maker’s purge duration and valve sequence so mixed gas is cleared before ignition.
- Light the torch with a spark lighter. Use the valve sequence in the manual. Never use matches, a cigarette lighter, or hot work as the ignition source.
- Establish a clean fuel flame. Adjust fuel until heavy soot stops before adding oxygen, unless the equipment manual specifies a different sequence.
- Adjust to neutral first. Add oxygen slowly until the acetylene feather just disappears into the bright inner cone.
- Create a slight carburizing flame. Add a very small amount of fuel, or reduce oxygen as the manual directs, until a short white feather appears.
- Test on clean scrap when possible. Watch for soot, popping, poor wetting, or a sluggish puddle before moving to the finished part.
Pro Tip: Adjust to a clear neutral flame first, then move only slightly toward fuel-rich. This makes the feather easier to judge and reduces the chance of starting with a long, sooting flame.
Visual and Sound Indicators
A correct slight carburizing flame should show:
- A stable, bright inner cone
- A short white feather extending beyond the cone
- A smooth blue outer envelope
- A steady sound without a sharp hiss, pop, or whistle
- A puddle that wets smoothly without heavy soot
If the inner cone becomes very short and pointed and the flame hisses, reduce oxygen. If the feather becomes long, bushy, smoky, or sooty, reduce fuel or add oxygen slowly. If the flame pops or goes out, close the torch safely, identify the cause, and inspect the tip before relighting.
Flame Distance and Feather Length
Do not let the nozzle touch the work. Holding the torch too close can overheat or block the tip and trigger backfire. Keep the inner cone just off the puddle at the distance recommended for the tip and process.
There is no universal feather length that fits every job. Filler manufacturers may describe the feather as a fraction or multiple of the inner-cone length. Use that instruction when available. Without a qualified procedure, keep the flame neutral rather than guessing.
Material Compatibility Considerations
The same carbon-rich effect that helps one operation can damage another. Verify the material before selecting the flame:
- Plain carbon steel: use a neutral flame unless the approved procedure requires a reducing adjustment.
- High-carbon, tool, or wear-resistant materials: follow the exact hardfacing or repair procedure because extra carbon and heat can change hardness and cracking risk.
- Alloy and nonferrous work: follow the filler, flux, and base-metal instructions; do not assume every oxidation-sensitive alloy needs a carburizing flame.
- Galvanized, painted, oily, or plated metal: remove contamination safely and control fumes before hot work.
- Unknown metal or repaired components: identify the alloy and service requirements before welding, brazing, or heating.
Stable gas flow also matters in other thermal processes. The same principle of matching gas, consumable, and manufacturer settings applies when choosing gas for plasma cutting.
Troubleshooting Carburizing Flame Problems
Stop when the flame or puddle looks wrong. Most problems come from excess fuel, insufficient oxygen, a dirty or overheated tip, incorrect pressure, leaks, damaged equipment, or poor surface preparation.
| Problem | Likely Cause | Fix |
|---|---|---|
| Black soot on the work | Too much acetylene, too little oxygen, or lighting before the fuel flame is cleaned up | Adjust toward neutral until soot stops, then create only the short feather required |
| Popping or backfire | Tip too close, partly blocked, overheated, damaged, or supplied at the wrong pressure | Shut down by the manual, cool and inspect the tip, clean it correctly, and reset pressures from the chart |
| Harsh hissing sound | Excess oxygen or excessive flow | Reduce oxygen or flow and re-establish a neutral flame before adding a slight feather |
| Flame lifts off the tip | Gas flow or pressure too high for the tip | Shut down and reset pressures and valves to the manufacturer’s chart |
| Dirty or sluggish puddle | Contaminated metal, over-rich flame, wrong filler or flux, or insufficient heat | Clean the joint, shorten the feather, confirm consumable compatibility, and check tip size |
| Hard or brittle bead | Possible excess carbon pickup, wrong filler, or unsuitable heat cycle | Stop using the carburizing setting and verify the material, filler, and repair procedure before continuing |
| Feather changes while working | Pressure drop, restricted hose, low cylinder contents, tip heating, or regulator instability | Stop safely and inspect the supply system rather than readjusting continuously at the torch |
Backfire vs Flashback: Know the Difference
A backfire is a brief event in which the flame burns back into the torch, often with a sharp pop, then goes out or reignites at the nozzle. Common causes include holding the tip too close, a partly blocked nozzle, an overheated tip, or incorrect gas flow.
A flashback is more serious. Flame continues burning backward through the torch and may enter a hose, regulator, or gas-supply system. Reverse gas flow can create an explosive mixture inside a hose. The HSE gas-welding safety guide explains that non-return valves reduce reverse flow but do not stop a flashback after it has started; flashback arrestors are designed for that additional protection.
Warning: If a flashback occurs, follow the emergency shutdown procedure for your equipment only if it is safe to do so. If the fire cannot be controlled immediately, evacuate and call emergency services. Do not reuse the torch, hoses, regulators, check valves, or arrestors until they have been inspected and damaged parts replaced.
Safety Checks Before Using a Carburizing Flame
Gas-welding safety is not optional. Build these checks into every job:
- Get trained: use hands-on instruction and the manual for the exact torch, regulators, and tips.
- Check for leaks: use an approved leak-detecting solution. Never use a flame.
- Keep oxygen equipment oil-free: oil and grease can react violently in oxygen service.
- Secure cylinders upright: use a cart, chain, or other approved steadying device, and keep cylinders away from flame and hot metal.
- Inspect each shift: check hoses, couplings, valves, tip connections, regulators, gauges, and the torch before use.
- Use the specified protective devices: fit check valves and flashback arrestors where the manufacturer, risk assessment, or applicable rule requires them. Do not treat one device as a substitute for the other.
- Use a spark lighter: never light a torch with matches, a pocket lighter, or another hot-work source.
- Keep hoses protected: route them away from spatter, sharp edges, hot metal, vehicle traffic, stairs, and walkways.
- Control fire risk: move combustibles, shield materials that cannot be moved, inspect the opposite side of walls or floors, and keep suitable extinguishing equipment ready.
- Use a fire watch when required: OSHA requires one in specified higher-risk conditions and requires it to remain at least 30 minutes after hot work is complete.
- Ventilate the work: use local exhaust or mechanical ventilation when required, especially indoors, in confined spaces, or on coated metal.
- Keep cylinders outside confined spaces: OSHA requires gas cylinders and welding machines to remain outside while gas welding or cutting is performed inside.
- Wear PPE: use suitable gas-welding eye protection, gloves, flame-resistant clothing, and protective footwear.
- Never heat a closed or contaminated container: tanks, drums, tubes, and hollow parts can explode unless properly cleaned, isolated, vented, and approved for hot work.
After the job, shut down in the sequence specified by the torch manufacturer, close the cylinder valves, bleed pressure as directed, back out regulator adjusting screws, and store the equipment where hoses and fittings cannot be damaged.
Note: This guide explains flame identification and general controls. It does not replace qualified training, a hot-work permit, a welding procedure specification, local safety rules, or the instructions supplied with your torch and consumables.
Frequently Asked Questions
What is a carburizing flame used for?
A carburizing flame is used when a filler, flux, base-metal specification, or welding procedure calls for an acetylene-rich, less-oxidizing flame. Procedure-dependent uses include selected hardfacing, brazing, heating, and alloy work. It is not the standard choice for every weld.
What are the three types of flames used in gas welding?
The three common oxy-acetylene flame adjustments are neutral, carburizing, and oxidizing. A neutral flame has no visible acetylene feather. A carburizing flame has excess acetylene and a feather. An oxidizing flame has excess oxygen, a short pointed cone, and a sharper hiss.
Why should a carburizing flame be avoided when welding some steels?
A carburizing flame may transfer carbon to susceptible molten steel. That can raise hardness and reduce ductility or toughness. An over-rich flame can also leave soot and interfere with clean fusion. Use a neutral flame unless the approved procedure requires carburizing action.
How hot is a carburizing flame?
It is hot enough for many welding, heating, brazing, and hardfacing operations, but manufacturers describe it as lower in temperature than a neutral flame. The actual heat delivered to the part depends on the torch, tip, flow, pressure, distance, and adjustment, so one fixed temperature is not a useful setup target.
How do you identify a carburizing flame?
Look for a white acetylene feather extending beyond the bright inner cone. A short feather indicates a slight carburizing adjustment. A long bushy feather, smoke, or black soot means the flame is too rich for most welding work.
Is a carburizing flame the same as a reducing flame?
In oxy-acetylene work, the terms are commonly used together. The excess fuel makes the flame less oxidizing near the work. However, the exact chemical effect depends on the material and flame setting, so “reducing” does not mean the flame is harmless to every metal.
How long should the acetylene feather be?
There is no universal feather length. Use the filler manufacturer’s or welding procedure’s instruction. For general identification, a slight carburizing flame has a short, stable feather. Without a procedure, return to neutral rather than guessing.
What is the difference between a backfire and a flashback?
A backfire is usually a brief pop as flame burns back into the torch and goes out or returns to the tip. A flashback is sustained burning backward into the torch or hose and can reach the regulator or gas supply. A flashback requires immediate emergency action and equipment inspection.
Should you use a carburizing flame on mild steel?
Normally, use a neutral flame for mild-steel gas welding. Use a carburizing flame only when an approved procedure or compatible hardfacing consumable specifically requires it. Extra carbon and soot can reduce weld quality when they are not part of the process.
Conclusion
A carburizing flame is an acetylene-rich oxy-fuel flame identified by a white feather beyond the inner cone. Its less-oxidizing character can help in selected, procedure-approved hardfacing, brazing, heating, and alloy work. The same fuel-rich condition can also create soot, poor fusion, carbon pickup, and brittle weld metal. Start from neutral, add only the feather the procedure requires, and follow the torch manufacturer’s pressure, lighting, shutdown, and safety instructions every time.
Sources
- OSHA 29 CFR 1910.253: Oxygen-fuel gas welding and cutting — maximum acetylene pressure, approved equipment, cylinder systems, and protective devices.
- OSHA 29 CFR 1910.252: General welding, cutting, and brazing requirements — eye protection, fire prevention, ventilation, confined spaces, coatings, and fire-watch requirements.
- OSHA 29 CFR 1926.350: Gas welding and cutting — cylinder handling, hose and torch inspection, friction lighters, regulators, and oil-and-grease controls.
- Health and Safety Executive: Safety in gas welding, cutting and similar processes — backfires, flashbacks, arrestors, fumes, oxygen misuse, cylinders, and emergency actions.
- Miller Little Torch Owner’s Manual — neutral, carburizing, and oxidizing flame characteristics and relative heat effects.
- Smith Oxy-Fuel Torch Setup Guide — leak testing, purging, regulator setup, flame identification, lighting, and shutdown guidance.




