
One winter evening in the shop, I mixed a batch of J-B Weld to patch a small crack in a steel bracket. Hours later, it was still soft. The cold workpiece and unheated air had slowed the cure far more than I expected. That experience taught me that “set,” “dry,” and “fully cured” are not interchangeable—and that an epoxy repair should never be rushed simply because its surface feels firm.
Quick Answer
J-B Weld does not publish one guaranteed cure time for freezing weather. Original J-B Weld normally sets in 4–6 hours and fully cures in 15–24 hours at room temperature, but cold extends both times. Below 40°F, warm the product, workpiece, and workspace, then keep them warm until the bond is completely hard before loading it.
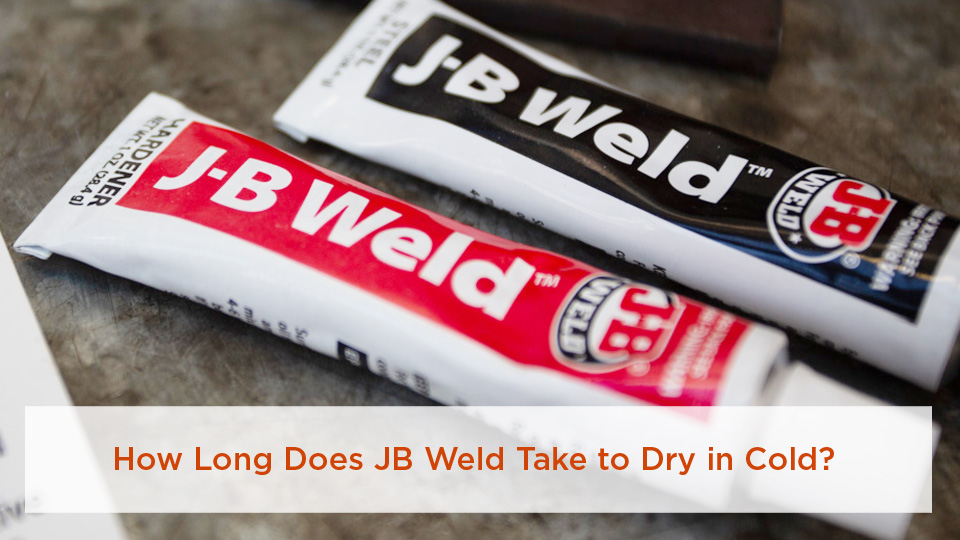
Image by nzperformancecar
Key Takeaways
- Original J-B Weld’s published 4–6-hour set time and 15–24-hour cure time are room-temperature figures, not guarantees for an unheated winter shop.
- Cold slows the chemical reaction. Warm the tubes, workpiece, and surrounding air before mixing, and maintain that warmth throughout the cure.
- Mix equal parts resin and hardener exactly as directed. Adding extra hardener can leave the repair soft or weak.
- A clean, roughened, completely dry surface is essential. Watch for condensation when a cold part is brought into a warm room.
- Do not use an epoxy patch as a substitute for an engineered repair on brakes, steering, suspension, trailer hitches, lifting equipment, pressurized hydraulics, or other safety-critical parts.
At a Glance
| Time Required | About 15–30 minutes of preparation and application, followed by the product’s full cure time. Original normally requires 15–24 hours at room temperature and longer when cold. |
| Difficulty | Easy for suitable cosmetic or low-risk repairs; inappropriate for safety-critical or highly loaded joints without an approved repair procedure. |
| Tools Needed | Chemical-resistant gloves, eye protection, abrasive paper or file, suitable cleaner, lint-free cloth, disposable mixing surface, mixing stick, clamp, and thermometer. |
| Cost | Low for a small repair: one package of the correct J-B Weld formula plus basic preparation supplies. Retail price varies by formula, package size, and seller. |
What Is J-B Weld?
J-B Weld Original is a two-part, steel-reinforced epoxy. Equal parts resin and hardener are mixed to start a chemical reaction that turns the paste into a rigid material. It is often marketed as a “cold weld,” but it is not a metallurgical weld: it does not melt or fuse the base metals together.
According to the current J-B Weld Original Twin Tube instructions, the product uses a 1:1 mixing ratio, sets in four to six hours, and fully cures in 15–24 hours under normal room-temperature conditions. Once cured, it can be shaped, drilled, tapped, filed, sanded, and painted.
Original J-B Weld can bond many metals, rigid plastics, wood, ceramic, concrete, fiberglass, and similar materials. However, the manufacturer says its general-purpose epoxies do not bond well to flexible rubber, polyethylene, polypropylene, canvas, leather, or vinyl. Always check the package for the exact formula and surface involved.
Note: J-B Weld’s current product pages and its general FAQ do not always show the same tensile-strength figure. Treat the label and technical information for your exact package as the controlling specification, and do not compare one adhesive PSI number directly with weld-metal strength.
Set Time Is Not the Same as Full Cure
Working time is the period after mixing during which the epoxy can still be spread and positioned. Set time is when it has become firm enough to hold its shape or tolerate very light handling. Full cure is when the chemical reaction has progressed far enough for the product to approach its stated service properties.
A repair that feels firm on the surface may still be softer inside or at the bond line. Do not remove clamps, machine the epoxy, expose it to fluid, or load the joint merely because it is no longer tacky. Follow the full cure time on the package and extend it whenever the repair spent part of that period in cold conditions.
Why Cold Weather Slows J-B Weld
Epoxy cures through a temperature-dependent chemical reaction. Colder resin, hardener, air, and base material slow that reaction. J-B Weld’s manufacturer FAQ states that environmental conditions, including temperature and humidity, can affect set and cure times.
General epoxy chemistry follows the same pattern: warmer conditions speed the reaction, while cooler conditions extend it. The WEST SYSTEM epoxy chemistry guide also explains that the amount and geometry of mixed epoxy affect how much reaction heat is retained.
The important temperature is not just the reading on the garage wall. A steel bracket that sat outside overnight may remain far colder than the air around it. Likewise, tubes stored in an unheated toolbox may mix poorly and cure slowly even after the garage heater is turned on.
How Long Does J-B Weld Take to Dry in Cold Weather?
There is no manufacturer-backed chart that guarantees Original J-B Weld will cure in a specific number of hours at 50°F, 40°F, 30°F, or 20°F. The safest approach is to start with the published room-temperature time, then maintain the entire repair near ordinary room temperature until the full cure period has passed.
| J-B Weld Product | Published Set Time | Published Full Cure | Published Temperature Resistance | Cold-Weather Guidance |
|---|---|---|---|---|
| Original Twin Tube | 4–6 hours | 15–24 hours | Up to 550°F once fully cured | Cold extends the timetable. The manufacturer does not publish a guaranteed below-freezing cure schedule. |
| KwikWeld Twin Tube | 6 minutes | 4–6 hours | Up to 250°F once fully cured | The manufacturer states that set time becomes longer below 40°F. |
| WaterWeld Epoxy Putty | 25 minutes | 1 hour | Up to 250°F once fully cured | It can set in wet conditions, but cold may still extend the cure. Follow the exact package instructions. |
These are manufacturer-published times for the listed products, not a promise that every package, joint, or winter repair will cure on that schedule. Syringe, Twin Tube, putty-stick, and specialty versions may have different specifications even when their names are similar.
Practical Temperature Planning
| Repair Temperature | What to Expect | Best Approach |
|---|---|---|
| About 70–80°F | The published set and cure times are most applicable. | Prepare, mix, clamp, and leave undisturbed for the full label time. |
| About 50–69°F | Set and cure may take longer than the label time. | Warm the product and part first, then maintain a stable indoor temperature. |
| About 40–49°F | Curing may be substantially slower and difficult to predict. | Do not plan around an exact hour count. Move the repair into a controlled environment whenever possible. |
| Below 40°F or freezing | The manufacturer does not provide a universal guaranteed cure schedule for Original J-B Weld. | Warm the tubes, workpiece, and cure area to room temperature before starting, or postpone the repair. |
The cure clock is meaningful only when the epoxy and the entire joint remain within a suitable temperature range. Six cold hours are not equivalent to six hours at room temperature.
Factors That Affect Cure Time in the Cold
Product, workpiece, and air temperature: All three matter. A warm room does not instantly warm a heavy steel or aluminum part.
Mixing ratio: Original and KwikWeld require equal parts. Too much resin or hardener can leave soft, sticky, or streaky areas.
Mixing quality: Scrape the mixing surface and fold the components together until the color and texture are uniform. Unmixed material along the edge of the mixing area can remain soft.
Surface moisture and condensation: When a cold part enters a warm, humid room, water can condense on it. Let the part warm fully, then confirm that it is dry before applying Original or KwikWeld.
Surface contamination: Grease, oil, loose rust, paint, dust, and cleaner residue interfere with adhesion even when the epoxy itself cures normally.
Joint geometry: Epoxy generates some heat as it reacts. A larger contained mass may retain more heat than a thin film, but an oversized blob is not automatically stronger. Apply enough material to wet and fill the joint as designed.
Movement: Vibration, clamp movement, or handling during the set period can damage the developing bond.
Product age and storage: Keep unmixed components capped and stored according to the package instructions. If the material has separated, crystallized, leaked, or exceeded its stated shelf life, replace it rather than risking the repair.
How to Use J-B Weld in Cold Weather
Using J-B Weld in winter is less about finding a shortcut and more about controlling the conditions. My shop rule is simple: make the product, part, and workspace ready before opening either tube.
Products Worth Considering

【Highly Accurate & Adjusts to Any Surface】Designed with the latest thermopile sensor technology, the infrared laser thermometer gun is accurate to +/-1.5%; Improve this pizza oven thermometer gun measurements by adjusting the emissivity from 0.1–1.0 to match the surface material being measured
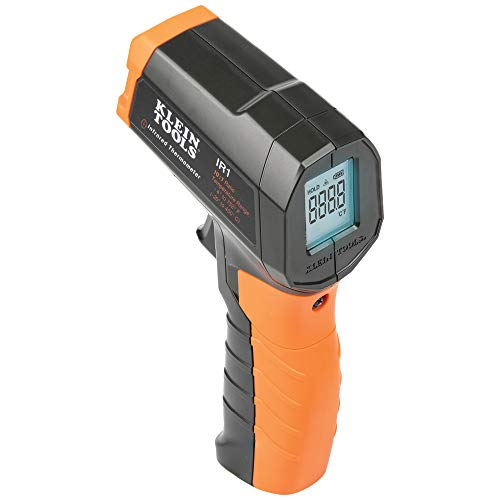
PRECISE TEMPERATURE MEASUREMENT: Optical resolution (distance-to-spot) of 10:1 ensures accurate temperature readings from a distance

Temperature measurement range:-50℃-500℃ (-58℉-932℉)Display resolution: 0.1 ℃ or 0.1 ℉
Step 1: Decide Whether Epoxy Is Appropriate
Before preparing the surface, consider what will happen if the repair fails. J-B Weld can be useful for covers, housings, nonstructural brackets, tools, fixtures, household items, and other low-risk applications when the correct product is used.
Warning: Do not rely on a general-purpose epoxy patch for brakes, steering, suspension, wheels, trailer hitches, lifting points, roll structures, pressure vessels, gas lines, pressurized fuel parts, hydraulic fittings, or any joint whose failure could injure someone. Use an approved mechanical repair, replacement part, or qualified welding procedure.
Step 2: Warm the Product and Workpiece
Bring the unopened tubes and the part into a temperature-controlled area. Let a heavy metal part warm all the way through rather than warming only its surface for a few minutes. A basic infrared or contact thermometer helps confirm that the workpiece is near room temperature.
If the repair cannot be moved, create a safely heated work area and monitor it. A thermostatically controlled electric heater can warm the surrounding air, provided it is kept away from flammable cleaners, rags, plastic sheeting, and the repair itself.
Pro Tip: Warm first and mix second. Trying to rescue ice-cold epoxy after it has already been applied gives you less control over the bond line and surrounding temperature.
Step 3: Clean, Roughen, and Dry the Surface
Remove paint, loose rust, scale, oxidation, and damaged material from the repair area. Roughen smooth metal with coarse sandpaper, a file, or another suitable abrasive to create a clean mechanical profile.
Clean off oil and grease with a product compatible with the substrate and the J-B Weld instructions. The manufacturer recommends a detergent or degreaser for general preparation and discusses acetone or lacquer thinner in its FAQ. If a flammable solvent is used, eliminate ignition sources, provide ventilation, and allow it to evaporate completely before mixing epoxy or applying heat.
Do not assume a surface is dry merely because it looks dry. Check seams, cracks, and pores for trapped water. When a cold object is brought indoors, wait for condensation to form and evaporate before applying the epoxy.
Step 4: Mix Equal Parts Thoroughly
Dispense equal amounts of resin and hardener onto a clean, disposable mixing surface. Mix until the color and texture are uniform, scraping across the full mixing area so no separate streaks remain.
Do not add extra hardener to speed the cure. A two-part epoxy is formulated around a specific chemical ratio. Too much of either component can leave unreacted material in the finished repair.
Warning: A large quantity of mixed epoxy can generate significant heat. Mix only what you can apply during the product’s working time, and do not leave a large mixed mass unattended in a deep disposable cup.
Step 5: Apply and Clamp the Joint
Apply enough mixed epoxy to wet the prepared surfaces and fill the intended gap. Do not spread it unusually thin or pile it into a thick mound merely to change the cure speed.
Bring the pieces together and apply steady pressure with a clamp, vise, strap, or fixture that will not shift. Avoid squeezing out all the adhesive from the bond line. Remove excess material before it hardens if doing so will not disturb the joint.
For a crack-filling repair on a suitable noncritical part, a shallow groove may provide more clean bonding area. Remove all weakened material first and avoid cutting so deeply that the part is further damaged.
Step 6: Maintain Gentle, Controlled Warmth
Keep the assembly near room temperature for the full cure period. An indoor room is usually safer and more consistent than trying to heat one small spot in a freezing garage.
A hair dryer, heat lamp, or heat gun may supply indirect warmth, but use the lowest practical setting, keep it moving, and monitor the actual surface temperature. Do not direct intense heat at one point, use an open flame, or exceed the product’s instructions.
A space heater can warm a larger area more evenly, but it must be positioned according to its safety clearances. Do not operate a heater near solvent vapor, fuel, oily rags, cardboard, or loose plastic.
Do not submerge a fresh Original or KwikWeld repair in hot water as a general curing shortcut. WaterWeld is formulated for wet applications, but that does not make hot-water post-curing suitable for every product or assembly. Winter sunlight is also too inconsistent to serve as a controlled cure method.
Step 7: Wait for the Full Cure
For Original J-B Weld, allow the complete 15–24-hour labeled cure period after the repair has reached and remained near room temperature. If it spent part of that period in cold conditions, extend the wait rather than assuming the clock continued at the normal rate.
KwikWeld cures faster at normal temperature, but a six-minute set does not mean the repaired object is ready for service. WaterWeld also needs its full stated cure even though it becomes firm sooner.
Step 8: Inspect Before Use
The cured epoxy should be uniformly hard and no longer tacky. Look for soft edges, wet-looking streaks, flexible pockets, cracks, or movement at the bond line. Confirm that the complete package cure time has elapsed under suitable conditions.
Do not pour gasoline or another hazardous solvent onto the repair as a cure test. Chemical resistance varies by formula, and a flammable liquid does not verify bond strength.
For an appropriate noncritical repair, introduce service loads gradually and watch for movement, seepage, or cracking. If failure could create a safety hazard, inspection alone is not enough—the part needs an approved repair or replacement.
Common Mistakes and How to Fix Them
| Problem | Likely Cause | What to Do |
|---|---|---|
| Still soft after the normal cure period | Cold product or workpiece, inaccurate ratio, incomplete mixing, or old material | Warm the assembly to room temperature and allow more time. If it remains soft or streaky, remove it, clean the surface, and start over with a fresh 1:1 mix. |
| Tacky patches or colored streaks | Poor mixing or material scraped from an unmixed edge | Do not coat over it. Remove the defective material and remix thoroughly. |
| Bond releases cleanly from the surface | Oil, paint, oxidation, condensation, incompatible plastic, or insufficient surface profile | Remove the epoxy, identify the substrate, clean and roughen it correctly, and use a product intended for that material. |
| Joint cracks after handling | Movement before full cure, peel loading, vibration, or an unsuitable joint design | Redesign or mechanically reinforce the joint rather than simply applying a thicker layer. |
| Repair overheats or begins to smoke | Excessive external heat or a large contained batch | Move away, ventilate the area if it is safe to do so, and follow the product safety data sheet. Do not touch a hot container of curing epoxy. |
Products Worth Considering

HIGH QUALITY - Repair kit for white quartz, granite, marble, cultured marble, silestone, corian, porcelain, acrylic, stone repairs in minutes

Prepare and paint surface the same day with a tough, with tub and tile’s 2-part epoxy acrylic formula that withstands moisture and resists corrosion

J-B Weld ClearTop is a two-part pour-on epoxy that is specially formulated for coating projects on tables, bartops, and other surfaces. ClearTop cures crystal clear in 24 hours with a durable finish that is scratch and impact resistant
Poor Surface Preparation
Grease, oil, rust, paint, and condensation can ruin an otherwise correct mix. If the repair peels away or remains contaminated, scrape off uncured material with a suitable disposable tool, clean the area according to the manufacturer’s instructions, roughen it, and let it dry completely before reapplying.
Changing the Mix Ratio
Extra hardener is not a cold-weather accelerator. If a batch is sluggish, the answer is controlled heat and more time—not a 1.1:1 ratio or an extra squeeze from one tube.
Applying Too Much or Too Little
A thick glob may hide poor preparation and create an awkward stress concentration. An extremely thin, squeezed-dry bond line may also lack enough material to fill the joint. Apply the amount needed for complete contact and gap filling.
Overheating the Repair
A heat gun on high can soften nearby plastic, damage paint, cause the epoxy to run, or overheat the resin. Use indirect warmth and a thermometer rather than relying on a fixed distance or an arbitrary number of minutes.
Disturbing the Joint Too Early
Leave the clamp and assembly alone through the required set period. For a cold-weather repair, keep it supported through the full cure whenever practical.
Tips for Specific Repair Applications
J-B Weld is not a one-formula solution. Select the product by substrate, temperature, fluid exposure, pressure, joint design, and the consequences of failure.
Automotive Repairs
Original J-B Weld may be useful on suitable noncritical housings, covers, stripped low-load holes, trim mounts, and similar repairs after the part has been cleaned and brought to a stable temperature. Its published temperature resistance does not mean it is appropriate for every engine or exhaust location.
Do not use a general-purpose epoxy as a permanent repair for an alternator mounting bracket, suspension bracket, steering component, wheel, brake part, trailer hitch, tow point, fuel-pressure component, or another vibration-loaded safety part.
For an exhaust leak, use a product specifically designed for exhaust service and follow its location and temperature limits. J-B Weld’s own FAQ directs exhaust repairs toward its dedicated exhaust products rather than assuming Original is suitable everywhere.
A radiator or cooling-system patch should be treated as an emergency measure only when the exact product is compatible with the material, temperature, coolant, and pressure. Work only on a completely cool and depressurized system, and arrange a proper component repair or replacement.
Plumbing Repairs
WaterWeld is designed for many wet repairs and is marketed for pipes, drains, pools, spas, boats, and potable-water tanks. Shut off and depressurize the line whenever possible, remove contamination, and follow the package instructions for kneading, application, set time, and cure.
Do not use a general-purpose epoxy patch on a fuel-gas line, steam line, unknown chemical line, or pressure system unless the product, code, equipment manufacturer, and repair procedure specifically permit it. A plumbing patch also does not replace a required code-compliant fitting.
Fabrication Projects
Epoxy can join dissimilar materials where fusion welding is impractical, such as a nonstructural steel tab attached to an aluminum cover. Prepare both surfaces separately and design the joint to place the adhesive mainly in shear rather than peel.
On a trailer or vehicle project, limit adhesive-only joints to nonstructural accessories, trim, covers, or other parts whose failure cannot affect control, load retention, or road safety. Frame, suspension, hitch, and tie-down repairs require an engineered mechanical or welded solution.
Heavy Machinery Repairs
On construction or agricultural equipment, use epoxy only where the equipment manufacturer or an approved repair procedure allows it. A low-risk housing seep or damaged cover is different from a pressurized hydraulic fitting, load-bearing casting, lifting point, rotating component, or guard whose failure exposes moving machinery.
Do not put a patched hydraulic fitting back under pressure merely because the epoxy feels hard. Replace the fitting or use an approved hydraulic repair performed by a qualified technician.
Pros and Cons of Using J-B Weld in Cold Weather
Pros
- Versatile: The correct formula can bond many metals, rigid plastics, wood, ceramic, concrete, and fiberglass.
- No welding equipment required: Suitable repairs do not require an arc, shielding gas, torch, or filler metal.
- Gap filling: The paste can bridge small irregularities that a thin liquid adhesive may not fill.
- Machinable after cure: Many formulas can be sanded, filed, drilled, tapped, shaped, and painted.
- Widely available: Common formulas are sold by hardware and automotive retailers.
Cons
- Cold extends cure time: An unheated shop makes set and full-cure timing difficult to predict.
- Not a metallurgical weld: It does not replace an engineered weld or mechanical fastener on a structural joint.
- Preparation is critical: Oil, rust, paint, moisture, and incompatible plastics can cause adhesion failure.
- Mixing errors cause soft spots: Equal quantities must be blended completely.
- Limited by heat, chemicals, pressure, and joint design: The published headline rating does not establish suitability for every service condition.
- Difficult to remove after cure: Fully cured material may require filing, grinding, or machining.
Joint Preparation and Welding After an Epoxy Repair
Preparing metal for J-B Weld resembles some parts of weld preparation: remove contamination, expose sound material, and create enough clean surface area for the joint. A shallow groove can help retain epoxy in a suitable crack-filling application, but it does not turn the patch into a structural weld.
Never weld directly through or over J-B Weld. Remove all epoxy from the weld zone and surrounding heat-affected area until clean, uncontaminated base metal is exposed. Also remove paint, oil, cleaner residue, plating, and other substances that could contaminate the weld or decompose when heated.
The OSHA Technical Manual notes that respiratory exposure from epoxy systems can increase when curing temperatures are high enough to volatilize the resin mixture. Overheated or decomposing epoxy can also release hazardous vapors.
Warning: Do not select a universal MIG amperage such as 80–100 amps to “avoid burning through epoxy.” Welding parameters depend on the process, material, thickness, joint, position, wire or electrode, shielding gas, and approved welding procedure. The epoxy must be removed before welding begins.
Safety Considerations
Read the safety data sheet for the exact product before use. Wear suitable chemical-resistant gloves and eye protection, and prevent uncured resin or hardener from contacting your skin. Epoxy systems can cause irritation and may lead to skin sensitization in susceptible users.
Work in a ventilated area. OSHA notes that skin exposure is often a greater concern than inhalation during ordinary epoxy handling, but respiratory exposure can increase when resin is sprayed, excessively heated, sanded into airborne dust, or used in poorly ventilated conditions.
Do not automatically rely on a general dust mask or respirator without checking the product SDS and the exposure involved. Respiratory protection must be selected for the actual contaminant and used correctly.
Keep acetone, lacquer thinner, degreasers, fuel, oily rags, and other flammable materials away from heaters, lamps, sparks, and welding operations. Allow cleaners to evaporate fully before applying epoxy or heat.
When sanding, drilling, or grinding cured epoxy, control dust and wear eye protection. Do not heat cured epoxy simply to make removal easier unless the manufacturer’s safety information and proper exposure controls allow it.
Before repairing plumbing, cooling, hydraulic, or machinery components, shut the equipment down, isolate its energy sources, let hot parts cool, and release pressure safely. Never work on a hot cooling system, energized machine, pressurized line, or rotating assembly.
Conclusion
J-B Weld can make a dependable cold-weather repair, but only when the cold is controlled rather than ignored. Original J-B Weld normally sets in four to six hours and fully cures in 15–24 hours at room temperature. In a cold shop, those figures may no longer apply.
Warm the unopened product and the entire workpiece, prepare a clean and dry surface, mix equal parts thoroughly, clamp the joint, and maintain a stable temperature through the full cure. Do not add extra hardener, blast the repair with uncontrolled heat, or judge readiness only by the surface.
KwikWeld may be useful when a suitable low-risk repair needs a shorter room-temperature cure, while WaterWeld is designed for many wet applications. Original remains the slower, general-purpose option. Whichever product you choose, follow the label on the exact package and use a mechanical, welded, or manufacturer-approved repair whenever failure could affect safety.
Frequently Asked Questions
Can I use J-B Weld in freezing temperatures?
Do not rely on a predictable outdoor cure in freezing conditions. J-B Weld does not publish a universal Original cure schedule for every subfreezing temperature. Warm the tubes, workpiece, and cure area to ordinary room temperature before mixing, then keep the repair warm for the full labeled cure period.
How long does Original J-B Weld take to cure at 40°F?
The manufacturer does not publish a guaranteed Original cure time at exactly 40°F. It states that environmental conditions affect set and cure. Move the repair into a controlled room-temperature environment rather than assuming a specific 36- or 48-hour timetable.
Should I warm J-B Weld before mixing it?
Yes, when it has been stored in a cold location. Bring the closed package and workpiece to room temperature before dispensing. Use gentle ambient warmth rather than placing the tubes on a hot surface or exposing them to a flame.
Can I add extra hardener to make J-B Weld cure faster?
No. Original and KwikWeld are designed for equal parts resin and hardener. Changing the ratio can leave uncured components and weaken the repair. Control temperature instead of altering the formula.
How do I know whether J-B Weld is fully cured?
Wait for the complete package cure time under suitable temperature conditions. The material should be uniformly hard, non-tacky, and free of soft or streaky areas. Do not use gasoline or another hazardous solvent as a cure test.
Can I speed up J-B Weld curing in cold weather?
You can speed curing by bringing the product, part, and surrounding air to a stable room temperature. Use safe, indirect, monitored heat if needed. Do not use an open flame, uncontrolled high heat, hot-water immersion, or an altered mixing ratio.
Is J-B Weld as strong as a real weld?
No direct comparison is valid. J-B Weld is an adhesive and filler, while welding fuses metals through a designed joint. Their published PSI figures describe different tests and do not account for peel loading, fatigue, joint geometry, heat, or the base metal.
What is the best J-B Weld product for a cold-weather repair?
Choose by application rather than temperature alone. Original provides a longer working and cure period for many general repairs. KwikWeld sets and cures faster at room temperature. WaterWeld is intended for many wet repairs. All can be affected by cold, so follow the exact package instructions.
Can I weld over a J-B Weld repair?
No. Remove the epoxy completely and expose clean base metal before welding. Heated epoxy can contaminate the weld area and create hazardous decomposition products. Use welding parameters appropriate for the material and an approved procedure.
Sources
- J-B Weld Original Twin Tube — current mixing ratio, surface preparation, set time, cure time, and temperature resistance.
- J-B Weld KwikWeld Twin Tube — current set time, cure time, preparation, and product specifications.
- J-B Weld WaterWeld Epoxy Putty — wet-application uses, set time, cure time, and temperature resistance.
- J-B Weld Frequently Asked Questions — environmental effects, material compatibility, surface cleaning, chemical resistance, and specialty product selection.
- WEST SYSTEM Epoxy Chemistry Basics — how temperature, epoxy mass, and supplemental heat affect epoxy cure.
- OSHA Technical Manual: Polymer Matrix Materials — epoxy exposure pathways, elevated-temperature exposure, ventilation, and worker protection.

