Before you weld, verify that each panel sits straight by checking it with a ruler, straightedge, and fixed reference points. Measure vertical and horizontal gaps, aiming for about 1/8 inch, and confirm edge flushness across every seam. Cross-measure corners to confirm the body is square, and compare door bottoms, rocker panels, hood, and fenders for consistent fit. Use clamps or Clecos to lock position, then recheck the mockup for any shift or distortion.
Check Panel Alignment Before Welding
Before you weld, you should verify that every panel sits straight and even by spanning the gaps with a ruler and checking for any offset. This Panel Alignment check keeps body panels true and prevents locked-in errors. Compare the door’s bottom edge with the rocker panel, then confirm the leading edge tracks the same line. Use shims at the fenders when needed, and keep the top and bottom bolts tight so height stays fixed. Mock up the full exterior first; that lets you see whether hood-to-fender and door-to-quarter panel relationships remain uniform. Measure from fixed reference points, like the cowl to the hood, to confirm the structure is square before you weld. If a panel drifts, correct it now, because later heat will magnify the fault. Precise body panels give you clean panel gaps, stronger fit, and the freedom to finish without compromise. Additionally, using proper flanges and hardware ensures that your tools remain safe and effective during the welding process.
Measure Gaps and Edge Flushness
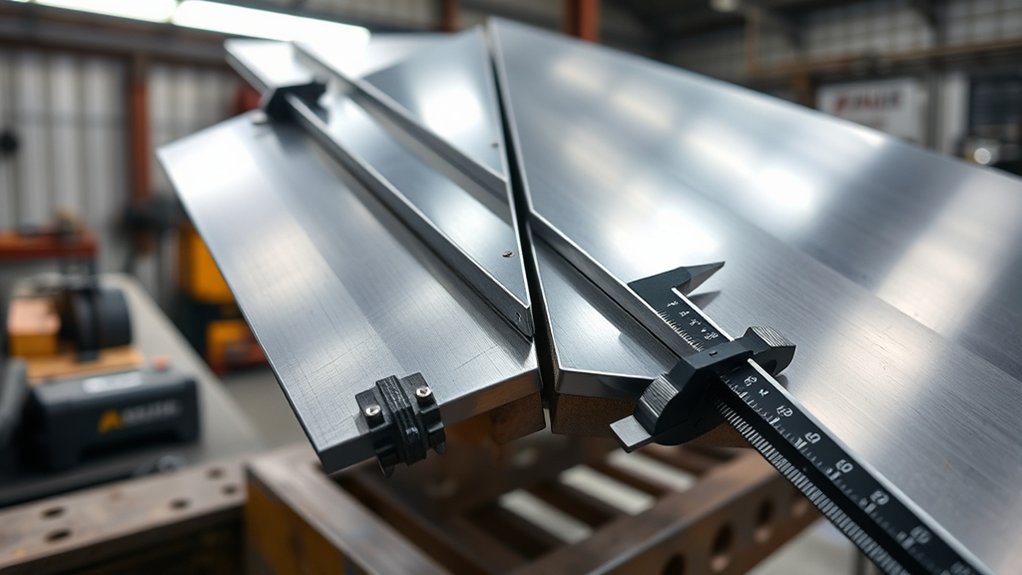
Measure the gaps with a ruler, and check both the vertical and horizontal spacing between adjacent panels so the opening stays uniform, ideally around 1/8 inch. You’ll measure gaps across each joint to expose misalignments before they can trap you in rework. Verify edge flushness with a straightedge; the panel surfaces should meet cleanly, without steps or bowing, because uneven edges can distort the welding process. Ensuring proper fillet weld sizing is crucial to maintaining structural integrity throughout the welding process.
| Check | Result |
|---|---|
| Uniform gap | Calm confidence |
| Flush edges | Clean control |
| Any misalignment | Immediate correction |
| Consistent panel alignment | Freedom from failure |
Use the ruler and straightedge methodically, then compare door and quarter panel gaps for consistency. When you hold uniformity to a strict tolerance, you protect fitment and preserve the structure’s integrity. Precise panel alignment isn’t just technical discipline; it’s how you reclaim control over the job and avoid hidden defects later.
Products Worth Considering
Premium material: This measuring tool is made of high quality material, sturdy for long time use.
【Quality Material】: The car taper gauge tool is made of high-quality plastic material, with a smooth surface, comfortable to the touch, lightweight, wear-resistant, and rugged. It is not easy to be deformed after a long time of use, which can provide a reliable guarantee for your measurement work.

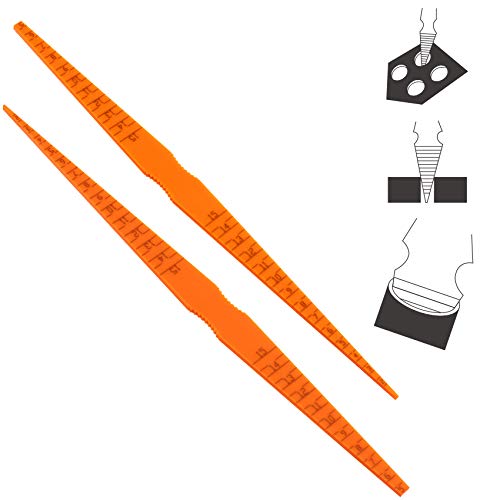
Check Gap: Door panel gap ruler is suitable for checking the assembly gap of cars' components, which helps to quickly locate parts that may need adjustment. Panel gap alignment ruler can help you achieve a more coordinated body alignment effect
Test Door, Hood, and Fender Fit
With the gaps and edge flushness verified, test the door, hood, and fender fit as a full assembly. Start by checking gaps at every seam, aiming for about 1/8 inch and equal reveal from end to end. In your mock-up assembly, confirm the door’s alignment with the rocker panel; the lower edge and leading edge should track the rocker cleanly. Cross-measure corner to corner to prove the panels are square and not raked. Then inspect the hood and fenders together with the entire front clip on the core support, because small errors here will lock in once you weld. If the door sits high, low, or drifts fore and aft, adjust hinges until the opening reads correctly. Set the latch only after the weatherstrip is in place and the panel closes without force. This method gives you accurate geometry before commitment, and it protects your freedom to correct the structure now, not later. Additionally, ensure that any joint types for body panels are appropriately considered to minimize the risk of misalignment during welding.
Use Clamps, Clecos, and Straightedges
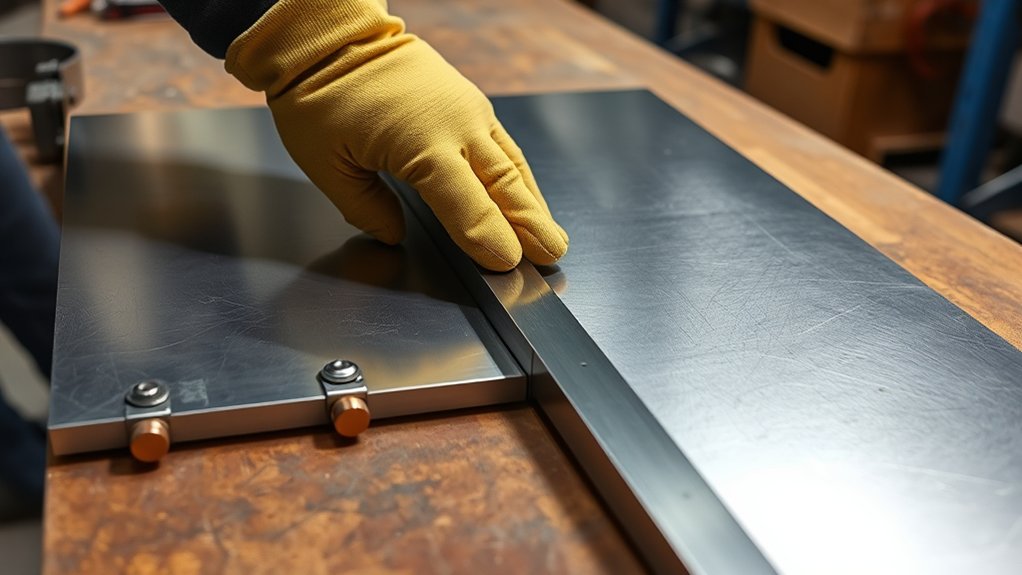
Use clamps and Clecos to lock the panels in place while you check alignment, so you can make quick corrections without the assembly shifting. You’ll get controlled fitment when clamps hold load and Clecos preserve registration. Run straightedges across the gaps to read high and low spots, then adjust until the lines stay true. Combine both fasteners for iterative alignment checks before welding.
Additionally, ensure that the surfaces are clean and free from contaminants, as grinding off zinc can significantly enhance weld strength.
| Tool | Function |
|---|---|
| Clamps | Hold panels securely |
| Clecos | Allow temporary fastening |
| Straightedges | Reveal gap inconsistency |
| Recheck | Maintain panel integrity |
| Adjust | Prevent warping |
This setup lets you test each panel independently and as a system. If one corner drifts, reset the clamps, swap Clecos, and measure again. Keep the pressure even, and don’t let force distort the panel edges. When you work this way, you keep control, reduce rework, and protect the weld-ready geometry you’ve built.
Verify Final Mockup Before Welding
Once the panels are clamped in their final mockup position, verify every gap and datum before you strike an arc. You should treat this final mockup as your last chance to lock in panel alignment and eliminate misalignment. Run a ruler across each seam to confirm consistent spacing, then cross-measure corner to corner to verify the structure’s squareness. Check door and fender gaps now; if they’re uneven, correct them before welding so the parts move freely and fit cleanly later. Tighten or reset clamps as needed, because a loose joint can shift under heat and undo your work. Finish with a careful visual inspection of edges and seams, looking for curling, proud flanges, or other imperfections. When you verify every datum with discipline, you preserve freedom from rework, reduce distortion, and enter welding with confidence that the assembly’s geometry is true. Additionally, ensuring proper electrode diameter is crucial to achieving optimal weld quality and preventing issues during the process.
Frequently Asked Questions
How to Prevent Misalignment in Welding?
Use precise welding techniques, alignment tools, and pre weld inspection to control joint preparation, fixture design, and dimensional accuracy. You’ll clamp panels, mock up assemblies, and tack sequentially to prevent heat distortion and misalignment.
What Is the Golden Rule in Welding?
The golden rule in welding’s simple: you guarantee perfect panel alignment before you strike an arc. For example, you’d use alignment tools, inspection methods, fit up standards, distortion control, and quality assurance to prevent failure.
What Is Panel Alignment?
Panel alignment means you position panel types evenly so gaps, edges, and surfaces match. You use measurement techniques, alignment tools, visual inspections, and adjustment methods to catch common errors and keep your fit precise.
How to Check Welded Joints for Alignment?
You’ll catch a million-mile mistake fast: use welding fixtures and alignment tools, perform visual inspection, apply measurement techniques for gap assessment, and verify joint preparation; then adjust until seams stay flush, square, and true.
Conclusion
Before you strike an arc, you should confirm every contour, clearance, and corner. Check gaps, gauge flushness, and verify door, hood, and fender fit with clamps, Clecos, and straightedges. When you complete a final mockup, you catch misalignment early and avoid costly correction later. Your careful calibration keeps panels parallel, precise, and permanently positioned. This disciplined double-check delivers durable, damage-free welds and a cleaner, straighter finished assembly.


