How to Braze Copper Pipes for Automotive Cooling Systems
What’s in This Article
- Why Brazing Matters in Automotive Cooling Systems
- Before You Begin: Safety, Time, and Setup
- Tools You Need for Effective Brazing
- Preparing Your Copper Pipes for Brazing
- Choosing the Best Filler Metal for Your Copper Pipes
- Torch Brazing Copper Pipes: A Step-by-Step Guide
- Induction Brazing: How to Connect Copper Pipes
- Furnace Brazing for Automotive Cooling Systems: Key Advantages
- Top 5 Common Mistakes in Brazing Copper Pipes and How to Avoid Them
- What to Do If Your Torch Brazing Fails?
- Maintenance Tips for Long-Lasting Copper Connections
- Frequently Asked Questions
A weak copper pipe joint can turn a small cooling system repair into a leak, overheating, or repeat teardown. To braze copper pipes in automotive cooling systems, you need clean metal, a close-fitting joint, steady heat, the right filler metal, and safe work habits. This guide shows you how to prepare the pipe, choose filler, apply heat, avoid common mistakes, and inspect the finished joint.
Quick Answer
To braze copper pipes for an automotive cooling system, clean and deburr the pipe ends first. Fit the joint tightly, apply the correct flux when the filler requires it, heat the joint evenly, then feed filler metal into the gap by capillary action. Let the joint cool naturally, clean off residue, and inspect it before use.
Key Takeaways
- Clean copper surfaces give the filler metal a better path to bond.
- A close, even joint gap helps capillary action pull filler through the connection.
- Different copper joints need different filler metals and flux choices.
- Even heating matters more than simply using a hotter flame.
- Natural cooling helps reduce stress and cracking in the finished joint.
Why Brazing Matters in Automotive Cooling Systems
Brazing matters in automotive cooling systems because the joints must handle heat, pressure, vibration, and coolant exposure. Copper also transfers heat well, which helps coolant systems move heat away from the engine.
Brazed connections usually offer more strength than soft-soldered joints when you prepare and heat them the right way. Good technique helps reduce leaks caused by thermal expansion, poor fit, and weak filler flow.
Use proper techniques, such as surface cleaning, correct flux use, and steady heat control. Nitrogen purging can also help limit internal oxidation in some cooling and air-conditioning work. For related metalwork basics, review proper techniques before you work on critical parts.
Before You Begin: Safety, Time, and Setup
Plan about 30 to 60 minutes for a small brazing repair once you have the tools ready. Larger assemblies, tight access, and failed joints can take longer.
Work in a clean, dry, well-ventilated area. Keep flammable materials away from the torch zone, and use eye protection, gloves, long sleeves, and a fire-safe work surface.
Warning: Brazing uses high heat, fuel gas, and fumes, so keep a fire extinguisher nearby and avoid heating closed or pressurized parts.
Drain and remove the part from the vehicle when possible. Never braze a cooling system part that still contains coolant, pressure, fuel residue, or trapped vapor.
Tools You Need for Effective Brazing
Effective brazing requires the right tools, clean work, and safe setup. Gather everything before you light the torch.
- Flame torch: Use a propane, MAP-Pro, air-acetylene, or oxy-acetylene torch that can heat the joint evenly.
- Filler rods: Use phosphorus-copper filler for many copper-to-copper joints, or silver-based filler for mixed metals.
- Cleaning brush or emery cloth: Remove oxidation, dirt, grease, and old residue from the joint area.
- Deburring tool: Smooth cut pipe edges so the parts fit tightly.
- Flux: Use the flux recommended for your filler metal and base metals.
- Clamps or fixtures: Hold the parts still while you heat and feed filler.
- Safety gear: Wear safety glasses, heat-resistant gloves, and flame-resistant clothing.
Some filler metals for copper-to-copper work do not need paste flux, but mixed-metal joints often do. Check the filler rod instructions before you start.
For more background on welding consumables, see this guide to low-hydrogen rods. The process differs from brazing, but it helps you understand why filler selection matters.
Products Worth Considering

3.6ft Hose for Extra Reach: This propane torch kit have a 3.6ft long gas hose that connects the torch to your propane/Map source, it's handy to get into small places. Warm tips: Gas bottles don't like being upside down
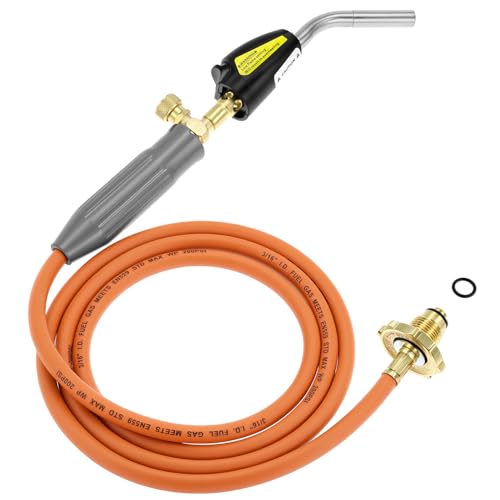
Torch Head Material: This propane torch is crafted with materials ensuring long-lasting durability and resistance to extreme heat.
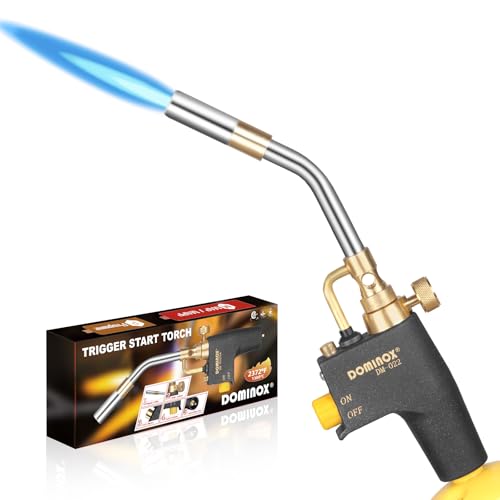
【Powerful Upgrade Propane Torch Head】DOMINOX propane torch head has been upgraded and optimized. 1. The surface of the propane torch handle adopts an anti slip frosted texture to optimize the user experience. 2. The ignition system has been upgraded, the welding torch head can ensure 100% successful ignition every time, improve fuel efficiency. 3. Our map gas torch head is equipped with a pressure regulator inside, you don't have to worry about using it upside down at all, turbo torch can be used upside down for up to 30 minutes.
Preparing Your Copper Pipes for Brazing
Good brazing starts before you apply heat. Clean metal, smooth pipe ends, and close fit all help the filler metal flow through the joint.
Start by cleaning the joint surfaces to remove oxidation and contaminants. Then check that the pipes fit snugly together so capillary action can pull filler into the gap.
Use dedicated cleaning tools when possible. This helps reduce cross-contamination from other metals.
Cleaning Pipe Surfaces
To get a strong brazed joint, clean the copper pipe surfaces until they look bright. Use a cleaning brush, emery cloth, or sandpaper to remove oxidation, dirt, and grease.
Use 120 to 180 grit sandpaper when you need a smooth surface for better filler flow. After cutting the pipes, inspect the ends for burrs or sharp edges.
Use a deburring tool to create a clean connection point. Wipe the joint with a suitable solvent or degreaser, then let it dry before you apply flux or filler.
Ensuring Proper Fit
A proper fit between copper pipes helps create a strong, leak-resistant joint. Cut the pipes cleanly with a pipe cutter so the ends stay square and smooth.
A small, even gap lets filler metal flow by capillary action. Avoid loose joints because the filler may bridge the opening instead of filling it.
Clean the surfaces again after test fitting, since handling can add oil or dirt. Align the pipes carefully, then use clamps or fixtures to keep the joint stable during heating.
Choosing the Best Filler Metal for Your Copper Pipes
Choosing the right filler metal for brazing copper pipes helps control strength, corrosion resistance, and heat performance. Match the filler to the base metals, service temperature, and cooling system design.
For many copper-to-copper joints, phosphorus-copper filler can work well. Some silver-phosphorus alloys, such as Sil-Fos®-type alloys, may not need paste flux on copper-to-copper joints.
If you braze copper to brass, steel, or another metal, use a filler designed for that metal pair. These joints often need paste flux because the filler must wet dissimilar surfaces.
For copper-to-aluminum work, use filler made for that specific combination. Copper and aluminum form difficult joints, so repairs need careful fit, correct filler, and close heat control.
Do not choose filler metal by price or availability alone. The wrong filler can crack, fail to flow, or weaken the cooling system connection.
For structural sizing concepts in other weld joints, read about proper weld sizes. Brazing uses a different process, but joint design still affects reliability.
Products Worth Considering
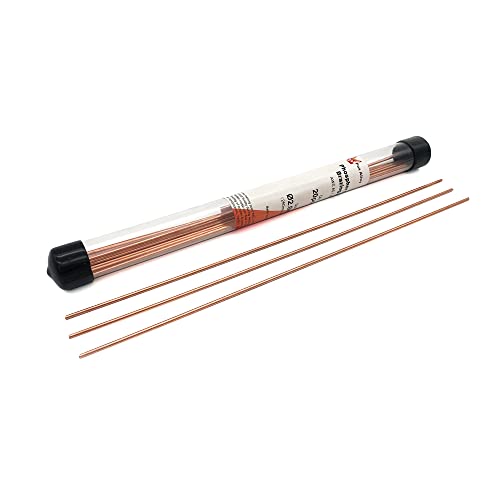
Material: The package includes 20PCS 2.0mm cooper brazing rods BCuP-2 brass brazing rod

[Professional Brazing Solution] Designed for HVAC technicians, refrigeration specialists, plumbers, and repair professionals who need reliable brazing performance in demanding jobs.

40 PCS BCuP-2 copper brazing rods per tube. Easy to identify and retrieve.
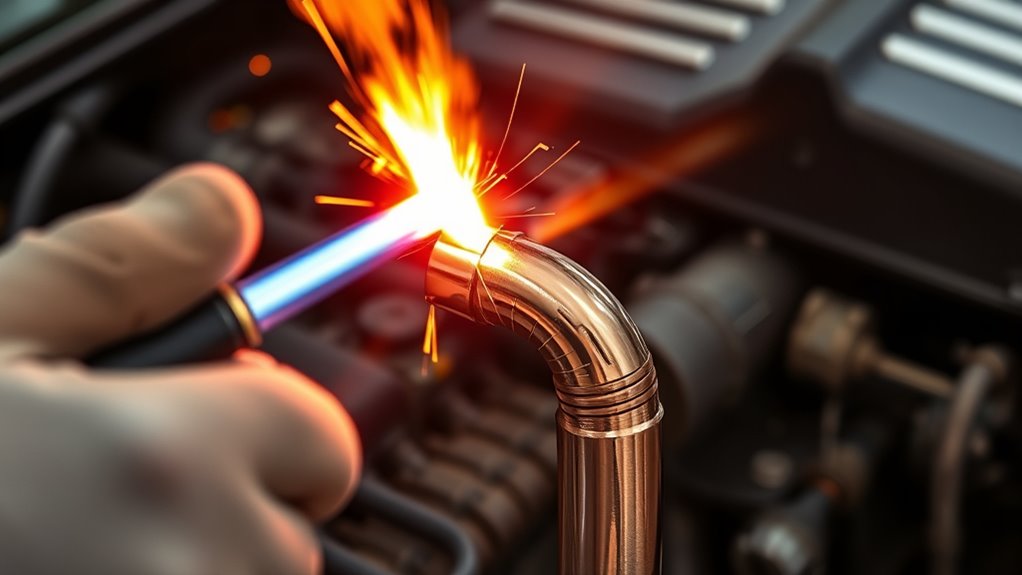
Torch Brazing Copper Pipes: A Step-by-Step Guide
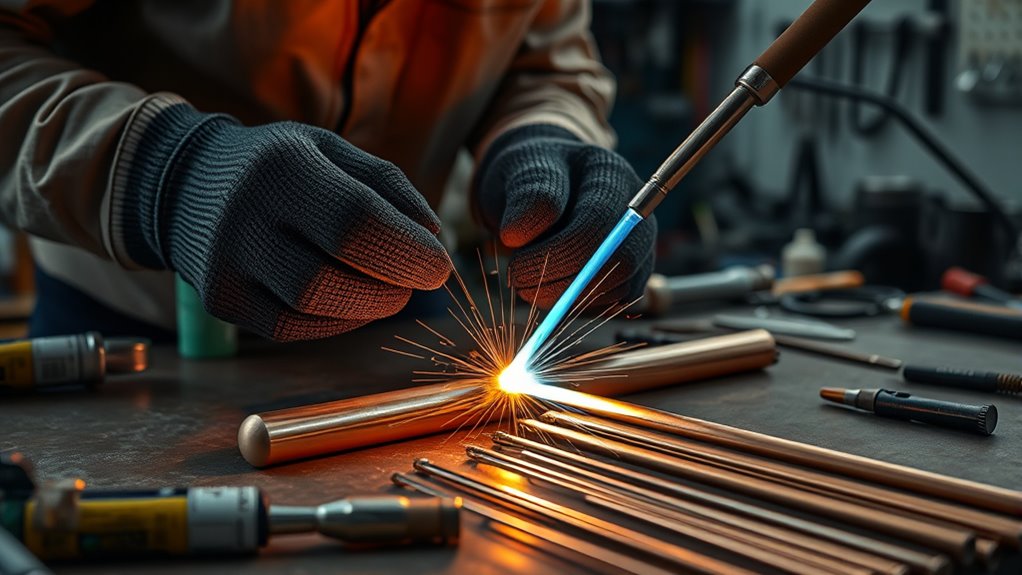
After you choose the right filler metal, use a steady torch method to create a strong joint. Heat the base metal, not the filler rod alone.
- Cut and deburr the pipe: Cut the copper squarely, then remove burrs from the inside and outside edges.
- Clean the joint area: Brush or sand the mating surfaces until the copper looks clean and bright.
- Test the fit: Assemble the joint and confirm that the parts sit straight without large gaps.
- Apply flux if needed: Coat the joint area with the correct flux when your filler metal requires it.
- Heat the joint evenly: Move the flame around the joint so the entire area reaches brazing temperature.
- Feed the filler metal: Touch the filler to the joint and let capillary action draw it into the gap.
- Let the joint cool naturally: Avoid quenching unless the filler maker gives that instruction.
- Clean and inspect the joint: Remove flux residue, then check for gaps, pinholes, cracks, or uneven filler flow.
Most brazing filler metals melt above soldering temperatures, so use enough heat for the filler to flow freely. Avoid overheating one spot because that can oxidize the copper or distort thin parts.
Clean metal remains one of the most important steps. This related guide on how the joint area is clean explains why contamination can weaken a bond.
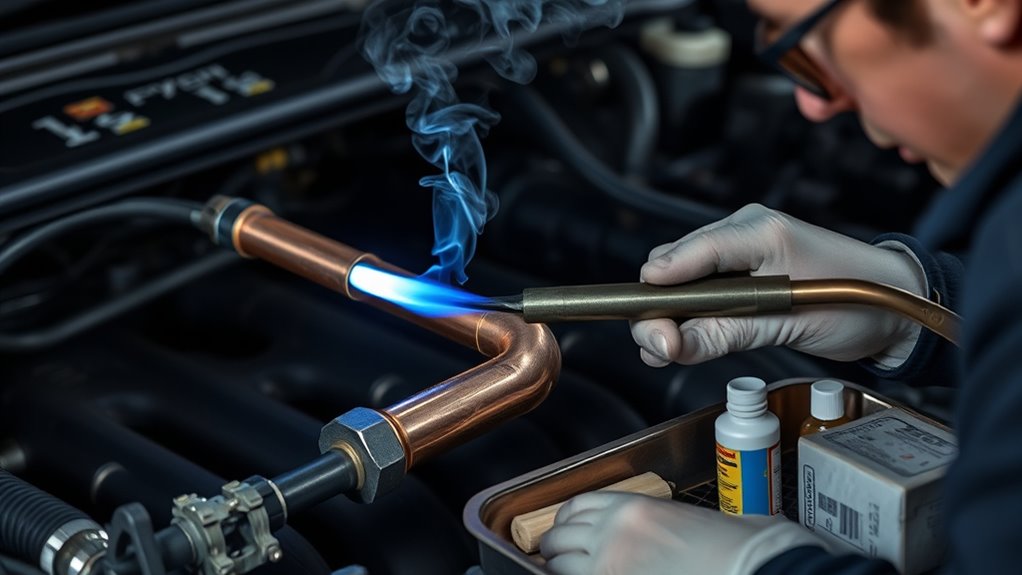
Induction Brazing: How to Connect Copper Pipes
Induction brazing connects copper pipes by using electromagnetic induction instead of an open flame. This method can give you precise, repeatable heat when you have the right equipment.
Use this process when the joint design, filler metal, and work area suit induction heating:
- Prepare the joint: Clean the pipe surfaces and confirm the parts fit closely.
- Position the induction coil: Place the coil around the joint so it heats the area evenly.
- Heat the joint: Turn on the induction unit and bring the joint to brazing temperature.
- Apply filler metal: Feed the filler into the heated gap and let it flow by capillary action.
- Cool and inspect: Let the joint cool, clean the residue, and inspect the connection.
Induction brazing can limit heat spread to nearby parts when you set it up correctly. It also reduces open-flame risk, but you still need ventilation and heat protection.
Surface preparation still matters. In some fabrication work, plasma cutting techniques can help shape metal before joining, but you must still clean the brazing area afterward.
Furnace Brazing for Automotive Cooling Systems: Key Advantages
Furnace brazing works well for production-level automotive cooling system parts, such as radiators and heat exchangers. It uses controlled heating to braze many joints at once.
This method can reduce oxidation when the furnace uses a suitable atmosphere. It also allows batch processing, which helps manufacturers make repeat parts with consistent joint quality.
Pre-shaped filler metals can improve joint consistency across many parts. Furnace brazing may also remove the need for some flux use, depending on the furnace atmosphere and material system.
Uniform heating helps reduce thermal distortion. That matters when parts need tight tolerances for fit and flow.
For shop safety around hot work, read about proper ventilation and heat control in welding settings.
| Advantage | Description | Impact on Production |
|---|---|---|
| Controlled Atmosphere | Helps reduce oxidation and improve joint quality | Improves reliability |
| Batch Processing | Brazes many parts in one controlled cycle | Supports faster production |
| Pre-shaped Filler Metals | Helps keep filler placement consistent | Improves repeatability |
| Reduced Flux Use | May simplify cleaning after brazing | Speeds up assembly |
| Uniform Heating | Helps reduce distortion across the part | Maintains closer tolerances |
Top 5 Common Mistakes in Brazing Copper Pipes and How to Avoid Them
Brazing copper pipes can feel simple, but small errors can weaken the joint. Avoid these five mistakes when you work on cooling system parts:
- Skipping joint preparation: Clean the copper fully so oxidation, oil, and dirt do not block filler flow.
- Heating unevenly: Move the flame around the joint so one side does not overheat.
- Using too little filler metal: Feed enough filler to fill the joint without leaving gaps.
- Using the wrong flux: Match the flux to your filler metal and base metals.
- Cooling the joint too fast: Let the joint cool naturally so you do not add stress or cracks.
Pro tip: Practice on scrap copper before repairing a cooling system part that must hold pressure.
Internal oxidation can also weaken some copper tube work. Proper nitrogen purging may help keep the inside of the tube cleaner during brazing.
What to Do If Your Torch Brazing Fails?
If your torch brazing fails, inspect the joint before you try again. Look for contamination, poor fit, gaps, cracks, or signs of overheating.
Check whether you heated the joint evenly. Uneven heat can keep the filler from melting and flowing through the full joint.
Apply heat to the joint, not just the filler rod, so the filler can flow into the gap.
Review your flux application. Too little flux, old flux, or the wrong flux can allow oxidation and stop the filler from wetting the copper.
If a joint fails, re-clean the surfaces fully before the second attempt. Remove old flux, burned residue, and filler lumps that could block a clean fit.
You may also need a better filler metal or a different torch setting. Keep the flame steady, avoid overheating, and maintain ventilation strategies to reduce fume exposure during hot work.
Maintenance Tips for Long-Lasting Copper Connections
After you finish the repair, maintenance helps protect your copper connections. Check brazed joints as part of routine cooling system service.
- Inspect joints regularly: Look for corrosion, coolant stains, wet spots, or white residue near the joint.
- Separate dissimilar metals: Use proper insulation or design methods to reduce galvanic corrosion risk.
- Check for leaks: Test the repaired area before you return the vehicle to normal use.
- Keep the area clean: Remove dirt and moisture that can hide corrosion or damage.
Surface condition still matters after the repair. Limiting surface contamination helps protect weld and brazed joint quality.
Frequently Asked Questions
Do You Use Flux When Brazing Copper AC Lines?
Use flux when your filler metal and base metal combination requires it. Many copper-to-copper phosphorus-bearing fillers do not need paste flux, but copper-to-brass or copper-to-steel joints often do.
What Gas Do You Use to Braze Copper Pipe?
You can braze copper pipe with propane, MAP-Pro, air-acetylene, or oxy-acetylene, depending on pipe size and heat demand. Use a setup that heats the joint evenly without overheating thin copper.
What Metals Cannot Be Brazed?
Some metals are difficult to braze because they oxidize fast, melt too low, or need special filler and atmosphere control. Magnesium, titanium, and some aluminum work can require specialized methods instead of basic torch brazing.
Do You Braze Copper Pipes?
Yes, you can braze copper pipes when the joint needs more heat resistance than soft solder can provide. Use proper cleaning, joint fit, filler choice, and heat control to build a durable connection.
Can You Rebraze a Leaking Copper Cooling System Joint?
You can rebraze some leaking joints if the pipe and fitting still have enough sound metal. Clean out old residue, correct the fit problem, and inspect the area for cracks before reheating.
How Do You Know If a Brazed Copper Joint Is Good?
A good brazed joint usually has smooth filler flow around the connection and no visible gaps or cracks. After cleaning, pressure test the part when the application requires leak-free service.
Safety Disclaimer: This article is for informational purposes only and does not replace professional automotive or welding advice. If you are unsure about torch work, pressure testing, or cooling system repair, ask a qualified technician for help.
Conclusion
Brazing copper pipes well comes down to clean surfaces, tight fit, correct filler, steady heat, and careful inspection. Do not rely on a quick solder-style repair when the joint must handle heat, pressure, and vibration.
Before you work on a vehicle part, practice the same steps on scrap copper. Build the joint carefully, test it properly, and your cooling system repair has a much better chance of lasting.


