A shattered angle grinder wheel acts like shrapnel. If a disc breaks at high speed, the resulting debris causes devastating injuries. Inspecting your grinder wheel before every use is the only way to catch hidden cracks or wear. This guide shows you exactly how to inspect, mount, and test your wheels so you can work safely.
Quick Answer
To inspect an angle grinder wheel, visually check for cracks, chips, and discoloration. Verify that the wheel’s RPM rating matches or exceeds your grinder’s maximum speed. Finally, mount the wheel securely and run it in a safe direction for one minute to check for abnormal vibrations.
Key Takeaways
- Never use a grinder wheel if you spot cracks, chips, or uneven wear.
- The wheel’s maximum RPM must always equal or exceed the grinder’s RPM.
- Perform a one-minute test run before starting any cutting or grinding work.
- Always use the tool guard and wear proper personal protective equipment.
What You Will Need
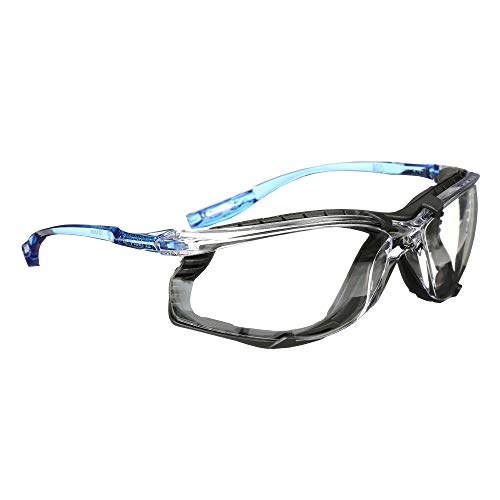
- Safety glasses and a face shield
- Heavy-duty leather work gloves
- The appropriate pin wrench for your grinder
- A clean, compatible replacement grinding wheel
Inspecting your grinder wheel directly impacts your safety and efficiency. A damaged wheel can shatter at high speeds, risking serious injury from flying debris. Before you start cutting or grinding, you must verify the wheel’s RPM rating matches your grinder’s speed. This basic compatibility check prevents breakage.
You must also regularly inspect for chips, cracks, and deformities. Identifying these issues early allows you to replace worn wheels before you turn the tool on. Proactive maintenance safeguards your body and extends the lifespan of your grinder.
Products Worth Considering

DEWALT ToughCoat hard coated lens provides tough protection against scratches.

Expanded Coverage – Wide-frame design with extended temples and wraparound lenses delivers greater side and frontal protection, shielding against flying debris and impact hazards in demanding environments
DUST DEFENSE: Foam removable gasket helps limit eye exposure to nuisance dust and other particles while providing additional cushioning
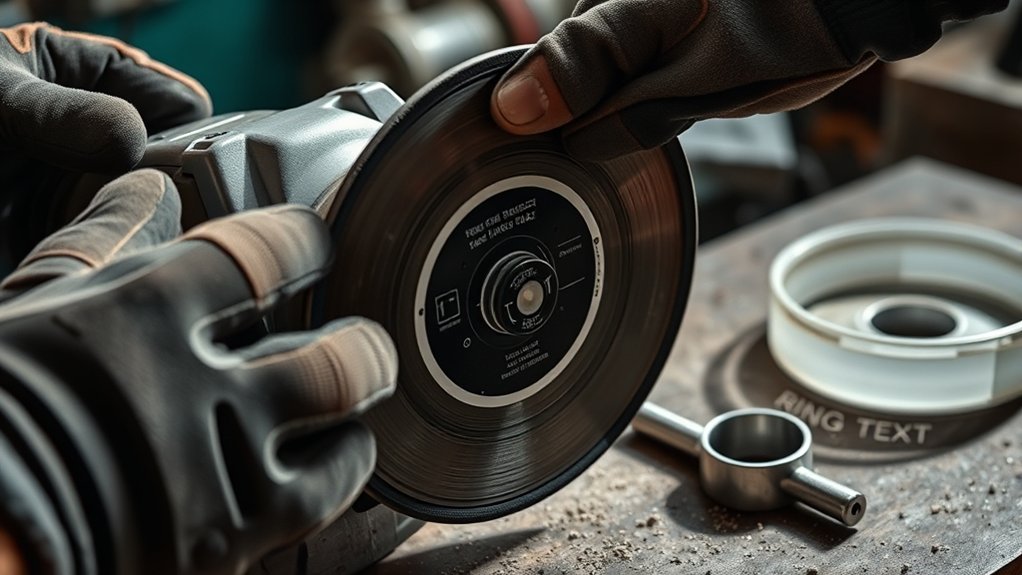
What Damage Looks Like on a Grinder Wheel
When inspecting grinding wheels, actively watch for visible cracks and chips. These small defects lead to dangerous failures under stress. You should also look for discoloration or uneven wear, which usually indicates improper use. Addressing these signs immediately keeps your workspace safe.
Cracks and Chips
Cracks and chips seriously compromise the structural integrity of a grinding wheel. You must examine the surface carefully before mounting it. Even microscopic imperfections can cause a catastrophic failure during operation. Check the edges for missing segments and uneven surfaces.
Do not overlook the mounting hole. Verify that the center hole remains undamaged and fits properly on the grinder’s spindle. A loose fit causes dangerous wobbling.
Discoloration and Wear
Discoloration usually signals severe overheating. Inspect the wheel closely for darkened spots or a glossy finish, as heat compromises the internal bonding agents. Flat spots or uneven surfaces indicate you need to adjust your grinding technique.
If you notice a shiny, glazed finish on the abrasive edge, the wheel has lost its cutting ability. You should discard glazed or overheated wheels immediately. Always follow the manufacturer’s specific guidelines for acceptable wear limits.
| Damage Type | Action Required |
|---|---|
| Discoloration | Inspect for overheating and replace if severe |
| Uneven Wear | Replace wheel to prevent tool vibration |
| Cracks or Chips | Discard and replace immediately |
| Glossy Finish | Replace wheel (abrasive is worn out) |
How to Perform the Ring Test
A visual inspection cannot catch every internal crack. Occupational safety standards recommend performing a “ring test” on all vitrified or hard wheels before mounting them. To do this, suspend the wheel by the center hole using a small pin or your finger.
Tap the wheel gently with a non-metallic object, like the plastic handle of a screwdriver. A safe, intact wheel produces a clear metallic ring. A cracked wheel sounds dull or dead. If the wheel fails the ring test, break it and throw it away.
How to Match Wheel Size and RPM
Warning: Never mount a wheel with an RPM rating lower than your grinder’s maximum RPM, as centrifugal force will cause it to explode.
You must verify that the wheel size aligns perfectly with your tool’s specifications. Check the wheel’s diameter and thickness first. Using an oversized wheel forces you to remove the safety guard, which invites severe injury.
Next, inspect the maximum RPM rating printed on the face of the disc. The disc’s RPM must equal or exceed your grinder’s top speed. Finally, verify that the wheel’s arbor hole fits your grinder’s spindle securely. Never modify a disc hole to make it fit a mismatched tool.
Products Worth Considering


Next generation 11 amp AC/DC 11,000 rpm motor on the electric grinder provides the best power to weight/size ratio available

High performance aluminum oxide grain for long life and high material removal of the grinding wheel
How to Install a Grinder Wheel Safely
Proper installation prevents the wheel from binding or vibrating loose during heavy work. Follow these steps to mount your wheel correctly.
- Disconnect the power. Unplug the grinder or remove the battery before you touch the spindle.
- Inspect the disc. Check for visible cracks, chips, or expiration dates on the wheel face.
- Clean the flanges. Wipe away dust and metal debris from the inner and outer mounting flanges to ensure a flat seating surface.
- Mount the wheel. Slide the wheel onto the spindle. The arbor hole should fit snugly without requiring you to force it.
- Position the guard. Adjust the safety guard so it rests between you and the spinning disc.
- Tighten the nut. Thread the outer flange nut onto the spindle. Use the provided pin wrench to secure it, but do not overtighten it. Overtightening can crack the center of the wheel.
Pre-Operation Safety Checks

Before you pull the trigger on your angle grinder, you must conduct a final set of safety checks. A quick mechanical review guarantees everything operates smoothly. Practice safe handling habits to prevent accidents before they happen.
Visual Inspection Checklist
Start by checking the entire tool body. Verify the safety guard sits tightly and covers at least half the wheel. Examine the power cord for fraying or exposed wires that could cause an electrical short.
Check the surface condition of the wheel one last time. Look for missing segments or foreign materials stuck to the abrasive surface. Finally, ensure the flanges sit flat against the wheel to secure it properly during high-speed rotation.
Safe Handling Practices
Always wear safety glasses and a full face shield. An angle grinder throws a constant stream of sparks and sharp metal fragments directly at your face. Protect your hands with heavy leather gloves, and wear hearing protection.
Keep your work area clean and free of flammable materials. Sparks from grinding easily ignite oily rags, sawdust, or fuel containers. Clamp your workpiece securely to a heavy table so it does not shift while you cut.
How to Perform a Test Run
Before you touch the grinder to metal, you must perform a one-minute test run. Aim the grinder in a safe direction, away from yourself and bystanders. Turn the power switch on and let the tool reach its maximum speed.
Hold the grinder firmly and listen for unusual sounds. Feel for excessive vibration, which indicates an unbalanced or improperly mounted wheel. If the tool shakes or rattles, turn it off immediately and remount the disc. If everything feels smooth, you are ready to work.
How to Build an Inspection Routine
Establish a regular inspection habit to keep your equipment in top shape. You should check your grinder and discs before every single use. This simple schedule detects wear and damage before they cause an accident.
| Inspection Item | Action Required |
|---|---|
| Grinder Wheel | Check for cracks, chips, or glazing |
| Maximum RPM | Verify disc RPM exceeds tool speed |
| Wheel Tightness | Confirm the flange nut sits securely |
| Flanges & Guard | Inspect for cleanliness and rigid placement |
Discard damaged wheels immediately so you do not accidentally use them later. By adhering to this methodical approach, you extend your tool’s life and guarantee a safer workshop.
Frequently Asked Questions
Can I use a grinder wheel if I dropped it?
No. Dropping a wheel causes microscopic internal cracks that weaken the bonding material. Discard any dropped wheel immediately, even if the exterior looks completely flawless.
What happens if I use a wheel with a lower RPM rating than my grinder?
The centrifugal force of the faster tool will tear the wheel apart. The disc will explode into high-speed shrapnel, which frequently causes severe lacerations or fatal injuries.
How tight should an angle grinder wheel be?
Tighten the flange nut until it sits snugly against the disc using the provided pin wrench. Do not overtighten it, as excessive crushing pressure cracks the center hub of the wheel.
Safety Disclaimer: This article is for informational purposes only and does not constitute professional safety advice. Always consult manufacturer guidelines and OSHA standards before operating heavy machinery or power tools.
Conclusion
Inspecting your angle grinder wheel takes only two minutes but prevents catastrophic workshop accidents. Build a rigid habit of checking the RPM rating, inspecting for cracks, and running a one-minute test before every job. Discard damaged discs immediately to eliminate future risks. Start your next project by giving your grinder a thorough visual inspection right now.
References
- Abrasive wheel machinery standard (1910.215) — Occupational Safety and Health Administration (OSHA)


