To inspect weld quality in automotive body work, start with a clean, well-lit visual check, then compare the weld to the vehicle maker’s repair procedure for the exact material, joint type, weld count, and weld size. Look for uniform bead shape, clean tie-in, proper fusion, correct plug-weld fill, and no cracks, burn-through, undercut, missed spots, heavy spatter, or panel distortion. Use test coupons and destructive checks when the repair procedure calls for them. Use NDT only when the part, access, procedure, and inspector qualification make that method suitable.
Quick Answer
A good automotive weld passes three checks: it matches the OEM repair procedure, it looks clean and consistent on the surface, and it passes any required test weld or inspection method. Reject welds with cracks, holes, weak tie-in, burn-through, severe porosity, missing plug fill, or heat damage.
Key Takeaways
- Use the OEM repair procedure as the pass/fail standard, not a visual guess.
- Clean the weld area before inspection so paint, soot, slag, adhesive, and spatter do not hide defects.
- Check bead shape, edge tie-in, weld count, plug-weld fill, penetration evidence, cracks, burn-through, and distortion.
- Practice welds on matching scrap help confirm settings before welding the vehicle.
- Use liquid penetrant, magnetic particle, ultrasonic, or radiographic testing only when the method fits the material, access, and required standard.
At a Glance
| Time Required | 10 to 30 minutes for a basic visual check; longer if test coupons, destructive checks, or NDT are required |
| Difficulty | Moderate for visual inspection; advanced for NDT or structural repair acceptance |
| Tools Needed | Bright inspection light, mirror, magnifier, weld gauge, calipers, camera, marker, PPE, OEM procedure, and matching scrap for practice welds |
| Cost | Low for visual tools; higher if a qualified NDT inspection or OEM repair information subscription is needed |
Warning: Welding inspection can expose you to hot metal, sharp edges, fumes, dust, arc flash, and fire hazards. Wear proper PPE, let metal cool before handling, keep combustibles away, and use ventilation. Zinc-coated or galvanized steel needs extra care because welding or cutting zinc-bearing materials requires proper ventilation and exposure control under OSHA welding rules.
What Makes a Good Automotive Weld?
A good automotive weld starts with proper fusion between the joined metals. The weld should connect both sides of the joint without gaps, skipped areas, cracks, or burn-through. In body work, that matters because many welds support crash structure, panel fit, corrosion protection, and long-term durability.
Check the weld against the exact repair procedure for the vehicle. The required weld type, weld count, weld spacing, material thickness, wire size, heat setting, squeeze-type resistance spot weld setting, or plug-weld size can change by vehicle model and location. A weld that looks neat can still fail if it does not match the required procedure.
For most visual checks, a good weld has:
- Uniform shape: steady bead width or even plug-weld fill.
- Clean tie-in: the weld blends into the base metal without cold lap or raised edges.
- Correct penetration: enough heat to fuse the joint without blowing through thin sheet metal.
- No open defects: no cracks, holes, severe porosity, undercut, slag, or skipped weld sections.
- Controlled heat: no excessive panel warping, coating burn, or enlarged heat-affected area beyond the repair procedure.
Note: “Good looking” is not the same as “approved.” Always compare the weld to the OEM repair procedure, weld schedule, or shop standard that applies to that vehicle and joint.
Follow a 5-Step Weld Inspection Workflow
Use the same inspection order each time so you do not miss a hidden problem. This workflow works for common automotive body welds, including plug welds, seam welds, tack welds, lap joints, butt joints, and practice coupons.
- Prepare the area. Let the metal cool, then clean the weld area enough to see the bead and the edge of the joint. Remove loose slag, soot, and spatter only in a way that does not hide or grind away defects.
- Confirm the standard. Open the OEM repair procedure and note the weld type, location, spacing, size, material, and any required test weld.
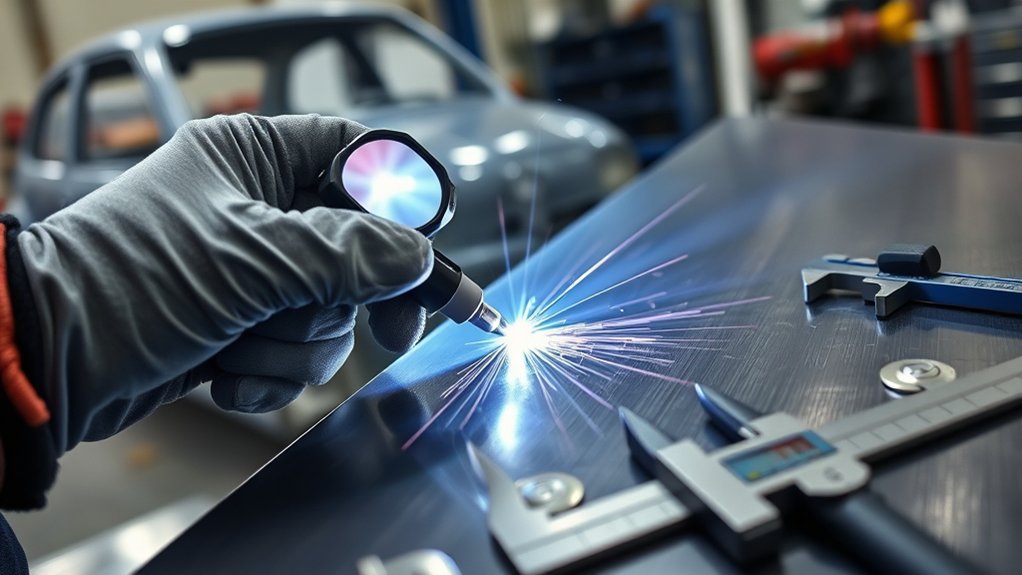
- Inspect visually. Use bright angled light, a mirror, and magnification if needed. Check surface shape, tie-in, holes, cracks, and distortion.
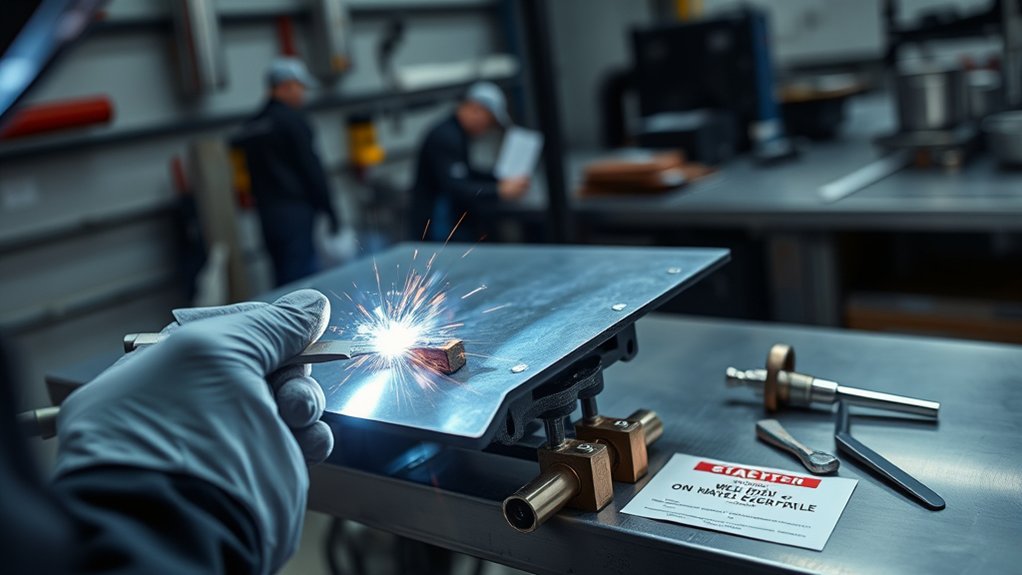
- Test a sample when required. Use practice welds or coupons made from matching material and thickness. Bend, peel, chisel, or cut the sample only if the repair procedure or shop standard calls for it.
- Document the result. Photograph the setup, welds, sample tests, settings, and final inspection result before applying seam sealer, primer, or corrosion protection.
Pro Tip: Take photos before grinding or dressing a weld. Heavy grinding can remove evidence of poor fusion, cracks, undercut, or burn-through, which makes later quality control harder.
Inspect the Weld Visually First
A visual inspection is your first pass because it catches the most obvious weld problems fast. Use bright, angled light instead of only overhead shop light. Angled light makes undercut, pinholes, missed edges, and uneven bead height easier to see.
Check these items before you move to advanced testing:
- Weld location: the weld is placed where the repair procedure shows it should be.
- Weld count and spacing: plug welds or spot welds are not missing, doubled up, or spaced incorrectly.
- Bead or plug shape: the surface is even, filled, and not sunken, crowned too high, or washed out.
- Edge tie-in: both sides of the joint are fused, with no cold lap at the edges.
- Cracks: any crack is a fail point until a qualified repair procedure says otherwise.
- Burn-through: holes, melted edges, and excessive thinning can weaken thin auto body steel.
- Porosity: scattered pinholes can point to contamination, poor shielding gas, or dirty metal.
- Undercut: grooves along the weld edge reduce the effective thickness of the joint.
- Spatter and slag: heavy spatter or trapped slag can signal poor setup or cleaning.
- Panel fit and distortion: heat should not pull the panel out of alignment.
Surface prep matters before this step. Dirt, paint, seam sealer, adhesive, undercoating, rust, oil, and zinc coating can all affect weld quality. If you are welding or inspecting galvanized steel, remember that zinc fumes can cause health problems, so use proper ventilation and preparation. For more background on galvanized welding concerns, see this guide to MIG welding galvanized steel.
Pass/Fail Cues for Automotive Welds
Use the OEM procedure as the final authority, but these common cues help you decide whether a weld needs more review before the vehicle moves forward.
| Inspection Item | Pass Cue | Fail Cue |
|---|---|---|
| Bead shape | Even width, steady height, smooth transition | Lumpy, rope-like, sunken, or inconsistent bead |
| Tie-in | Edges fuse cleanly into both panels | Cold lap, rolled edge, or unfused side |
| Plug weld fill | Hole is filled and fused around the full edge | Center blob, edge gap, void, or incomplete fill |
| Cracks | No visible cracking | Any crack across, beside, or at the end of the weld |
| Heat control | No burn-through or severe panel distortion | Holes, melted edges, severe warping, or excessive heat marks |
Use NDT to Catch Hidden Weld Flaws
After your visual check, non-destructive testing can help find flaws that are not obvious on the surface. NDT does not replace the OEM procedure, test welds, or basic visual inspection. It adds another layer when the joint is safety-critical, the repair procedure requires it, or a defect is suspected.
Use the right method for the material and defect type. Liquid penetrant and magnetic particle testing are surface-focused methods. Ultrasonic and radiographic testing are used for internal or volumetric inspection, but they need proper access, equipment, written procedures, and trained interpretation. The International Atomic Energy Agency’s NDT training material identifies liquid penetrant, magnetic particle, radiographic, ultrasonic, visual, and other testing methods as separate techniques with different uses and training needs. IAEA NDT training material also emphasizes reporting and accept/reject decisions against standards and specifications.
Visual Surface Checks
Visual surface checks are still the first line of defense. You can inspect the joint before welding, during setup, and after the weld cools. Before welding, check fit-up, clamping, metal cleanliness, hole size for plug welds, and access. During welding, watch for poor arc behavior, burn-through, wire stubbing, or loss of shielding gas. After welding, inspect bead shape, edge tie-in, porosity, cracks, and distortion.
Use magnification when needed, but do not rely on it to approve a structural weld by itself. If the joint is part of a rail, pillar, rocker, apron, frame section, or other structural area, follow the required OEM process and document the final result.
Liquid Penetrant Testing
Liquid penetrant testing can help reveal surface-breaking cracks or pores on non-porous materials. The surface must be clean enough for the penetrant to enter openings. Heavy grinding marks, paint, oil, adhesive, porous coatings, and rough surfaces can create false or unclear results.
Use penetrant only when the material and repair procedure allow it. It can be useful when a surface crack is suspected, but it will not prove deep fusion or internal strength by itself.
Magnetic Particle Testing
Magnetic particle testing is used on ferromagnetic materials to find surface and near-surface indications. It is not suitable for aluminum or non-magnetic stainless steel. It also requires the right magnetization direction, clean surface conditions, and a trained person who can separate real indications from false ones.
In collision repair, this method is less common than visual checks and coupon tests, but it may be used when a qualified inspector needs to confirm cracks in a steel part.
Radiographic Flaw Detection
When surface checks look acceptable but you still need internal evidence, radiographic testing can reveal density changes inside the weld, such as porosity, inclusions, some cracks, and lack of fusion. It uses X-ray or gamma-ray imaging and should be performed only by qualified personnel following radiation safety rules.
Radiographic testing is not a shortcut for every body repair. Thin sheet metal, joint overlap, access limits, surrounding vehicle structure, and safety controls can make it impractical. Use it only when the inspection plan, equipment, and acceptance criteria are suitable.
Ultrasonic Internal Testing
Ultrasonic testing uses high-frequency sound waves to locate internal reflectors that may indicate lack of fusion, cracking, voids, or other discontinuities. It can give useful real-time feedback, but the inspector must understand the material, weld shape, probe angle, calibration block, and acceptance criteria.
On complex automotive shapes, ultrasonic testing can be difficult because access is limited and thin panels can be challenging to read. Use this method when the joint geometry and procedure support it, not as a universal pass/fail tool.
Follow OEM Welding Specs and Test Rules
You should follow the OEM welding requirements for the exact vehicle because modern body structures use different steels, aluminum, adhesives, reinforcements, coatings, and joint designs. A repair method that works on one panel may be wrong for another panel on the same vehicle.
Before you weld the vehicle, make practice welds on scrap that matches the part material and thickness. Then inspect or break those test welds as required. If the sample fails, adjust your settings, clamp pressure, travel speed, wire speed, electrode condition, or surface prep before touching the vehicle. Understanding amperage ranges can help with general welding knowledge, but OEM body repair settings still come first.
OEM Welding Requirements
OEM welding specifications define the repair method needed to protect vehicle safety and structural performance. Review the manufacturer’s repair information before you strike an arc. Look for the required weld type, weld count, location, size, spacing, corrosion protection, adhesive use, and any required tests.
Pay close attention to warnings about high-strength steel, ultra-high-strength steel, boron steel, aluminum, squeeze-type resistance spot welding, plug welding, MIG brazing, and sectioning locations. Some parts cannot be repaired with heat or welding in certain areas. If the OEM procedure prohibits a method, do not use it.
Practice and Test Welds
Practice welds on scrap from new or removed parts before repairing the vehicle. Match the exact material, thickness, joint design, coating condition, and process as closely as possible.
| Test | Purpose | Pass Cue |
|---|---|---|
| Practice weld | Validate settings before welding the vehicle | Consistent shape and proper fusion |
| Visual weld check | Find surface defects and poor technique | No cracks, holes, severe porosity, or poor tie-in |
| Destructive coupon check | Confirm fusion and weld strength on a sample | Failure mode matches the repair procedure or shop standard |
| NDT | Check surface or internal indications without cutting the part | No rejectable indications under the chosen standard |
If a weld misses the target, do not “fix” the vehicle weld by hiding it under grinding, filler, primer, or seam sealer. Correct the setup, repeat the test weld, and move forward only when the sample and repair procedure agree.
Document Setup and Results
Before any repair starts, document the OEM welding process guidelines from the manufacturer repair information. Then record your setup, test results, and inspection criteria so each step can be reviewed later.
Your record should include:
- Vehicle year, make, model, VIN, and repair area.
- OEM procedure name or screen reference used for the repair.
- Material and thickness when available.
- Welder type, wire size, shielding gas, voltage, amperage, wire speed, and squeeze pressure when applicable.
- Photos of joint prep, clamps, practice welds, destructive test results, and final welds.
- Pass/fail notes, defect notes, and corrective action.
- Final corrosion protection steps before closing the repair.
This record helps prove that the weld was not guessed, rushed, or hidden. It also supports shop quality control, insurer review, and future repair traceability.
Set Up Practice Welds for Each Joint Type
Set up practice welds for each joint type you will use, including butt, lap, plug, tee, corner, and edge joints. Use scrap materials that match the vehicle part as closely as possible. Thickness, coating, fit-up, and backing all affect the result.
Start with a simple sample, then repeat the weld until you can control penetration, fusion, bead shape, and heat input. Use the same gun angle, travel speed, clamp pressure, and settings you plan to use on the vehicle. If the practice weld overheats, burns through, or fails during testing, the vehicle weld will likely have the same problem.
Follow safety regulations throughout the process, including eye protection, gloves, fire control, and ventilation. OSHA’s welding, cutting, and brazing standard warns that welding can produce hazardous fumes and requires adequate ventilation and exposure controls in many conditions. For setup basics, see these essential welding tips for beginners.
Document Weld Tests for Quality Control
Document every weld test with visual results, measurements, photographs, and notes. A clear record helps you verify compliance with OEM specifications and keep a defensible quality-control file.
For each weld, record:
- Where it is: panel area, joint type, and weld number or pattern.
- What was required: OEM weld type, size, spacing, and test requirement.
- How it was done: welder settings, prep method, clamp position, and material condition.
- What you found: bead shape, plug fill, cracks, porosity, undercut, distortion, and penetration evidence.
- What you changed: any adjustment to settings, cleaning, fit-up, or technique.
- Final result: pass, fail, rework, or qualified inspection required.
Use non-destructive testing such as dye penetrant, magnetic particle, ultrasonic, or radiographic testing only when the joint design, material, standard, and inspector skill support it. A complete record protects the repair and keeps hidden defects from being buried under the next repair step. Documentation should also align with accepted industry standards and your shop’s quality system.
Frequently Asked Questions
How do you check the quality of a weld?
Check weld quality by comparing the weld to the OEM procedure, then inspecting bead shape, weld size, edge tie-in, plug-weld fill, penetration evidence, cracks, porosity, undercut, burn-through, and panel distortion. Use test coupons or NDT when the repair procedure requires more proof.
What are the 6 common defects of welding?
Six common weld defects are lack of fusion, porosity, burn-through, slag inclusion, undercutting, and cracking. In auto body work, missed plug welds, poor edge tie-in, excessive grinding, and heat distortion are also common quality problems.
How do I know if my welds are good?
Your welds are good when they match the OEM repair procedure, have clean fusion, show no rejectable surface defects, and pass any required practice-weld or coupon test. A smooth bead alone is not enough if the weld is in the wrong location, wrong size, or wrong process.
How are welds inspected?
Welds are inspected with visual checks first, then measurements, test coupons, destructive sample testing, or NDT when needed. Visual inspection checks surface quality, while NDT methods such as penetrant, magnetic particle, ultrasonic, or radiographic testing may reveal surface or internal indications.
Can I inspect automotive welds without NDT equipment?
Yes, many basic checks start with visual inspection, OEM comparison, and practice-weld testing. However, structural repairs may require a trained technician, approved equipment, or qualified NDT depending on the vehicle maker’s procedure and shop requirements.
Should I grind a weld before inspecting it?
Inspect and photograph the weld before heavy grinding. Light cleaning may be needed, but aggressive grinding can hide undercut, porosity, cracks, or lack of fusion. Only dress the weld if the repair procedure allows it.
Conclusion
In automotive body work, you cannot afford to guess. Inspect every weld for correct location, size, bead shape, plug fill, fusion, heat control, and visible defects. Then compare the result to the OEM repair procedure and support the repair with practice welds, test records, and photos. Use NDT only when the method fits the material and the inspection standard. When you verify weld quality step by step, you build safer repairs that can stand up to real driving stress.
Sources
- OSHA 29 CFR 1910.252, Welding, Cutting, and Brazing General Requirements — ventilation, fire prevention, zinc-bearing materials, PPE, and welding safety controls.
- International Atomic Energy Agency, Liquid Penetrant and Magnetic Particle Testing at Level 2 — NDT method categories, personnel competence, reporting, and accept/reject decisions.
- NIOSH Criteria for a Recommended Standard: Welding, Brazing, and Thermal Cutting — health and exposure concerns from welding, brazing, and thermal cutting operations.
- American Welding Society ANSI Z49.1 Safety in Welding, Cutting, and Allied Processes — safety guidance referenced in welding safety programs and OSHA hazard communication language.


