Start with 18-gauge sheet metal and the right tools, like a brake, shrinker, stretcher, grinder, and cutoff wheel. Clean the rusted area fully, then tape and mark the true rust boundary, bend lines, and spot welds. Transfer a template to the sheet, cut it slightly oversized, and shape it to match the panel. Test-fit, trim, and tack weld in short bursts. Grind smooth, seal, prime, and paint, and there’s more detail if you keep going.
Choose Your Tools and Metal
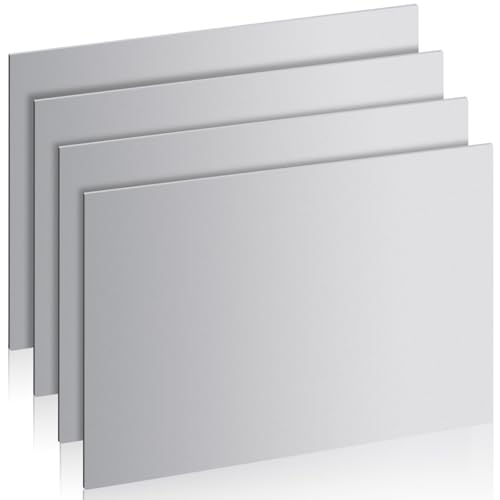
Start by choosing 18-gauge sheet metal, since it offers a good balance of durability and formability for most automotive patch panels.
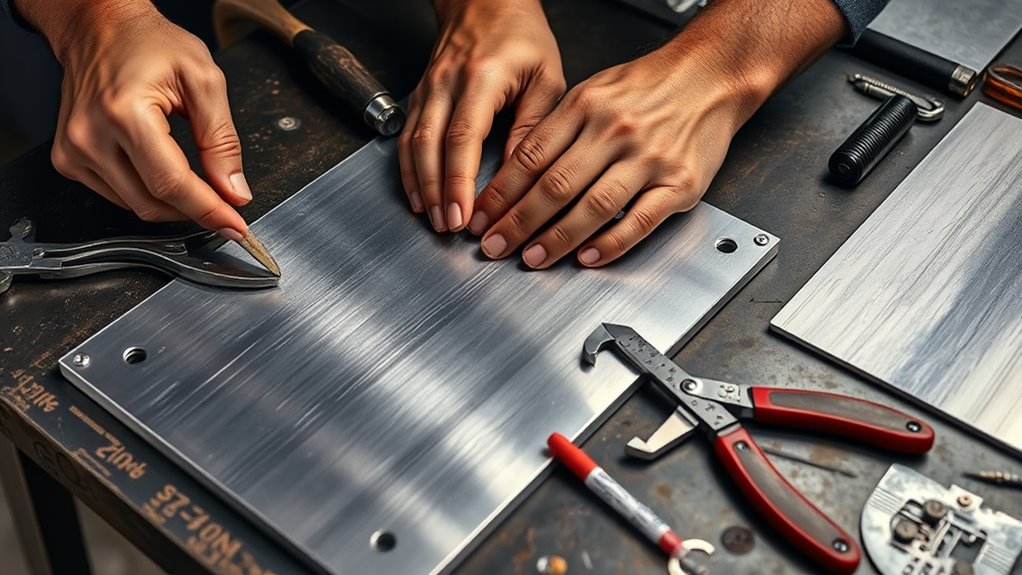
You’ll free yourself from guesswork by gathering the right tools before you cut. Use an English wheel to smooth large contours, a metal break to make clean bends, and a grinder to dress edges fast.
Keep a shrinker and stretcher on hand when you need to tighten or open curves so the panel matches the original shape. Basic hand tools matter too: hammers, pliers, and clamps let you control fit and hold parts securely during fabrication.
For removal and trimming, reach for a Blair Rotobroach cutter to open spot welds and a 1/16-inch cutoff wheel for precise cuts along marked lines.
When you choose your metal and tools with intent, you take control of the repair and make clean, accurate work possible. Additionally, understanding plasma cutting technology can enhance your overall fabrication skills and improve your cutting efficiency.
Products Worth Considering

4 Pack A36 Cold Rolled Steel Sheet Good durability and weldability requirements, ideal for structural projects requiring corrosion resistance.
Premium Material: Selected cold-rolled carbon steel with excellent bending strength and tensile performance, easily handling regular loads and precision machining requirements

Premium Material: Selected cold-rolled carbon steel with excellent bending strength and tensile performance, easily handling regular loads and precision machining requirements
Mark the Rusted Area
Inspect the panel closely and identify the full rust boundary, including any hidden corrosion or damaged edges.
Then apply masking tape around the perimeter and trace the cut lines directly on the tape to create a clean, accurate template.
Mark any spot welds, overlap joints, and bend lines so you’ve got the dimensions and reference points you need before cutting. Additionally, consider preheating the material to prevent further corrosion during the welding process.
Identify Rust Boundaries
Before you cut anything, carefully inspect the vehicle to locate the full extent of the rust, since corrosion often extends beyond the visible damage.
To identify rust boundaries, clean the panel and study adjacent structures for hidden spread. Use masking tape to outline the rusted zone, leaving enough overlap for the new patch to weld securely. Mark the tape with a pen so you’ve got a precise template.
- Trace only sound metal outside the damage.
- Check nearby overlaps like the cowl or firewall.
- Keep the tape edge clear and readable.
- Remove every trace of rust before forming the patch.
This method keeps you from cutting into good metal and gives you control over the repair.
Precision here protects fit, strength, and the freedom to build it right.
Trace Cut Lines
With the rust boundaries already mapped, trace the actual cut lines on the masking tape so you know exactly where the damaged metal ends. Use the tape as your template, and mark every edge, corner, and bend location with a fine marker.
Keep the lines tight and deliberate; this is where you’ll trace cut lines that free the panel from corrosion without sacrificing solid material. Cut on the marked path, but stay just outside the rust so you remove every compromised spot and leave clean, strong edges.
Then transfer the tape pattern to 18-gauge sheet metal and cut it slightly oversized for final fitting. Test fit the patch often, trimming only as needed until it sits flush and true.
Cut and Shape the Patch Panel
Start by making a precise template of the damaged area with masking tape, tracing the full outline and marking any bend lines so you can reproduce the panel’s shape accurately. Transfer that template to 18-gauge sheet metal, then cut and shape the patch panel slightly oversized so you’ve got room for final correction. Use snips, a cutoff wheel, or a shear to keep the edge clean and controlled.
- Mark the bend lines clearly on the metal.
- Cut the blank a little large, not tight.
- Form angles and curves with a brake or vise.
- Refine edges with hammers and pliers.
As you work, keep the patch panels true to the original contours. Each bend should mirror the surrounding metal, and every edge should land where the repair demands. Trim only what’s necessary. Your goal is a disciplined fit that restores the panel’s form and keeps the bodywork free. Additionally, ensure that you understand the maximum fillet weld size to maintain structural integrity during the welding process.
Test-Fit the Patch Panel
After cutting the patch panel, test-fit it in the damaged area to confirm alignment and coverage before you weld anything in place.
Set it into the opening and verify that it follows the original contour without forcing the metal. Use small clamps or magnets to hold it temporarily while you inspect the fit from every angle.
If you see gaps, high spots, or interference, mark the problem areas and remove the panel. Then trim, bend, or lightly hammer the edges until the patch sits flush with the surrounding sheet metal.
Keep checking the perimeter so the joint stays tight and even. A clean test-fit matters because a flat, accurate panel welds more predictably and finishes with less grinding.
Work patiently and deliberately; each adjustment gives you more control over the repair and helps you reclaim the body line with precision.
Tack the Patch Panel In Place
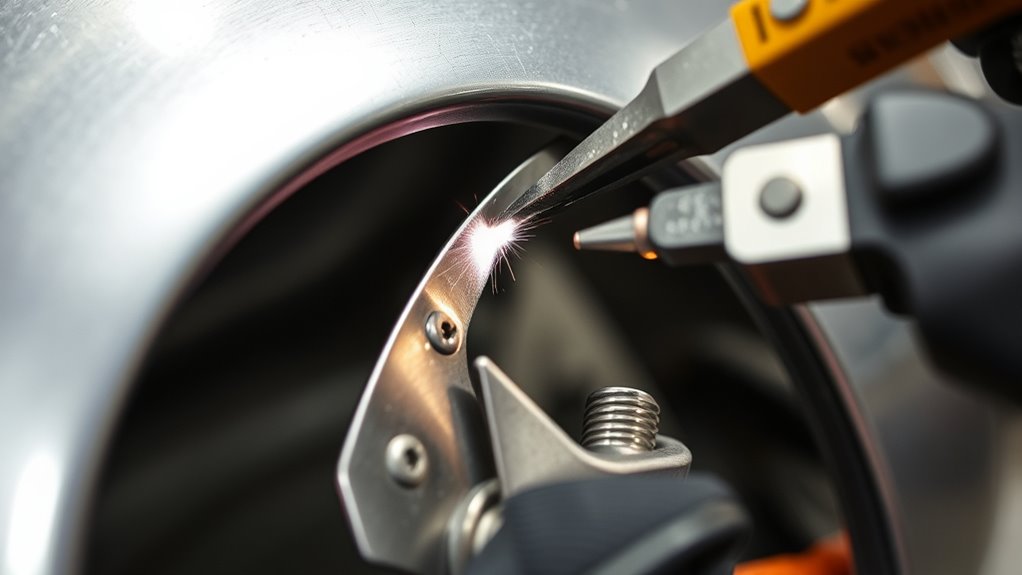
Once the patch fits snugly and follows the surrounding contour, hold it in place with small triangular magnets so it doesn’t shift during welding. You can also add Cleco pins or 1/8-inch self-tapping sheet-metal screws at original spot weld locations to lock the panel’s alignment. This keeps the repair true while you perform tack welding and preserves the panel’s structural line.
- Verify every edge sits flush before striking an arc.
- Place three to four quick tacks at spaced points, not a continuous bead.
- Keep each tack small to limit heat distortion and protect fitment.
- Air quench the area immediately after tack welding to reduce warping.
Work deliberately, but don’t let the repair boss you around; you’re controlling the metal, not the other way around.
Check the panel after each tack, and adjust only if the seam starts to pull. When the joint stays aligned, you’ve secured a clean foundation for the rest of the build.
Grind, Seal, and Paint the Repair
After your welds cool, you’ll grind them flush with a 36-grit Norton Blaze Speed Lok TR disc, then refine the surface with Norton Rapidprep Speed Lok TR A/O discs in CRS grit. Before you install the top patch, apply Copperweld Weld-Through coating to the seams to help prevent rust between layers. Remember, proper cleaning ensures penetration of the filler metal, which is crucial for a strong bond. Finish by building up sanding sealer, then paint the repair with a color-matching automotive finish to protect the panel and blend it with the surrounding bodywork.
Grind Welds Flush
Grind the welds flush with a 36-grit grinding disc so the patch panel blends smoothly into the surrounding metal and leaves a clean, professional junction. As you grind welds flush, keep the disc moving to avoid heat buildup and low spots.
Check the surface often; you want the repair level, not thinned.
- Dress high spots until the seam disappears.
- Feather the edges into the parent metal.
- Inspect for pinholes or missed welds.
- Wipe the area clean before coating.
Once the metal’s smooth, apply Copperweld Weld-Through coating to exposed overlaps, then build sanding sealer in light coats.
This gives you a stable, rust-resistant foundation for later primer and color, helping the patch hold its integrity and stay visually free.
Seal And Paint
Blend the repair with a 36-grit sanding disc, then coat any exposed overlap with a weld-through product such as Copperweld to help prevent rust between the patch and the original panel. Next, seal the repair with sanding sealer, building a uniform skin that levels scratches and lets primer bite evenly.
| Step | Purpose |
|---|---|
| Sealer | Smooths the repair |
| Primer | Locks out corrosion |
| Paint | Restores finish |
| Match | Preserves the panel’s look |
After the sealer dries, apply high-quality primer to strengthen adhesion and block corrosion. Then spray color-matched automotive paint in even coats. Keep your passes controlled, and let each layer flash before the next. When you seal and paint this way, you protect your work, honor the metal, and keep the panel free to serve.
Frequently Asked Questions
What Gauge Sheet Metal Should I Use for the Patch Panel?
Use 18-gauge sheet metal for most patch panels; it balances strength and weldability. Match Material Thickness to the original panel when possible, and step up to 16-gauge only if you need extra rigidity.
How Do I Choose the Right Welding Machine for This Repair?
Choose a MIG welder with adjustable voltage and wire speed; it’s ideal for thin sheet metal. I once dialed mine down like a violin’s tuning peg, and clean Welding Techniques followed, giving you control and freedom.
Can I Make a Patch Panel Without Removing the Surrounding Panel?
Yes, you can, but you’ll risk Panel Integrity and fit. You’ll need tight masking, precise cuts, and strong heat control. If you’re careful, you can patch locally and keep surrounding metal intact.
What Safety Gear Is Essential When Cutting Sheet Metal?
You need safety glasses, cut-resistant gloves, hearing protection, long sleeves, and sturdy boots; like a shield at the gate, these Safety Precautions protect you from sharp edges, flying sparks, noise, and metal shards.
How Do I Prevent the Patch Panel From Warping During Welding?
You prevent warping by tacking the panel in spaced spots, then stitching short Welds with cooling pauses. Use Welding Techniques, clamp firmly, and planish as needed. You’ll keep control and protect liberated, precise alignment.
Conclusion
By choosing the right tools and sheet metal, you’ve turned a rusted weak spot into a solid repair. When you cut, shape, test-fit, and tack the patch in place, the panel should sit like a key in its lock. After grinding, sealing, and painting, the repair blends in like new skin over old damage. You’ve restored strength, blocked corrosion, and finished the job with a clean, durable result that should hold up for years.


