Weld-through primer can help protect hidden steel flanges and overlapping seams that will be difficult to coat after assembly. It must be used as part of an approved welding and corrosion-protection process, however. Applying the wrong product, coating the weld area too heavily, or ignoring ventilation and OEM instructions can lead to porosity, excess spatter, poor adhesion, or unsafe fume exposure.
Quick Answer
Check the OEM repair procedure and primer data sheet first. Clean the approved bare-metal mating surfaces, apply the specified light coats, and allow the full flash and drying time. For GMA/MIG plug welds, remove primer from the direct weld site when required. Make test welds, use local fume extraction, and restore all final corrosion protection afterward.
Key Takeaways
- Use weld-through primer only where the product data sheet and applicable repair procedure allow it.
- Prepare clean, bare, approved metal and keep primer out of adhesive-bonding areas unless the procedure expressly permits it.
- Coat thickness, flash time, drying time, and weld-site cleaning vary by product and welding process.
- Do not rely on a universal “hot” setting. Make representative test welds and follow the welding procedure.
- Control zinc-containing welding fumes with local exhaust and the PPE required by the SDS and workplace safety program.
- Weld-through primer is not a final finish. Restore primer, seam sealer, topcoat, and cavity protection as required after welding.
At a Glance
| Time Required | About 30–60 minutes for preparation and primer application, plus product drying, welding, cooling, and final coating time |
| Difficulty | Intermediate to advanced; welding skill and procedure knowledge are required |
| Tools Needed | Approved primer, TDS and SDS, abrasives, compatible cleaner, lint-free cloths, masking supplies, clamps, welding equipment, test coupons, local fume extraction, and required PPE |
| Cost | Varies by primer, abrasives, coating system, and existing equipment; welding equipment, ventilation, and PPE are separate costs |
What’s in This Article
- What Is Weld-Through Primer and What Does It Do?
- Where Should Weld-Through Primer Be Used?
- What You’ll Need Before You Start
- How to Prepare the Surface for Weld-Through Primer
- How to Apply Weld-Through Primer Effectively
- Best Welding Techniques When Using Primer
- Troubleshooting Common Problems
- How to Care for Your Welds After Welding
- Mistakes to Avoid With Weld-Through Primer
- Frequently Asked Questions
- Conclusion
- Sources
What Is Weld-Through Primer and What Does It Do?
Weld-through primer is a conductive or weldable coating used between approved metal mating surfaces before they are joined. Many products are zinc-based, while some formulations are enriched with other conductive metals. Its main job is to improve corrosion protection in hidden flanges, overlaps, inserts, and seams that may be difficult to reach after welding.
The coating does not make contaminated or badly fitted metal weldable. It also does not replace correct joint preparation, suitable welding parameters, sound weld inspection, or final corrosion protection.
Use weld-through primer after the mating surfaces have been straightened, test-fitted, stripped as required, and cleaned. Joining surfaces can become corrosion hot spots when moisture reaches bare, untreated steel.
One key benefit of weld-through primer is that it places corrosion-resistant material between panels before the joint closes. When existing damage is present, complete the necessary rust repair before welding rather than coating over weakened or perforated steel.
Weld-through products are available in aerosol and brush-on forms. Apply a product only to the substrates and joining methods named in its technical data sheet. Do not assume that every product is suitable for every steel grade, coated panel, aluminum part, adhesive system, or welding process.
Weld-through primer protects the hidden mating surfaces around an approved joint; it does not excuse welding through dirt, rust, excess coating, or an unapproved repair design.
Where Should Weld-Through Primer Be Used?
Appropriate Use Areas
Typical approved uses include bare-steel mating flanges, plug-weld overlaps, reinforcements, inserts, and other enclosed steel surfaces that cannot receive the full paint system after assembly. The exact location depends on the product data sheet and the repair or fabrication procedure.
For automotive work, check the vehicle-specific body repair manual before stripping or coating a flange. Some manufacturers specify a zinc-based weld-through coating, weldable seam sealer, adhesive, or another corrosion-protection process depending on the panel and joining method.
Areas That Require Special Caution
- Direct GMA/MIG plug-weld sites: Many procedures require the coating to be removed from the plug hole or direct arc path before welding.
- Resistance spot-weld sites: Instructions may differ. For example, the 3M Weld Thru II technical data sheet distinguishes spot welding from MIG/MAG plug welding.
- Adhesive-bonding zones: Do not place weld-through primer beneath panel adhesive unless the OEM, adhesive maker, and repair procedure specifically approve that combination.
- Aluminum and other nonferrous metals: Do not use a steel-oriented product unless its technical sheet expressly lists that substrate.
- Painted, rusty, oily, or sealed surfaces: Remove incompatible material and expose the surface specified by the procedure.
- Visible exterior surfaces: Weld-through coating is generally not the finished primer or topcoat and may have to be removed before refinishing.
Note: FCA/Stellantis guidance is one example of why vehicle-specific instructions matter. It limits approved use to ferrous parts, specifies zinc-based material, requires removal from the GMA weld zone, and restricts use where welding and adhesive bonding are combined. Other manufacturers may give different directions. See the I-CAR FCA/Stellantis weld-through primer summary.
What You’ll Need Before You Start
Gather the procedure, products, safety controls, and tools before opening the primer. Drying time can range from several minutes to longer depending on the exact product, film thickness, temperature, and humidity.
- The OEM repair manual, qualified welding procedure, or approved fabrication instructions
- The weld-through primer technical data sheet and safety data sheet
- Weld-through primer approved for the substrate and joining process
- A compatible degreaser or surface cleaner
- Clean lint-free cloths
- An approved abrasive belt, sanding disc, abrasive pad, wire brush, or sandpaper
- Compressed-air dust removal or another approved dust-control method
- Masking tape and paper for nearby surfaces and adhesive zones
- Clamps and panel-fitting tools
- Representative scrap metal or test coupons matching the repair
- The correct welding machine, wire, shielding gas, electrodes, and accessories
- Local exhaust ventilation or a fume-extraction system positioned near the welding plume
- Flame-resistant clothing, welding gloves, safety glasses, hearing protection, and an approved welding helmet
- Respiratory protection when required by the SDS, hazard assessment, and applicable respiratory-protection program
Proper eye protection is essential during preparation and welding. This guide to auto-darkening welding eye-protection options can help explain available features, but the selected equipment must be rated for the process and exposure.
Warning: Zinc-bearing coatings can produce hazardous welding fumes. For indoor work, use local exhaust ventilation positioned to pull the plume away from your breathing zone. Follow the primer SDS and OSHA welding-ventilation requirements. Do not spray near an arc, flame, hot surface, or ignition source, and never weld inside an unventilated or unapproved confined space.
Warning: Do not allow vapors from chlorinated degreasers or cleaning solvents to enter the welding area. Welding ultraviolet radiation can react with some chlorinated vapors and form highly toxic decomposition products. Use only a compatible cleaner and allow the surface and surrounding area to dry fully.
Note: Before welding on a vehicle, follow the vehicle manufacturer’s precautions for the 12-volt battery, high-voltage system, restraints, fuel system, electronics, interior trim, glass, and nearby heat-sensitive materials. Welding current and heat can damage components or create a fire hazard.
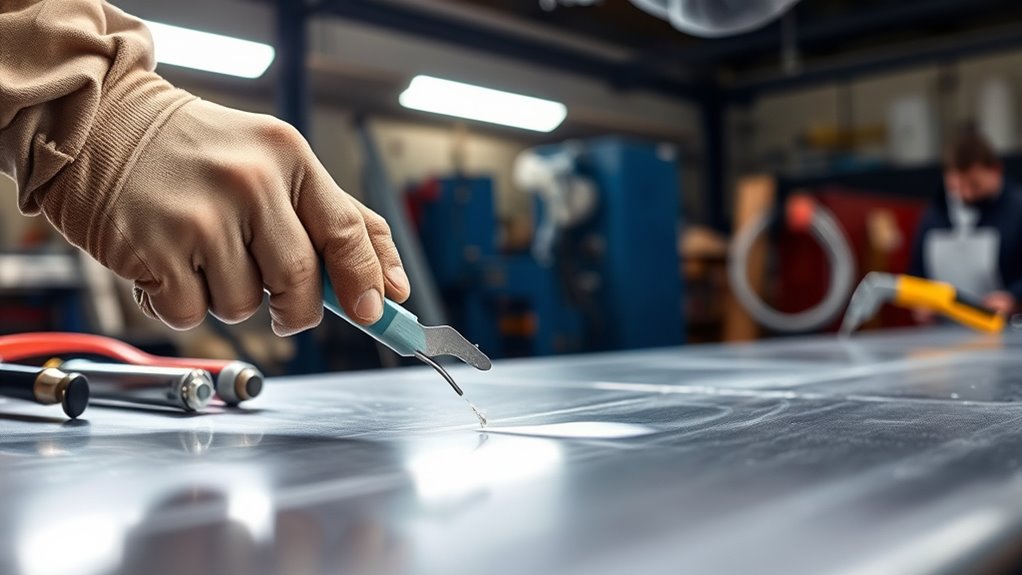
How to Prepare the Surface for Weld-Through Primer
Good preparation is more important than applying extra primer. Rust, oil, paint, seam sealer, adhesive, dust, moisture, and heavy factory coatings can interfere with conductivity, adhesion, fit-up, and weld quality.
1. Verify the Procedure and Substrate
Identify the base metal, panel type, welding process, joint design, adhesive requirements, and corrosion-restoration procedure. Confirm that the selected weld-through product is approved for each of them.
Do not remove factory E-coat or corrosion protection beyond the area required by the procedure. Unnecessary stripping creates more bare steel that must later be restored.
2. Test-Fit and Straighten the Mating Surfaces
Dry-fit the parts before coating. Correct flange damage, panel gaps, plug-hole size, overlap, clamp access, and alignment now. Primer should not be used to fill gaps or hide poor contact between mating surfaces.
3. Remove Coatings and Corrosion
Use the abrasive type and grit required by the repair procedure or primer manufacturer. Remove paint, rust, old primer, loose scale, adhesive residue, seam sealer, and other incompatible material from the specified mating area.
When working on galvanized or zinc-coated material, remove only what the procedure requires. Additional preparation considerations are covered in this guide to cleaning galvanized metal before coating.
4. Degrease and Remove Dust
Blow away or vacuum abrasive dust using an approved method. Wipe the metal with a compatible surface cleaner and clean lint-free cloths. Use separate wet and dry cloths if the cleaner manufacturer specifies that method.
Do not use a cleaner that leaves an oily film. Keep solvent vapors away from the welding operation and allow all cleaned surfaces to dry fully.
5. Mask Unapproved Areas
Mask visible exterior areas, electrical grounds, threaded parts, adhesive-bonding zones, and any surface that does not need weld-through coating. Prevent overspray from reaching panels that will later receive filler, primer, adhesive, or topcoat.
6. Keep the Prepared Metal Clean and Dry
Apply the coating soon after preparation so fresh contamination or oxidation does not form. If the part is handled, exposed to moisture, or left overnight, inspect and clean it again before coating.
How to Apply Weld-Through Primer Effectively
- Read the technical data sheet: Confirm the approved substrate, application temperature, number of coats, flash time, drying time, welding method, and topcoat limitations.
- Set up ventilation: Start the required spray-area and welding fume controls before applying the aerosol or beginning hot work.
- Mix the coating: Shake an aerosol or stir a brush-on product for the full time stated by the manufacturer so conductive solids are evenly suspended.
- Apply the specified film: Coat only the approved mating areas. Keep each pass even and avoid runs, puddles, pinholes, or heavy edge buildup.
- Coat both mating surfaces when required: Some products and procedures specify coverage on both sides of the overlap. Do not assume one-side application is enough.
- Observe the flash time: Wait the stated interval between coats. Applying the next coat too soon can trap solvent and increase film thickness.
- Allow complete drying: Do not assemble or weld until the product reaches the condition required by its data sheet.
- Remove coating from the direct weld site when required: For many GMA/MIG plug-weld procedures, clean the plug hole and direct arc path while leaving approved coating on the surrounding mating surfaces.
- Fit and clamp the joint: Maintain the required panel contact, overlap, hole size, and clamp pressure.
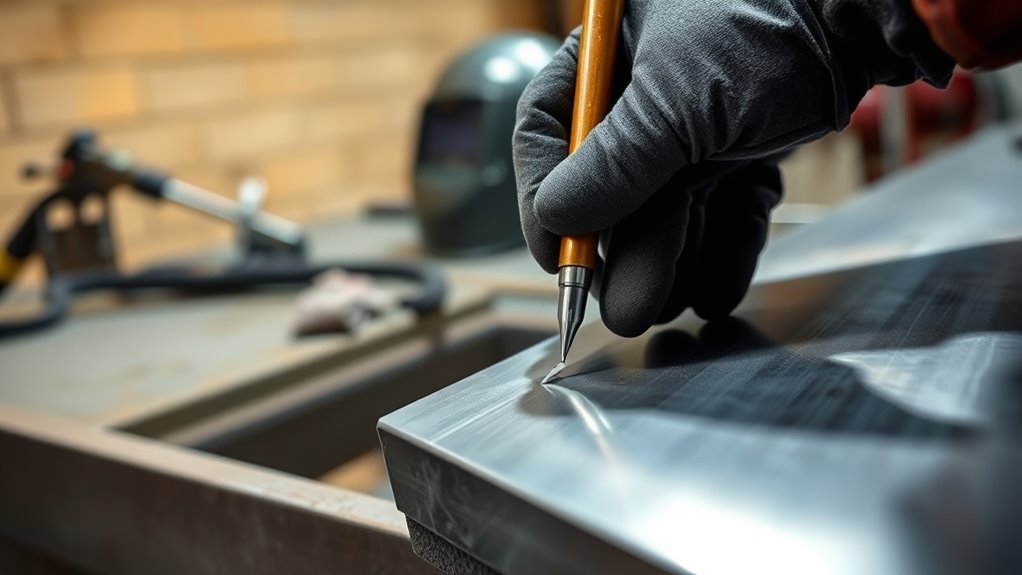
- Make test welds: Use representative metal and the same coating, joint, wire, gas, and equipment planned for the repair. Adjust settings according to the procedure and test results.
- Complete the approved weld sequence: Follow the required weld size, spacing, order, cooling intervals, and inspection criteria.
Product directions are not interchangeable. For example, the 3M 05917 data sheet specifies two light coats, a five-minute interval between coats, and 10–15 minutes of drying before assembly. The SEM Copperweld data sheet specifies two medium wet coats, a three-to-five-minute flash, and approximately 20 minutes before welding. Follow the sheet for the product in your hand rather than copying either example.
Before starting the finished weld, remove coating from the direct weld site whenever the product or joining procedure requires it. Excess material in a GMA weld zone can contribute to porosity, unstable arc starts, and excessive spatter.
Sound preparation remains important with every arc-welding process. Beginners using flux-cored equipment can review these metal preparation and flux-core welding tips, but the weld-through primer and joint procedure must still be followed.
Pro Tip: Prepare a test coupon from the same metal thickness and coating system as the real joint. Clamp it the same way, reproduce the plug-hole or spot-weld arrangement, and verify the settings before touching the repair panel.
Best Welding Techniques When Using Primer
Welding through a coated joint creates different electrical, thermal, and fume conditions than welding clean uncoated scrap. The correct response is not to increase heat automatically. Start with the specified procedure, make representative test welds, and change settings only as the procedure and weld results justify.
Remove loose rust and all unapproved coatings before welding. This article on whether you can coat directly over rust explains why surface condition matters for coatings, but structural welding still requires sound, properly prepared metal.
GMA/MIG Plug Welding
For many plug-weld procedures, remove the weld-through coating from the plug hole and the direct weld site before striking the arc. Leave only the approved film on the surrounding hidden mating surfaces.
Use the wire type, diameter, shielding gas, polarity, plug-hole size, travel method, weld spacing, and settings required by the procedure. A first-time wire-welding guide can explain basic machine controls, but it does not replace the applicable welding specification. See how to use a wire welder for the first time for foundational information.
Squeeze-Type Resistance Spot Welding
Resistance spot welding uses electrode force and current through the panel stack. Product and OEM instructions may permit the coating to remain at the weld site, may require removal where the electrode tips contact the surface, or may specify weldable sealer instead.
Do not apply a GMA plug-weld rule automatically to resistance spot welding. Follow the approved panel stack, electrode-tip preparation, squeeze force, current, weld time, and test requirements.
Controlling Heat and Distortion
Control distortion through correct fit-up, clamping, weld sequence, spacing, cooling intervals, and tested machine settings. Stop if the panel begins to oil-can, buckle, discolor excessively, or burn through.
Do not compensate for a heavy primer layer by repeatedly increasing voltage, wire speed, current, or dwell time. Stop, clean the direct weld area as required, prepare another test coupon, and correct the cause.
Controlling Welding Fumes
Position local exhaust close enough to capture the plume without disrupting shielding gas. Keep your head out of the plume and make sure extraction air moves fumes away from you and nearby workers.
Welding fumes are linked with acute and long-term respiratory hazards. The NIOSH welding-fume control guidance describes the value of engineering controls such as fume-extraction equipment.
Warning: Stop work if ventilation fails, fumes enter the helmet, the primer or nearby material catches fire, or you develop eye irritation, coughing, breathing difficulty, dizziness, nausea, fever, or flu-like symptoms. Move to fresh air and follow the site emergency and medical-response procedure.
Troubleshooting Common Problems
Porosity or Pinholes
Possible causes: Excess coating in the arc path, trapped solvent, rust, moisture, oil, poor shielding-gas coverage, incorrect plug-hole preparation, or unsuitable settings.
Correction: Stop welding. Remove the defective weld as the repair procedure permits, clean and dry the joint, verify shielding gas and fit-up, remove coating from the direct weld zone when required, and repeat the test-weld process.
Excessive Spatter or an Unstable Arc
Possible causes: Film that is too thick, a contaminated or poorly placed ground, incorrect polarity, inconsistent wire feed, unsuitable settings, or dirty base metal.
Correction: Check the coating thickness, clean the weld and ground locations, inspect consumables, confirm polarity and gas, and retest on representative scrap.
Poor Penetration or Incomplete Fusion
Possible causes: Coating left in an area that should be bare, poor panel contact, an undersized plug hole, wrong machine settings, or incorrect technique.
Correction: Do not cover the problem with another weld. Review the joint specification, correct the preparation, and remake test welds before repairing the joint.
Burn-Through or Panel Distortion
Possible causes: Excess heat input, long dwell time, poor fit-up, incorrect sequence, thin or previously damaged metal, or repeated welding over a contaminated area.
Correction: Stop and allow the panel to cool naturally. Recheck thickness, joint fit, weld sequence, and tested settings. Do not quench a repair panel unless the applicable procedure permits it.
Primer, Filler, or Topcoat Lifting
Possible causes: Weld-through coating or overspray left beneath a material that is not compatible with it.
Correction: Remove excess weld-through material from refinishing surfaces and apply the approved primer, filler, sealer, and topcoat system. The SEM technical sheet, for example, warns that excess material beneath filler can cause lifting.
How to Care for Your Welds After Welding
Post-weld work must restore both joint quality and corrosion protection. Weld-through primer should never be the only coating left on a finished repair.
- Allow the joint to cool: Let the metal reach a safe handling temperature without unapproved quenching.
- Inspect the welds: Check the required weld size, location, fusion, penetration indicators, spacing, panel fit, and visible defects.
- Correct defects properly: Repair porosity, missed welds, burn-through, or distortion according to the welding and repair procedure.
- Dress only where permitted: Do not grind away required weld reinforcement or thin surrounding metal.
- Remove residue and overspray: Clean smoke, spatter, loose coating, abrasive dust, and weld-through primer from surfaces that will receive other materials.
- Apply the approved primer: Restore epoxy primer, direct-to-metal primer, or another specified coating to exposed areas.
- Restore seam sealer and anti-chip material: Match the required location, thickness, texture, and cure procedure.
- Apply the specified topcoat: Use the compatible paint system after the preceding materials have cured as directed.
- Restore hidden-cavity protection: Apply cavity wax or the specified anti-corrosion compound inside enclosed rails, pillars, rockers, doors, and panel backs after welding and refinishing when the procedure requires it.
- Complete a final inspection: Confirm that drain holes, fasteners, grounds, trim, wiring, and nearby components have been restored correctly.
A hidden seam is not finished when the arc stops. The repair is complete only after the weld passes inspection and every required corrosion barrier has been restored.
Keep repaired areas clean and inspect them for coating damage, trapped moisture, or new corrosion. Address chips, cracked seam sealer, blocked drains, and exposed metal before corrosion spreads into the seam.
For general non-structural fabrication, a compatible protective coating may be suitable after the metal is prepared and cooled. This guide to using Rust-Oleum on prepared metal discusses one coating approach. Automotive collision repairs should instead follow the vehicle and refinish-system procedures.
Mistakes to Avoid With Weld-Through Primer
- Skipping the OEM or product procedure: A coating approved for one panel, substrate, or welding process may be prohibited for another.
- Applying primer over rust, paint, oil, moisture, or sealer: Contamination can weaken coating adhesion and disrupt the weld.
- Using too much material: Heavy buildup can raise electrical resistance, trap solvent, increase spatter, and contribute to porosity.
- Welding before the required dry time: “Dry to the touch” is not a universal standard. Use the exact condition stated in the data sheet.
- Leaving coating in a GMA weld site that should be bare: Clean the direct arc path whenever the procedure requires it.
- Removing coating from a spot-weld site without checking the procedure: Resistance spot-welding preparation may differ from GMA plug-weld preparation.
- Using primer beneath panel adhesive without approval: The combination may weaken the bond or violate the repair procedure.
- Guessing at hotter settings: Test the joint and use qualified settings rather than compensating for poor preparation with more heat.
- Working without local fume extraction: General room airflow may not control zinc-bearing welding fumes at the breathing zone.
- Using the coating as final primer or paint: Remove incompatible overspray and restore the complete approved coating system.
- Ignoring hidden cavities: Apply the specified cavity protection after the welding and refinishing stages.
Frequently Asked Questions
Can you weld directly on weld-through primer?
Only when the product and welding procedure permit it. Many GMA/MIG plug-weld procedures require the coating to be removed from the direct weld site, while some resistance spot-welding applications permit coating between the mating surfaces. Heavy or wet coating should not be treated as weld-ready.
How do you properly use weld-through primer?
Verify the approved product and procedure, expose and clean the required bare-metal mating areas, mask unapproved surfaces, mix the coating, apply the specified coats, observe the flash and drying times, prepare the direct weld site as required, make test welds, and restore the complete corrosion-protection system after welding.
When should you use weld-through primer?
Use it on approved bare-metal mating surfaces that will become enclosed or difficult to coat after welding. Common examples include steel flanges, overlaps, inserts, and reinforcements. The product data sheet and the applicable OEM or fabrication procedure determine whether it belongs in a particular joint.
Do I need to remove primer before welding?
Remove it from the direct weld site whenever the product or joining procedure requires bare metal there. This is common for GMA/MIG plug welds. Do not assume the same preparation applies to squeeze-type resistance spot welding.
Should weld-through primer be applied to both mating surfaces?
Apply it to both surfaces when the product data sheet or repair procedure says to do so. Some products specify coating both sides of the overlap. Use even coverage without creating a heavy layer, and keep the coating out of direct weld or adhesive areas when required.
How long should weld-through primer dry?
Drying time is product-specific. Temperature, humidity, coat thickness, and airflow also affect it. Published examples range from roughly 10–15 minutes before assembly to about 20 minutes before welding, but the technical sheet for the exact product is the controlling instruction.
Can weld-through primer be used on aluminum?
Do not use a steel-oriented weld-through product on aluminum unless both the product manufacturer and the applicable joining procedure expressly approve it. Aluminum repairs often require different cleaning, isolation, joining, and corrosion-protection materials.
Can weld-through primer go under panel adhesive?
Not unless the OEM repair procedure and adhesive manufacturer specifically approve it. Many weld-bonding procedures require clean prepared metal or another specified coating in the adhesive path and prohibit ordinary weld-through primer there.
Is weld-through primer the same as epoxy or self-etching primer?
No. Weld-through primer is intended for approved mating surfaces involved in welding. Epoxy, self-etching, direct-to-metal, and other refinishing primers have different purposes and compatibility rules. Do not substitute one for another unless the coating and repair procedures allow it.
Can weld-through primer replace final paint or corrosion coating?
No. After welding, clean and inspect the joint and restore the required primer, seam sealer, anti-chip coating, topcoat, and cavity protection. Weld-through material alone is not a complete exterior or hidden-cavity finish.
Conclusion
Weld-through primer works best as a controlled coating on approved hidden mating surfaces, not as a thick layer that must be burned away. Start with the OEM or fabrication procedure, prepare clean bare metal, follow the exact coat and drying instructions, and treat GMA plug welds and resistance spot welds according to their separate requirements.
Make representative test welds instead of guessing at hotter settings. Use local exhaust to control fumes, keep primer away from unapproved adhesive and refinishing areas, and inspect the finished weld before restoring the full primer, sealer, paint, and cavity-protection system. Those steps improve weld consistency while reducing the risk of corrosion returning inside the seam.
Sources
- 3M Weld Thru II Coating 05917 Technical Data Sheet — supports surface preparation, coat timing, test welds, and process-specific weld-site cleaning.
- SEM Copperweld Weld-Thru Primer Technical Data Sheet — supports bare-metal preparation, coat application, drying time, storage, and filler-compatibility cautions.
- I-CAR Weld-Through Primer Guidelines: FCA/Stellantis — supports OEM-specific restrictions involving ferrous metals, zinc-based material, GMA weld-zone cleaning, and adhesive-bonding areas.
- 3M Weld-Bonding Standard Operating Procedure — supports flange preparation, test welding, and the caution against weld-through primer in adhesive-bonding areas.
- OSHA 29 CFR 1910.252: Welding, Cutting, and Brazing — supports eye protection, zinc-coated metal ventilation, confined-space controls, and cleaning-solvent precautions.
- NIOSH Welding Fumes and Fume Extraction Guns — supports welding-fume health information and engineering-control guidance.


