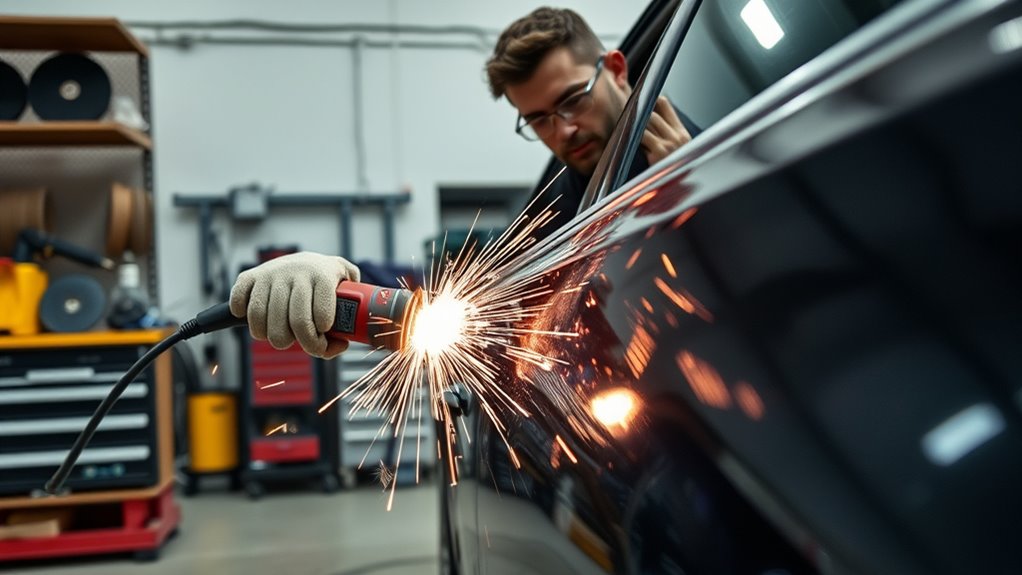
Grinding welds flush on a car body is a controlled finishing process, not a race to remove metal. Your goal is to lower only the raised weld crown until the repair blends with the surrounding panel, while preserving weld strength and sheet metal thickness. Before touching the grinder to the vehicle, confirm that the vehicle-specific repair procedure allows the weld to be dressed.
Quick Answer
To grind welds flush on a car body, first confirm the OEM repair procedure allows the weld to be dressed. Use a guarded grinder and an abrasive rated for its RPM, remove only the raised crown in short passes, and switch to finer abrasives before reaching the panel. Vacuum, inspect, and restore corrosion protection immediately.
Key Takeaways
- Check the vehicle-specific body repair manual before grinding. Do not flatten structural welds, plug-weld nuggets, or sectioning joints unless the procedure permits it.
- Use a guarded tool, a correctly mounted abrasive rated above the grinder’s no-load RPM, and only the working face and angle allowed by the abrasive manufacturer.
- Remove the raised weld crown in short, light passes. Change to a finer abrasive before the bead becomes completely level.
- Control heat with brief contact, sharp abrasives, and cooling pauses. Never touch potentially hot sheet metal with bare skin to judge its temperature.
- Protect glass, wiring, trim, upholstery, hoses, batteries, and hidden cavities from sparks and metal dust.
- After grinding, inspect for pinholes, undercut, thin metal, and distortion, then restore primer, seam sealer, backside protection, and cavity wax as required.
At a Glance
| Time Required | About 20 to 60 minutes for a small cosmetic patch, depending on weld height, access, material, and required finish |
| Difficulty | Moderate; thin panels are easy to gouge, overheat, distort, or weaken |
| Tools Needed | Guarded angle grinder, rated grinding or flap discs, die grinder or quick-change discs for tight areas, DA sander, hand block, straightedge, marker, vacuum or suitable dust extraction, cleaner, and corrosion-protection products |
| Cost | Typically $15 to $60 in abrasives, cleaner, and primer for a small repair if you already own the tools and required PPE |
Understanding the Goal: Flush, Not Thin
A properly dressed cosmetic weld should feel smooth when you move your fingertips across the repair. It should not have a raised ridge, sharp edge, deep groove, open pinhole, or obvious low spot. You do not need to erase every visible trace of the seam. You only need to remove the excess weld that would interfere with metal finishing, filler, primer, or paint.
This distinction matters on thin automotive sheet metal. Heavy pressure, a dull abrasive, or extended contact can lower the parent metal around the weld faster than you expect. The result may be a thin joint, a dished panel, heat distortion, or a low area that requires unnecessary filler.
Inspect the weld before grinding. Look for porosity, pinholes, cracks, undercut, poor fusion, missed tacks, or gaps between the panels. Grinding cannot turn a defective weld into a sound one. Repair the defect first, allow the area to cool, and then dress the bead.
Warning: Do not grind frame, suspension, seat-belt, roll-cage, reinforcement, high-strength structural, or other safety-critical welds flush unless the vehicle maker’s repair procedure specifically permits it. A smooth-looking weld is not automatically a safe weld.
Check the Repair Procedure, Material, and Joint Type
Before choosing an abrasive, identify what you are grinding. A cosmetic butt seam in an outer skin is not the same as a plug weld on a flange, a factory spot-weld replacement, a weld-bonded joint, or a sectioning seam in a structural member.
Confirm OEM Repair Requirements
Use the vehicle-specific body repair manual whenever the repair involves a replaced panel, structural member, reinforcement, advanced high-strength steel, aluminum, adhesives, rivets, or factory joining points. The procedure may specify the weld location, weld size, nugget diameter, number of welds, attachment method, and whether the finished weld may be ground.
- Butt-welded cosmetic seams: These are often dressed for metal finishing, but you still need enough weld remaining to keep the seam sound.
- Plug welds and spot-weld replacements: Do not assume every nugget should be flattened. Some procedures require the nugget or reinforcement to remain.
- Lap and weld-bonded joints: Grinding through the weld or adhesive area can reduce the joint’s intended strength and corrosion protection.
- Structural sectioning welds: Follow the exact sectioning and finishing procedure. Do not improvise based on appearance.
Identify Steel or Aluminum
Steel and aluminum repairs do not share identical tooling or dust-control practices. For bare aluminum, use abrasives and hand tools reserved for aluminum work when the repair procedure requires them. Do not reuse steel-contaminated discs, wire brushes, files, or sanding tools on aluminum because embedded ferrous particles can contribute to contamination and corrosion.
Fine aluminum dust can also create a serious fire or explosion hazard when it accumulates or is collected with incompatible metal dust. Use the dust-control equipment and housekeeping method approved for aluminum work. Do not connect aluminum grinding to an ordinary shop vacuum or mixed-metal dust collector unless that system is specifically designed and approved for the task.
Warning: Never grind unidentified vehicle material. If you do not know whether a panel is mild steel, high-strength steel, press-hardened steel, aluminum, or a layered assembly, stop and check the repair information first.
Essential Tools for Grinding Welds Effectively
The best tool depends on the weld’s height, location, panel shape, and material. A 4.5-inch angle grinder removes a high bead quickly on an open area, but it also removes parent metal quickly. A die grinder, belt file, or small quick-change disc gives you more control around body lines, jambs, flanges, corners, and plug welds.
Recommended Grinding Tools
- Angle grinder: Useful for initial controlled passes on accessible weld crowns. Keep the guard and side handle installed and position the guard between you and the abrasive.
- Grinding wheel or fiber disc: Suitable for reducing a high bead only when the product is approved for the grinder, material, mounting system, working face, and contact angle.
- Air or electric die grinder: Helpful in corners, door jambs, curved seams, and other areas where a large disc could gouge the panel.
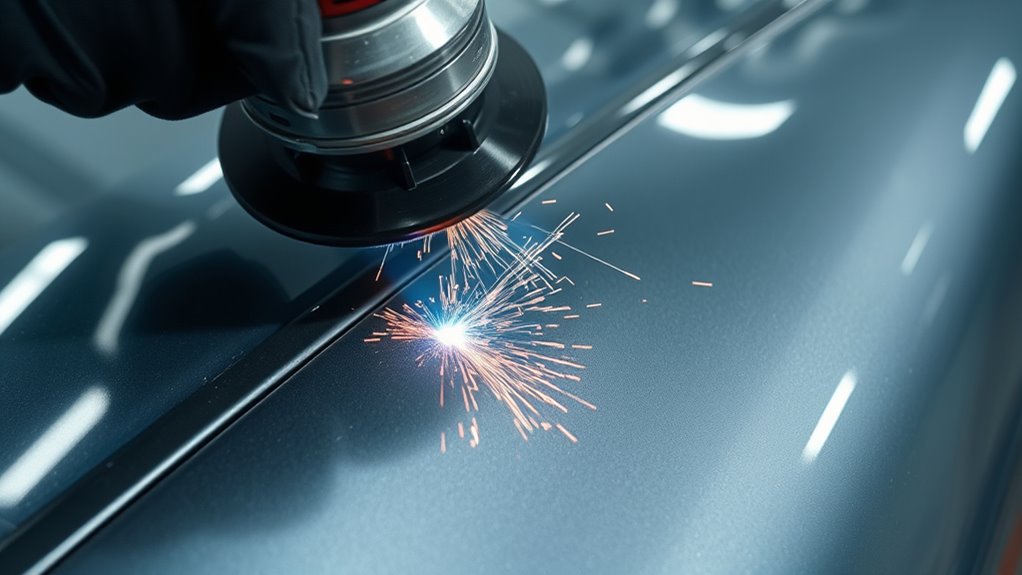
- Quick-change or roloc-style disc: Provides a small contact area for plug welds and tight repairs, but it can cut a groove quickly if tilted or held still.
- Flap disc: Useful once the bead is nearly level. Use light contact because a flap disc can still thin or dish sheet metal.
- DA sander: Best for refining grinder marks and feathering the surrounding repair after the weld crown is already low.
- Hand block and straightedge: Slower than power tools, but valuable for checking flat areas, panel transitions, and body lines.
- Small rotary tool: Suitable for tiny tabs and difficult corners. It is normally too slow for long seams.
Before mounting an abrasive, inspect it for cracks, chips, moisture damage, distortion, missing labels, contamination, or an unknown speed rating. OSHA’s portable powered-tool standard requires covered portable grinding wheels to be guarded, inspected, and used below their marked maximum operating speed.
Warning: Never use the side of a cutting wheel to grind a weld. Cutting wheels are made for edge cutting unless the manufacturer clearly marks them for another operation. Side-loading the wrong wheel can cause breakage and serious injury.
Tool Selection Tips
Start with the least aggressive abrasive that can lower the weld efficiently. A tall MIG bead may need a short rough-grinding stage. A low tack-welded seam may need only a small fiber disc, flap disc, or sander. On thin, curved, or flexible panels, favor control over speed.
The correct working angle depends on the abrasive design. Follow the label and manufacturer instructions rather than applying one angle to every wheel. Keep the contact area on the raised bead and avoid letting the disc edge run beside the weld.
| Tool or Abrasive | Best Use | When to Stop | Main Caution |
|---|---|---|---|
| Grinding wheel or coarse fiber disc | Reducing a clearly raised weld crown | When the bead is slightly above the panel | Fast cutting can gouge, heat, or thin the panel |
| Flap disc | Blending a bead that is already close to level | Before a low spot appears around the seam | Its broad contact patch can dish sheet metal |
| Quick-change disc | Tight spots, jambs, small patches, and permitted plug-weld finishing | As soon as the local high point disappears | The small contact area can dig a narrow groove |
| DA sander or hand block | Removing grinder marks and refining the transition | When the required scratch profile is reached | Not efficient for removing a tall bead |
Safety Gear Essentials
Grinding throws hot sparks, abrasive fragments, sharp metal particles, and fine dust. Wear safety glasses with side protection under a face shield, snug work gloves, hearing protection, long sleeves, and flame-resistant clothing. A face shield supplements eye protection; it does not replace safety glasses. OSHA’s eye and face protection standard addresses hazards from flying particles and requires side protection where flying objects are a risk.
Remove paint, seam sealer, filler, undercoating, and other coatings from the immediate work zone before welding or grinding whenever the approved procedure allows it. Use local exhaust or suitable dust extraction close to the source instead of relying only on room ventilation.
Respiratory protection must match the actual hazard. Metal particles, lead-containing coatings, chromate primers, galvanized coatings, fillers, adhesives, solvents, and paint vapors do not all require the same filter or cartridge. Review the coating’s safety data sheet and use a NIOSH-approved respirator selected for the contaminant. In workplaces, required tight-fitting respirators are covered by OSHA’s respiratory protection standard, including medical evaluation, training, and fit testing.
Note: A loose nuisance-dust mask is not a substitute for a properly selected and fitted respirator. Particulate filters also do not automatically protect against solvent or coating vapors.
Prepare Your Work Area for Safe Grinding
Good grinding starts with a controlled work zone. Stabilize the repair, remove contamination, protect the vehicle, manage the spark path, and light the panel from more than one angle. Preparation makes high spots easier to see and prevents sparks or dust from damaging nearby parts.
Clear the Work Surface
- Vacuum debris: Remove dust, chips, paper, rags, loose fasteners, and abrasive fragments from the work area.
- Strip nearby coatings: Remove paint, filler, seam sealer, undercoating, and adhesive residue close to the weld according to the repair procedure.
- Secure loose parts: Clamp patch panels or small removable pieces so they cannot chatter or move.
- Mark the raised bead: Use a contrasting marker across the weld and surrounding panel. The disappearing marks help show where the abrasive is cutting.
- Confirm backside access: Inspect the rear of the repair for wiring, insulation, foam, seam sealer, cavity wax, fuel lines, brake hoses, or trim.
Protect the Vehicle Before Grinding
Cover nearby glass, painted panels, chrome, trim, and interior surfaces with suitable spark-resistant protection. Grinding sparks can permanently pit glass and embed hot metal in paint. Move wiring looms, hoses, weatherstripping, and upholstery away from the spark path whenever possible.
Follow the OEM procedure for 12-volt battery disconnection, memory preservation, supplemental restraint systems, hybrid components, and electric-vehicle high-voltage isolation. Do not disconnect or service an EV high-voltage system unless you have the required training and equipment.
- Aim sparks away from the battery, fuel system, brake hoses, wiring, sensors, modules, and open cavities.
- Do not allow grinding dust to enter connectors, bearings, air intakes, or ventilation ducts.
- Protect the backside of glass and trim even when the grinder is several feet away.
- Check both sides of thin sheet metal because heat and sparks can affect hidden material behind the panel.
Fire Prevention Before Grinding
Move paper, cardboard, solvents, fuel containers, upholstery, dry leaves, shop towels, and other combustible material away from the work. Sparks can travel through panel gaps and ignite material that you cannot see from the grinding side.
For professional hot-work planning, OSHA’s welding and cutting fire-prevention standard uses 35 feet as a combustible-clearance benchmark where practical and requires suitable extinguishing equipment to be ready. Your workplace, insurer, fire code, or vehicle-repair procedure may impose additional rules for spark-producing grinding.
Note: Hidden foam, cavity wax, insulation, seam sealer, and undercoating may continue to smolder after visible sparks stop. Inspect the front, rear, underside, and nearby cavities after the job. Where a formal fire watch is required for associated hot work, follow its full duration and documentation requirements.
Proper Lighting Conditions
Use bright LED work lights from two directions. Side lighting creates shadows that reveal a remaining ridge, a grinder groove, panel waviness, and small pinholes. Move the lights as you work around wheel arches, rocker panels, door jambs, and body lines.
| Lighting Source | Positioning Tips | Benefit |
|---|---|---|
| LED work light | Aim it across the panel instead of directly at it | Shows high and low spots through shadow |
| Second movable light | Place it at a different angle and move it frequently | Reveals scratches and pinholes hidden by the first light |
| Light-colored background | Position it behind an edge or opening when practical | Improves contrast around panel gaps and edges |
How to Grind Welds Flush: Step-by-Step
Remove the weld crown in stages. The closer you get to the panel surface, the less aggressive your abrasive and pressure should become.
- Confirm that grinding is permitted. Check the OEM repair procedure, panel material, joint type, and weld type. Do not proceed if the repair information requires the weld nugget or reinforcement to remain.
- Inspect and repair the weld. Look for cracks, pinholes, porosity, undercut, missed tacks, contamination, and gaps. Reweld defects before finishing.
- Clean and expose the work area. Remove nearby coatings and contamination. Inspect both sides of the panel for hidden hazards.
- Protect the vehicle and work zone. Shield glass, paint, wiring, upholstery, hoses, sensors, and cavities. Remove combustibles and prepare suitable fire protection.
- Inspect the grinder and abrasive. Confirm the guard, handle, flange, arbor, and mounting hardware are correct. Verify that the abrasive is undamaged and rated above the grinder’s no-load RPM.
- Mark the bead and surrounding panel. Draw witness marks across the seam so you can see whether the abrasive is touching the bead or the parent metal.
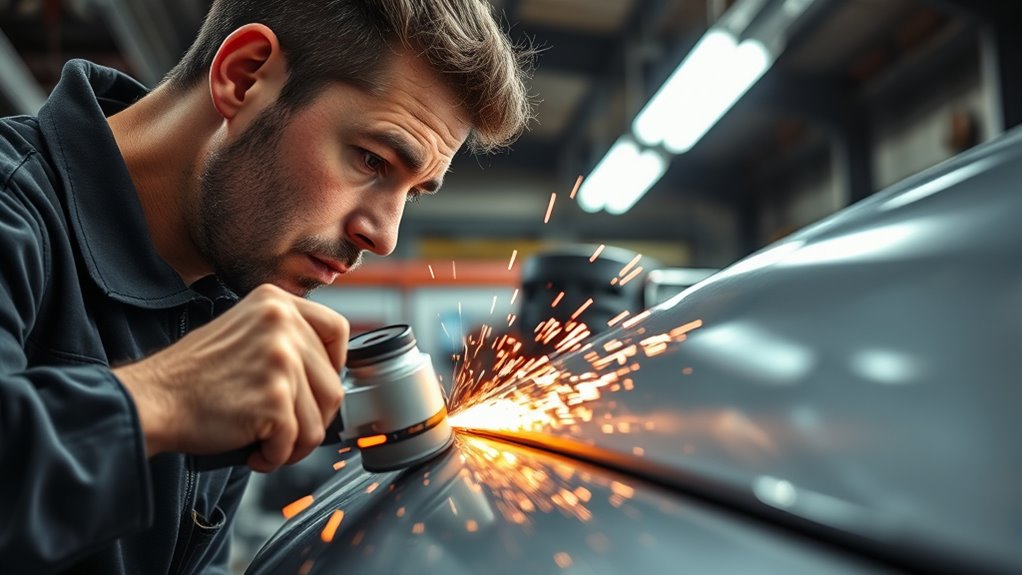
- Start on the highest points. Touch only the raised crown. Let the abrasive cut without forcing the tool into the panel.
- Use brief, overlapping passes. Move across the bead rather than following one edge for a long distance. Work several separated areas instead of finishing one hot point continuously.
- Pause and inspect frequently. Vacuum loose dust and check the surface with glancing light, fingertips, and a short straightedge. Never place bare skin on metal that may be hot.
- Switch abrasives early. Change from the aggressive disc while the bead remains slightly proud. Use a flap disc, quick-change disc, DA sander, or hand block for the final transition.
- Stop at the correct point. Stop when the raised crown is gone, the surrounding panel has not been lowered, and the seam remains solid. Do not chase a mirror finish with a grinding wheel.
- Sand to the required scratch profile. Follow the primer, filler, or coating manufacturer’s technical data sheet for the final grit.
- Clean and inspect again. Vacuum the area, wipe it with the cleaner approved for the coating system, and check for pinholes, undercut, thin spots, grinder grooves, and distortion.
- Repair defects before coating. Reweld soundly repairable pinholes or gaps. Do not bury a weak seam under body filler.
- Restore corrosion protection. Prime the bare metal and protect seams, flanges, backsides, and cavities in the sequence required by the OEM and coating system.
Pro Tip: Stop rough grinding while a narrow, slightly raised witness line is still visible. Let the finer abrasive remove the last high spot. This gives you more control and reduces the chance of cutting a low groove beside the weld.
Common Mistakes to Avoid When Grinding Welds
A clean finish depends as much on what you avoid as on the tool you choose. The following errors can weaken the repair, damage the panel, or create a fire hazard.
- Grinding without checking the repair procedure: A weld that looks cosmetic may be part of a structural or weld-bonded joint.
- Using too much pressure: Heavy force creates heat, wears the abrasive unevenly, and removes parent metal.
- Grinding beside the bead: Lowering the surrounding sheet metal creates a low area that cannot be corrected by more grinding.
- Holding the grinder still: Stationary contact creates grooves and concentrates heat in one small area.
- Using the wrong face of the abrasive: Side-loading a cutting wheel or using an abrasive outside its approved angle can cause wheel failure.
- Using a worn, glazed, damaged, or unrated disc: A dull abrasive makes you press harder, while an incorrect speed rating creates a breakage risk.
- Using steel-contaminated tools on aluminum: Shared abrasives and tools can contaminate aluminum and interfere with a proper repair.
- Ignoring the backside of the panel: Sparks can ignite hidden insulation, foam, cavity wax, carpet, wiring loom, or seam sealer.
- Grinding plug welds automatically: Some weld nuggets must remain at their specified size and height.
- Using filler to hide a weak seam: Filler is a finishing material, not a substitute for sound welding and adequate metal thickness.
- Leaving bare metal exposed: Ground steel can begin developing surface corrosion quickly in humid conditions.
Techniques to Minimize Heat and Warping During Grinding
Thin car body panels distort when concentrated heat expands a small area faster than the surrounding metal. Control heat by limiting contact time, using sharp abrasives, spreading the work across the seam, and stopping before the parent metal becomes the main cutting surface.
Optimal Tool Selection
Choose the smallest practical tool that still cuts efficiently. A large grinder may be useful on a straight, open seam, while a die grinder, belt file, or small disc gives you more control near edges and body lines. Do not use a small tool as an excuse to concentrate on one spot for too long.
Replace dull abrasives before they glaze or clog. A sharp disc removes the bead with less force and shorter contact. A worn disc often causes the operator to lean harder on the tool, increasing heat without improving control.
Controlled Grinding Techniques
- Work across the bead: Crossing the seam helps keep the abrasive centered on the raised crown.
- Use a light grip: Guide the tool and let the abrasive do the cutting.
- Alternate locations: Move to a cooler section instead of completing one point from start to finish.
- Use short contact: Lift the abrasive regularly so heat can spread and the disc can clear itself.
- Watch the witness marks: Marks disappearing from the surrounding panel show that you are cutting outside the bead.
- Monitor heat safely: Watch how far warmth spreads from the seam. Use an infrared thermometer when you need an objective comparison, but follow the tool’s limitations and do not rely on a universal temperature threshold.
- Let the panel cool naturally: Avoid suddenly quenching hot sheet metal unless the approved repair method specifically calls for it.
- Stop at the first sign of distortion: If the panel begins to oil-can, change shape, discolor unusually, or develop a growing low spot, stop and reassess the repair.
The best flush weld is not the shiniest one. It is the weld that remains sound while the surrounding panel stays full-thickness, cool, and correctly shaped.
Achieving a Smooth Finish: Sanding After Grinding
Sanding removes grinder marks and creates the surface profile needed for filler or primer. Begin sanding only after the weld crown is close to level. Sandpaper is inefficient for a tall bead and can heat a much wider section of the panel.
- Begin with the least aggressive grit that removes the remaining marks efficiently: A typical repair may begin around 80 grit after rough grinding, but the correct starting point depends on the surface and coating system.
- Refine the scratch pattern: Progress through finer abrasives such as 120 grit when needed rather than jumping directly from deep grinder marks to a fine finish.
- Use 180 grit only where the product instructions call for it: Primer, filler, epoxy, and self-etching products do not all require the same surface preparation.
- Use a block on flat panels and body lines: A block helps reveal a low groove that a soft DA pad may follow without correcting.
- Keep edges under control: Panel edges, door skins, wheel arches, and body lines lose thickness quickly.
- Vacuum between stages: Removing dust helps you see pinholes and prevents coarse particles from creating new scratches.
Use body filler only for minor surface leveling over a sound, properly prepared repair. Follow the filler and primer manufacturer’s technical data sheets for whether filler goes over bare metal, cured epoxy primer, or another approved substrate. Do not combine products based on guesswork.
What to Do If Your Welds Don’t Look Right?
If the ground weld looks uneven, stop removing metal until you identify the cause. Continued grinding rarely fixes an unknown problem and can turn a repairable defect into a thin or distorted panel.
| Issue | Likely Cause | Corrective Action |
|---|---|---|
| High bead remains | The raised crown has not been fully reduced | Make brief passes on the crown only, then change to a finer abrasive before reaching the panel. |
| Low groove beside the weld | The abrasive cut the parent metal | Stop grinding. Check panel thickness and shape, then use approved metal finishing and minimal filler only if the panel remains sound. |
| Pinholes appear | Porosity, contamination, or missed tacks | Clean the defect, reweld it using the approved process, allow it to cool, and inspect again. |
| Panel warps or oil-cans | Heat buildup or excessive metal removal | Stop, let the panel cool naturally, and correct the metal shape using an approved repair method before continuing. |
| Thin or flexible seam | Over-grinding or poor original fusion | Do not cover it with filler. Reassess whether the seam can be rewelded or whether the panel must be repaired again. |
| A plug-weld nugget remains proud | The weld may be designed to remain at its specified size | Check the OEM procedure before removing any more material. |
Safety Gear and Best Practices for Grinding
Use this final checklist immediately before starting the grinder. It focuses on conditions that can change after the repair has been welded, moved, or partially disassembled.
- Eye and face protection: Wear safety glasses with side protection under a full face shield.
- Hearing protection: Use suitable earplugs or earmuffs for the grinder and work environment.
- Respiratory and dust control: Use source extraction and hazard-appropriate, NIOSH-approved respiratory protection when required.
- Hand and body protection: Wear snug gloves, long sleeves, and flame-resistant clothing. Keep loose clothing, jewelry, and long hair away from rotating tools.
- Tool inspection: Check the guard, handle, cord or air hose, spindle, flanges, mounting hardware, and abrasive condition.
- Speed and application check: Confirm the abrasive rating exceeds the tool speed and that the disc is approved for the material and operation.
- Spark-path control: Aim sparks away from yourself, helpers, glass, wiring, batteries, fuel and brake components, upholstery, and painted surfaces.
- Fire protection: Remove or shield combustibles and keep suitable extinguishing equipment immediately available.
- Backside inspection: Check behind the panel before, during, and after grinding.
- Workpiece stability: Clamp removable parts securely and maintain a balanced stance with two-handed tool control.
Warning: Never grind near fuel vapors, leaking fuel lines, open solvent containers, explosive dust, damaged batteries, or an unidentified enclosed cavity. Stop immediately if you smell fuel or solvent or find unexpected heat, smoke, or smoldering material.
Final Steps Before Painting Your Car Body
Once the weld is level and the grinding marks are refined, protect the repair before moisture, fingerprints, or shop contamination reach the bare metal.
- Inspect the seam: Check for pinholes, cracks, undercut, low grooves, thin edges, sharp burrs, and distortion.
- Confirm the panel shape: Use side lighting, a straightedge, a flexible contour tool, and your fingertips to compare the repair with the surrounding panel.
- Vacuum the repair: Remove dust from the face, backside, seams, flanges, and nearby cavities. Do not spread metal dust through the vehicle with uncontrolled compressed air.
- Clean the substrate: Use the cleaner specified by the filler or coating manufacturer and allow it to flash completely.
- Apply the approved primer: Use epoxy primer, self-etching primer, or another corrosion-control product only where the complete coating system permits it.
- Apply filler only where needed: Use a thin layer for final leveling over the substrate approved by the filler manufacturer.
- Restore seam protection: Reapply seam sealer in the original locations and shapes or as directed by the repair procedure.
- Protect the backside and cavities: Apply primer, anti-corrosion compound, or cavity wax after refinishing and before trim installation when the procedure requires it. I-CAR’s guidance on corrosion protection during collision repair emphasizes following OEM timing and product requirements.
- Complete the final sanding: Follow the primer maker’s cure time and abrasive requirements before basecoat or topcoat.
- Perform the final fire check: Inspect nearby cavities, insulation, seam sealer, flooring, and the reverse side of the panel for heat or smoldering material.
A shiny bare-metal seam is not the finish line. A durable repair also needs correct panel shape, adequate metal thickness, sealed joints, backside protection, and a compatible coating system.
Frequently Asked Questions
Can you grind welds flush on a car body?
You can grind permitted welds flush on cosmetic body-panel repairs, but you should check the vehicle-specific repair procedure first. Use light, brief passes and change to a finer abrasive while the bead remains slightly high. Do not flatten structural or safety-critical welds unless the approved procedure directs you to do so.
What should I use to grind welds down?
Use a guarded angle grinder with a correctly rated grinding wheel or fiber disc for a high accessible bead. Use a die grinder, belt file, or quick-change disc for tight areas, then switch to a flap disc, DA sander, or hand block for blending. Follow the abrasive manufacturer’s approved angle and application.
Can you use a Dremel to grind welds?
A small rotary tool can dress tiny tabs, corners, and difficult edges, but it is normally too slow for long body seams. Use only accessories rated for the tool speed and avoid forcing a small bit into the weld, which can break the accessory or dig a narrow groove.
Does grinding down welds weaken them?
Grinding can weaken a weld when you remove required reinforcement, uncover poor fusion, thin the parent metal, or reduce a plug-weld nugget below its required size. Controlled dressing may be acceptable on a cosmetic seam, but the repair procedure determines whether the weld can be ground and how far.
How do you stop sheet metal from warping while grinding?
Use a sharp abrasive, light pressure, brief contact, and frequent cooling pauses. Alternate between separated parts of the seam instead of completing one point continuously. Stop if heat spreads widely, the panel begins to oil-can, or witness marks show that you are lowering the surrounding metal.
Should welds be flush before body filler?
The weld should be low enough that filler is used only for minor surface leveling. Filler should not hide tall beads, pinholes, cracks, poor fusion, thin metal, or deep grinder grooves. Finish and inspect the metal first, then apply filler over the substrate approved by the product manufacturer.
Can plug welds be ground flush?
Only grind a plug weld flush when the vehicle-specific repair procedure permits it. Some plug-weld or spot-weld replacement nuggets must retain a specified diameter, location, and reinforcement. Do not remove the visible crown only because it looks unfinished.
What grit should you use after grinding a body weld?
A common finishing sequence begins near 80 grit to remove grinder marks, followed by 120 grit and sometimes 180 grit. Treat that only as a starting point. The filler, primer, or coating manufacturer’s technical data sheet should determine the final scratch profile.
How do you know when to stop grinding a weld?
Stop when the raised crown no longer creates a high ridge, the surrounding panel has not been lowered, and the seam remains solid and free of pinholes. Change to sanding before the bead becomes completely invisible. A faint seam line is safer than a polished low spot.
Conclusion
Grinding welds flush on a car body requires more judgment than force. Confirm that the repair procedure allows the weld to be dressed, identify the panel material and joint type, protect the vehicle from sparks, and use a guarded tool with the correct abrasive. Reduce only the raised crown, spread the work across the seam, and change to finer abrasives early.
After the weld is level, inspect it for defects and lost thickness before applying filler or primer. Finish by restoring the coating system, seam sealer, backside protection, and cavity treatment required for the repair. A successful result looks smooth without sacrificing the strength, shape, or corrosion resistance of the panel.
Sources
- OSHA 1910.243, Guarding of Portable Powered Tools – supports portable-grinder guarding, wheel inspection, mounting, and maximum-speed checks.
- OSHA 1910.133, Eye and Face Protection – supports eye and face protection for flying-particle hazards.
- OSHA 1910.134, Respiratory Protection – supports hazard-based respirator selection, medical evaluation, training, and fit testing in covered workplaces.
- OSHA 1910.252, Welding, Cutting, and Brazing – supports combustible control, extinguishing equipment, fire-watch precautions, and hidden-fire checks during associated hot work.
- OSHA, Hazards Associated With Aluminum Grinding – supports precautions for aluminum dust, combustible-metal hazards, and incompatible material contamination.
- I-CAR, When to Apply Corrosion Protection During the Repair Process – supports OEM-specific use and timing of primer, seam sealer, foam, adhesives, and cavity wax.


