Thin car panels warp fast because sheet metal cannot absorb much heat before it expands, shrinks, and pulls out of shape. To prevent distortion when welding car panels, use the least heat that will make a sound weld, keep every weld short, spread the welds around the panel, and let the metal cool between tacks. Good fit-up matters just as much as welder settings.
Quick Answer
Prevent car-panel distortion by making tight-fitting joints, using many small tack welds, skipping around the seam, cooling between tacks, and avoiding one long continuous bead. Use copper backing where possible, keep the panel clamped, and follow the vehicle maker’s repair procedure for structural or high-strength steel panels.
Key Takeaways
- Do not run a continuous bead on thin body panels. Tack, skip, cool, and repeat.
- Tight gaps reduce burn-through, filler buildup, and heat input.
- Copper backing, clamps, magnets, and temporary braces help hold shape while pulling heat away.
- Remove paint, zinc coating, undercoating, seam sealer, and solvent residue before welding.
- For structural panels, aluminum, or high-strength steel, use the OEM repair procedure before choosing a weld method.
At a Glance
| Time Required | 30 minutes to 2 hours for a small patch after cutting, cleaning, and fitting |
| Difficulty | Moderate to advanced, because thin panels burn through and warp easily |
| Tools Needed | MIG or TIG welder, clamps, copper backing, grinder, wire brush, IR thermometer or temperature sticks, PPE, fire extinguisher |
| Cost | Usually low if you already own the welder, but expect added cost for wire, gas, discs, primer, seam sealer, and PPE |
Warning: Welding car panels can start fires and create hazardous fumes. Remove interior trim, sound deadener, seam sealer, undercoating, paint, zinc coating, and solvent residue near the weld. Disconnect the battery when required, protect fuel lines and wiring, keep a fire extinguisher nearby, and use eye, hand, skin, and respiratory protection suited to the job.
Immediate Steps to Prevent Distortion When Welding Car Panels
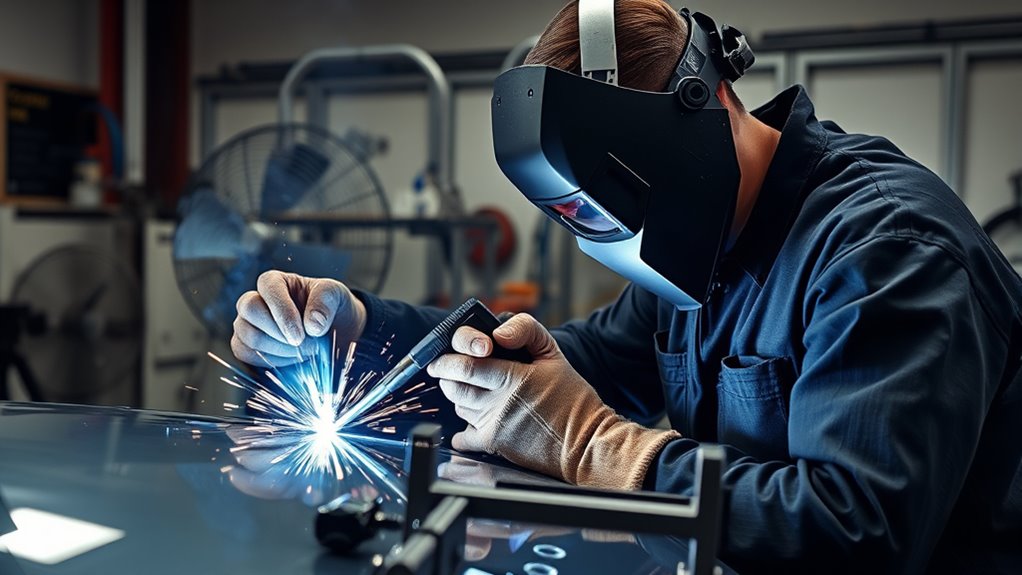
Start by treating the panel as thin sheet metal, not as heavy fabrication steel. The goal is to join the metal without letting one area get hot enough to shrink hard as it cools.
- Clean both sides of the weld area. Remove paint, rust, zinc coating, adhesive, undercoating, seam sealer, and oil. OSHA notes that surfaces should be cleaned of coatings that could create toxic exposure during welding.
- Make the gap as tight as possible. A wide gap forces you to add more filler metal, which adds heat and shrinkage.
- Clamp the panel in its final shape. Use sheet-metal clamps, locking pliers, magnets, or a simple brace so the patch cannot move as it heats.
- Practice on scrap first. Use scrap from the same panel thickness and make test tacks until you can fuse the joint without burn-through.
- Tack, skip, and cool. Place a tack, move several inches away, place another tack, then move again. Do not weld in a straight line from one end to the other.
For most non-structural steel body patches, short-circuit MIG with solid wire and shielding gas is easier to control than self-shielded flux core. TIG can also work well, but it requires more hand control. For structural panels, high-strength steel, or aluminum, follow the vehicle maker’s repair procedure before welding.
Note: If the repair area is near airbags, sensors, wiring harnesses, fuel lines, EV battery cables, or structural reinforcements, stop and check the OEM repair information. Some panels must be bonded, riveted, spot welded, or replaced as a section instead of welded with a continuous seam.
Understanding Welding Distortion and Its Causes
Welding distortion happens because metal expands when it gets hot and contracts when it cools. On a thin car panel, that small movement can pull a flat surface into a wave, crown, low spot, or oil-can shape.
The biggest distortion causes are:
- Too much heat in one area: long beads, slow travel, high voltage, or too much wire speed can overheat the sheet.
- Poor fit-up: gaps make you bridge the joint with filler, which adds heat.
- Weak clamping: loose panels shift as they expand and shrink.
- Wrong weld sequence: welding from one end to the other concentrates shrinkage in one direction.
- Over-grinding: heavy grinding after welding heats and thins the panel, which can add more waves.
Thin materials are vulnerable because they have little mass to absorb heat. A roof skin, quarter panel, door skin, or floor patch can move with only a few overheated tacks. That is why distortion control starts before the arc is struck.
Safety and Surface Prep Before You Weld
Before welding, look beyond the outer skin. Heat travels through the panel and can ignite materials on the back side. Check the inside of the quarter panel, rocker, door, floor, or trunk area before you begin.
- Remove flammables: carpet, foam, insulation, paper, plastic clips, trim, and sound deadener.
- Clean coatings: paint, primer, seam sealer, undercoating, cavity wax, zinc coating, and solvent residue can contaminate the weld and create harmful fumes.
- Ventilate the area: use fresh air movement and local fume extraction when possible. Welding outdoors or in an open shop does not always provide enough ventilation.
- Protect your eyes and skin: use a welding helmet with the correct shade, safety glasses under the hood, gloves, sleeves, and hearing protection when grinding.
- Keep a fire watch: check the back side of the panel during and after welding. Keep water or an extinguisher nearby, but do not spray the weld area unless there is a fire.
Be especially careful with galvanized steel. The zinc layer on galvanized steel should be removed from the weld zone, and the area must be ventilated because heated zinc can create harmful fume.
The Importance of Heat Management to Prevent Distortion
Heat management is the main skill in thin-panel welding. The weld only needs enough heat to fuse the edges. Anything beyond that makes the surrounding metal expand and shrink more than needed.
Use these heat-control habits:
- Use short tacks instead of a bead. Make a tack, stop, and let the area cool.
- Skip around the panel. Move to the opposite side or a distant part of the seam after each tack.
- Let the panel cool between rounds. The surface should stay warm, not hot enough to discolor a large area.
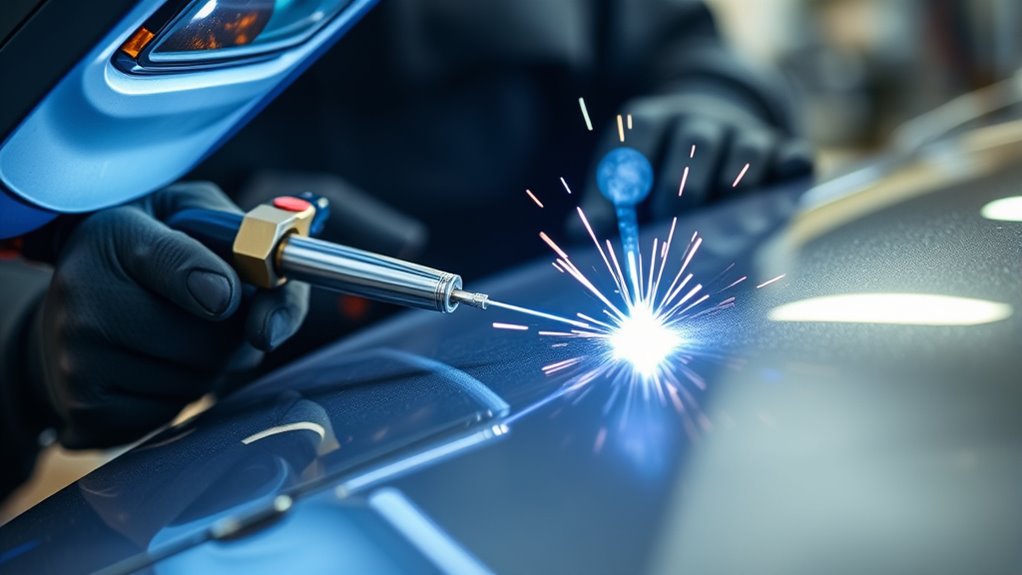
- Use copper backing where possible. Copper supports the puddle and pulls heat out of the joint.
- Do not chase gaps with more weld. Stop, refit, or add a small patch if the gap is too wide.
The safest weld for a thin car panel is not the longest bead you can run. It is the smallest series of sound tacks that joins the metal while keeping the panel cool and stable.
Do not use your bare hand as a temperature gauge. Use an infrared thermometer, temperature stick, or simple timing routine. If the panel is getting too hot to work near comfortably, pause and let it cool naturally.
Choosing Welding Techniques to Minimize Distortion
The best welding technique depends on the panel, metal type, and repair location. For outer sheet-metal patches, you usually want small, controlled tacks. For factory-style joints, plug welds or resistance spot welds may be required. For structural areas, follow the OEM procedure.
Use Tack Welding and Stitch Welding
Place the first tacks at key points to lock the patch in position. Then fill the seam slowly by spacing the tacks apart.
- Place one tack at the center of the seam.
- Place the next tack near one end.
- Place another tack near the opposite end.
- Keep adding tacks in a scattered pattern.
- Let each area cool before placing a tack beside it.
Once the tacks are about 1/2 inch to 1 inch apart, connect them with very short welds only if the repair calls for a continuous welded seam. Many panel repairs do not need a full seam, and some should not receive one.
Use Back-Step Welding When You Need Short Seams
Back-step welding means each small weld is made opposite the overall direction of progress. For example, if you are moving across the panel from left to right, each tiny weld can be made from right to left. This helps spread shrinkage instead of pulling the panel in one direction.
Avoid Self-Shielded Flux Core on Thin Visible Panels
Self-shielded flux core is useful for some outdoor and thicker steel jobs, but it is usually a poor first choice for thin visible car panels. It tends to create more spatter, more smoke, and more heat than a well-set short-circuit MIG process with shielding gas. If you are learning, review basic flux core welding tips, but use the process that fits the vehicle repair and panel thickness.
How to Prepare Materials: Fit-Up and Alignment
Fit-up is where most distortion problems are either prevented or created. A clean, tight seam needs less filler metal. Less filler means less heat. Less heat means less shrinkage.
Use this fit-up checklist before welding:
- Cut slowly and test fit often. Sneak up on the final size instead of cutting the patch too small.
- Keep the gap consistent. A near-zero gap or very small uniform gap is easier to weld than an uneven opening.
- Match the panel contour. Shape the patch before welding, not after.
- Clamp every loose edge. Movement during welding causes misalignment and extra grinding.
- Clean both sides. Contamination on the back side can burn into the puddle.
If you use a flanging tool, keep the flange shallow and even. If you make a butt joint, use panel clamps or small magnets to hold the edges flush. Before welding galvanized material, remove coating from the weld zone and clean away zinc residues so the weld is cleaner and fumes are reduced.
| Step | Action | Why It Prevents Distortion |
|---|---|---|
| Cutting | Trim the patch in small steps | Prevents wide gaps that need extra weld metal |
| Cleaning | Remove coatings from both sides | Reduces fumes, porosity, and dirty welds |
| Clamping | Hold edges flush and steady | Stops the panel from shifting as it heats |
| Tacking | Tack opposite sides first | Balances shrinkage across the repair |
Effective Cooling Techniques to Mitigate Distortion
Cooling helps, but it must be controlled. The aim is to keep the whole panel from overheating, not to shock the weld while it is still molten. Let each tack freeze fully, then cool the surrounding area as needed.
Compressed Air Cooling
Compressed air works well when used in short bursts after a tack has solidified. Aim the air around the weld area, not directly into a molten puddle. This helps bring the surrounding sheet metal back down in temperature before the next tack.
Keep the nozzle moving. Holding air in one spot for too long can cool one area faster than the surrounding metal, which may create a new pull in the panel.
Damp Rag Application
A damp rag can help draw heat from the area around a weld, but do not soak the seam or press a wet rag onto molten metal. Use it as a gentle heat sink near the repair after the tack has cooled enough to solidify.
| Step | Action |
|---|---|
| 1 | Make a tack and let it solidify. |
| 2 | Place the damp rag near the weld, not on a glowing bead. |
| 3 | Move to another part of the seam while the area cools. |
| 4 | Check temperature with an IR thermometer or temperature stick before welding nearby. |
Heat Sink Utilization
Copper is one of the most useful heat sinks for body-panel welding. A copper spoon or copper backing plate supports the molten puddle and helps prevent burn-through. Weld metal will not stick to copper the same way it sticks to steel, so it is useful behind small holes and butt joints.
Commercial heat-blocking pastes can also help protect nearby areas, but test them on scrap first. Keep any product away from the joint itself unless the label says it is safe near welding. Contamination can cause porosity.
Pro Tip: Keep a scrap strip from the same panel or donor metal. Before you weld the car, test your wire speed, voltage, travel speed, and cooling pattern on that scrap. If the test strip warps, the car panel will warp too.
How to Use Fixtures and Bracing to Stabilize Car Panels During Welding
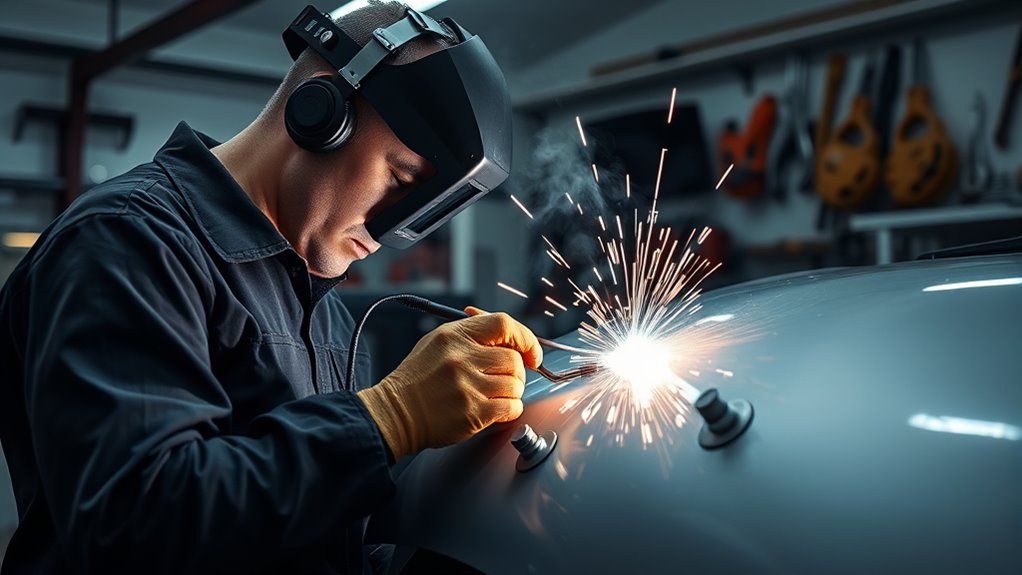
Clamping and bracing do not remove the need for heat control, but they keep the panel from moving while you weld. This is especially helpful on rocker patches, floor pans, quarter-panel sections, door skins, and frame-related repairs.
Use fixtures and braces this way:
- Clamp close to the seam. The closer the clamp is to the joint, the less the edge can lift.
- Support large flexible panels. A wide panel can sag or twist if it hangs unsupported.
- Use temporary braces on openings. Door openings, trunk openings, and frame sections can move when metal is cut out.
- Check diagonal measurements. Measure before cutting, after tacking, and after welding.
- Do not over-restrain thin skin panels. Heavy restraint can hide movement until the clamps come off, then the panel springs.
For frames or structural members, do not rely on guesswork. Fillet size, weld type, sectioning location, and heat input all matter. General fillet weld size guidance can help explain weld sizing, but the vehicle maker’s repair procedure is the final authority for structural repairs.
Controlled Welding Strategies to Avoid Distortion
A controlled welding strategy is a planned sequence. You decide where each tack goes before you start, then you follow the plan instead of reacting to the puddle.
- Start with anchor tacks. Place tacks at the center and ends to hold the patch flush.
- Divide the seam into zones. Work one tack per zone, then rotate to another zone.
- Keep tacks small. A tack should fuse the joint without making a wide heat stain.
- Wait before welding beside a hot tack. Adjacent welds compound heat and shrinkage.
- Planish lightly if needed. Small hammer-and-dolly work can relieve shrinkage as you go, but only if you have access and know where the metal moved.
- Grind slowly. Heavy grinding can warp a panel after the welding is done.
The main idea is simple: put heat in one small area, then leave that area alone until it cools. Proper welding technique is not just about bead appearance. On car panels, it is about controlling shrinkage.
Monitoring Real-Time Distortion Risks During Welding
You do not need a factory weld camera to monitor distortion on a car panel. You need to watch the panel shape, heat pattern, and fit-up as you work.
Heat Monitoring Techniques
Use an infrared thermometer, temperature sticks, or a consistent cooling routine. Also watch the size of the heat-affected area. If the blue or straw-colored heat mark spreads far from the weld, you are putting too much heat into the panel.
Slow down the job, not the travel speed. A slower job with more cooling time usually makes a flatter panel. A slower travel speed during the weld usually adds heat and makes warping worse.
Real-Time Measurement Tools
For most garage repairs, the best measurement tools are simple:
- Straightedge: shows crowns, dips, and waves.
- Contour gauge: helps compare the repair area to the original panel shape.
- Diagonal tape measurements: help check square frames, braces, and openings.
- Marker lines: show whether the patch is creeping as you tack.
- IR thermometer: helps prevent welding too close to a hot tack.
Advanced shops may use measuring systems, frame racks, or 3D tools, but a careful visual check after every few tacks is enough for many small non-structural patch repairs.
Adjusting Welding Parameters
| Parameter | Distortion Risk | Fix |
|---|---|---|
| Voltage too high | Wide puddle and extra heat | Lower voltage and test on scrap |
| Wire speed too high | Tall cold tacks or burn-through | Tune until the tack is flat and fused |
| Travel too slow | Overheated panel | Use quick tacks, then stop |
| Welding in order | Panel pulls in one direction | Skip around and balance the tacks |
How to Troubleshoot Panel Warping While You Weld
If the panel starts moving, stop welding. Adding more weld usually makes the distortion worse. Let the metal cool, inspect the shape, and fix the cause before continuing.
| Problem | Likely Cause | What to Do |
|---|---|---|
| Panel oil-cans | Weld shrinkage pulled the panel tight | Stop welding, cool, check shape, and planish only if you can support the back side |
| Burn-through | Gap too wide, settings too hot, or travel too slow | Use copper backing, lower heat, shorten tacks, and improve fit-up |
| Patch sinks below panel | Weak clamping or uneven tacking | Cut tacks only if needed, realign, clamp closer, and restart with anchor tacks |
| Porous welds | Paint, zinc, seam sealer, oil, or poor shielding gas coverage | Clean both sides, improve gas coverage, and grind out porous tacks before continuing |
How to Keep Your Frame Aligned After Welding
Frame and structural repairs need more care than outer body patches. If the vehicle has frame damage, door-opening movement, suspension pickup-point damage, or advanced high-strength steel sections, use a proper measuring system and OEM procedures.
For basic square frames, braces, or non-critical supports, use these steps:
- Measure diagonally before welding. Record the numbers before you cut or tack anything.
- Support the chassis evenly. Uneven jack stands can twist a frame or body opening.
- Add temporary braces. Braces across door openings or crossmembers help hold shape while metal is removed.
- Weld in a balanced sequence. Alternate sides and locations so shrinkage does not pull the frame out of square.
- Measure again after every welding round. Do not wait until the weld is finished to find movement.
If alignment changes after welding, do not hide it with filler or force the panel into place. A structural misalignment can affect panel gaps, suspension geometry, crash performance, and safety.
Post-Weld Finishing Without Adding More Warp
Many panels are warped after welding because of grinding, not only because of the weld itself. Grinding creates heat, and thin metal reacts quickly.
- Grind in short passes. Move around and let the area cool.
- Do not thin the panel. Stop as soon as the weld is level enough for the repair plan.
- Use a hammer and dolly carefully. Light planishing can flatten small shrink spots, but heavy hammering stretches metal.
- Seal the repair. After welding and finishing, apply corrosion protection, primer, seam sealer, and cavity wax where appropriate.
- Check the back side. Bare steel behind a patch will rust if it is not protected.
A flatter weld with less grinding is usually better than a tall weld that needs heavy cleanup. Aim for small, consistent tacks from the start.
Frequently Asked Questions
How do you stop distortion when welding car panels?
Stop distortion by controlling heat. Use tight fit-up, small tack welds, a skipped welding pattern, copper backing, and cooling pauses. Do not run a continuous bead on thin sheet metal unless the repair procedure specifically calls for it.
How do you weld body panels without warping?
Fit the patch tightly, clamp it flush, place tack welds far apart, and let each area cool before welding nearby. Keep the welder set low enough for quick fusion without burn-through. Practice on same-thickness scrap before welding the car.
Should you use compressed air or a wet rag after welding thin panels?
You can use compressed air or a damp rag to cool the surrounding area after a tack has solidified, but do not blast air into a molten puddle or soak a glowing weld. For structural, aluminum, or high-strength steel repairs, follow the OEM procedure.
What is the best welding process for thin car panels?
For many non-structural steel patch panels, short-circuit MIG with solid wire and shielding gas is the easiest process to control. TIG can work well for skilled welders. Factory-style joints may require resistance spot welds or plug welds. Always follow the vehicle maker’s procedure for structural panels.
When welding a square frame, how do you prevent distortion?
Measure diagonally before welding, brace the frame, support it evenly, and weld in a balanced sequence. Alternate sides instead of welding one side completely. Recheck measurements after every round of welding.
What is one simple way to minimize distortion on structural panels?
The simplest way is to reduce heat input. Use the approved weld type, make short welds, skip around, and let the panel cool between welds. For structural panels, do not guess. Use the OEM repair information for weld size, location, and method.
Conclusion
To prevent distortion when welding car panels, keep the repair clean, tight, clamped, and cool. Use short tack welds, skip around the seam, support the panel with copper or fixtures, and stop often to check shape and temperature. The best repair is not the fastest weld. It is the one that joins the panel while preserving its original contour, strength, and corrosion protection.
Sources
- OSHA Welding, Cutting, and Brazing: Hazards and Solutions — welding hazards, PPE, burns, electric shock, eye damage, and fume risks
- OSHA Fact Sheet: Controlling Hazardous Fume and Gases during Welding — welding fumes, coating removal, ventilation, and respiratory protection
- OSHA Fact Sheet: Eye Protection against Radiant Energy during Welding and Cutting — welding helmet, filter lens, and eye protection guidance
- NIOSH: Welding, Brazing, and Thermal Cutting — occupational health guidance for welding and thermal cutting operations
- TWI Job Knowledge: Distortion, Causes and Prevention — weld distortion principles, shrinkage, and distortion-control concepts


