
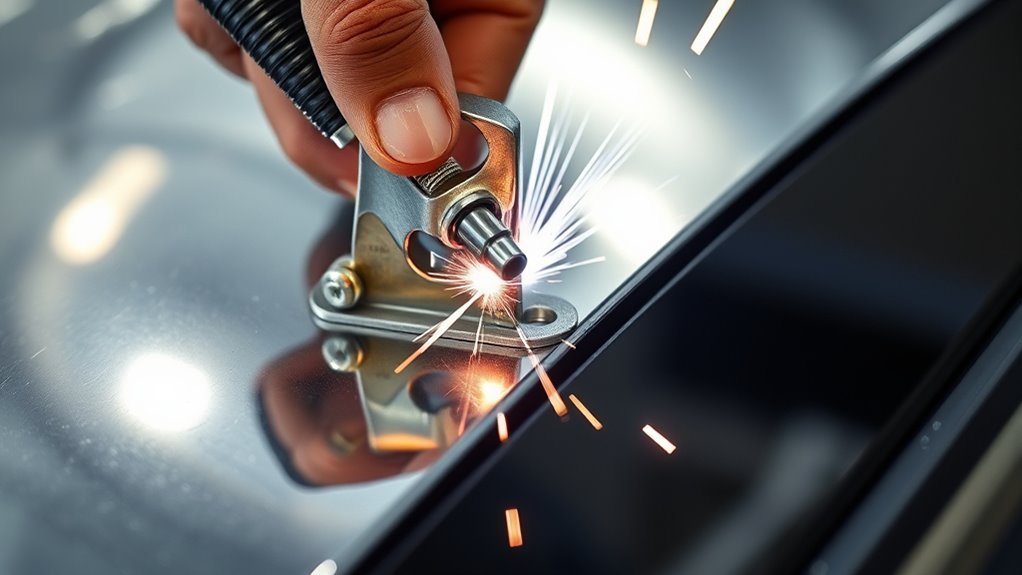
Using welding clamps on auto body panels is about more than holding metal in place. The right clamp setup keeps thin sheet metal flush, controls the weld gap, reduces panel movement, and gives you enough access to tack weld without overheating the area. Before you weld, always confirm the repair method in the vehicle maker’s repair information, because modern collision repairs may call for plug welds, squeeze-type resistance spot welds, rivets, adhesive bonding, or a combination of methods.
Quick Answer
To use welding clamps on auto body panels, clean the metal, dry-fit the panel, choose clamps based on the joint type, and place them close enough to hold the seam flat without blocking your tack welds. Use short tack welds, recheck the gap often, and avoid forcing a crooked panel into place with clamp pressure alone.
Key Takeaways
- Choose clamps by joint type, not by a simple panel-thickness rule.
- Butt-weld panel clamps help keep replacement panels edge-to-edge and surface-to-surface.
- Clamp pressure should hold the panel steady, not force a poor-fitting patch into shape.
- Short tack welds, cooling time, and a steady gap matter more than heavy clamping force.
- For collision repairs, always follow OEM repair procedures before choosing welding, plug welding, rivets, or adhesive bonding.
At a Glance
| Time Required | 30 to 90 minutes for cleaning, fitting, clamping, and tack welding a small patch panel |
| Difficulty | Moderate; thin sheet metal needs careful fit-up and heat control |
| Tools Needed | Butt-weld panel clamps, locking sheet-metal clamps, blind panel holders or Clecos, marker, straightedge, grinder or abrasive tools, welder, PPE, and fire extinguisher |
| Cost | Low if you already own welding gear; clamp cost varies by style, count, and brand |
Warning: Welding on a vehicle can create fire, fume, burn, eye, and electrical hazards. Remove nearby flammable materials, use proper PPE and ventilation, keep a fire extinguisher nearby, and place the welder work clamp close to the weld area. I-CAR notes that voltage or current spikes can damage sensitive vehicle electronics, so follow the repair procedure before welding on a vehicle.
Essential Steps for Preparing Auto Body Panels

Good clamping starts before the first clamp touches the panel. If the metal is dirty, rusty, painted, or poorly trimmed, even the best clamps will not give you a clean weld seam.
- Check the repair procedure first. For collision repair, use the vehicle maker’s service information or a trusted OEM repair source. Some panels are welded, some are bonded, and some use a mix of welds, rivets, and adhesive.
- Remove paint, rust, seam sealer, adhesive, and undercoating from the weld area. Welding through coatings can create contamination, porosity, fumes, and weak welds.
- Dry-fit the replacement panel. Hold it in place by hand first, then use clamps only after the shape and trim line are close.
- Mark reference points. Use body lines, flanges, trim holes, and factory spot-weld locations to confirm the panel has not shifted.
- Trim slowly. A tight, even edge is easier to weld than a patch with random gaps. Do not rely on clamp force to close a bad cut.
- Drill only where the repair plan calls for it. Holes may be needed for Clecos, blind panel holders, plug welds, or rivets, but they should not be added randomly.
For thin auto body sheet metal, fit-up and heat control are closely linked. MillerWelds explains that thin metal welding is prone to warping, burn-through, and excessive heat-affected zones, so your clamps should support a careful tack-welding sequence rather than encourage long weld beads.
A clamp does not make a bad joint good. It only holds a well-fitted joint steady long enough for you to weld it correctly.
Choose the Right Welding Clamps for Auto Body Panels
The best clamp depends on the joint, panel shape, and repair method. A common mistake is treating 1/8 inch and 3/16 inch as general clamp sizes for thin or heavy panels. In body repair, those sizes more often relate to temporary fastener holes or panel-holder systems, not a universal rule for clamp choice.
Products Worth Considering

Value Pack: The package includes 24 packs of butt welding clamps, enough quantity to meet your daily needs and replacements. Each butt welding clamps is individually wrapped in a small bag, convenient to carry and use.

16-Pack Welding Clamps Set: Includes 16 butt welding clamps designed for precise edge-to-edge welding, ideal for body repair, floor patching, door skins, and sheet metal alignment.

Adaptability: Our butt welding clamps are suitable for both straight panels or curved panels. Maintains 0.40" gap between panels for edge-to-edge welding.They will work well in these 2 kinds of p
Butt-Weld Panel Clamps
Use butt-weld or intergrip-style panel clamps when two panel edges need to meet edge-to-edge. These are useful for patch panels, rust repair, and restoration work where you want the outside surfaces flush. Some intergrip panel clamps are designed to leave about a 0.040-inch gap for weld penetration, but always match the gap to your clamp system, wire size, process, and panel thickness.
Locking Sheet-Metal Clamps
Use locking sheet-metal clamps, panel clamps, and low-profile vise-grip style clamps for flanges, lap joints, curved edges, and areas where a butt-weld clamp will not fit. They are helpful on quarter-panel flanges, floor patches, rocker repairs, and small bracket areas.
Blind Panel Holders and Clecos
Blind grip panel holders and Clecos are useful when you need repeatable test fitting. They hold panels through drilled holes, so use them only where the holes will later be plug welded, riveted, hidden, or repaired according to the job plan.
Magnets and Copper Backers
Small welding magnets can help during dry fitting, but keep them away from the arc if they affect the weld puddle or block access. A copper backer can help support a small edge while tacking, but it is not a substitute for a properly trimmed patch.
Note: On modern vehicles, clamp choice is only one part of the repair. The OEM procedure may specify squeeze-type resistance spot welds, plug welds, rivets, adhesive, or a specific weld location. Do not change the attachment method just because a clamp makes another method easier.
How to Position and Adjust Your Clamps for Best Results
Correct clamp placement keeps the panel flat while still leaving room for your torch, electrode, or weld gun. The goal is even contact without denting the sheet metal or blocking your tack-weld path.
- Start at fixed reference points. Align body lines, door gaps, trim openings, and factory edges before tightening the clamps.
- Clamp from the center outward on long seams. This helps spread tension instead of pushing the panel to one side.
- Keep clamps close to the seam, but not on top of your tack location. You need enough room to weld without hitting the clamp.
- Tighten in small steps. Over-tightening can crown the panel, flatten a body curve, or create a high-low edge.
- Use more clamps on larger panels. A long patch panel needs several holding points so the gap stays even while the first tack welds cool.
- Recheck after each tack group. Heat shrink can pull the seam, so verify the gap, surface height, and body line before adding more welds.
Pro Tip: If the panel moves as soon as you tack it, add more clamps and reduce the distance between tack welds. Do not simply turn up clamp pressure, because that can bend the panel and hide poor fit-up until the clamps come off.
Products Worth Considering

ANGLED REACH: These pliers are ideal for body shop repairs, featuring an angled design that easily reaches tight spaces like doorposts, trunk edges, hatchbacks, and triangular windows with precision and ease.

Adaptability: Our butt welding clamps are suitable for both straight panels or curved panels. Maintains 0.40" gap between panels for edge-to-edge welding.They will work well in these 2 kinds of p

Product Purpose: Butt welding clamps set includes 8 welding corner square welder clamps, which can be used to make precision butt welds and edge-to-edge welds for patch repairs in floors, wings, door skins, fabricating, and re-skinning projects
Tips for Maintaining a Tight Gap and Preventing Blow-Through

A tight, even gap gives you a better chance of making a clean weld on thin sheet metal. A wide or uneven gap forces you to add more heat and filler, which raises the risk of burn-through and warping.
- Use butt-weld clamps for edge-to-edge seams. They help hold the outside surfaces flush while maintaining a controlled gap.
- Do not leave a random gap. If the gap changes from tight to wide along the seam, stop and re-trim the panel before welding.
- Tack in short bursts. Make a tack, move to another area, and let the first tack cool before returning.
- Avoid long continuous beads on thin panels. Long beads put too much heat into the sheet metal and can pull the panel out of shape.
- Remove butt-weld clamps after enough tack welds hold the panel. Then finish the areas where the clamp tabs were sitting.
- Use a copper backer only where it helps. It can support a small area, but it should not cover up poor joint fit.
If you keep burning through near the seam, the problem is usually too much heat, too wide a gap, poor panel fit, contaminated metal, or a tack sequence that keeps heat concentrated in one place.
Safety Checks Before You Strike an Arc
Auto body welding often happens close to paint, seam sealer, carpet, insulation, wiring, fuel lines, trim panels, and electronics. Take a few minutes to control those hazards before you start.
- Clear the work area. OSHA requires precautions when welding near combustible materials, including shielding or moving combustibles where needed.
- Use ventilation and PPE. OSHA lists welding hazards such as fumes, UV radiation, burns, eye damage, electrical shock, cuts, and crushed toes and fingers.
- Protect vehicle electronics. Follow the OEM repair information for battery disconnects, SRS precautions, and module protection. I-CAR recommends keeping the current path short by placing the work clamp close to the weld area on the same panel when welding.
- Remove nearby trim and insulation. Heat can travel through thin sheet metal and ignite material on the back side of the panel.
- Keep a fire watch. Check the back side of the repair area during and after welding.
Warning: Never weld over closed cavities, coated panels, fuel-system parts, SRS components, or high-voltage vehicle parts unless the OEM procedure and safety steps clearly allow it. If you are unsure, stop and verify the repair information first.
When to Clamp, Weld, Plug Weld, or Bond the Panel
Clamps hold the panel, but they do not decide the repair method. That decision should come from the vehicle maker’s procedure, especially on late-model vehicles with high-strength steel, aluminum, adhesives, rivets, and mixed-material construction.
- Use butt welding when the repair procedure and panel design call for an edge-to-edge seam, such as many patch-panel repairs on older vehicles.
- Use plug welds when replacing factory spot welds and the procedure allows plug welding instead of resistance spot welding.
- Use panel bonding adhesive only where the OEM procedure allows it and the adhesive maker’s standard operating procedure is followed. 3M’s panel bonding repair procedure includes steps for panel preparation, cleaning, adhesive application, and installation.
- Use rivets or rivet-bonding only when specified by the repair information.
- Do not substitute attachment methods. A repair that looks neat can still be unsafe if the wrong joining method is used.
For restoration and non-structural patch work, you may have more flexibility. For collision repairs, structural areas, late-model body sections, and anything near crash-load paths, follow the OEM method.
Troubleshooting Common Clamping Problems
If the panel shifts, gaps open, or the seam starts to burn through, stop and correct the setup before continuing. Most clamping problems are easier to fix before the panel is fully welded.
- The panel moves after the first tack: Add more clamps, shorten the distance between holding points, and tack from opposite ends instead of welding in one direction.
- The gap opens as you weld: The panel may be shrinking from heat. Let it cool, re-clamp, and spread the next tack welds farther apart.
- One edge sits higher than the other: Loosen the nearby clamps, reset the surfaces, and use a butt-weld clamp or light planishing after tacks if appropriate.
- You keep burning through: Check for a wide gap, dirty metal, high heat, slow travel, or too much welding in one area.
- The clamp leaves dents: Reduce pressure, use a wider clamp face, or add a thin protective shim where it will not contaminate the weld.
- The clamp blocks the weld path: Tack around it, remove it after the seam is stable, and then weld the areas the clamp covered.
Organizing Your Welding Tools for Efficiency
A clean, organized workspace makes clamping faster and safer. It also helps you avoid grabbing the wrong clamp while a panel is already balanced in place.
- Sort clamps by type. Keep butt-weld clamps, locking clamps, Clecos, magnets, and specialty holders in separate labeled containers.
- Keep small parts together. Wing nuts, clamp tabs, Cleco pliers, and temporary fasteners disappear quickly if they are stored loose.
- Clean spatter and dust from clamp faces. A rough clamp face can mark thin body panels.
- Inspect screws and moving parts. Replace bent clamp bars, worn threads, or weak springs before they let a panel move during welding.
- Store tools away from moisture. Rusty clamps can transfer debris to clean metal and make adjustment harder.
- Lay out clamps before fitting the panel. This prevents one-handed searching while trying to hold a patch in place.
Frequently Asked Questions
What is the best way to weld auto body panels?
The best way is to clean the metal, fit the panel closely, clamp it so the surfaces stay flush, and use short tack welds spread across the seam. Let the metal cool between tacks. For collision repair, follow the OEM procedure because some panels require plug welds, resistance spot welds, rivets, adhesive, or a specific combination.
How do you hold sheet metal together for welding?
Use butt-weld panel clamps for edge-to-edge seams, locking sheet-metal clamps for flanges or lap joints, and Clecos or blind panel holders when repeatable test fitting is needed. The panel should fit naturally before you clamp it. If the clamp has to pull the metal hard into position, the panel likely needs more trimming or shaping.
How do you use blind grip panel holders?
Drill the correct-size holes only where the repair plan allows them, insert the blind panel holder through both layers, and tighten it until the panels sit flush. Use them for test fitting and alignment, then remove them when you are ready to weld, rivet, or finish the holes according to the repair method.
Is it better to weld or glue body panels?
Neither is automatically better. Welding, plug welding, resistance spot welding, rivets, and panel bonding adhesive all have valid uses. The correct choice depends on the vehicle maker’s repair procedure, the panel location, the material, and whether the area is structural. Do not replace an OEM-specified method with adhesive or welding just because it is easier.
What gap should you leave between auto body panels for butt welding?
The gap should be small, even, and matched to your welding process, wire size, and clamp system. Some intergrip-style butt-weld clamps are designed around an approximately 0.040-inch gap. The most important point is consistency. A gap that changes along the seam makes burn-through and distortion more likely.
Should you remove panel clamps before final welding?
Yes, after enough tack welds hold the panel securely. Butt-weld clamps often sit in the seam, so you tack around them first, remove them, and then weld the spaces they covered. Do this gradually so the panel does not shift after the clamps come off.
Conclusion
Using welding clamps effectively on auto body panels comes down to clean metal, careful fitting, the right clamp type, and controlled heat. Choose clamps based on the joint style, keep the seam flush, tack in short spaced welds, and recheck alignment as the panel cools. For modern collision repairs, never let the clamp setup override the OEM repair procedure. When the panel fits well before welding, your clamps can do their real job: holding the repair steady so you can make a cleaner, safer, and stronger weld.
Sources
- OSHA Welding, Cutting, and Brazing Hazards and Solutions — welding hazards, PPE, fumes, burns, eye damage, and shock risks
- OSHA 1910.252 General Welding Requirements — fire prevention and combustible-material precautions
- I-CAR OEM Information — importance of current OEM collision repair information
- I-CAR Battery Disconnect and Welding Guidance — electronics protection and welding current-path guidance
- MillerWelds Sheet Metal Welding Guide — thin sheet metal heat control, warping, and burn-through risks
- Eastwood Intergrip Panel Clamp Set — butt-weld panel clamp use and approximate 0.040-inch gap reference




