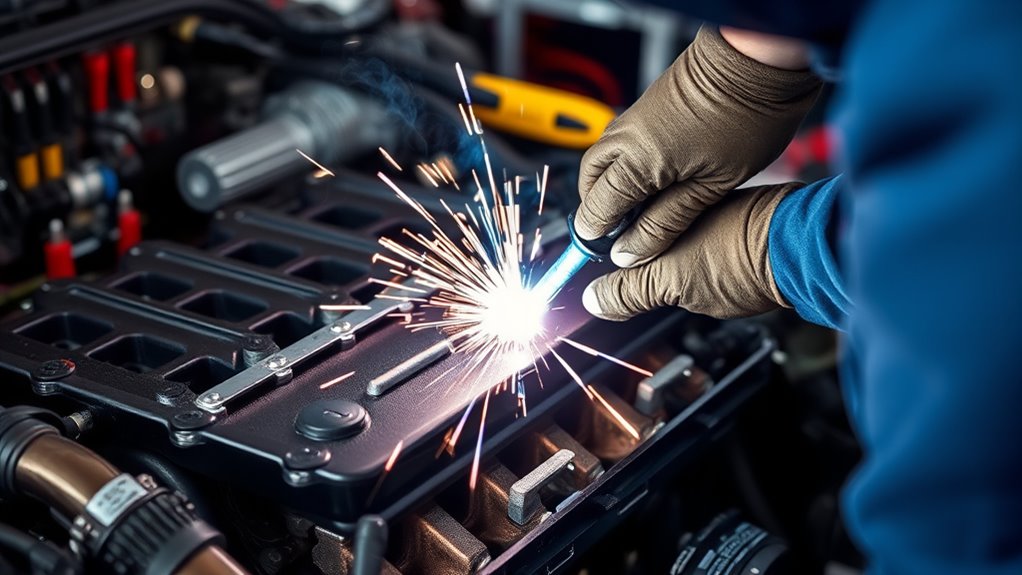
To weld a coolant pipe on an automotive engine, start by thoroughly cleaning the pipe and inspecting for damage. Use TIG welding for better control, especially on thin materials, and opt for corrosion-resistant materials like stainless steel. Guarantee proper heat control to avoid blow-through and prepare slip joints for stronger connections. Remember to wear adequate safety gear to protect from burns and fumes. There are additional techniques and tips that can enhance your welding process in these situations.
Addressing Common Issues in Welding Coolant Pipes
When you tackle the welding of coolant pipes, you’ll quickly encounter several common issues that can complicate the process.
Welding thin coolant pipes demands precise heat control; otherwise, you risk blowing through the material. MIG welding isn’t the best choice here, as it often results in brittle joints. Instead, consider using a brazing rod or silver soldering for stronger, visually appealing results.
Welding thin coolant pipes requires careful heat control; opt for brazing or silver soldering for stronger, more durable joints.
Corrosion is another significant factor. Before you start, inspect and clean both the interior and exterior of the pipe to guarantee a reliable seal.
When working at slip joints, remember that the double thickness improves your chances of a leak-free connection. While experienced TIG welders may achieve better outcomes, be cautious—success isn’t guaranteed, especially with corroded or thin-walled materials. Additionally, ensure thorough cleaning of aluminum surfaces to prevent issues like porosity in your welds.
Prioritizing these details will help you navigate the challenges of welding coolant pipes effectively.
Products Worth Considering

Quality Material – Each brazing rod contains 15% silver for exceptional flow, strength, and heat stability.

Quality Material: our silver brazing rods are made of quality 15% silver and other elements, which will bring you more safety by using our silver solder products, and they can patch lots of things for your home and bring you more convenience

Quality Material – Each brazing rod contains 15% silver for exceptional flow, strength, and heat stability.
Preparing the Pipe for Welding
Addressing common welding issues sets the stage for properly preparing the coolant pipe. Begin by thoroughly cleaning the stainless steel pipe to eliminate corrosion, dirt, and grease. This guarantees proper adhesion and minimizes contamination during the weld.
Inspect the pipe for structural weaknesses, such as cracks or rust hidden beneath powder coating, which could complicate your welding process.
Next, make certain the pipe ends are cut squarely and fit snugly together. Gaps can lead to leaks, so aim for precision. If needed, use heat shields or clamps to stabilize the pipe during welding, preventing any warping or movement.
Finally, choose a suitable filler material, like copper or appropriate brazing rods. This helps maintain the integrity of the weld in high-heat applications.
Proper cleaning ensures your coolant pipe won’t only look good but also perform reliably under pressure.
Choosing the Right Materials and Tools for the Job
Choosing the right materials and tools is vital for a successful coolant pipe weld.
You’ll want to use corrosion-resistant materials like copper or stainless steel, and opt for TIG welding for thin pipes to guarantee clean, strong joints.
Don’t forget to gather essential tools like a pipe bender and proper safety equipment to enhance your welding process. Additionally, understanding welding current is crucial for achieving the optimal heat required for effective welding.
Products Worth Considering

Complete 123-Piece Set:All necessary TIG torch accessories and consumables for WP-17, WP-18, and WP-26 torches.

Complete TIG Torch Kit - 71pcs Tig Welding Torch accessories (consumables) kit. This set includes all the essential TIG torch accessories and consumables, so you can get started on your welding projects right away.
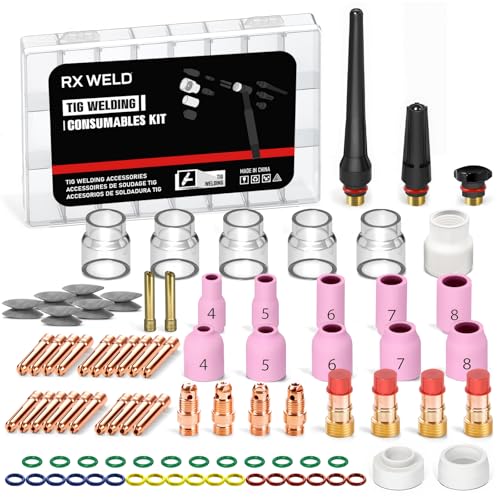
87 PCS tig torch accessories (consumables) with 12 tig cups.
Selecting Suitable Materials
Selecting the right materials for welding coolant pipes involves understanding both the properties of the materials and the specific requirements of your engine. For a successful repair, consider the following:
- Copper: Excellent heat conductivity and corrosion resistance.
- Stainless Steel: Maintains structural integrity under high temperatures.
- MAPP or MAP-Pro Gas: Provides adequate heat for effective soldering.
- TIG Welding Techniques: Ideal for thin materials, minimizing the risk of blowing through.
- Brazing with Hose Clamps: Guarantees secure connections, especially at slip joints.
Verify the replacement pipe fits your engine model, like the passenger side of the LQ1 or LH0, to avoid compatibility issues at the end of the pipe.
Your choice of materials will greatly impact the durability and effectiveness of your repair.
Essential Welding Tools
When preparing to weld a coolant pipe, having the right tools is essential for achieving a strong and reliable joint.
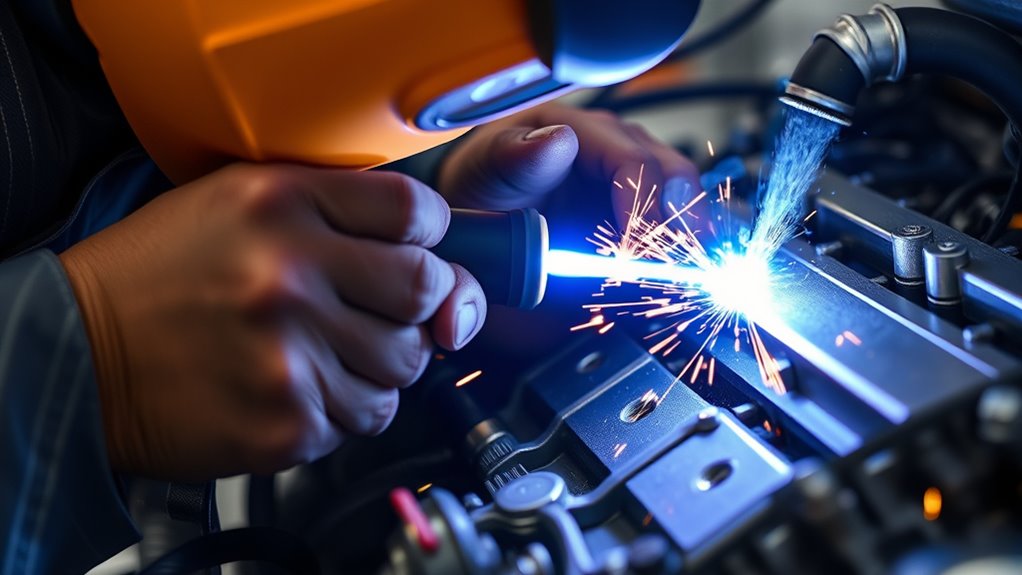
Start with TIG welding techniques for better control, especially on thin pipes, minimizing the risk of blow-through.
Guarantee proper pipe alignment using a high-quality pipe bender, which helps maintain consistent shapes.
Select compatible filler materials, like copper or appropriate alloys, to ensure integrity during the welding process.
For brazing, MAPP or MAP-Pro gas provides the necessary heat without the risks of higher-temperature methods.
Additionally, invest in corrosion-resistant materials, such as stainless steel, to enhance longevity and reduce future repairs.
Finally, always use a reliable welding helmet for peak eye protection.
Safety Equipment Considerations
While welding coolant pipes, guaranteeing your safety is as critical as the technique you use. Start by donning the right safety gear to protect yourself from burns, sparks, and harmful fumes.
Use a TIG welding setup for better control, especially with thin materials. Here are essential safety items to take into account:
- Welding gloves to prevent burns and provide grip
- Goggles for eye safety against bright arcs and flying debris
- Welding helmet to shield your face from sparks
- Respiratory protection to filter out harmful fumes
- Fire extinguisher nearby to handle any fire hazards
Choose corrosion-resistant materials like stainless steel or copper for durability, and guarantee your workspace is well-ventilated.
Your safety is paramount.
Best Practices for Welding and Soldering Techniques
Understanding the best practices for welding and soldering techniques is crucial for achieving strong, reliable joints in coolant pipe repairs.
For thin materials like coolant pipes, leverage TIG advantages to minimize the risk of blowing through, guaranteeing a cleaner repair. While MIG welding is common, consider brazing techniques or silver soldering for their ability to create stronger, less brittle joints with lower heat application. Use MAPP gas or MAP-Pro gas for effective brazing, as propane won’t reach the necessary temperatures for proper soldering.
When possible, weld at slip joints in exhaust systems; this double thickness boosts joint strength and reduces leak risks. Additionally, ensuring correct filler rod selection contributes to the overall integrity of the joint and its resistance to cracking.
Finally, always clean and prepare surfaces meticulously before welding or soldering. This guarantees ideal adhesion and minimizes corrosion-related failures, enhancing the longevity of your repair.
Follow these practices to achieve reliable, high-quality results in your coolant pipe projects.
How to Test Your Coolant Pipe Repair?
How can you guarantee your coolant pipe repair holds up under pressure? Start by employing effective pressure testing techniques.
After your repair, run the engine with the radiator cap off to let trapped air escape and check for leaks. Next, conduct a pressure test on the cooling system to confirm the repaired area can withstand necessary pressure.
Consider these steps for thorough evaluation:
- Monitor coolant levels regularly, topping up if needed.
- Observe the repaired area for signs of seepage during and after a test drive.
- Utilize leak detection methods to pinpoint any potential weaknesses.
- Inspect for significant drops in coolant level, indicating a possible leak.
- Re-evaluate sealing methods if issues arise, confirming the integrity of your work. Additionally, ensure that all zinc residues are thoroughly removed from the weld area to prevent contamination.
What to Watch Out For When Welding
When welding, you need to take into account material compatibility to avoid weak joints. Controlling heat is essential, especially with thin materials, as excessive heat can blow through the metal. Implementing effective heat control techniques will help maintain the integrity of your repair. Additionally, using flux core welding can be beneficial as it allows for better penetration and handles contaminants effectively.
Material Compatibility Issues
Before you start welding a coolant pipe, it’s crucial to guarantee the material compatibility of both the pipe and your welding technique. Failing to do so can lead to material selection challenges and compromised repairs.
Consider these points:
- Inspect for rust and corrosion; they weaken your pipe.
- Understand that different engine models, like LQ1 and LH0, require specific parts.
- Choose the right welding technique—MIG might create brittle joints on thin pipes.
- Be cautious at slip joints; gaps can cause leaks.
- Use materials like copper for repairs, ensuring they’re compatible with your existing components.
Heat Control Techniques
Proper heat control is vital for successful welding of coolant pipes, as inadequate management can lead to serious issues like leaks or structural failure. Employing effective heat management strategies is important. Use TIG welding for better control, and always preheat the area to minimize thermal shock.
| Technique | Purpose |
|---|---|
| Preheating | Reduces thermal shock |
| TIG Welding | Better heat control |
| Shielding Gas Adjustment | Minimizes overheating |
| Welding Temperature Monitoring | Guarantees consistent temperature |
| Visual Color Monitoring | Guides heat levels |
Keep an eye on the metal’s color; a consistent bright orange glow indicates you’re on the right track. Avoid excessive discoloration to maintain strong weld integrity.
Frequently Asked Questions
Can I Use JB Weld on a Coolant Leak?
Yes, you can use JB Weld on a coolant leak as a temporary fix. Make certain the area’s clean and dry. For larger leaks, consider more robust repair techniques or automotive adhesives for lasting solutions.
How to Seal a Leaking Coolant Pipe?
Sealing a leaking coolant pipe’s like patching a tire; you need precision. Use high-quality brazing rods and proper sealing techniques. Regular pipe maintenance can prevent leaks and guarantee your engine runs smoothly.
How to Fix a Broken Pipe Without Replacing It?
To fix a broken pipe without replacing it, use pipe repair techniques like brazing or automotive adhesives. Temporary fixes, such as rubber hoses, can effectively seal leaks until a permanent solution’s applied.
How Long Does JB Weld Take to Cure on a Radiator?
“Good things come to those who wait.” JB Weld’s cure time on a radiator is 15-24 hours. Confirm proper surface preparation and maintain temperatures between 50°F and 90°F for the best results.
Conclusion
So, after all that effort to weld your coolant pipe, you might think your troubles are over. Ironically, it’s often the smallest leak that can ruin your day, not the big, obvious ones. Remember, a perfect weld doesn’t guarantee a perfect seal. Always test your repair thoroughly. With the right materials and techniques, you can guarantee your engine stays cool—unless, of course, you forget to check for leaks. Then, you might just have a hot mess on your hands!


