Before you weld inside a car door cavity, inspect it with a flashlight for rust, thin metal, and hidden obstructions, then remove insulation, underseal, and any flammables. Fit the panel tightly, set up ventilation, and keep a fire watch nearby. Weld in short sections, starting near the center, so you control heat and avoid warping. Grind the welds smooth and inspect for cracks or gaps, because the details below show you how to do each step better.
Inspect the Car Door Cavity for Rust and Hazards
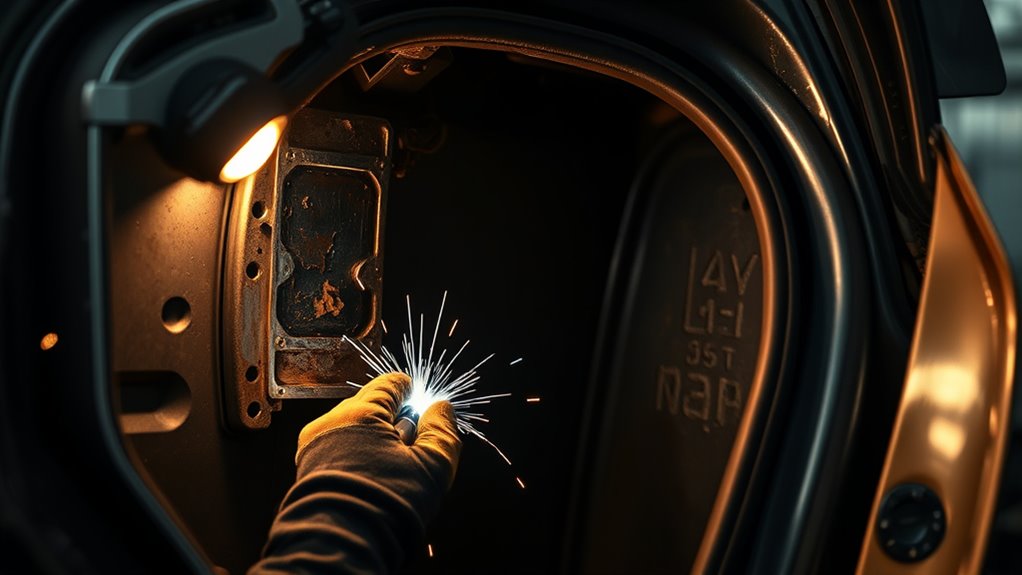
Before you strike an arc, inspect the door cavity with a flashlight for rust, hidden obstructions, and any flammable materials such as underseal or soundproofing.
You need to inspect the car door cavity for rust and hazards before you weld, because rust can weaken the panel and invite failure. Probe every seam and flange for scale, pitting, and thin metal, and mark any rust you find.
Inspect every seam and flange for rust, scale, and thin metal before welding.
Remove loose debris, insulation, and residue that could ignite. Check the area for fuel lines or tanks nearby; if they’re close, stop and reassess the fire risk.
Keep the cavity ventilated so fumes can’t collect and blind you or harm you. Work slowly, because a clear, clean cavity gives you control and protects your freedom to shape the metal safely. Remember, maintaining proper ventilation is essential to avoid hazardous fumes.
When you confirm the space is sound, unobstructed, and free of combustibles, you’re ready for the next step.
Products Worth Considering

5-in-1 Versatility: This multi-functional tool serves as a wide beam mechanic light, a long-distance spotlight, a flash beacon, a car window breaker, and a seatbelt cutter....
Fit the Panels Before Welding
Before you weld, you need to check that the replacement panel sits snugly against the existing structure with no gaps.
Use datum and scribe lines to confirm alignment, and make sure the style line matches the bottom of the door.
Trim the panel edges carefully so you get a tight fit that reduces shrinkage, distortion, and weld stress. Additionally, ensure that the fillet weld size adheres to the thickness of the thinner plate to maintain structural integrity.
Check Panel Alignment
Alignment is critical here: you need the replacement panel to sit snugly against the original structure with no visible gaps before you strike an arc. When you check panel alignment, set datum lines and scribe marks from fixed points, such as the bottom of the door, so you can confirm position without guesswork. Inspect the parent metal for dents or distortion that could skew load paths or stress distribution.
| Check point | Purpose |
|---|---|
| Datum lines | Verify exact location |
| Style lines | Match exterior contour |
Repeat the check panel alignment process several times as you hold the panel, because small shifts can become permanent after welding. You’re controlling fit, preserving strength, and protecting your right to a clean, accurate repair.
Trim For Tight Fit
Trim the replacement panel carefully so it fits snugly against the door structure with minimal gap; even a small opening can invite weld shrinkage and throw the panel out of alignment.
To trim for tight fit, mark datum lines and scribe references, then measure from the bottom of the door so the new section matches the factory shape.
Inspect the original panel for dents or waves that could distort stress flow, and correct them before you fit the replacement.
Hold the panel in place, confirm the seam multiple times, and make small adjustments until the edges meet cleanly.
Once satisfied, tack weld in several spots to lock the position.
Recheck alignment before full welding so you keep control, reduce distortion, and protect the door’s structure.
Clear Flammables and Set Up Fire Watch
Clear out hidden flammables in the door cavity, including underseal, sound deadening, and any nearby fuel lines or wiring that can ignite.
Set up a fire watch to monitor the work area for smoke or sparks, and keep the space well ventilated. Proper ventilation management is crucial for reducing fire risks while welding in confined spaces.
Keep a fire extinguisher or bucket of water within reach so you can respond immediately if a fire starts.
Products Worth Considering

Reliable Fire Protection: Stop common vehicle fires involving flammable liquids, gases, and electrical equipment

Combats Vehicle Fires: Use to fight basic fires common to your cars & trucks: flammable liquids and gases (Class B) & electrical equipment (Class C)

Multipurpose Usage: Ostutry fire extinguisher is suitable for A B C K fires, including solid materials, flammable liquids, electrical equipment, cooking oils, even circuit fire under 36,000 volts(power off first), lithium-Ion battery-common in phones laptops
Clear Hidden Flammables
Before you strike an arc inside a car door cavity, inspect the area for hidden flammables such as underseal, soundproofing, and any residual fuel or oil.
You need to make sure every concealed combustible is removed, scraped away, or shielded before welding starts. Check behind trim, seams, and reinforcement pockets where residue can hide.
Verify that no fuel lines, tanks, wiring insulation, or adhesive patches sit close enough to ignite from heat or sparks.
Open windows or use fans to improve ventilation and clear fumes from the enclosed space.
This isn’t about restriction; it’s about taking command of the worksite and welding with control.
With the cavity stripped of hidden fuel, you reduce fire risk and keep the door ready for precise, liberated repair.
Set Up Fire Watch
Once the cavity is stripped of combustibles, keep a fire spotter on hand and maintain a clear escape route while you weld.
You should verify that underseal, fuel lines, and soundproofing are removed or shielded, because stray sparks can reach hidden fuel sources fast.
Position your fire spotter where they can see the seam, the drain holes, and the inner skin, and keep them alert for smoke, glow, or late smoldering.
You also need solid ventilation to purge fumes and reduce inhalation or flash risk.
Work deliberately, pause often, and inspect the cavity after each weld pass.
When you defend the space with disciplined observation, you take control of the job and protect your freedom to work safely.
Keep Extinguisher Ready
Keep a charged fire extinguisher within arm’s reach before you strike an arc, and make sure a dedicated fire watch can see the work area at all times. You’ve got to clear underseal, fuel lines, loose tools, and hidden debris from the door cavity before welding. Keep ventilation moving so fumes don’t build and feed a fire.
| Item | Action | Risk |
|---|---|---|
| Fire extinguisher | Stage it ready | Fast suppression |
| Door cavity | Inspect fully | Hidden ignition |
| Flammables | Remove now | Fire spread |
| Fire watch | Monitor continuously | Early response |
| Ventilation | Keep airflow | Lower hazard |
Your fire watch should scan for smoke, heat, or sparks and act immediately. Recheck the cavity often; trapped material can ignite without warning. Stay disciplined, stay prepared, and weld with control.
Weld in Short Sections
Weld inside the door cavity in short sections of about 5/8 inch (16 mm) to limit heat buildup and reduce the risk of warping the panel.
You should tack each section securely before extending the bead, so you lock alignment and keep the panel free from distortion.
Use controlled, consistent motion, and let each short weld establish good penetration without chasing extra length.
Use controlled, consistent motion, letting each short weld achieve solid penetration without chasing unnecessary length.
Check the metal’s temperature often; if it climbs too fast, stop and let it cool so you don’t invite weld shrinkage, high spots, or stress in the sheet.
By working in deliberate increments, you keep the load on the surrounding metal low and preserve structural integrity.
This method gives you cleaner results inside tight access areas, where the door skin can’t absorb much heat.
Stay disciplined, and you’ll maintain precision while welding with greater freedom and less risk. Additionally, ensure you grind off zinc around the weld area to prevent toxic fumes and achieve a stronger weld.
Control Heat to Prevent Warping
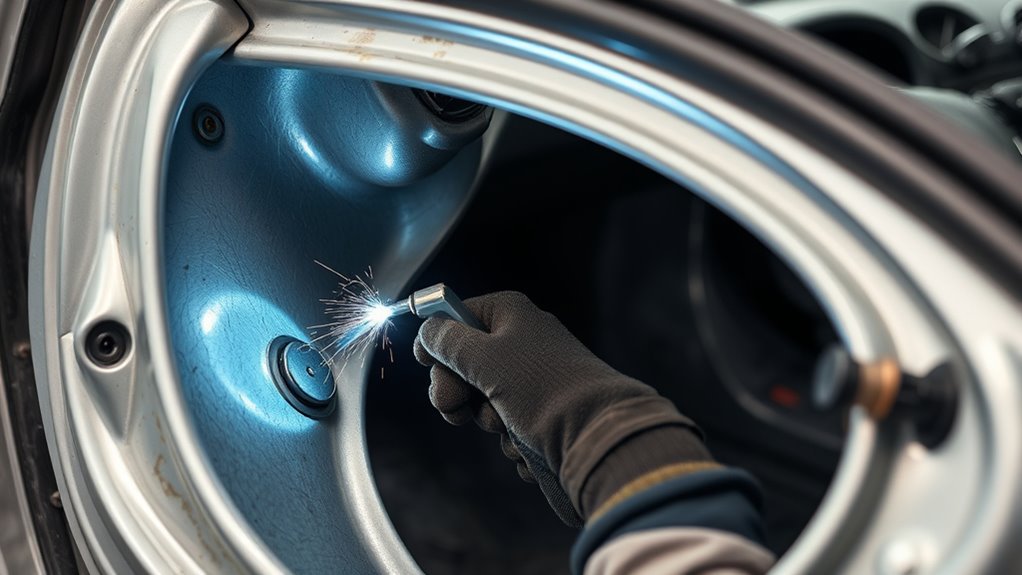
To keep the door panel flat, manage heat as carefully as your weld placement. Use short, controlled welds of about 5/8 inch (16 mm) so you don’t flood one area with heat.
Start at the center of the panel and work outward; this spreads thermal load and helps you avoid distortion problems. Pause between welds and let the metal cool so expansion and contraction stay limited.
If you keep pushing heat into one zone, the panel can pull, buckle, or lose its original shape. Use a backing bar or block behind the work to absorb heat and support the sheet while you weld.
Stay alert for high spots or small gaps as you go, and correct them immediately before they harden into warpage. This controlled approach gives you cleaner results, protects the panel’s integrity, and keeps you in command of the repair instead of letting heat control you. Additionally, maintaining the correct electrode angle is crucial to prevent undercut and ensure a strong weld.
Grind and Inspect the Finished Welds
Grind the finished welds inside the door cavity with an angle grinder fitted with 60-grit 3M Cubitron 2 discs to knock down high spots, smooth sharp edges, and leave a clean surface for inspection.
Keep the tool moving so you don’t thin the panel or gouge the weld area. After grinding, blow out dust and wipe away residue so you can inspect every seam clearly.
Keep the tool moving to avoid thinning the panel, then clean away dust for a clear seam inspection.
Check each weld visually for uniform bead profile, full tie-in, and any gaps, cracks, or undercut that could weaken the structure and demand rework. Ensure proper joint preparation to enhance the weld’s strength and avoid rework.
Use a flashlight to reveal shadows, and pass a magnet near the cavity to help locate hidden defects or incomplete penetration. If you find a flaw, correct it before moving on.
Finish with a final inspection of all welded joints, then apply primer or sealant only after the weld area meets your standards.
Frequently Asked Questions
How to Safely Weld Inside?
You weld inside safely by disconnecting power, clearing flammables, clamping the earth lead close, ventilating the space, and using a fire spotter. Apply Welding Techniques with skin pins to hold patches and reduce distortion.
What Is the Golden Rule in Welding?
The golden rule in welding is safety: you must follow Safety Precautions, keep your workspace ventilated, clear flammables, wear PPE, ground properly, and keep extinguishing gear nearby so you protect yourself and others.
How to Fix a Hole in a Car Without Welding?
You can fix it with Patch Alternatives; about 70% of small body holes don’t need welding. You’ll clean, apply fiberglass, metal patch, or filler, then seal with rust-inhibiting paint for a durable, safe repair.
What Kind of Welder Do I Need to Weld on a Car?
You’ll want a MIG welder for car Welding Techniques, ideally around 28 volts, with adjustable heat and wire feed. Use argon-CO2 shielding gas for clean, safe welds on thin automotive metal.
Conclusion
When you finish welding inside the door cavity, you’re not just joining metal—you’re restoring the door’s backbone. The bead should lie like a steady seam, clean and even, with no hidden rust or weak spots beneath it. Let the panel cool, inspect every edge, and grind only what needs refinement. A safe, well-controlled weld keeps the door true, resists warping, and leaves you with a solid repair that stands guard long after the sparks fade.


