
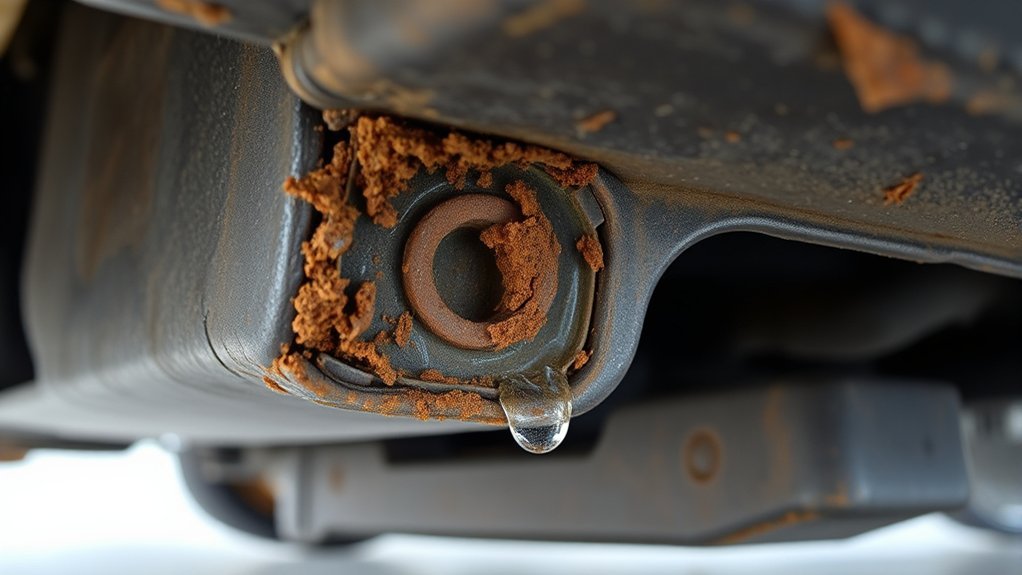
If your car starts clicking, rattling, flexing, or showing cracks near a repaired panel, do not dismiss it as normal body noise. The cause may be loose trim, a worn hinge, suspension movement, failed seam sealer, or a problem with the repair itself. A careful visual check can help you find warning signs of faulty welds in a car, but only a qualified inspection can confirm whether a structural joint is safe.
Quick Answer
Possible signs of a bad car weld include cracking, separated seams, rust bleeding from a repaired joint, loose panels, missing or irregular attachment points, porous welds, severe undercut, burn-through, and new alignment problems. Stop driving and arrange towing if the structure is separating or the car’s steering, handling, suspension, seat, or restraint mounting feels unsafe.
Key Takeaways
- Noise alone does not prove that a weld failed, but repeatable clicking, popping, or creaking near a repaired structural seam needs investigation.
- Cracks, separation, active movement, fresh rust, distorted openings, burn-through, and missing attachments are stronger warning signs than appearance or sound alone.
- A visual check cannot confirm penetration, fusion, weld nugget size, hidden corrosion, or crashworthiness.
- Pillars, rockers, frame rails, roof rails, strut towers, suspension mounts, and restraint anchorages should be evaluated using current vehicle-specific repair information.
- Do not grind, heat, drill, reweld, or remove seam sealer from a suspected structural repair at home.
- Hybrid and electric vehicles require trained high-voltage handling and the exact manufacturer disable procedure before welding or cutting.
At a Glance
| Time Required | 10 to 20 minutes for a basic owner check; longer when trim removal, measuring, scanning, or professional testing is required |
| Difficulty | Beginner for visible warning signs; professional for structural diagnosis, testing, and repair |
| Tools Needed | Flashlight, clean cloth, inspection mirror, phone camera, gloves, and the vehicle’s repair history or invoices if available |
| Cost | Free for an owner visual check; professional cost depends on access, teardown, material, measuring, parts, refinishing, corrosion protection, scanning, calibration, and labor |
Warning: Stop driving and arrange towing if a repaired structural joint is visibly opening, a suspension or restraint mount is moving, the vehicle suddenly pulls or feels unstable, a door opening is changing shape, or a loose panel could detach. A minor stain or rough-looking seam without movement still needs evaluation, but it does not automatically prove that the vehicle is unsafe to move.
Unusual Noises That May Point to a Welding Issue
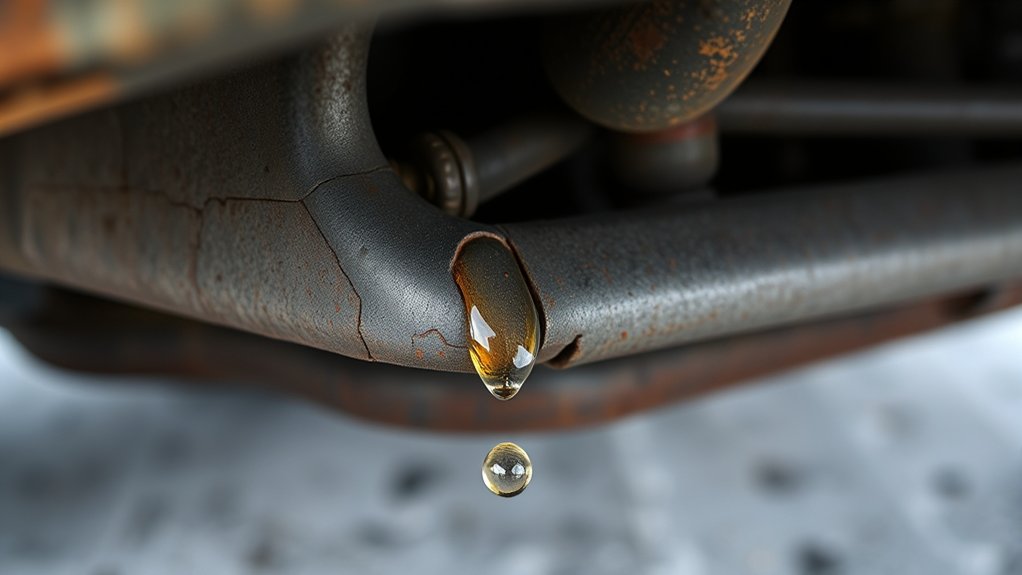
Clicking, popping, rattling, or creaking near a repaired quarter panel, rocker panel, pillar, trunk floor, frame rail, roof rail, or door opening can mean that two parts are moving against each other. Possible causes include a cracked weld, weak plug weld, missed attachment, loose bonded joint, failed sealer, or poor panel fit.
Noise by itself is not proof of weld failure. Loose trim clips, exhaust shields, suspension bushings, striker plates, hinges, seats, weatherstripping, and cargo can create similar sounds. Concern rises when the noise began after collision repair, rust repair, panel replacement, or a new impact and repeatedly comes from the same repaired area.
Note: Record where and when the noise occurs instead of trying to force the body to flex. A rattle near the headliner is different from a sharp pop at a rocker, pillar, wheel well, strut tower, or suspension mount.
If the noise returns after a repair, ask the shop to recheck the attachment method, panel fit, weld quality, seam sealer, adhesives, corrosion protection, and body measurements. Surface contamination can contribute to porous welds, but a proper diagnosis must also consider material type, joint fit, heat input, clamping, weld placement, and the vehicle maker’s repair procedure.
Factory Welds, Repair Welds, and Bonded Joints Are Not All the Same
A modern vehicle body may use resistance spot welds, laser welds, GMA plug welds, MIG brazing, structural adhesives, rivets, weld bonding, or several methods in the same assembly. A row of round marks may be factory spot welds, while a repaired flange may use plug welds or another approved attachment method.
The correct method depends on the vehicle, model year, material, panel, and repair location. The I-CAR OEM Technical Information Matrix shows the types of material, sectioning, attachment, adhesive, corrosion-protection, and repair information available from vehicle manufacturers.
Do not assume that every factory weld must be copied with a visible MIG bead. Some manufacturers require squeeze-type resistance spot welding where access permits, while others specify plug welds, rivets, adhesives, or a particular combination. A repair can be wrong even when the visible weld looks smooth if the attachment method, location, quantity, or material preparation does not match the procedure.
A rough-looking weld is not automatically unsafe, and a neat-looking weld is not automatically strong. Material, fusion, fit, attachment method, location, corrosion protection, and the OEM repair procedure all matter.
Safe Visual Inspection Checklist for Bad Car Welds
Park on level ground, set the parking brake, switch the vehicle off, and let hot components cool. Use a flashlight without removing structural coatings or trim. Do not jack the vehicle or crawl under it unless it is correctly supported with equipment rated for the vehicle.
- Review the repair history. Identify the repaired side, replaced panels, collision location, rust work, and any structural or frame work listed on the invoice.
- Look for cracks. Check visible welds, nearby metal, paint edges, seam sealer, and panel corners for fresh splitting or branching lines.
- Check for separation or movement. Look for a seam that opens, a flange that lifts, or a panel that shifts during normal door, hood, hatch, or trunk operation.
- Inspect for rust bleeding. Brown staining, bubbling paint, swollen seams, or damp residue can point to exposed metal or moisture inside the joint.
- Check attachment consistency. Look for abrupt changes, unusually large gaps between visible attachments, missed holes, or welds that never joined the lower panel.
- Compare both sides carefully. Symmetry can reveal a problem, but factory construction may differ from side to side. Use the comparison as a clue, not proof.
- Check panel operation and gaps. Note doors that drop, rub, pop, require extra force, or suddenly sit higher or lower than before.
- Check nearby mechanical parts. Loose hinges, striker plates, exhaust shields, suspension parts, and trim can imitate weld-related symptoms.
- Photograph suspicious areas. Take wide shots for location and close shots for detail without grinding, scraping, or removing evidence.
What a Visual Check Cannot Prove
A visual owner inspection can identify warning signs, but it cannot certify a vehicle’s structural repair. Many attachments are hidden beneath paint, seam sealer, trim, sound insulation, adhesives, overlapping flanges, or closed sections.
Appearance alone cannot confirm:
- Fusion between both metal layers
- Penetration through the required joint
- Internal porosity or cracking
- Resistance spot-weld nugget size
- Correct material strength or filler selection
- Hidden corrosion inside a rocker, rail, pillar, or closed cavity
- Whether the body remains within manufacturer dimensions
- Whether the repair will perform as intended in another collision
Before welding a replacement panel, a trained technician may create test welds on matching metal and perform a destructive peel or twist test. I-CAR explains that these destructive weld tests are performed on test pieces so settings and technique can be checked before the vehicle is welded. Owners should not drill, peel, bend, or tear a completed vehicle joint to test it.
Critical Areas Where Car Weld Failures Matter Most
Some weld problems affect only appearance or water sealing. Others can affect crash-energy management, steering, suspension geometry, roof strength, or restraint performance. Give extra attention to the following locations:
- A, B, and C pillars: These form part of the roof, door-opening, and side-impact structure.
- Rocker panels and pinch welds: Rockers are major load paths on many unibody vehicles, while pinch weld damage can also affect approved lifting points.
- Frame rails and crossmembers: Damage or an incorrect sectioning joint can affect dimensions and crash-energy management.
- Roof rails and header panels: These may be part of the occupant safety cell and can interact with curtain-airbag mounting areas.
- Strut towers and suspension mounts: Cracking, separation, or corrosion can affect alignment, tire loading, and handling.
- Seat and seat-belt mounting areas: These anchor occupant-restraint loads during a crash.
- Bumper reinforcements and crush structures: These components may have strict repair-versus-replace limits.
- Wheel wells, trunk floors, and quarter-panel seams: These areas can reveal incomplete rust repair, poor sealing, or missing corrosion protection.
When to Stop Driving With a Suspected Bad Weld
Stop Driving and Arrange Towing
Do not continue normal driving when a structural seam is visibly separating, a suspension or steering mount is cracked or moving, the vehicle has a sudden pull or unstable feel, a seat or seat-belt anchorage is loose, a structural panel may detach, or a door opening has changed enough to prevent safe latching. Avoid driving merely to “test” the symptom.
Arrange a Prompt Inspection
Schedule an inspection soon when you find a small crack near a previous structural repair, recurring body pops, rust bleeding from a repaired flange, newly uneven gaps, cracked seam sealer with movement underneath, or visible welds that appear missed, separated, or burned through. Limit use until the cause is known.
Monitor and Document Lower-Risk Signs
A cosmetic paint chip, dry seam-sealer edge, mild trim rattle, or rough-looking non-structural bead without movement may not require towing. Photograph it, note any change, and ask a qualified shop to evaluate it. Location and repair history determine the risk.
Key Visual Indicators of Weld Failure
Many weld and repair problems leave visible clues. No single clue proves the whole joint is defective, but several signs in the same repaired area increase concern.
Cracks, Fractures, and Separated Seams
Cracks along a weld, beside it, or through the surrounding coating are serious warning signs. Causes can include poor fusion, contamination, stress concentration, fatigue, collision movement, an incorrect sectioning location, or an unsuitable attachment method. A crack in a pillar, rail, rocker, roof structure, suspension mount, or restraint area deserves prompt professional inspection.
Porosity, Pinholes, and Pockmarks
Porosity consists of cavities formed when gas becomes trapped as weld metal solidifies. Visible surface pores may be linked to contamination, moisture, poor shielding, paint, rust, oil, or unsuitable settings. The amount of hidden porosity cannot be determined from surface appearance alone, and acceptance depends on the joint, procedure, material, and required weld quality.
Undercut, Overlap, and Poor Weld Shape
Undercut is a groove at the edge of a weld that reduces the effective base-metal thickness. Overlap occurs when deposited metal rolls onto the surface without proper fusion at the edge. Excessive spatter, irregular globules, missed plug-weld holes, or sudden changes in bead shape can indicate poor preparation or settings, but appearance must be evaluated with the joint design and repair procedure.
Lack of Fusion and Incomplete Plug Welds
A plug weld can look filled at the surface without being fused correctly to the lower panel. Warning signs include a visible ring or gap around the weld, a center that has pulled away, movement between the panels, or a hole filled only at the top sheet. Confirmation normally requires professional access, repair records, or evaluation of representative test welds.
Discoloration, Burn-Through, and Warping
Heat tint, scorched coatings, or a large heat-affected area shows that heat reached the panel, but color alone does not prove that the material exceeded its repair limit. Burn-through leaves a hole or severely thinned area. Wavy seams, oil-canning panels, and distorted door openings can result from poor fit, collision damage, or excessive welding heat. Proper welding technique on thin metal is important, but structural automotive heat limits must come from the vehicle maker’s procedure.
Rust, Bubbling Paint, and Failed Seam Sealer
Rust around a repair can mean bare metal remained exposed, moisture entered the seam, seam sealer failed, or internal corrosion protection was not restored. I-CAR advises checking seam sealer, adhesives, cavity wax, and other protection against the body repair manual during the repair process.
Galvanized or coated steel may require controlled coating removal in the weld zone, followed by approved protection after welding. Removing zinc coating is not an owner inspection step. Grinding coated steel and welding galvanized material can create dust, fumes, fire hazards, and corrosion risks, so the work requires trained personnel, ventilation, PPE, hot-work controls, and the correct OEM procedure.
How Misaligned Panels and Doors Can Signal Repair Problems
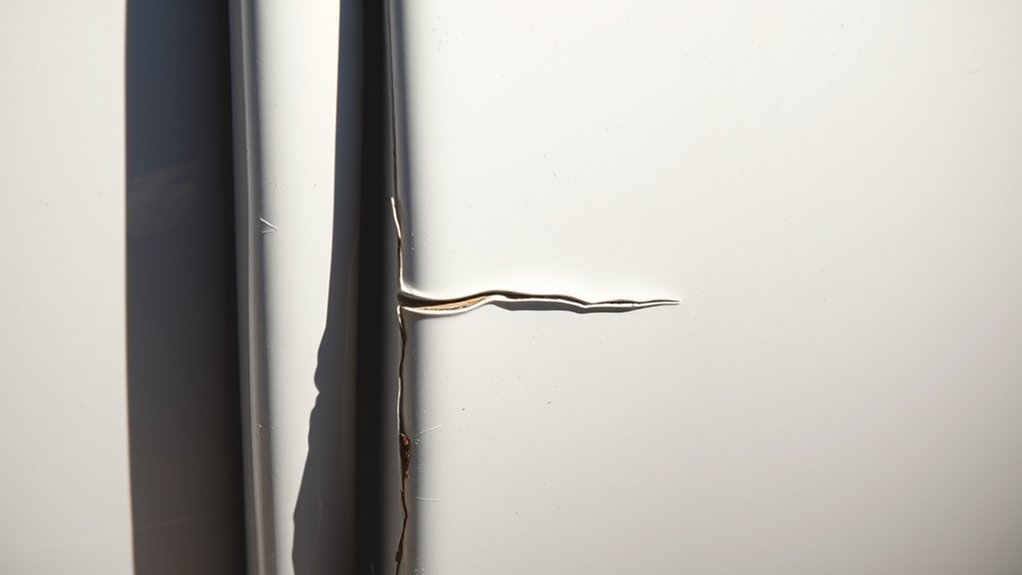
Misaligned panels and doors can reveal poor fit-up, heat distortion, missed attachments, weak plug welds, incomplete measuring, or structural movement. Warning signs include an uneven gap that appeared after repair, a door that sits high or low, a hatch that rubs, a trunk that needs extra force, or a fender that no longer aligns with the hood and door.
These symptoms do not always mean the weld failed. Worn hinges, damaged latches, loose striker plates, deteriorated bushings, prior collision damage, and incorrect panel adjustment can cause similar problems. The weld and underlying structure deserve closer inspection when the change is next to a repaired joint, returns after adjustment, or occurs with popping or visible seam movement.
Clean cutting and edge preparation can improve panel fit, and some cutting processes use gases such as nitrogen for cutting. Cutting gas does not determine whether the final vehicle repair is correct. Measuring, material identification, clamping, attachment placement, heat control, and the exact repair procedure are more important.
Why Welds Fail After Collision or Rust Repair
A failed repair weld usually has an underlying cause. Common possibilities include:
- Paint, corrosion, adhesive residue, moisture, oil, or dirt left in the weld zone
- Poor panel fit or excessive gaps between metal layers
- Incorrect wire, filler, shielding gas, welder setting, or electrode tip
- Too little heat for fusion or too much heat for the material
- Poor clamping or shunting during resistance spot welding
- Missed welds, incorrect weld count, or wrong spacing
- Plug-weld holes with the wrong size or preparation
- Sectioning a panel where the manufacturer does not permit it
- Using welding where the procedure requires brazing, rivets, adhesives, spot welding, or replacement
- Failing to restore primers, sealers, coatings, underbody protection, or cavity wax
- Leaving hidden collision distortion or incorrect body dimensions in place
Modern vehicles can contain mild steel, high-strength steel, ultra-high-strength steel, aluminum, castings, composites, adhesives, and mixed-material joints. Heat or straightening that is permitted on one material may be prohibited on another. The vehicle’s VIN, model year, body repair manual, and current procedure should be verified before structural work begins.
Pro Tip: Ask the repairer to identify the exact OEM procedure, attachment method, material, corrosion-protection products, and measurements used. “We welded it back together” is not enough documentation for a modern structural repair.
Hybrid, Electric-Vehicle, and Airbag Safety
Warning: Never touch, cut, probe, disconnect, or move orange high-voltage cables or components. Do not attempt to de-energize a hybrid or electric vehicle unless you are trained, equipped, and following the exact manufacturer procedure.
Welding current, heat, sparks, and cutting operations can damage wiring, electronic modules, batteries, sensors, airbag components, and seat-belt pretensioners. Vehicle manufacturers may require the 12-volt battery to be isolated, the high-voltage system to be disabled, nearby components to be removed, and the welding ground clamp to be positioned in a specific way.
For example, I-CAR’s summary of a Volvo electric-vehicle welding position statement says to disconnect the 12-volt battery and de-energize high voltage before welding, with additional component-removal requirements when work is near an electronic unit or high-voltage battery. These requirements are manufacturer-specific and should not be treated as a universal owner procedure.
After structural or nearby electrical work, the repair plan may also require diagnostic scanning, initialization, aiming, or calibration. The exact requirement depends on the vehicle and the affected systems.
What You Can Check Safely at Home
You can document visible symptoms without trying to prove structural weld strength. Use this low-risk approach:
- Gather the repair history. Note any collision repair, rust patch, rocker replacement, quarter-panel work, roof repair, suspension repair, or frame work.
- Inspect in good light. Use a flashlight and mirror on areas that are already accessible.
- Check panel gaps and operation. Look for a recent change, rubbing, dropping, or extra force needed to latch.
- Check visible paint and seam sealer. Photograph cracking, bubbling, rust stains, or a joint that appears to be opening.
- Listen only during normal use. If the car has no tow-level warning signs and is already safe to operate, note sounds during ordinary low-speed driving. Do not deliberately drive over obstacles to flex the body.
- Record symptoms. Save dated photos, short videos, invoices, and notes describing temperature, road condition, speed, and load.
- Stop when access requires disassembly. Leave trim removal, coating removal, lifting, and structural teardown to a qualified facility.
Do not grind paint from the repair, scrape away seam sealer, drill spot welds, apply dye penetrant, strike the joint with a hammer, or heat the panel. Those actions can remove evidence, damage corrosion protection, expose hazardous materials, or worsen the repair.
When to Seek Professional Help for Weld Inspections
Arrange professional inspection when you see an open crack, separated seam, heavy corrosion around a repaired joint, a loose structural panel, suspiciously missed attachments, recurring body noise after collision repair, or alignment changes that return after adjustment.
Professional review is especially important near the suspension, steering, roof rail, rocker, pillar, frame rail, seat mount, seat-belt anchorage, bumper reinforcement, battery structure, or airbag-related area. These components can affect handling, restraint performance, and crash-energy management.
Bring the vehicle’s VIN, repair invoice, photographs, estimate, alignment records, and any list of replaced panels. Ask the inspector to compare the work with current vehicle-specific repair information rather than relying only on a general welding opinion.
What a Professional Weld Inspection May Include
The inspection process depends on the material, access, symptoms, and repair history. It may include:
- Visual inspection: Checks for cracks, corrosion, gaps, incomplete plug welds, damaged coatings, missing attachments, poor fit, and seam movement.
- Repair-procedure review: Confirms the permitted sectioning location, attachment method, weld count, material restrictions, and required corrosion protection.
- Dimensional measuring: Checks whether relevant body reference points remain within the vehicle maker’s specifications.
- Selective access or teardown: Removes only the trim, coating, or sealer needed to inspect a hidden area while preserving evidence where possible.
- Repair-record review: Examines test-coupon results, welder settings, photographs, parts records, scans, calibration records, and quality-control documentation.
- Liquid penetrant testing: Can help reveal suitable surface-breaking flaws after correct surface preparation.
- Magnetic-particle testing: Can reveal certain surface and near-surface flaws in ferromagnetic steel.
- Ultrasonic testing: May detect internal features where thickness, geometry, access, and material permit useful interpretation.
- Diagnostic scanning and calibration review: Confirms whether affected electronic or driver-assistance systems received required post-repair procedures.
Non-destructive testing can provide useful evidence without cutting apart a component, but no single method works for every automotive joint. Thin sheet metal, coatings, adhesives, layered flanges, curved surfaces, and limited probe access can restrict what a test can show.
How to Choose a Qualified Inspection or Repair Shop
For a suspected structural repair problem, start with a collision-repair facility experienced with your vehicle’s make, construction material, and model year. A general fabrication welder may be highly skilled but may not have access to OEM body repair procedures, structural measuring equipment, resistance spot-welding equipment, scanning tools, or calibration resources.
Ask the shop:
- Do you have current OEM repair information for this VIN and model year?
- Can you identify the material and permitted repair or replacement method?
- Can you measure the body or frame when the location requires it?
- Can you document the weld count, attachment method, and test-weld results?
- How will seam sealer, primer, undercoating, and cavity protection be restored?
- Does this repair require pre- or post-repair scanning, aiming, initialization, or calibration?
- Will you provide photographs and an itemized written repair plan?
- What warranty applies to workmanship, corrosion protection, and refinishing?
For a disputed prior repair, consider an independent shop that did not perform the original work. Preserve invoices, photographs, removed parts when practical, and written findings before authorizing major rework.
Products Worth Considering

Compact Practical Door Alignment Tool: This handy door aligner efficiently fixes misaligned doors and uneven gaps caused by body collisions, bringing precise adjustment for flush door fit and smooth closing

COMPREHENSIVE KIT - Includes bumping, pick, and reverse curve hammers plus four specialized dollies, providing professional-grade tools for both major collision repair and precision dent removal on vehicles

I-Car Professional Automotive Collision Repair - Hardcover
Repair Options for Faulty Car Welds
The correct repair depends on the location, material, defect, prior work, and manufacturer procedure. A non-structural cosmetic problem may require controlled removal of the defective weld, correct rewelding, sealing, priming, and refinishing. A structural problem may require removal of the previous repair, replacement parts, an approved sectioning joint, measuring, test welds, corrosion protection, scanning, calibration, and documented quality checks.
Rewelding over a defective bead without removing the cause can trap contamination, add heat, distort the panel, and hide poor fusion. Likewise, grinding a weld smooth does not make it strong. The technician must determine why the original joint failed and whether the surrounding metal remains repairable.
Repair cost cannot be estimated responsibly from the appearance of one weld. Major cost drivers include:
- Diagnostic time and access
- Trim, glass, interior, suspension, battery, or drivetrain removal
- Body measuring and fixture time
- Steel grade, aluminum, mixed materials, and required equipment
- New panels, reinforcements, adhesives, rivets, and fasteners
- Corrosion protection and seam sealing
- Paint preparation, blending, and refinishing
- Diagnostic scanning and required calibrations
- Correction of damage hidden beneath the previous repair
Request an itemized estimate after damage analysis or necessary teardown. Ask whether the proposed work affects alignment, crash structure, corrosion coverage, sensors, cameras, radar, airbag systems, or high-voltage components.
If the issue may be a factory defect rather than an individual repair error, check the 17-character VIN through the NHTSA recall lookup. A result showing no open recall does not prove that a particular repair is correct. Owners who believe a broader safety-related defect exists can also file a complaint through NHTSA.
Products Worth Considering

【Material】: Crafted from premium stainless steel, this repair mesh boasts exceptional tensile strength to withstand intense pulling forces. Its inherent rust-proof and corrosion-resistant qualities guarantee reliable performance over extended periods, maintaining integrity without succumbing to deterioration or wear.

Automotive Bodywork and Rust Repair

Package Contents: You will receive 5 pieces of plastic reinforcing stainless steel wire mesh screen
Frequently Asked Questions
Which weld fault is the most serious?
A crack, lack of fusion, incomplete penetration, missed attachment, or separated joint in a load-bearing area can be serious. Risk depends on the flaw’s size, location, material, loading, and the required repair procedure. An open crack in a rocker, pillar, rail, roof structure, suspension mount, or restraint anchorage needs prompt professional evaluation.
How expensive is welding on a car?
There is no reliable universal price. Cost depends on access, teardown, material, body measuring, replacement parts, attachment method, corrosion protection, paint work, scanning, calibration, and local labor. Get an itemized estimate after the shop has identified the exact damage and OEM repair procedure.
How do you tell if a car weld is bad?
Look for cracking, seam separation, rust bleeding, bubbling paint, incomplete plug welds, missing attachment points, severe undercut, burn-through, movement, or new panel-alignment problems. These signs justify inspection, but appearance alone cannot confirm penetration, fusion, hidden corrosion, or structural strength.
Where do weld failures usually matter most on cars?
The greatest concern is at high-load or safety-related locations such as pillars, rockers, frame rails, roof rails, strut towers, suspension mounts, bumper reinforcements, seat mounts, seat-belt anchorages, battery structures, and previous structural sectioning joints.
Can you drive with a suspected faulty weld?
Stop driving and arrange towing if the structure is separating, a suspension or restraint mounting point is moving, the car suddenly handles poorly, or a panel may detach. A lower-risk cosmetic concern may allow limited use while arranging inspection, but do not deliberately flex or road-test a vehicle that shows structural warning signs.
Can rust around a weld mean the weld failed?
Rust does not automatically prove that the weld has broken, but it can weaken surrounding metal, hide cracking, and show that moisture entered the seam or corrosion protection was not restored. Rust at a structural repair should be inspected before it spreads.
Can a visual inspection prove that a car weld is safe?
No. A visual inspection can find cracks, gaps, corrosion, poor fit, and other warning signs, but it cannot certify hidden fusion, penetration, spot-weld nugget size, internal porosity, body dimensions, or crash performance. A complete judgment may require OEM procedure review, measuring, selective teardown, repair records, and suitable testing.
What should I ask the body shop after a structural weld repair?
Ask which OEM procedure and attachment method were used, whether the material and sectioning location were verified, how test welds were checked, whether body measurements were recorded, how corrosion protection was restored, and whether scans or calibrations were required. Request photographs and an itemized written repair record.
Conclusion
Unusual noises, cracked seams, rust, incomplete attachments, and changing panel alignment can all point to faulty welds in a car, but no single surface sign tells the whole story. The most important questions are where the problem is located, whether the joint is moving, what repair was performed, and whether the vehicle’s steering, suspension, occupant restraints, or structure may be affected.
Document visible symptoms without grinding, drilling, heating, or removing protective coatings. Stop driving and arrange towing when the structure is separating or the vehicle feels unsafe. For less urgent warning signs, have a qualified collision-repair professional compare the work with current OEM repair information, measurements, material requirements, attachment methods, corrosion protection, and any required electronic-system procedures.
Sources
- I-CAR OEM Technical Information Matrix — supports the need for vehicle-specific material, attachment, sectioning, adhesive, and corrosion-protection information.
- I-CAR: Back-To-Basics — Destructive Weld Testing — supports visual checks and destructive testing on matching test material before vehicle welding.
- I-CAR: Corrosion Protection Inspection During the Repair Process — supports inspection and restoration of seam sealer, cavity wax, adhesives, and other corrosion protection.
- TWI: What Is Non-Destructive Testing? — supports the general role and limitations of visual, penetrant, magnetic, ultrasonic, and other NDT methods.
- OSHA 29 CFR 1910.252: Welding, Cutting, and Brazing — supports ventilation, fire prevention, and hot-work safety precautions.
- NHTSA Recalls and Safety Complaints — supports VIN recall checks and reporting a suspected vehicle safety defect.




