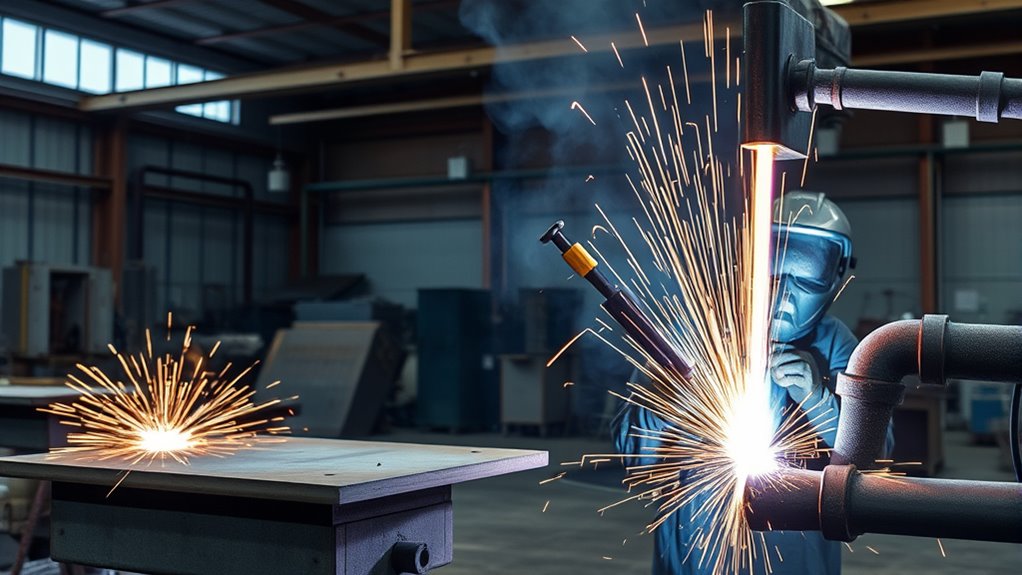
Welding positions can make a clean bead feel easy or turn a simple joint into a hard test of control. The code tells you how the joint sits, how gravity pulls the puddle, and how your body must move. You use 1G for flat groove welds, 2G for horizontal groove welds, 3G for vertical groove welds, and 4G for overhead groove welds. Pipe positions such as 5G and 6G add more challenge because you weld around a fixed pipe instead of turning the work.
Quick Answer
Welding positions describe the angle of the joint and the direction you weld. The number shows the position, while the letter shows the weld type: G means groove weld, and F means fillet weld. Flat positions feel easier because gravity helps the puddle stay in place, while vertical, overhead, and fixed-pipe positions need tighter torch control.
Key Takeaways
- Use 1G for flat groove welds, 2G for horizontal groove welds, 3G for vertical groove welds, and 4G for overhead groove welds.
- Expect 5G and 6G pipe welds to feel harder because the pipe stays fixed while your angle changes.
- Read G as groove weld and F as fillet weld before you choose your setup or test position.
- Match your travel speed, arc length, and torch angle to the way gravity affects the weld pool.
What 1G, 2G, 3G, 4G, 5G, and 6G Mean
Use these welding positions to match your setup, build control, and improve with steady practice. Flat welding often gives you the best place to build your foundation.
The number tells you the position. The letter tells you the weld type. A G position means groove weld, while an F position means fillet weld.
For plate welding, 1G places the weld flat, 2G places it horizontal, 3G places it vertical, and 4G places it overhead. For pipe welding, 5G fixes the pipe in a horizontal position, while 6G fixes it at an angle.
How 1G, 2G, 3G, and 4G Differ
The four basic groove positions differ mainly in how gravity affects the weld pool. Each position also changes how much control you need to keep the bead even.
In 1G, you work flat on a horizontal surface. The molten metal stays where you place it, so you can focus on speed, penetration, and high deposition.
In 1G, flat welding keeps the puddle stable, so you can focus on speed, penetration, and high deposition.
In 2G, the joint sits horizontal, but you must steer the puddle from side to side. Gravity pulls the metal along the bead, so steady travel speed matters.
In 3G, you weld vertically and move up or down while you control buildup. This position demands tighter welding techniques and disciplined travel speed.
In 4G, you weld overhead, so gravity works against you. Use a precise torch angle, short arc length, and clean joint preparation. Understanding the thermal properties of stainless steel can also help you control heat in these positions.
As you master each position, you gain more freedom to take on complex jobs, qualify for stronger roles, and build better welds.
Warning: Use proper eye, face, hand, and respiratory protection when you weld, especially in overhead or confined positions.
Why 5G and 6G Pipe Welding Positions Are Harder
When you move into 5G and 6G, the pipe stops rotating, and your technique must adapt to fixed angles. In 5G, you weld on a horizontal pipe that won’t turn, so you control travel, puddle size, and torch angle at every point.
In 6G, the pipe sits at 45 degrees. You must blend vertical, horizontal, and overhead movements with care. These welding technique challenges demand strong position adaptability skills.
- Hold a steady arc over the top edge.
- Adjust your body position before the joint tightens.
- Control heat input to reduce defects.
- Keep your rhythm consistent around the pipe.
These positions test how well you adapt under pressure, so they affect weld quality and productivity. Proper fillet weld sizing also helps welds meet strength needs.
Certification tests often use 6G because the position checks control across several angles. Strong 5G and 6G skills can also support higher-paying pipe welding work, but pay depends on location, industry, certification, and experience.
G and F: Groove vs. Fillet Welds

Groove welds, marked with a G, fill the gap between two metal pieces. They can give you deeper penetration and a stronger joint when the design calls for it.
Fillet welds, marked with an F, build weld metal along the outside corner where two parts meet at an angle. You often use them on tee joints, lap joints, and corner joints.
You should choose groove welds when the joint needs higher joint strength, deeper penetration depth, or full joint preparation. These welds often suit butt, corner, tee, lap, and edge joints when the design requires them.
Use fillet applications when you need a simpler setup, especially on right-angle joints. They can suit thin stock and many structural details when the weld size meets the design requirement.
Use fillet applications for simpler setup on thin stock or right-angle joints when the design allows them.
Your welding techniques must match the position and joint. A 1G groove weld, a 2F fillet weld, and a 6G pipe weld all demand different control.
Check material compatibility before you start because the weld profile affects strength, distortion, and access. Understanding plasma cutting gases can also help you prepare cleaner joints before welding.
When you plan the joint before you strike an arc, you reduce weak spots and build welds that hold.
How AWS and ISO Welding Position Names Compare
After you choose between groove and fillet welds, you need to read the position name correctly. American Welding Society (AWS) and International Organization for Standardization (ISO) systems use different labels for similar weld orientations.
In AWS Standards, 1G means flat groove weld, 2G means horizontal groove weld, 3G means vertical groove weld, and 4G means overhead groove weld. ISO Standards use letter codes, such as PA for flat and PC for horizontal.
- Picture a plate lying open and level: 1G in AWS, PA in ISO.
- Picture the joint turned sidewise at chest height: 2G in AWS, PC in ISO.
- Picture the seam standing upright: 3G in AWS, with ISO terms that vary by weld type and direction.
- Picture the weld above your head: 4G in AWS, with ISO overhead terms based on the joint type.
For pipe, AWS 5G fixes the pipe horizontally. ISO terms depend on pipe angle and welding progression, so match the drawing, procedure, and test code before you weld.
Learn these tags, and you’ll choose Welding Techniques, filler metals, and body positions with more confidence.
Common Mistakes When Reading Welding Position Codes
Many beginners mix up the number and the letter. Remember that the number shows the position, while the letter shows the weld type.
Another common mistake involves pipe rotation. A 1G pipe weld can rotate during welding, but 5G and 6G pipe welds stay fixed. That difference changes your body position and puddle control.
You should also avoid treating AWS and ISO labels as exact word-for-word matches. The safest approach uses the code, drawing, weld procedure, and test requirement together.
Pro tip: Before you weld, point to the joint, say the position code aloud, and plan where your hands and body will move.
Frequently Asked Questions
How Do Weld Positions Affect Inspection and Testing Requirements?
Weld positions change access, defect risk, and inspection needs. You may face stricter visual, radiographic, or ultrasonic testing when gravity makes defects more likely.
Which Welding Position Is Best for Beginners to Practice First?
You should start with 1G because flat welds help you see bead control clearly. Practice on clean scrap material first, then move to horizontal, vertical, and overhead positions.
Can All Metals Be Welded in Every Position Equally Well?
No, you can’t weld all metals equally well in every position. Metal type, thickness, heat control, joint design, and process choice all change how the puddle behaves.
How Does Pipe Diameter Change Welding Position Difficulty?
Smaller pipe diameters can increase position difficulty because they limit torch angle, travel speed, and access. Larger pipe can give you more room, but it still demands steady body position and rhythm.
What Equipment Adjustments Help Maintain Weld Quality in Awkward Positions?
Adjust your torch angle, shorten electrode distance, and control travel speed to manage the puddle. Use suitable filler material, steady shielding, and a comfortable grip to maintain penetration and reduce spatter.
Safety Disclaimer: This article is for informational purposes only and does not replace hands-on training, workplace procedures, or qualified instruction. Always follow your welding procedure, equipment manual, local codes, and safety rules before you weld.
Conclusion
Welding position codes help you understand the joint angle, puddle behavior, and control needed before you start. You now know that 1G through 4G describe common groove weld setups, while 5G and 6G add fixed-pipe challenges. For example, a clean 6G pipe test shows strong control across several positions. Use the code to set up correctly, practice with purpose, and match your technique to the joint every time.


