When I first decided to set up a welder in my garage, I thought it’d be as simple as plugging it in and striking an arc. Turns out, there’s a lot more to it — from figuring out whether MIG or TIG fits your projects, to dialing in the right amps for the metal thickness, prepping joints so the filler rod flows smooth, and making sure your power supply can handle the load without tripping breakers. I’ve learned the hard way that skipping steps — like proper grounding or ventilation — can ruin weld quality, weaken structural strength, or even put your safety on the line.
Whether you’re burning rods on mild steel, working stainless, or experimenting with aluminum, the way you set up your welder in your garage will make or break your results. Stick around, because I’m going to walk you through the exact setup process I use — tested, tweaked, and proven in real-world shop conditions.
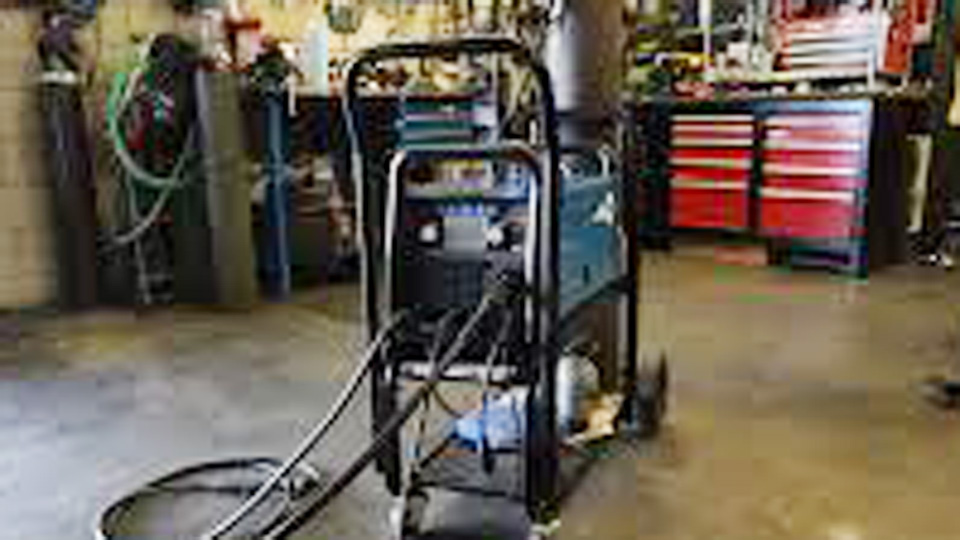
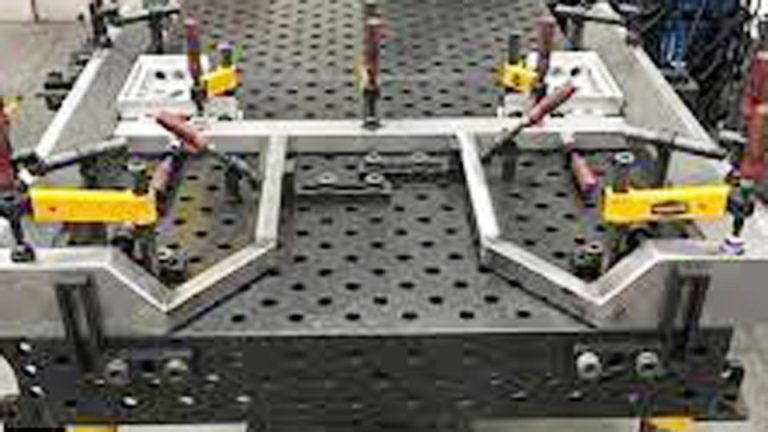
Photo by hotrod
Why a Proper Garage Welding Setup Matters
A good welding setup isn’t just about plugging in a machine and striking an arc. It’s about creating a safe, efficient workspace that supports clean welds and keeps you out of trouble. A poorly set welder can lead to bad welds, fire hazards, or electrical issues. I once saw a buddy fry his welder because he didn’t check his garage’s power supply—don’t make that mistake. A solid setup saves time, ensures your welds meet code (if needed), and lets you focus on the craft, whether you’re joining mild steel for a gate or aluminum for a boat repair.
Choosing the Right Welder for Your Garage
Picking the right welder is the foundation of your setup. The best choice depends on your projects, skill level, and garage constraints. Let’s break down the main types and what works in a garage.
Types of Welders for Garage Use
MIG (Metal Inert Gas): Uses a wire feeder and shielding gas. Great for beginners and versatile for steel, stainless, and aluminum. I started with a 110V MIG welder in my garage—perfect for thin sheet metal.
Stick (Shielded Metal Arc): Uses flux-coated rods. Rugged, cheap, and ideal for outdoor or rusty metal. It’s my go-to for heavy steel repairs but can be messy.
TIG (Tungsten Inert Gas): Precise, clean, and best for stainless or aluminum. Harder to learn but worth it for intricate work. I’ve used TIG for custom motorcycle parts.
Flux-Core: Like MIG but no gas needed. Good for thicker steel and windy conditions. It’s louder and smokier, so ventilation is key.
Matching Welder to Power Supply
Most garages have 110V outlets, which limit you to smaller welders (100-140 amps). For heavier work, you’ll need a 220V outlet for 200+ amp machines. Check your breaker box—I once had to upgrade to a 50-amp breaker to run my 220V MIG. If you’re renting, talk to your landlord before wiring changes.
Practical Tips for Choosing
- Budget: Entry-level MIG welders start at $300-$600 (e.g., Lincoln Electric or Hobart). Stick is cheaper, TIG is pricier.
- Space: A compact MIG or stick welder fits small garages. TIG setups need more room for gas bottles.
- Projects: Thin sheet metal? Go MIG or TIG. Heavy structural steel? Stick or flux-core.
- Mistake to Avoid: Buying a welder too big for your power supply. A 220V welder on a 110V circuit won’t work—trust me, I’ve seen the sparks fly (not the good kind).
| Welder Type | Best For | Power Needs | Cost Range |
|---|---|---|---|
| MIG | Beginners, versatile metals | 110V or 220V | $300-$1,000 |
| Stick | Heavy steel, outdoor | 110V or 220V | $200-$600 |
| TIG | Precision, stainless/aluminum | 220V | $800-$2,000 |
| Flux-Core | Thick steel, no gas | 110V or 220V | $300-$800 |
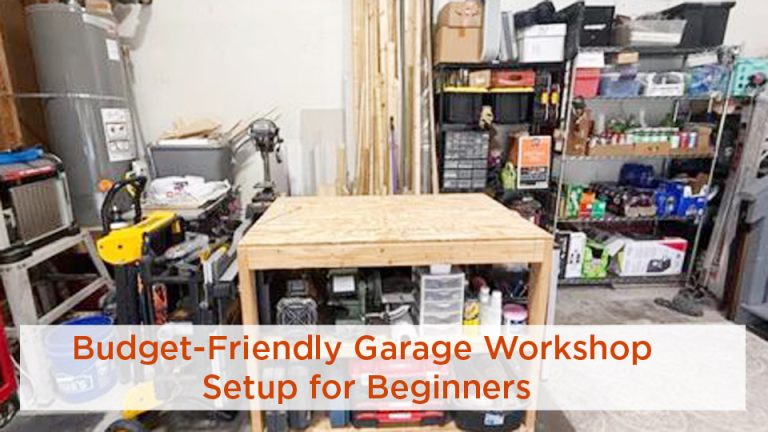
Setting Up Your Garage for Welding
Your garage needs to be weld-ready before you plug in. Safety, ventilation, and workspace prep are non-negotiable.
Electrical Setup
Check Power: Confirm your garage has the right voltage (110V or 220V) and amperage for your welder. Most 110V welders need a 20-30 amp circuit; 220V needs 40-50 amps.
Dedicated Circuit: Avoid sharing the circuit with other appliances. I once tripped a breaker mid-weld because the fridge kicked on—annoying and dangerous.
Extension Cords: Use heavy-duty, short cords (10-12 gauge) to avoid voltage drops. Better yet, plug directly into the outlet.
Ventilation
Welding fumes are no joke—zinc oxide from galvanized steel can give you metal fume fever. I learned this the hard way early on.
- Open Doors/Windows: Natural airflow helps, but it’s not enough for heavy welding.
- Exhaust Fan: Install a 500-1,000 CFM fan to pull fumes out. I mounted one in my garage window for under $100.
- Fume Extractor: For pro setups, a portable extractor (like a Lincoln X-Tractor) is worth the investment.
Fire Safety
Welding sparks can ignite anything flammable. I’ve seen a stray spark start a smoldering pile of rags—scary stuff.
- Clear the Area: Remove paper, wood, or chemicals within 35 feet. Store gas cans outside.
- Fire Extinguisher: Keep a 10-lb ABC extinguisher nearby. Check it yearly.
- Welding Blanket: Drape spark-resistant blankets over nearby surfaces. They’re cheap insurance.
Workspace Prep
- Welding Table: A sturdy steel table (3/16-inch thick top) is ideal. I built mine from scrap for $50. Ensure it’s level for stable welds.
- Lighting: Bright LED shop lights (5,000 lumens) help you see your work. Dim lighting leads to sloppy welds.
- Storage: Organize rods, wire, and tools in a dry cabinet to prevent rust. Damp stick electrodes are a nightmare to weld with.
Step-by-Step Guide to Setting Up Your Welder
Let’s get that welder up and running. Here’s a step-by-step guide based on setting up my own 110V MIG welder in my garage.
Step 1: Unbox and Inspect
Unpack your welder and check for damage. Read the manual—boring but critical. My first welder had a loose ground clamp that caused arcing issues until I tightened it.
Step 2: Install Consumables
- MIG: Load the wire spool (e.g., 0.030-inch ER70S-6 for mild steel). Thread it through the feeder and set tension so it feeds smoothly.
- Stick: Insert a rod (e.g., 6011 for general use) into the electrode holder.
- TIG: Sharpen a tungsten electrode (2% thoriated for steel) and install it with the right collet.
Step 3: Connect Gas (if needed)
For MIG or TIG, attach a shielding gas bottle (e.g., 75/25 argon/CO2 for MIG). Secure it to a wall or cart to prevent tipping. Set the regulator to 20-30 CFH for MIG. I once forgot to tighten the regulator—gas leaks are expensive mistakes.
Step 4: Plug In and Test
Plug into a compatible outlet. Turn on the welder and test the trigger (MIG) or arc start (Stick/TIG) on scrap metal. Adjust voltage and wire speed for MIG (start at mid-range settings, like 3/10 voltage, 50 wire speed). For Stick, set amperage (e.g., 90-120 amps for 1/8-inch 6011 rods).
Step 5: Fine-Tune Settings
Run a test bead on scrap. For MIG, listen for a consistent “bacon sizzle” sound. Too much spatter? Lower voltage. Weak weld? Increase wire speed. I spent hours tweaking my first MIG welder to get smooth beads—patience pays off.
Selecting Rods and Filler Metals
Your filler metal choice affects weld strength and quality. Here’s what works for common garage projects.
MIG Wire
- ER70S-6: Best for mild steel (e.g., car frames, trailers). Good for rusty metal too.
- ER308L: Use for stainless steel (e.g., exhausts). Needs argon-rich gas.
- 4043 or 5356: For aluminum (e.g., boat repairs). 4043 is easier for beginners.
Stick Electrodes
- 6011: Versatile, penetrates dirty steel. Great for farm repairs.
- 7018: Strong, low-hydrogen for structural welds. Keep dry to avoid porosity.
- 308L: For stainless steel. Use DC current for best results.
TIG Filler Rods
- ER70S-2: General-purpose for steel. Easy to control.
- ER308L: For stainless. Match to your base metal.
- 4043: For aluminum. Flows smoothly with practice.
Tips for Filler Selection
- Match filler to base metal for strength and compatibility.
- Store rods/wire in a dry place. I use a sealed bucket with desiccant packs.
- Common Mistake: Using the wrong gas with MIG wire (e.g., 100% CO2 with stainless wire). Check your wire’s gas requirements.
Safety Gear and Practices
Welding is dangerous without proper gear. I’ve got a scar from a stray spark that slipped past a cheap glove—learn from my mistake.
- Helmet: Auto-darkening (shade 9-13) for comfort. A $50-100 helmet works fine for hobbyists.
- Gloves: Heavy leather welding gloves. Avoid thin ones—they burn through.
- Jacket: Flame-resistant cotton or leather. Long sleeves protect from UV burns.
- Respirator: For heavy welding or galvanized steel. Fumes are toxic.
- Boots: Steel-toe with non-slip soles. Sparks love to land on laces.
Always ground your workpiece properly to avoid shocks. I once forgot to clamp the ground and got a nasty zap—check it every time.
Common Garage Welding Mistakes and Fixes
Mistake: Poor ventilation. Fumes make you dizzy or sick. Fix: Install a fan or extractor before welding.
Mistake: Wrong welder settings. Burn-through or weak welds ruin your project. Fix: Test on scrap and adjust voltage/amperage gradually.
Mistake: Flammable clutter. Sparks ignite rags or paint cans. Fix: Clear a 35-foot radius and use welding blankets.
Mistake: Ignoring power limits. Tripped breakers or fried welders. Fix: Verify your circuit’s capacity before buying.
Sample Project: Welding a Steel Workbench
Let’s apply this to a real garage project—building a steel workbench.
- Welder: 110V MIG (e.g., Hobart Handler 140).
- Material: 1/8-inch mild steel angle iron for frame, 3/16-inch plate for top.
- Filler: 0.030-inch ER70S-6 wire, 75/25 argon/CO2 gas.
- Settings: Voltage at 3/10, wire speed at 50. Adjust for a smooth sizzle.
- Prep: Grind joints clean, clamp tightly. Use square tubing for legs to ensure stability.
- Safety: Wear helmet, gloves, jacket. Clear the garage of flammables.
- Process: Tack weld the frame, check for square, then run full beads. Grind smooth for a pro finish.
This setup got me a rock-solid table that’s held up for years of welding projects.
Meeting Welding Codes (If Needed)
If you’re welding for commercial use or resale (e.g., trailers), check local codes like AWS D1.1 for structural steel. These require proper joint prep, filler selection, and sometimes inspection (like RT or UT). For DIY, codes are less strict, but matching filler to base metal ensures strong welds. I’ve had to redo a trailer weld because I skipped code research—don’t skip it if it applies.
Conclusion
You’re now ready to set up a welder in your garage with confidence. From picking the right machine (MIG for beginners, Stick for rugged jobs, TIG for precision) to setting up a safe, ventilated workspace, you’ve got the know-how to create a shop that’s both functional and safe. Choose your filler wisely, dial in your settings with test welds, and always prioritize safety—helmet, gloves, and a clear workspace are non-negotiable.
My tips: Invest in a good auto-darkening helmet; it saves your eyes and makes welding way more comfortable. Now, fire up that welder, grab some steel, and start building something awesome.
FAQ
What’s the best welder for a small garage?
A 110V MIG welder (like a Lincoln Easy MIG 140) is ideal for small garages. It’s versatile, easy to use, and works with standard outlets. Great for steel or aluminum up to 1/4-inch thick.
How much power do I need for a garage welder?
Most garage welders run on 110V, 20-30 amp circuits for light work. For thicker materials, a 220V, 40-50 amp circuit is better. Check your breaker box and consult an electrician if needed.
Is welding in a garage safe?
Yes, if you ventilate properly (fans or extractors), clear flammables, and use safety gear (helmet, gloves, jacket). Keep a fire extinguisher handy and ground your workpiece to avoid shocks.
What filler metal should I use for mild steel?
For MIG, use ER70S-6 wire with 75/25 argon/CO2 gas. For Stick, 6011 or 7018 electrodes work well. Match filler to your base metal and store it dry to avoid porosity.
How do I avoid bad welds in my garage?
Prep your metal (grind clean, remove rust), use the right settings (test on scrap), and maintain steady hand movement. Poor prep or wrong settings cause porosity or burn-through.