Learning dual shield flux core welding was a game-changer in the shop. Unlike regular flux core, this process combines flux-cored wire with an external shielding gas, giving welds extra protection and strength. When I first tried it, I realized how much easier it makes tackling thicker steel, heavy fabrication, and structural projects compared to standard MIG or stick welding.
The key is managing arc control, metal thickness, and slower travel speeds to get a clean, strong bead without excessive spatter. For anyone struggling with weak welds or constantly cleaning up slag, mastering dual shield can save time, material, and headaches. Stick around — I’ll share practical tips, tricks, and real-world insights to help you get the most out of this powerful welding method.
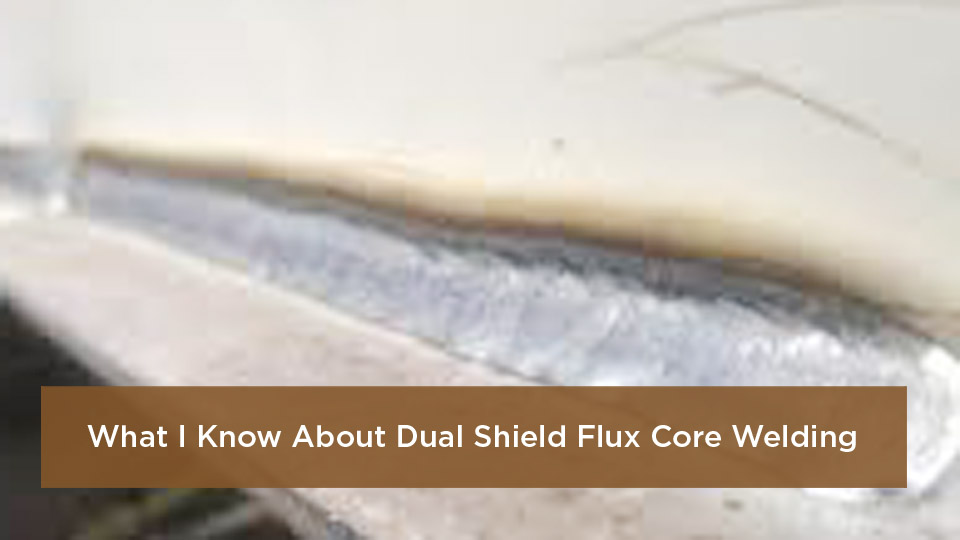
Image by reddit
What Is the Difference Between Dual Shield and Regular Flux Core Welding?
Regular flux core welding, or self-shielded FCAW, relies solely on the flux inside the wire to generate its own gas and slag protection. It’s like a one-man band—great for outdoor jobs where wind would scatter your shielding gas, but it kicks up smoke like a bonfire and leaves a messier bead that needs extra cleanup.
Dual shield flux core welding? That’s the upgraded version, buddy. It uses the same tubular wire filled with flux, but you add an external shielding gas—typically that Ar/CO2 mix I mentioned. The “dual” part comes from the double protection: the flux does its thing with slag and internal gas, while the external shield locks out atmospheric nasties even tighter.
I remember my first big job on a bridge repair crew in Ohio; we switched from self-shielded to dual shield on some I-beams, and the penetration jumped from okay to “holy cow, that’s fused deep.” No more porosity pockmarks ruining X-rays for inspection.
The key difference hits you in the practicals. Self-shielded is dead simple—no gas bottle to lug around—but it’s spattery and smoky, better for quick field fixes on dirty steel. Dual shield runs cleaner, with less undercut and a smoother arc that’s forgiving on out-of-position work.
Downside? You need gas, so wind’s still your enemy without a windbreak. But for shop work or semi-protected sites, it’s a game-changer. If you’re welding 1/4-inch plate or thicker, dual shield’s higher deposition rate means fewer passes, saving you hours. Just don’t try running self-shielded wire with gas; it’ll junk up your weld faster than you can say “slag inclusion.”
How Does Dual Shield Flux Core Welding Work?
At its heart, dual shield is a semi-automatic process, just like MIG, but with brains. You feed a continuous spool of flux-cored wire through your gun—say, 0.045-inch E71T-1 for mild steel—powered by a constant-voltage DC machine set to electrode positive polarity. The arc jumps from the wire tip to your workpiece, melting the wire and base metal into a puddle.
Here’s the magic: That flux core? It’s loaded with carbonates, ferromanganese for deoxidation, and iron powder to beef up deposition. As it heats up, it spits out shielding gases like CO2 and hydrogen, plus a liquid slag that floats on top of the puddle like a protective blanket.
Then, your external gas flows from the nozzle—about 25-35 cubic feet per hour—blanketing everything to prevent oxidation. The combo creates a stable, columnar arc that digs deep without wandering.
I once had a student who thought it was “just MIG with extras.” Wrong. The flux stabilizes the arc for high amps, letting you run hot on thick stuff without burn-through. The slag cools slow, giving you time to manipulate the puddle on verticals. Electrically, it’s DCEP, drawing 200-400 amps depending on wire size, with voltage around 24-28 for flat work.
Gas flow too low? Porosity. Too high? Turbulence. Nail it, and you’re laying down 5-8 pounds of filler per hour, way faster than stick. It’s physics meeting chemistry in a way that makes welds bulletproof—deep fusion, low hydrogen for crack resistance, and mechanical properties that match AWS D1.1 codes for structural steel.
Think of it as welding with training wheels for the arc: The flux forgives minor rust or oil, and the gas ensures consistency. In my shop, we run it on everything from low-alloy steels to weathering grades like Corten, always preheating if needed for codes.
What Equipment Do You Need for Dual Shield Flux Core Welding?
Gear up right, or you’re just asking for frustration—I’ve learned that the hard way, swapping out fried tips mid-job. Start with a solid MIG welder capable of 250+ amps; something like a Miller Multimatic 215 or Lincoln Power MIG 210 handles .035 to .045 wire like a dream. Constant voltage output is non-negotiable—CV keeps the arc steady as wire feed speed changes.
Your wire feeder needs knurled drive rolls to grip that tubular wire without flattening it; U-groove for solid, but knurled for flux core to avoid birdnesting. Gun-wise, go air-cooled for light duty or water-cooled for all-day runs—Bernard or Tweco nozzles, sized to your wire diameter. Don’t skimp on the liner; a clogged one turns your feed into a spaghetti factory.
Gas setup: A regulator for 75/25 Ar/CO2 mix, flowmeter set to 30 CFH, and a bottle—20 cubic feet for hobbyists, 100+ for pros. Polarity switch to DCEP, and ground clamp with at least 200-amp capacity.
Safety kit? Auto-darkening helmet (shade 10-12), leather jacket, gloves, and a good fume extractor—flux core loves to smoke, even with gas.
For joint prep, angle grinder with flap discs for bevels, and a chipping hammer for slag. Total startup? Under $2,000 for basics, but invest in quality wire—ESAB Dual Shield or Hobart Fabshield—to avoid inconsistencies.
In the field, I’ve hauled engine-driven welders like the Miller Bobcat; they genny power and gas if you’re remote. Pro tip: Always check your machine’s duty cycle—40% at 250 amps means breaks on heavy fab, or you’ll overheat.
Step-by-Step Guide to Setting Up Your Machine for Dual Shield Welding
Setting up is half the battle—get it wrong, and your arc fights you like a mule. Let’s walk through it, step by step, like I’m right there tweaking dials with you.
First, load the wire: Unspool your flux core—E71T-1 for all-position mild steel—and thread it through the feeder. Cut the end square, feed until it hits the gun, then trim to 3/4-inch stickout from the tip. Install knurled rolls, tighten just enough—no mashing.
Next, polarity: Flip to DCEP. Wire positive, work negative. Hook up your gas: Regulator on the bottle, hose to the gun, flow at 25-35 CFH. Test for leaks with soapy water—bubbles mean trouble.
Now, parameters: For .045 wire on 3/8-inch plate, start at 260 amps, 26 volts, 350 inches per minute wire speed. Consult the wire spool’s chart—it’s gold. Flat position? Drag at 15-degree angle. Vertical up? Same, but slower travel.
Ground it solid—magnetic clamp if flat, but clamp direct for best contact. Fire a test bead on scrap: Listen for a steady “frying bacon” sizzle, not popcorn. Adjust voltage up for flatter bead, wire speed for penetration. Too hot? Back off amps to avoid blow-through.
Last, clean your gun nozzle—flux loves to cake. In my early days, I ignored a gunked liner and spent an hour untangling wire. Now, I wipe after every spool. Run a purge: Pull trigger sans work, ensure gas flows clean. You’re set—strike that arc and lay a bead. Practice on butt joints first; it’ll build your feel.
Best Practices and Machine Settings for Dual Shield Flux Core Welding
Machine settings aren’t set-it-and-forget-it; they’re your recipe for success. I’ve dialed in hundreds of runs, and here’s what sticks: Match amps to wire size—180-220 for .035, 250-300 for .045. Voltage follows: 22-25 for short arc on thin stuff, 26-29 for spray on thick.
Wire speed? 250-400 IPM, syncing with amps for stable transfer. Gas flow: 30 CFH sweet spot—too low invites porosity, too high wastes argon. Travel speed: 10-18 inches per minute flat, slower uphill to let slag support the puddle.
Technique matters: Drag technique, 10-15 degree push for flat, slight weave for fillets. Keep stickout 1/2 to 3/4 inch—longer cools the wire, risking wander. Preheat 1/4-inch plus to 150°F on low-alloy; codes like AWS D1.1 demand it for hydrogen control.
Common tweak: Rusty base? Bump amps 10% for penetration, but grind heavy scale. Overhead? Drop voltage 1-2 points to control drip. In windy shops, use a booth or CO2 straight for deeper dig. Always chip slag between passes—trapped inclusions kill strength.
From my trailer builds, I learned: Stringer beads for speed, but weave for gaps over 1/16 inch. Test on witness coupons; bend ’em—if they snap, dial back heat. These aren’t guesses; they’re battle-tested for US fab shops where downtime costs real money.
Common Mistakes in Dual Shield Flux Core Welding and How to Fix Them
Man, the stories I could tell about rookies—and yeah, me included—botching dual shield. Biggest goof? Wrong polarity—DCEN instead of DCEP. Arc sputters, penetration tanks. Fix: Double-check switch; it’s a 30-second save.
Porosity pox? Blame low gas flow or dirty wire. I’ve chased ghosts like that on a shipyard gig—turned out contaminated gas hose. Clean fittings, purge lines, flow 30 CFH minimum. Worm tracking—those squiggly lines? Excess voltage; drop 0.5 volts till smooth.
Birdnesting in the feeder? Overtight rolls mash the tube. Loosen tension, use knurled V-grooves. Slag inclusions? Don’t skip chipping; hammer between passes, wire brush for shine. Undercut on edges? Slow travel, less weave—flux helps, but greed bites.
Overheating the gun on long runs? Water-cool or duty-cycle breaks. I fried a nozzle once rushing a boom arm repair—lesson learned, pause every 10 minutes. And don’t push the gun; drag it, or spatter explodes. Fix these, and your reject rate plummets. It’s not rocket science—just shop smarts.
Pros and Cons of Dual Shield Flux Core Welding
| Aspect | Pros | Cons |
|---|---|---|
| Deposition Rate | High—up to 8 lbs/hour, fewer passes on thick steel | Requires beefier machine for max output |
| Penetration | Deep, sidewall fusion on dirty/rusty metal | Can burn thin stock under 1/8 inch |
| All-Position Capability | Excellent vertical/uphill; slag supports puddle | Wind-sensitive without shelter |
| Weld Quality | Low hydrogen, crack-resistant; meets AWS codes | Slag cleanup needed, though easy |
| Cost Efficiency | Less filler per joint, tolerant of prep shortcuts | Wire + gas pricier than solid MIG |
| Ease of Use | Forgiving arc, less skill for consistency | Fumes require ventilation |
Dual shield shines for structural work—I’ve used it on everything from railcars to pressure vessels, where speed trumps perfection. But for cosmetic trailer panels? Skip it; MIG’s cleaner. Weigh your job, and it’ll pay off.
When Should You Use Dual Shield Flux Core Welding?
Pull dual shield when speed and strength trump a spotless shop. Thick sections—1/4 inch plus—like I-beams or heavy plate fab scream for it; that deep dig fuses without preheat hassles on mild steel. Out-of-position? Overhead on equipment repairs or verticals in shipbuilding—slag holds the puddle like glue.
Dirty conditions? Mill scale on recycled beams or rusty farm gear—flux deoxidizes, saving grind time. High-volume production: Bridge girders, offshore rigs, or railcar frames in the US, where AWS D1.1 certs demand low defects. Cost-wise, it’s killer for 70-80 ksi yield steels like HY-80 in military apps.
Skip it for thin sheet or windy fields—go self-shielded. Or indoors on clean stock? Solid MIG edges it for looks. In my experience, if you’re welding low-alloy or weathering steel like Corten for bridges, dual shield’s your hammer. It’s not everyday, but when it fits, nothing touches it for productivity.
Real-World Applications of Dual Shield Flux Core Welding in the USA
From the rust belt to the oil fields, dual shield’s woven into America’s backbone. Construction crews in Chicago slam it on skyscraper skeletons—fast fillets on wide-flange beams, meeting AISC codes with minimal distortion. Shipyards in Louisiana? It’s gold for hull repairs on tankers; all-position on curved plates, low hydrogen to dodge cracks in saltwater air.
Heavy equipment makers in the Midwest—think John Deere or Caterpillar dealers—use it for boom arms and chassis; penetrates castings without preheat, cuts downtime. Railcar fabricators in Pennsylvania lay miles of weld on hopper cars, high deposition for underframe gussets. Even offshore platforms in the Gulf: Wind breaks and gas mix handle the brine, ensuring X-ray clean roots.
I’ve welded potato bins in Idaho with it—structural frames that haul tons—and trailer hitches in Texas that tow forever. Military? HY-100 subs get Dual Shield II wires for toughness. It’s everywhere pros need welds that last, from pipelines to pressure vessels, proving its chops in real US grit.
Safety Considerations for Dual Shield Flux Core Welding
Safety ain’t optional—it’s your ticket home at quitting time. Flux core, even dual shielded, pumps fumes like a chimney: Manganese, CO2, ozone. Ventilate hard—fume arms or shop exhaust; NIOSH mask if tight spaces. I’ve coughed up lessons from ignoring that on a windy site—now I test air quarterly.
UV/IR rays fry skin; full leather—jacket, bib, gauntlets. Spatter? FR pants tucked into boots; I’ve got scars from loose cuffs. Gas bottles chain-secure, away from heat—explosion risk. Ground faults? GFCI outlets, inspect cables daily.
Slag flies hot; chip with eye pro, hammer away. Noise? Earplugs under the helmet. Fire watch post-weld—slag sparks linger. Follow OSHA 1910.252: No solvents nearby, dry workspace. In my crews, we drill “stop if unsure”—better safe than sidelined. Gear up, breathe easy, weld smart.
Comparing Dual Shield Flux Core to Other Welding Processes
Dual shield vs. stick? Stick’s portable, but slow—dual’s 3x deposition for fab. TIG? Pretty beads, but dual’s faster for dirty steel, less skill. MIG solid wire? Cleaner, but shallow on thick; dual penetrates rusty joints MIG hates.
Self-shielded flux? Outdoor champ, but smoky; dual’s shop king with gas polish. Submerged arc? Industrial beast, but dual’s versatile for positions. In US shops, dual slots between MIG speed and stick toughness—ideal for structural where codes bite.
I’ve switched mid-job: TIG root, dual fill on pipe—best of both. Pick by material, position, environment—dual wins most battles.
Step-by-Step Guide to Welding a Fillet Joint with Dual Shield
Fillet joints are bread-and-butter; let’s nail one vertical-up, like on a T-beam.
Prep: Bevel edges 45 degrees if gapped, grind clean to bright metal. Tack three points, 4 inches apart—check square.
Setup: .045 wire, 260A/26V/350 IPM, 30 CFH gas. Drag angle 15 degrees, 3/4 stickout.
Strike: Whip arc at tack, steady drag up. Stringer first pass—travel 8 IPM, let slag trail.
Weave second: Slight side-to-side, 1/8 inch wide, pause edges for tie-in. Chip hot—slag peels easy.
Cap: Straight stringer, feather ends. Grind if code calls, inspect for uniformity.
My anecdote: First fillet on a trailer frame—rushed, undercut city. Slow down, and it’s money. Practice on 1/4 tee; you’ll groove it quick.
Choosing the Right Filler Wire for Dual Shield Welding
Wire’s your weld’s soul—pick wrong, and it’s heartbreak. For mild steel, E71T-1 all-position, AWS A5.20 classified—handles 70 ksi tensile, low hydrogen. .035 for 1/8-1/4 plate, .045 for thicker.
Low-alloy? E80T-something for 80 ksi yield, like HY-80 naval. Weathering steel? Nickel-bearing for Corten. Check spool for gas match—100% CO2 for deep pen, Ar/CO2 for spray.
Store dry; moisture cracks welds. I’ve swapped Hobart 71 for ESAB Dual Shield on jobs—both rock, but match your machine’s feed. Diameter rule: Thicker wire, hotter run—test for spatter.
Preparing Joints for Optimal Dual Shield Welds
Prep’s 80% of perfection—lazy here, regret later. Butt joints? V-groove 30-60 degrees, 1/16 root gap for filler flow. Fillets? Clean to base metal, no paint; angle grinder shines.
Preheat: 100-200°F on 1/2-inch plus, torch or oven—prevents cold lap. Rusty? Wire wheel or flap disc; flux forgives light scale, but heavy? Grind or pickle.
Tack strong—1/2 length, pull test. Gaps over 1/8? Backing bar. In field repairs, I’ve clamped with magnets—steady hands win. Clean gun pre-run; residue poisons beads.
Advanced Techniques for Out-of-Position Dual Shield Welding
Out-of-position’s where dual shines—slag’s your buddy. Vertical up fillets: Drag slow, 6-8 IPM, slight pause for buildup. Overhead: Short stickout, 22V to control drip; stringers only.
Weave limits: 1/4 inch max, or slag traps. For pipes, root with TIG, fill dual—hybrid heat control. My trick: “Cough” technique—short arc bursts uphill, rests puddle.
On slopes, adjust amps +10% for gravity fight. Practice 6G mocks; certs demand it. Advanced? Pulse mode if your machine has it—reduces heat input on thin roots.
Troubleshooting Porosity and Other Weld Imperfections
Porosity—those pinholes? Gas culprits: Leaks, low flow, or dirty base. Fix: Soapy test hoses, grind out, re-gas. Inclusions? Incomplete slag removal—chip aggressive, back-gouge deep.
Cracks: Hydrogen from damp wire—bake at 250°F. Undercut: Too fast travel—slow 20%. Spatter: Voltage high—dial 0.5 down.
I’ve chased undercut on a crane boom—traced to weave too wide. Log settings, test scrap; inconsistencies scream operator error. Bend tests reveal hidden sins.
Wrapping Up
Dual shield flux core welding demystified, from arc basics to pro tweaks. You’re now armed to tackle thick steel with welds that won’t quit, whether patching hobby projects or chasing fab deadlines. It’s about deep penetration and speed on forgiving setups, but prep and settings are king.
You’re more prepared because you know the why behind the how—choose dual when strength demands it, and you’ll outpace the pack. Go fire that machine; your next joint’s waiting. Always end passes with a run-off tab—feathers the crater, kills cracks cold.
FAQs
Is Dual Shield Flux Core Welding Suitable for Beginners?
Absolutely, if you’re handy with MIG basics. It’s forgiving on dirty metal and positions, but start on flat scrap—learn drag before vertical. Less skill than TIG, more forgiving than stick. Gear up safe, and you’ll stack beads quick.
Can You Use Dual Shield Welding Outdoors?
Yes, but wind’s the thief—use a shelter or CO2-heavy mix for stability. Not as wind-proof as self-shielded, but for semi-protected sites like under trailers, it’s fine. I’ve run it on farms with tarps; just monitor for porosity.
What’s the Best Shielding Gas for Dual Shield Flux Core?
75% argon/25% CO2 is the workhorse—balances penetration and arc stability. Straight CO2 digs deeper but spattery; Ar/CO2 smoother for all-position. Match your wire spec; wrong mix equals defects.
How Do You Avoid Worm Tracking in Dual Shield Welds?
Worm tracking’s voltage greed—drop 0.5-1 volt from your start point. Keep stickout under 3/4 inch, clean base metal. It’s flux gas burrowing; I’ve fixed it mid-job by slowing wire feed 20 IPM.
Is Dual Shield Flux Core Stronger Than MIG Welding?
Not inherently “stronger,” but better mechanicals on thick, dirty steel—higher tensile, low hydrogen. Meets same AWS specs as MIG, but penetrates deeper for fusion. For trailers? MIG looks prettier; structures? Dual wins durability.


