Start Automotive Welding With MIG
What’s in This Article
- Start Automotive Welding With MIG
- Essential Auto Welding Gear for Beginners
- Set Up Your Auto Welding Space Safely
- Prep Automotive Metal Before Welding
- Practice Automotive Welding on Scrap
- How to Make Clean Auto Welds
- Control Heat to Prevent Warping
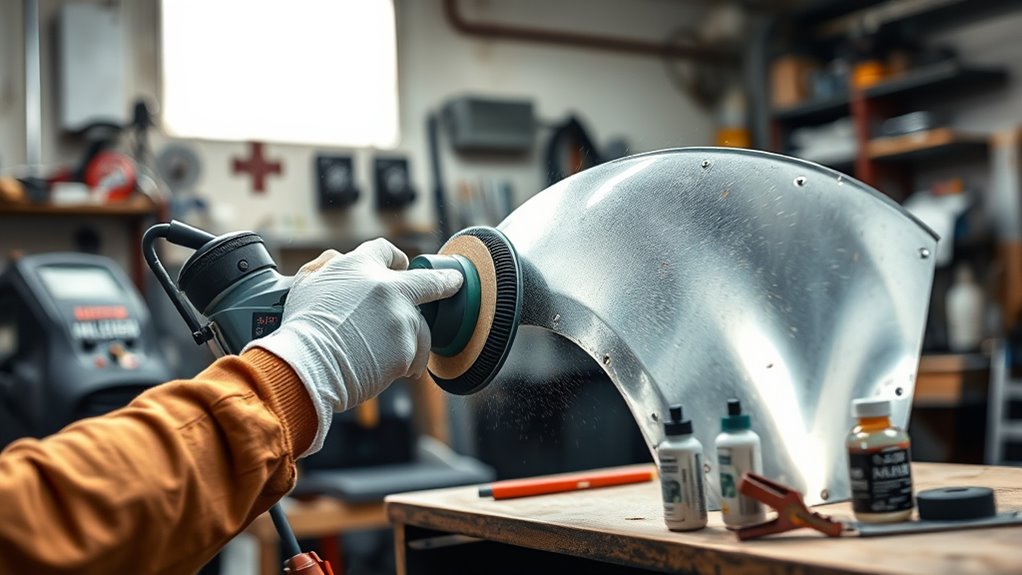
- Finish Welds With an Angle Grinder
- Common Auto Welding Mistakes to Avoid
- What to Learn After Your First Weld
- Frequently Asked Questions
Start with MIG welding on clean scrap metal, since it gives you the control and consistency you need as a beginner. Use a 75/25 argon-CO2 mix, set up proper safety gear, and keep an angle grinder handy for prep and cleanup. Clean every joint to bare metal, then practice on thicker scrap before moving to car panels. Focus on heat control and steady travel speed, and you’ll build strong welds faster while learning the next steps.
Quick Answer
The best way to start automotive welding is to use a MIG welder on clean scrap steel. Practice on thicker metal first, then move to thin car panels after you can control heat, travel speed, and bead shape. Keep safety gear, ventilation, clean metal, and short welds at the center of every session.
Key Takeaways
- Start with MIG welding because it gives beginners simple control on common automotive steel.
- Clean every joint to bare metal before you weld, grind, or test your settings.
- Practice on scrap before you weld a vehicle panel or structural part.
- Use short welds and low heat to reduce warping on thin automotive metal.
- Wear proper safety gear and keep flammable items away from your welding area.
Start Automotive Welding With MIG
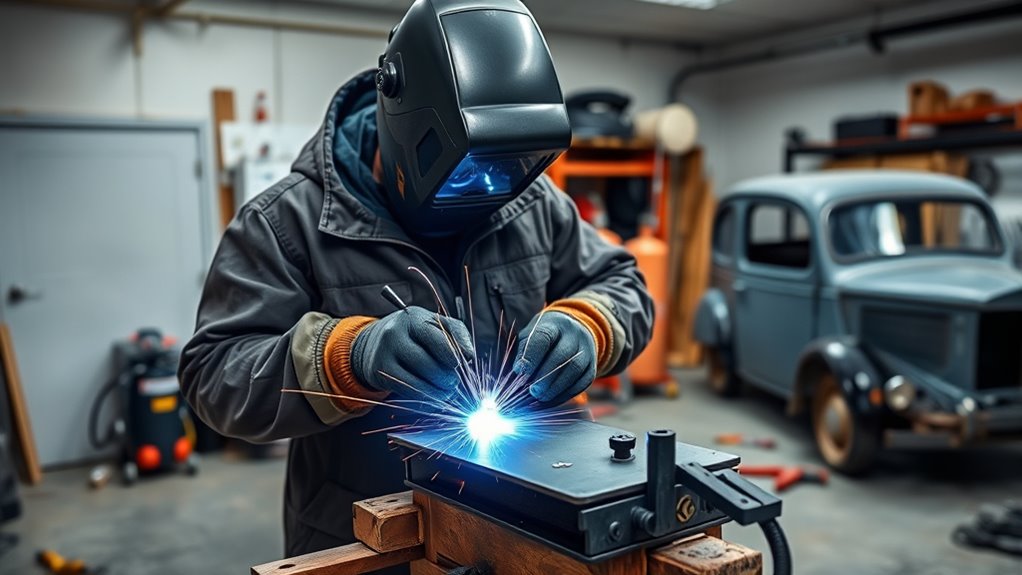
If you’re just getting started, MIG welding gives you a practical first step. It’s easier to control than many other welding methods, and it works well on thin to medium automotive steel.
You feed a spool wire electrode, set your shielding gas, and move with steady torch travel. That simple process helps you focus on the puddle, bead shape, and heat input.
A 75% argon and 25% CO2 mix helps shield the puddle from contamination during common mild steel MIG work. Machines such as the Millermatic 211 can cover a useful range for many shop jobs, but you should always match settings to your metal, wire, and machine chart.
For stainless steel parts, choose the right stainless filler wire for the base metal. For example, ER308L filler wire commonly matches 304 stainless steel components.
Don’t rush onto a vehicle. Practice first on scrap metal so you can learn heat control, gun angle, and bead placement without risking the body.
Wear a welding helmet, gloves, and protective clothing every session. Safe habits keep you focused, steady, and ready to build skill with less risk.
Products Worth Considering

★ADJUSTABLE SETTINGS: Our auto darkening welding helmet is equipped with sensitivity and delay settings to suit different environments and tasks. Enjoy enhanced visibility and color recognition. Light level of the filter is DIN4 and the time from dark to bright state is within 0.1s to 0.8s.

【True Color & Optical Clarity】Experience unmatched clarity with our True Color welding helmet, featuring optical class technology. The advanced golden lens eliminates distortion and color saturation, delivering a lifelike view of your weld pool and workpiece for precision in TIG, MIG, Stick, Cut, and Grind tasks.

Advanced Eye Protection with Blue Light Blocking Technology: This welding helmet features cutting-edge Blue Light Blocking outer lens, shielding your eyes from harmful blue light during welding, protects your eyes by filtering out most of harmful high energy blue light rays while letting through the less harmful portion of the blue light spectrum. This ensures long-lasting eye comfort and safety for extended welding sessions
Essential Auto Welding Gear for Beginners
Once you choose MIG for beginner auto work, the next step is picking gear that helps you weld safely and consistently.
Start with a reliable welding machine that fits your repair goals. A Millermatic 211 or Lincoln Power MIG 210 MP can suit many home shop and auto repair tasks, but your best choice depends on power supply, metal thickness, and budget.
Match your wire and shielding gas to the metal and machine. For common mild steel MIG work, many beginners use C25 gas, which means 75% argon and 25% CO2.
Choose a reliable MIG welder, match your wire and gas, and use C25 for everyday mild steel auto repairs.
Your safety equipment matters just as much as the welder. Wear a welding helmet with the right shade, heat-resistant gloves, protective clothing, and a respirator rated for welding fumes when the job calls for it.
Add an angle grinder so you can clean welds and prep metal before you strike an arc. Keep scrap steel on hand for practice, because repetition builds control before you move to real panels.
A welder with multiprocess capabilities can help if you want to handle more welding tasks later. Start simple, then add more features as your skill grows.
With the right tools, you’ll weld with more confidence, less waste, and better control.
Products Worth Considering
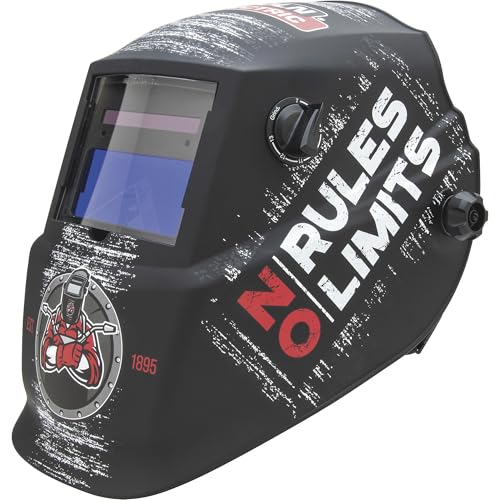
WELD PROTECTION: Lincoln Electric K4983-1 No Rules No Limits Welding Helmet is an auto-darkening hood for safety and protection that’s solar powered with battery backup

0.1ms Ultra-Fast Auto-Darkening Technology: Equipped with premium auto-darkening filter (ADF), the welding lens instantly darkens in just 0.1 millisecond when arc is struck, providing real-time eye protection against harmful UV/IR rays. No manual adjustment needed, ensuring seamless, uninterrupted welding operations and eliminating eye strain from sudden light exposure

LARGE VIEWING SCREEN: The welding hood is equipped with a 3.94" x 3.66" large viewing window, featuring top-tier 1/1/1/1 optical clarity lenses and true color technology. This helmet enhances your visual experience, allowing you to work more efficiently and accurately.
Set Up Your Auto Welding Space Safely
Before you strike an arc, set up a workspace that controls fumes, sparks, and clutter. For automotive welding, choose a spot with strong ventilation so fumes and gases don’t build up.
Keep your welding area away from gasoline, oil, paper, rags, solvents, and other flammable items. Place a fire extinguisher rated for flammable materials within reach, not across the shop.
Warning: Never weld near fuel lines, fuel tanks, oily rags, or open containers of solvent.
Cover the floor and nearby surfaces with a welding tarp or mat to catch sparks and molten metal. Organize your tools, machine, safety gear, and cleaning supplies so you can work without scrambling.
Clear cords, hoses, and scrap from walk paths. A clean setup reduces trip hazards and helps you move around the workpiece with better control.
Inspect your equipment before each session. Regular checks help you catch damaged cords, worn consumables, or grinder problems before they interrupt your project.
For grinder safety, review regular inspection habits before you start cleanup or metal prep.
Prep Automotive Metal Before Welding
Start by cleaning the metal thoroughly so your weld has a solid base. Use a wire brush and acetone to remove rust, dirt, grease, oil, and moisture.
Any contamination can weaken fusion and ruin clean welds. Paint, undercoating, and mill scale can also create fumes and poor bead quality.
Next, grind rough edges, burrs, and surface flaws until the joint fits tight and smooth. A clean fit helps you avoid weak spots and gives your gun a steady path.
Clamp the work securely before you strike an arc. Stable metal lets you control heat and placement with more precision.
If you’re working with stock over 1/8 inch thick, preheat only when the material and repair need it. Thin automotive sheet metal usually needs careful heat control more than preheat.
Check the joint again before starting your welding project. A small flaw now can become a bigger failure later.
Good prep keeps you in command and helps you build strong, clean welds. Also check that your wire feeding mechanism works smoothly before you weld.
Practice Automotive Welding on Scrap
Practice on scrap metal so you can test settings and techniques without risking a real vehicle. Start MIG welding on thicker scrap metal, such as 1/8-inch steel, because it gives you more room to learn heat control and penetration.
Clean every piece with a wire brush and acetone first. Contamination steals weld quality and weakens your practice results.
Try mild steel first, then test stainless steel only after you understand how your machine behaves. Each metal responds differently to heat and travel speed.
| Scrap Type | Use | Challenge |
|---|---|---|
| Mild steel | Baseline practice | Easy to read |
| Stainless steel | Skill expansion | Heat sensitive |
| 1/8-inch plate | Setup testing | More forgiving |
Log each session. Note wire speed, voltage, travel speed, and results.
Compare your notes after each run so you can correct mistakes fast. This simple routine builds control and removes guesswork.
Remember to maintain a steady travel speed to support consistent bead width and fusion quality. Keep practicing until your hands, eyes, and machine work together.
How to Make Clean Auto Welds
Start with clean metal. Use a wire brush and acetone to remove rust, paint, oil, and other contaminants so the weld bonds properly.
Make sure the surface stays free from mill scale when the metal has it. Clean steel gives you stronger fusion and fewer defects.
Set your wire and gas for the material, then keep a steady travel speed and consistent torch distance. This helps you make a uniform bead with less sp


