Seam sealer protects automotive welded joints from water, dirt, and corrosion after body repair. Start with a clean, scuffed, dry surface, then apply a thin bead and tool it into the seam. Use the product maker’s cure time before you sand, prime, or paint. This guide shows you the tools, prep steps, application method, cure checks, and common mistakes to avoid.
Quick Answer
To apply seam sealer on automotive welded joints, clean the weld area, scuff it with the right abrasive, remove dust and grease, then apply a thin bead into the seam. Tool the sealer while it stays wet, remove masking tape right away, and let it cure by the maker’s instructions before topcoating.
Key Takeaways
- Clean and scuff the welded joint before you apply seam sealer.
- Use primer first when your seam sealer maker calls for it.
- Apply a thin bead and tool it into the seam for strong contact.
- Remove masking tape while the sealer stays wet for a clean edge.
- Let the sealer cure fully before you sand, prime, or paint.
How to Properly Apply Seam Sealer for Automotive Welds

What’s in This Article
- How to Properly Apply Seam Sealer for Automotive Welds
- Why Seam Sealer Matters in Automotive Applications
- Before You Begin Seam Sealer Application
- Preparing the Surface for Seam Sealer
- Cleaning Techniques for Adhesion
- Step-by-Step Seam Sealer Application
- Essential Tools for Seam Sealing Success
- Curing Time for Seam Sealer: What You Need to Know
- Frequently Asked Questions
Estimated time: Plan on 30 to 60 minutes for surface prep and application, not including cure time.
Start with proper surface preparation if you want a strong, long-lasting seal on automotive welds. Clean the welded joints with a wire brush, then scuff the area using a grade 80 abrasive. This step removes loose material and gives the sealer a better surface to grip.
After you finish the bodywork, apply seam sealer to create a smooth, factory-like finish. Choose the right type for the joint. Urethane works well where flexibility matters, while butyl strip caulk can help with irregular openings.
Use a caulk gun or brush to apply a thin bead of seam sealer into the joint. Tool it into the seam so it matches the original seam shape. Let the seam sealer cure fully according to the manufacturer’s instructions before you paint or expose it to moisture. Wear appropriate protective clothing to help reduce injury risk during the sealing process.
Why Seam Sealer Matters in Automotive Applications
Seam sealer does more than improve the look of your repair. It blocks moisture from welded joints and panel seams, which helps reduce rust and corrosion. It also helps your repair match the original body seams.
The right seam sealer depends on the joint and repair area. Use a flexible product where the panel may move, and use the type your repair material and paint system support. Good product choice and careful application help protect the vehicle’s structural integrity over time. Proper weld sizing also helps joints stay strong under stress.
Seam sealer matters in both visible and hidden seams. Poor application can leave gaps, trap dirt, or affect your paint finish. A clean bead and full cure help your repair last longer and look more professional.
Before You Begin Seam Sealer Application
Check the seam sealer label before you start. Some products go over cured primer, while others may allow direct-to-metal use. Follow the product maker’s instructions because adhesion can change by formula.
Make sure the repair area stays dry, clean, and safe to work on. Remove any old seam sealer, loose rust, weld spatter, and dust before you apply a new bead. Do not use silicone products near the repair area because they can cause paint and adhesion problems.
Warning: Do not weld through seam sealer because heat can create fumes, contaminate the weld, and weaken the repair.
Products Worth Considering
![[Black] 2 Pack Professional Automotive Seam Sealer, Paintable Quick-Set Polyurethane Auto Body Seam Sealer for Metal Surfaces of Cars, Trucks, Etc, Includes Gloves & Tip - Black RV Roof Sealant](https://m.media-amazon.com/images/I/510+sWnUbnL._SL500_.jpg)
Bonds to All Surfaces: Our seam sealer automotive formula bonds strongly with primed, painted, or bare metal surfaces, offering a fast curing solution. Ready for paint in just 30 minutes, it serves as an effective RV roof sealant and polyurethane auto body filler without the need for sanding.

Versatile Application: This Brush-On Seam Sealer is ideal for a variety of materials, including fabric, canvas, and automotive surfaces, making it a perfect choice for automotive repairs and waterproofing projects.
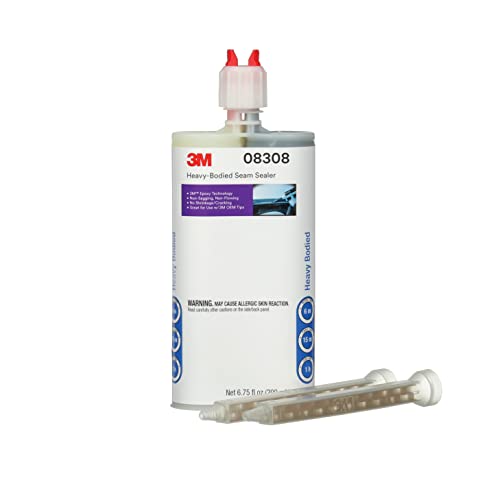
HIGH-PERFORMANCE: Two-part epoxy seals vertical and horizontal seams to match OEM seals
What You’ll Need
- Wire brush or abrasive file belt
- Grade 80 abrasive for dressing welds
- Dual action sander with 180-grade abrasive
- Maroon Scotch-Brite™ style hand pad
- Clean, dry compressed air
- All-purpose cleaner and degreaser
- Silicone-free wax and grease remover
- Clean cloths or paper towels
- Masking tape
- Caulk gun, brush, or spreader
- Automotive seam sealer that matches your repair
- Gloves, eye protection, and suitable work clothing
Preparing the Surface for Seam Sealer
- Dress welds with a grade 80 abrasive file belt to create a smooth surface.
- Use a dual action (DA) sander with 180 grade abrasive to feather-edge any grade 80 sand scratches.
- Scuff the area with a 3M maroon Scotch-Brite™ Durable Flex Hand Pad for better texture.
- Thoroughly clean the surface using clean, dry compressed air to eliminate dust and debris.
- Inspect the surface for any imperfections that might affect adhesion.
- Keep a clean workspace to support good adhesion and weld integrity.
Cleaning Techniques for Adhesion

Clean the repair area with a dedicated cloth before you apply seam sealer. Remove dirt, grease, sanding dust, and loose rust so the sealer can bond to the surface.
Use an all-purpose cleaner and a silicone-free wax remover. Do not soak the seams because trapped liquid can harm adhesion. Remove any zinc oxide buildup that may block proper adhesion. Lightly scuff the surface, then blow off dust with clean, dry compressed air.
Surface Preparation Essentials
Good surface preparation helps your seam sealer form a strong bond. Remove oils, dust, rust, old sealer, and loose coating from the welded joints before application.
Follow these surface preparation essentials:
- Use a dedicated clean cloth or paper towel with an all-purpose cleaner.
- Apply cleaner lightly and avoid soaking the seams.
- Scuff the surface with a light abrasive hand pad, such as a 3M maroon Scotch-Brite™ pad.
- Blow off the cleaned and scuffed surface with clean, dry compressed air.
- Inspect for remaining particles before you apply the sealer.
Recommended Cleaning Products
Choose cleaning products that support seam sealer adhesion. Start with an all-purpose cleaner and degreaser to remove common grime from the repair area.
Follow with a silicone-free wax and grease remover to remove oily residue. Avoid saturating seams with any cleaner because excess moisture can weaken your seam sealer application.
Clean the area until you remove all visible contamination. After cleaning, blow off the scuffed surface with clean, dry compressed air. These steps help you create a durable, reliable seal on automotive welded joints.
Avoiding Contamination Risks
Contamination can stop seam sealer from bonding well. Keep your gloves, tools, cloths, and work area clean while you prepare the joint.
Use these cleaning habits for better results:
- Use a clean cloth or paper towel only for the seam sealer area.
- Clean with an all-purpose cleaner and degreaser, then use a silicone-free wax and grease remover.
- Avoid soaking seams because trapped moisture can reduce adhesion.
- Blow off the cleaned surface with clean, dry compressed air.
- Confirm the surface feels dry and clean before you apply seam sealer.
Step-by-Step Seam Sealer Application
Use a clear process so you do not miss prep, tooling, or cure checks. Work in a clean area and keep the sealer nozzle close to the joint.
- Inspect the welded joint. Check for pinholes, loose rust, sharp edges, and old sealer before you begin.
- Dress the weld. Smooth high spots with the right abrasive and avoid grinding too much metal away.
- Scuff the area. Use grade 80 abrasive first, then feather scratches with 180-grade abrasive when needed.
- Clean the surface. Use cleaner, silicone-free wax and grease remover, and clean compressed air.
- Mask the edges. Apply masking tape beside the seam if you want a sharp, factory-style line.
- Apply a thin bead. Run the seam sealer directly into the joint with steady pressure.
- Tool the sealer. Push the sealer into the seam with a spreader, brush, or gloved finger.
- Remove the tape. Pull tape off while the sealer stays wet to avoid torn edges.
- Check the coverage. Fill missed spots before the product skins over.
- Let it cure. Follow the manufacturer’s cure time before sanding, priming, or painting.
How to Apply Seam Sealer Effectively
Prepare the welded joints before you apply seam sealer. Scuff the surface with a grade 80 abrasive, then clean it with a silicone-free wax and grease remover.
Apply the seam sealer in a thin bead directly onto the prepared joint. Tool it into the seam to improve contact and adhesion. Use masking tape around the application area if you want a clean edge, then remove it right after application.
Let the seam sealer cure fully according to the manufacturer’s guidelines. This step helps you achieve a clean, factory-like finish. Also, make sure the metal has been cleaned thoroughly to reduce the risk of weld defects like porosity.
Inspect the area for missed spots, thin areas, or rough edges. Fix those spots while the product still allows tooling. This final check helps create a durable and neat repair.
Pro tip: Cut the nozzle small first, then enlarge it only if you need a wider bead.
Essential Tools for Seam Sealing Success
You need the right tools as much as the right technique. A clean surface, steady bead, and smooth tooling help you create a professional finish.
Gather these essential tools before you start:
- Dual-action sander with 180-grade abrasive: Use it to feather-edge sand scratches and scuff the surface for better adhesion.
- Caulk gun: Use it to control the amount of seam sealer and keep the bead even.
- Wire brush: Use it to remove loose debris from welds before sealing.
- Peel-away spreader boards: Use them to shape the bead and create a cleaner factory-style look.
- Clean cloth or paper towel: Use it to wipe excess sealer and keep the workspace neat.
- Good surface preparation helps you build a strong bond, especially after removing zinc coating.
Products Worth Considering

【PREMIUM MATERIAL】: Sandpapers Made Made from aluminium oxide for longer life; electro coated technology make grit distributed evenly; Will not fall apart, tear or crumble off during using。
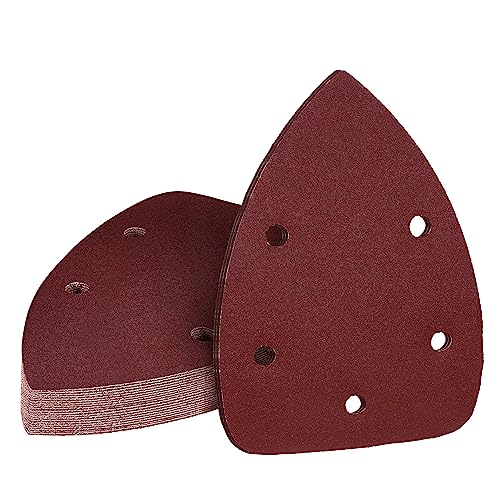
*Designed for Efficient Work: Includes 20 pieces 180 Girt mouse sanding papers each measuring 5.55" x 3.9". Designed with easy-to-attach velcro backing for fast and convenient sheet changes. Keeps your sanding tool stable and prevents slipping for a precision finish. We comes in various grit sizes for you to choose from, easily matching the requirements of your specific projects.

PERFORMANCE : Super Coated Alumina Oxide grain abrasive for increased durability and sharpness
Common Mistakes to Avoid
Small mistakes can shorten the life of your seam sealer. Most problems start with poor cleaning, the wrong product, or rushed curing.
- Do not apply seam sealer over dirt, oil, dust, or loose rust.
- Do not use household silicone caulk on automotive welded joints.
- Do not make the bead too thick unless the product maker allows it.
- Do not paint over sealer before it reaches the required cure stage.
- Do not leave gaps, pinholes, or thin edges along the seam.
Curing Time for Seam Sealer: What You Need to Know

Curing time affects seam sealer strength, paint quality, and long-term protection. The product type, bead thickness, temperature, and humidity can all change how long you need to wait. Always check the label before you sand, prime, or paint. Proper wheel placement also matters when you grind or finish areas near automotive joints.
Curing Time Factors
Curing time can change a lot by product and environmental conditions. Use the maker’s instructions as your main guide.
- Some urethane sealers may cure in about 24 hours.
- Two-component (2K) compounds can take longer, depending on the product.
- Many products cure best in moderate temperatures with low humidity.
- Thick beads often need more time than thin beads.
- The sealer should feel firm and non-tacky before you topcoat, unless the maker says otherwise.
Recommended Curing Durations
Check the product label because curing durations vary by formula. Some urethane sealers may need up to 24 hours to cure at room temperature.
Temperature and humidity can change cure time. Warm, dry air often speeds up curing, while cool or humid air can slow it down.
Many seam sealers skin over within 30 minutes to several hours, but full cure can take longer. Avoid painting over seam sealer until the product reaches the correct cure stage. This helps prevent paint defects and weak adhesion.
Signs of Complete Cure
You can check for several signs before you move to the next repair step. A cured seam sealer should no longer feel wet, soft, or tacky unless the product remains flexible by design.
- Firm texture: The sealer feels solid and does not smear under light pressure.
- No tackiness: The surface does not stick to your fingers.
- Stable color: Some sealers may darken or change color after curing.
- Label match: The cure time matches the manufacturer’s instructions.
- Dry conditions: Temperature and humidity support the product’s cure requirements.
Frequently Asked Questions
Do You Put Seam Sealer Over Primer or Bare Metal?
You should follow the seam sealer maker’s instructions because product rules can differ. Many automotive seam sealers work best over a properly prepared and cured primer, while some products allow direct-to-metal use.
How Do You Apply Automotive Seam Sealer?
Clean and scuff the joint first, then apply a thin bead with a caulk gun or brush. Tool the sealer into the seam while it stays wet, remove masking tape right away, and let it cure as directed.
Can You Weld Through Seam Sealer?
You should not weld through seam sealer. Heat can break down the sealer, contaminate the weld area, create fumes, and weaken the joint.
How to Make Seam Sealer Look Good?
Use masking tape, apply an even bead, and tool the edges before the sealer skins over. Remove the tape while the sealer stays wet so the edge stays clean.
Can You Paint Over Automotive Seam Sealer?
You can paint over many automotive seam sealers, but only after the product reaches the correct stage for topcoating. Check the label because some products need primer first, while others allow direct topcoat.
Conclusion
Good seam sealer work starts with clean metal, proper scuffing, careful application, and enough cure time. Choose the product that matches your joint, primer, and paint system. Then apply a thin, even bead and tool it into the seam before it skins over. Take your time on prep, and your automotive welded joints will have better protection against moisture, corrosion, and finish problems.


