I tried welding on a flimsy workbench that wobbled every time I struck an arc — and believe me, nothing kills your weld quality faster than chasing stability while trying to control your puddle. That’s when I realized a solid, custom welding table isn’t just a luxury, it’s a necessity for anyone serious about MIG, TIG, or even stick welding projects. From clamping down filler rods and prepping joints on stainless or mild steel to keeping metal thickness square for stronger welds, the right table makes the whole process safer, cleaner, and more efficient.
Too many DIY welders ask, “Can I just weld on a wooden bench?” or “Do I really need a steel top?” The truth is, a properly built welding table helps with arc control, heat dissipation, and prevents costly mistakes that ruin both your welds and your tools. Stick around, because I’m going to walk you through exactly how to build a rock-solid custom welding table for your garage — one that’ll handle everything from small repair jobs to heavy fabrication without letting you down.
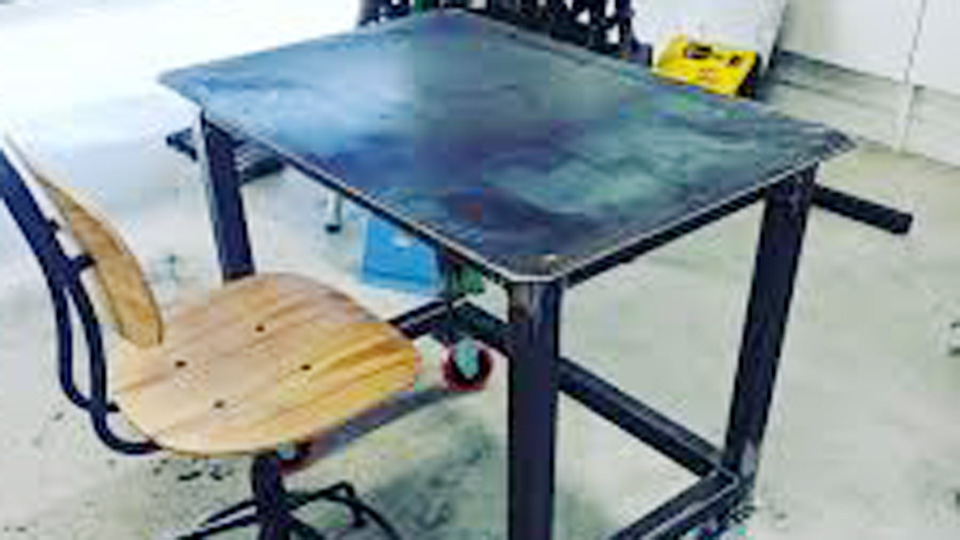
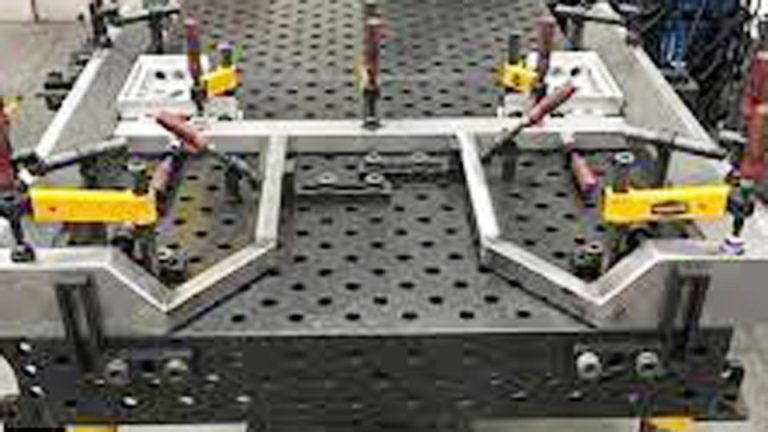
Image by reddit
Why You Should Build Your Own Welding Table
Picture this: you’re in your garage, mid-project, and your current setup is a rickety bench that’s too low, too small, or just not holding up to the heat and weight. Building your own welding table fixes all that. It’s about creating a workspace that’s safe and efficient, especially if you’re dealing with heavy steel or precise fabrications.
From a safety standpoint, a custom table means you can incorporate features like grounding points and stable legs to avoid tip-overs. Weld integrity improves because a flat, rigid surface minimizes distortion—I’ve seen too many beginners fight warpage because their table wasn’t level. And for material compatibility, you can choose steels that match your common projects, like mild steel for general fab work, ensuring your filler metals bond right without cracking.
Cost-wise, it’s a no-brainer. Off-the-shelf tables can run you hundreds or thousands, but with some scrap hunting and basic welding, you can keep it under $500. I once built one for a buddy using leftover tubing from a job site, and it saved him big time. It’s perfect for DIYers who want versatility, hobbyists experimenting with designs, pros needing reliability on the go, students learning the ropes, or industry folks optimizing their home shop.
Choosing the Right Size and Design for Your Garage Space
Before you grab your welder, think about your garage. How much room do you have? A table that’s too big crowds your space, while one too small limits your projects. I usually recommend starting with 3×5 feet for most garages—big enough for motorcycle frames or furniture, but not overwhelming.
Design-wise, consider height first. Aim for 32-36 inches if you’re average height; it saves your back during long sessions. Add casters for mobility so you can roll it out for bigger jobs or tuck it away. Include clamping holes or slots—16mm works great for standard clamps—to hold pieces securely.
Semantic fit here: think about your workflow. If you’re into automotive fab, add overhangs for exhaust work. For hobbyists, incorporate shelves for tools. I designed mine with a grid pattern for easy fixturing, and it’s made complex assemblies a breeze. Sketch it out on paper or use simple software if you’re techy—keeps everything aligned from the start.
One tip: measure your garage door if you plan to move it outside. I learned that the hard way when my first table got stuck indoors during a big project.
Materials You’ll Need to Get Started
Gathering materials is half the fun—hit up local scrap yards or steel suppliers for deals. For the top, go with mild steel plate, 1/4 to 1/2 inch thick. Thinner saves weight but might warp under heat; thicker holds up better for heavy hammering.
Frame it with 2×2 square tubing, 11-gauge or heavier, for strength without excess weight. Legs? Same tubing, cut to your height preference. Add 4-inch casters with locks—two swivel, two fixed—for easy moving.
Other bits: angle iron for reinforcements, bolts for adjustable features, and paint or oil for rust protection. If you’re adding shelves, 16-gauge sheet metal does the trick.
Here’s a quick comparison table to help you decide on plate thickness:
| Thickness | Pros | Cons | Best For |
|---|---|---|---|
| 1/4 inch | Lightweight, cheaper, easier to cut | More prone to warping, less durable for impacts | Light DIY projects, students |
| 3/8 inch | Good balance of strength and weight, resists heat better | Moderate cost, still movable | Hobbyists, general garage use |
| 1/2 inch | Extremely rigid, handles heavy abuse | Heavy (100+ lbs for top alone), pricier | Pros, industry-level fabrications |
I always opt for 3/8 inch—it’s tough enough for my truck part repairs but not a beast to handle alone.
Essential Tools and Equipment for the Build
You don’t need a fancy shop, but some basics make the job smoother. A MIG welder is my go-to for this—quick and clean for steel. Set it to 140-180 amps for 1/4-inch material, with 75/25 argon/CO2 gas for smooth beads.
Grinder with cutoff wheels for prepping edges, a chop saw or plasma cutter for clean cuts. Clamps—lots of them—to hold everything square. A level and carpenter’s square ensure flatness.
For safety gear: welding helmet, gloves, jacket, and respirator. Don’t skimp—I’ve got scars from skipping sleeves once.
If you’re new, practice on scrap. I tell trainees: dial in your machine on test pieces first to avoid weak joints.
Step-by-Step Guide: Designing Your Welding Table
Start with a plan. Draw your dimensions, noting where you’ll add holes or shelves. Consider your welding process—MIG for speed, stick if you’re outdoors and need portability.
I like including a 2-inch grid of holes for clamps. It turns your table into a fixture beast for odd-shaped projects.
Anecdote: On a job site, we sketched a table on the ground with chalk—worked fine, but measure twice to avoid cuts.
Cutting and Preparing Your Materials
Fire up your cutoff tools. Cut tubing to length: four legs at 32 inches, crossbars accordingly. Bevel edges for better weld penetration—about 30 degrees.
Clean everything. Grind off mill scale; it contaminates welds. Use a wire wheel for rust.
Tip: If using a plasma cutter, set to 45 amps for 1/4-inch steel—clean cuts, less cleanup.
Common mistake: Rushing cuts leads to uneven pieces. Take your time; square ends make assembly easy.
Assembling the Frame and Top
Lay out your frame on the floor—use squares to check 90-degree angles. Tack weld corners first, then check level.
Attach the top: Flip the frame, position the plate, tack around the edges. For joint prep, chamfer the tubing tops for full penetration.
If adding shelves, weld in supports now. I once forgot and had to grind welds—messy.
Welding It All Together
Time to burn some wire. MIG with .035 wire at 18-20 volts for solid fusion. Weld in short runs to minimize heat buildup and warping.
For legs, plumb them vertical—use magnets or clamps. Full weld all joints for strength.
Pro tip: Ground directly to the table for clean arcs. If using stick, 7018 rods at 120 amps work great for deeper penetration on thicker sections.
Watch for distortion—alternate sides. I’ve fixed bowed tables by clamping and reheating, but prevention is better.
Adding Legs, Casters, and Mobility Features
Weld legs to the frame bottom. Add gussets for extra rigidity if you’re heavy-handed.
Casters: Weld plates to leg bottoms, bolt on wheels. Lockable ones keep it stable during use.
This makes it garage-friendly—roll it out for space, lock it down for work. My table’s on casters, and it’s saved my back moving it around.
Finishing and Protecting Your Table
Grind welds flush for a smooth surface. Polish the top with a flap disc—shiny helps spot imperfections.
Apply rust inhibitor like WD-40 or linseed oil. Paint legs for looks.
Let it cure, then test: Clamp something and weld a bead. Adjust if needed.
Safety Considerations When Building and Using Your Table
Safety first—always. Wear full PPE: auto-darkening helmet, leather gloves, long sleeves. Ventilation is key in a garage; use a fan or extractor for fumes.
When building, handle heavy plates with help—dropped one once, dented my floor. Ground properly to avoid shocks.
For use, secure workpieces to prevent slips. Fire watch: Keep an extinguisher handy for sparks.
Students, remember: Overheating leads to burns; take breaks.
Customizations to Make It Your Own
Tailor it! Add tool holders from scrap tubing for your grinder or torch.
For pros: Drill a grid for modular fixturing. Hobbyists: Add a vise mount.
I customized mine with a shelf for fillers—keeps everything at hand. If you’re into TIG, add argon bottle brackets.
Pros/cons of add-ons:
| Customization | Pros | Cons |
|---|---|---|
| Clamping Grid | Versatile holding, precise setups | Drilling takes time, weakens top if overdone |
| Tool Shelves | Organized workspace, quick access | Adds weight, potential clutter |
| Adjustable Height | Ergonomic for different users | More complex build, higher cost |
Choose based on your needs—keeps it practical.
Common Mistakes and How to Fix Them
Biggest error: Not checking squareness—leads to wobbly tables. Fix by cutting and rewelding, but it’s a pain.
Warping from heat: Weld in sections, cool with air. If it happens, clamp to a flat surface and heat opposite side.
Poor prep: Dirty metal causes porous welds. Always clean.
I messed up once with uneven legs—shimmed them, but better to measure accurately.
Tip: Mock assemble without welding to spot issues early.
Maintenance Tips for Long-Lasting Performance
Keep it clean—wipe after use, reapply oil monthly to fight rust.
Check welds periodically for cracks, especially if it’s mobile.
Store in a dry spot; humidity is the enemy. I’ve had tables last decades with basic care.
For machine settings, if refinishing: Low amps to avoid burning through.
Conclusion
There you have it—everything you need to build a custom welding table that’ll transform your garage into a pro-level shop. You’ve got the materials, steps, safety know-how, and tips to avoid pitfalls, so your welds stay strong, your projects efficient, and your back happy. Whether you’re a DIYer tackling home repairs, a hobbyist crafting art, or a seasoned welder refining techniques, this table empowers you to take on bigger challenges with confidence. Go ahead, fire up that welder and make it yours—you’ll wonder how you ever worked without it.
One pro tip: Always start with a test weld on scrap to dial in your settings; it saves headaches down the line.
How Thick Should My Welding Table Top Be?
For most garage setups, 3/8 inch strikes the best balance—sturdy enough for daily use without being overly heavy. Adjust based on your projects: thinner for light work, thicker for heavy fab.
What Welding Process Is Best for Building the Table?
MIG is ideal for speed and clean beads on steel, but stick works if you need deeper penetration on thick sections. Use 75/25 gas for MIG, and practice on scrap to get consistent results.
Do I Need Casters on My Welding Table?
Absolutely, if space is tight—makes it easy to move. Go for heavy-duty ones rated over 250 lbs each, with locks to keep it stable during welding.
How Do I Prevent Warping During the Build?
Weld in short bursts, alternate sides, and clamp everything securely. If it warps slightly, heat the convex side and quench to straighten.
What Safety Gear Is Essential?
At minimum: auto-darkening helmet, leather gloves, jacket, safety glasses, and ear protection. Add a respirator for fumes in enclosed garages.