A good welding table for auto body work should be flat, fire-resistant, stable, and sized for the panels or brackets you repair most often. For a small garage, a 2-by-4-foot to 3-by-6-foot steel table with a stiff frame, lockable casters, and a 3/16-inch to 1/4-inch steel top gives you a practical balance of work area, strength, and mobility.
Quick Answer
For most auto body work, build a welding table with a 2-by-4-foot to 3-by-6-foot steel top, a working height near 36 inches, a 3/16-inch to 1/4-inch steel plate, a rigid C-channel or tube frame, cross bracing, lockable casters, and a fire-safe setup with ventilation and PPE.
Key Takeaways
- A 2-by-4-foot table works well in tight garages; a 3-by-6-foot table gives more room for doors, fenders, brackets, and fixtures.
- Use at least 3/16-inch steel plate for light work, or 1/4-inch plate for better stiffness, heat resistance, and hammering support.
- Build the frame square first, then add legs, cross supports, center braces, casters, and the top plate.
- Plan for safety before cutting or welding: PPE, ventilation, fire extinguisher, clean metal, and a clear work area matter as much as the table design.
- Check flatness, level, caster lock, weld quality, and table stability before using the table for body panels.
At a Glance
| Time Required | 1 full day for an experienced welder; a weekend for careful layout, fitting, welding, grinding, and painting |
| Difficulty | Intermediate welding and fabrication project |
| Tools Needed | Welder, angle grinder, cutoff wheel, clamps, square, tape measure, level, straightedge, PPE, and fire extinguisher |
| Cost | About $300 to $700 when using scrap steel; more if buying new plate, premium casters, and leveling feet |
| Best Table Size | 2 by 4 feet for small garages; 3 by 6 feet for larger auto body panels and fixtures |
Prepare Your Work Area and Safety Gear
Before you cut or weld any steel, set up a safe hot-work area. Welding and grinding can produce sparks, hot slag, ultraviolet light, metal fumes, electrical hazards, and sharp edges, so treat the table build like a real fabrication job, not a quick garage shortcut.
Warning: Move flammable liquids, cardboard, rags, paper, sawdust, and plastic away from the work area before welding or grinding. OSHA welding guidance calls for controlling fire hazards, keeping suitable fire-extinguishing equipment ready, and using a fire watch when conditions require it.
Wear a welding helmet or hand shield for arc welding, safety glasses under the helmet, leather gloves, hearing protection, long sleeves, and non-melting clothing. If you need a refresher on shop clothing, review proper welding clothing before starting.
Work with clean, dry steel. Remove paint, oil, undercoating, galvanizing, solvent residue, and rust from weld zones before welding. Use local exhaust, a fume extractor, or strong ventilation, especially when welding coated or unknown scrap steel. The CDC/NIOSH welding fumes guidance notes that welding fumes can contain metals and manganese, and exposure can increase in confined spaces.
Pick Your Welding Table Size
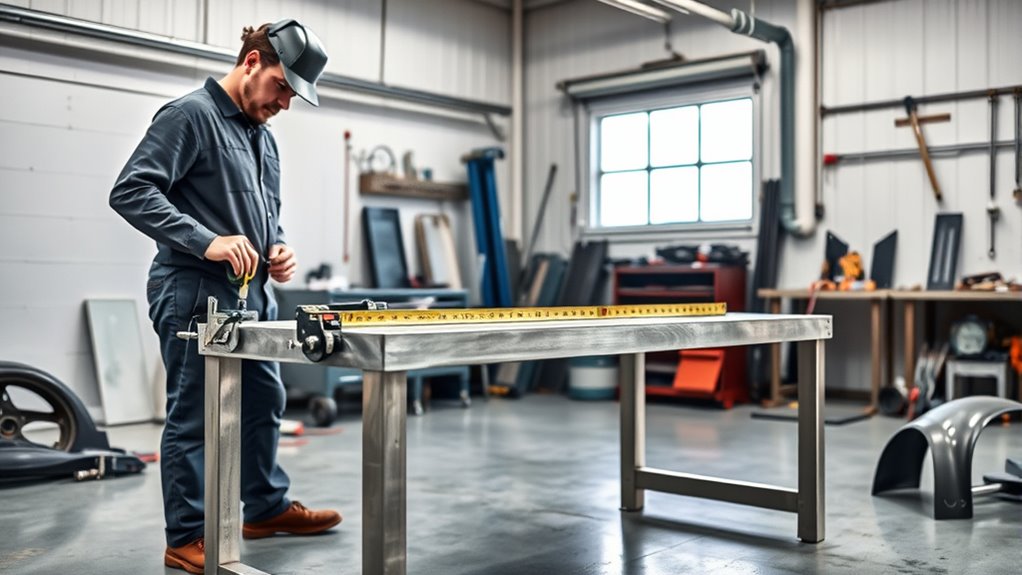
Start by choosing a table size that fits both your garage and the vehicles you repair. For most auto body work, a welding table between 2 feet by 4 feet and 3 feet by 6 feet gives you enough room to fixture panels, align brackets, repair small assemblies, and still move around the table.
A 2-by-4-foot table is easier to roll through a small garage. A 3-by-6-foot table gives you more space for doors, quarter-panel sections, bumper brackets, radiator supports, patch panels, and jigs. If you restore classic cars or larger vehicles, choose the larger top if your shop layout allows it.
Set the height near 36 inches if you usually work standing. If you are tall, add 1 to 2 inches. If you do detailed bench work while seated, lower the finished height or use adjustable feet. The goal is a table that lets you hold parts steady without bending your back or lifting your shoulders.
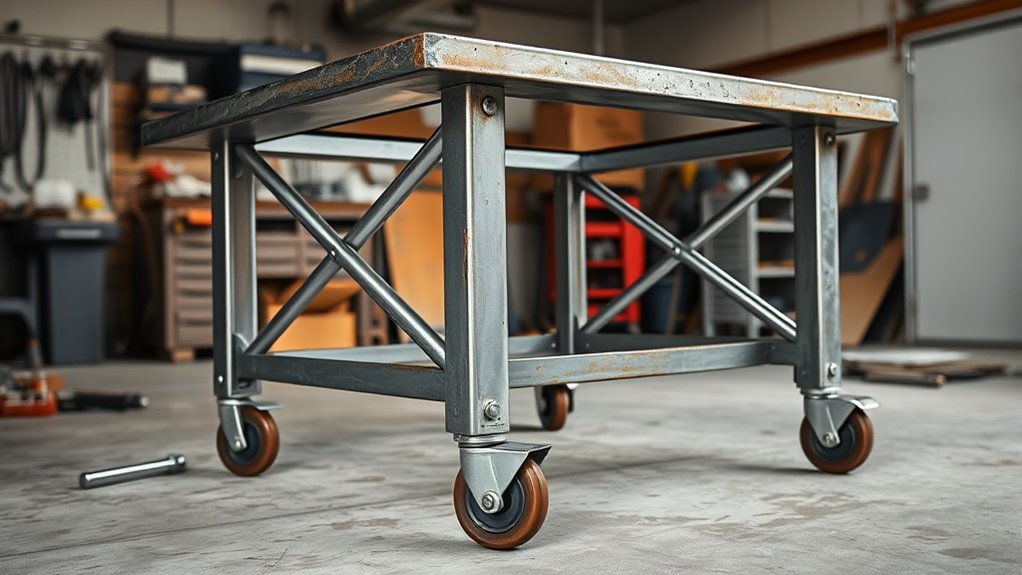
Choose a sturdy surface with a 3/16-inch to 1/4-inch steel plate. For heavier fixtures, hammering, and heat-heavy work, 1/4 inch is the better choice because it adds mass and helps the table stay stable. A finished table may weigh 250 pounds or more depending on the plate size, frame steel, shelf, casters, and accessories.
Materials and Cut List
Gather all materials before you begin. Your exact dimensions can change, but the list below gives you a practical starting point for a table with a top close to 72 inches by 36 inches.
- Top plate: 3/16-inch to 1/4-inch mild steel plate, sized to your planned tabletop.
- Frame: 3-inch C-channel steel, rectangular tubing, or heavy angle steel.
- Legs: Four steel legs cut to reach your final table height after adding plate thickness and caster height.
- Cross supports: Steel channel, angle, or tube between the legs to prevent racking.
- Center braces: Steel braces under the plate to reduce sag and heat movement.
- Casters: Four heavy-duty casters, with at least two locking casters. Use a total caster rating well above the full table, tools, clamps, and workpiece load.
- Shelf material: 16-gauge or thicker steel sheet if you want lower storage.
- Consumables: Grinding wheels, cutoff wheels, flap discs, welding wire or electrodes, primer, and paint.
Note: A 36-by-72-inch, 1/4-inch steel plate weighs about 183 pounds before you add the frame, shelf, tools, or workpieces. Plan lifting help, sawhorses, or a hoist before the plate arrives.
Choose the Plate Steel and Frame Material
You should choose plate steel thick enough to stay flat under load, with 3/16 inch as a practical minimum for light-duty work and 1/4 inch offering extra mass and stability. For the frame, use 3-inch C-channel steel, rectangular tubing, or heavy angle steel because these materials give you rigid, long-lasting support.
If you can source scrap plate and structural steel in the right dimensions, you can cut cost without sacrificing performance. Inspect scrap steel carefully for deep rust, cracks, severe bends, unknown coatings, and oil contamination. Clean weld areas to bright metal before fitting parts together; proper metal preparation helps prevent weak welds, porosity, and contamination.
Plate Steel Thickness
For a welding table built for auto body work, plate steel thickness sets the balance between rigidity, weight, and long-term durability. Start with 3/16 inch plate steel if you want a durable, stable surface that is still manageable in a small shop. This thickness can support panel alignment, bracket repair, and general fabrication if the frame is well braced.
If you tackle heavier panels, use clamps often, or plan to hammer and fixture parts on the table, step up to 1/4 inch plate steel. The extra thickness adds weight, but it also improves surface stability under load and gives you more confidence when welding or clamping near the edge.
For heavy industrial fixtures, 3/8 inch or thicker can work, but it adds major cost and weight. For most auto body jobs, a supported 1/4-inch top is a practical sweet spot.
Frame Material Choice
A solid welding table begins with the right materials. Use plate steel at least 3/16 inch thick and build the base from 3-inch C-channel, rectangular tubing, or heavy angle steel. These frame materials resist flex and help keep the top flat when you clamp panels or weld brackets.
Lay out the frame by measuring in from each corner so your joints stay square and your components align cleanly. Check the diagonals before final welding. If both diagonals match, the frame is square. If they do not match, tap the frame into position before adding more weld.
Set the table height near 36 inches for efficient reach and posture. If you expect heavier projects, add support angles or tubing inside the frame to increase stiffness.
Scrap Cost Savings
Scrap sourcing can cut your welding table material cost to around $300 if you shop strategically and already own the main tools. A 1/4-inch plate top can provide the rigidity you need for heavier auto body work without buying new stock.
Build the base from 3-inch C-channel steel or similar structural steel when available. You can also repurpose a damaged steel cart as a lower shelf if the metal is sound and clean enough to weld.
Check scrap bins, local steel yards, fabrication shops, farm auctions, and local marketplace listings before you buy retail steel. Avoid painted, plated, galvanized, oily, or unknown coated metal unless you can safely identify and clean it before welding.
Build the Welding Table Frame
Cut four long frame pieces and four short frame pieces to match your planned top size. For a table near 72 by 36 inches with a small top overhang, 68-inch side rails and 31-inch end rails can work. Notch or cope the corners as needed so the pieces sit flat and square before welding.
Cut and Square Steel
Lay out the welding table frame on a flat surface. Measure carefully, mark each cut, and cut each piece cleanly so the steel stays square and true. Use a grinder with a cutoff wheel or a metal-cutting saw, then deburr the ends.
- Cut the long side rails to your planned frame length.
- Cut the short end rails to your planned frame width.
- Notch or cope corners if your frame design requires it.
- Clean mill scale, rust, and paint from each weld zone.
- Check both diagonals before tacking.
This precise prep gives you a rigid platform and helps prevent twist later in the build.
Tack Frame Pieces
Set the frame pieces on a flat surface, align the corners, and tack the frame together at each joint. Tack opposite corners first, then recheck the diagonals. Do not fully weld one corner before the others are locked in place.
Add center support angles or cross tubes under the future top plate. Space them evenly so the structure can handle heavy-duty bodywork without flexing. Keep your measurements exact; small errors now can show up later as a rocking table or uneven top.
After each tack, verify alignment before adding the next point. The goal is a rigid, true frame that holds its shape before final welding.
Weld and Grind Flat
With the frame tacked square and checked for flatness, weld each joint fully. Use controlled passes and move around the frame so heat does not pull one side out of square. Let the frame cool naturally; do not quench it with water.
Add center support angles now to resist flex and keep the surface true under load. After the frame cools, grind only the high spots that interfere with plate fitment. Do not grind so deeply that you weaken the joints.
- Weld each corner joint fully.
- Alternate sides to reduce heat distortion.
- Install center support angles or tubes.
- Grind top-contact areas flat.
- Recheck square, level, and twist.
Always follow safe grinding and welding practices, including PPE guidelines for sparks, eye protection, hearing protection, and fire prevention.
Add Legs, Cross Supports, and Casters
Cut four legs to the height needed for your final table. If you want a 36-inch work height, subtract the top plate thickness and caster height from 36 inches before cutting the legs. For example, a 1/4-inch top and 6-inch casters need shorter legs than a fixed table with leveling feet.
Weld the legs securely to the bottom frame so the table sits stable under load. Set each leg square, then verify plumb with a level before finishing each weld. Tack all four legs first, stand the frame upright if possible, check for wobble, and then finish welds.
Add cross supports between the legs to lock the frame against racking. Use angled members or horizontal rails where needed so the structure stays rigid under weld heat, grinding force, and clamping pressure. Make every joint with a solid bead, then clean only the welds that interfere with fitment.
Next, mount four swivel casters rated well above the expected total table load. Two locking casters are the minimum. Four locking casters, or casters plus leveling feet, are better if you need the table to stay fixed while hammering, pulling, or aligning panels. This setup improves mobility and security during auto body tasks.
Pro Tip: If the table will hold heavy parts, use leveling feet in addition to casters. Roll the table into position, lock the casters, lower the feet, and take the weight off the wheels before precision work.
Attach the Top Plate and Shelf
Center the steel top plate on the frame so it overhangs evenly. A 1- to 2-inch overhang gives you room to clamp workpieces along the edge without pushing the frame into the way. Clamp the plate tight before welding.
Use short, controlled welds to attach the top to the frame. Do not run one long bead along one side because it can pull heat into the plate and create distortion. Stitch weld along opposite sides, move around the table, and let sections cool between passes.
- Fit the top plate before welding.
- Keep the overhang even on all sides.
- Clamp the plate tight to the frame.
- Stitch weld in short sections.
- Alternate sides to control heat.
- Install the lower shelf after the frame is stable.
If you use a stick welder, 3/32-inch 7018 electrodes can work on clean steel when your machine settings and material thickness are suitable. Use dry, low-hydrogen 7018 electrodes for the table frame and top, not “low-hydrogen wire.” If you use MIG, tune your settings and wire speed on scrap first so you can avoid common issues like porosity, poor fusion, and burn-through. This MIG welding troubleshooting guide can help if your welds look inconsistent.
For the lower shelf, cut 16-gauge or thicker scrap steel into pieces that match the frame opening. Weld or bolt them in place to add storage and extra structure. Keep heavy items low so the table stays stable when you roll it.
Add Grounding, Clamping, and Fixturing Features
A welding table works best when it supports clamping and electrical contact. Leave at least one clean bare-steel area near the frame for the ground clamp. Paint the legs and frame if you want, but keep the work surface and ground-contact point clean enough for reliable current flow.
Consider adding simple fixturing features before final paint:
- Edge overhang: Gives clamps room to grab the plate.
- Side hooks: Hold clamps, cables, and a MIG torch.
- Removable stops: Help repeat cuts or bracket alignment.
- Small tabs: Provide quick tie-down points for light fixtures.
- Dog holes or slots: Useful if you have the tools to drill or cut them accurately.
Do not drill a dense hole pattern unless you can keep the holes square and deburred. For many auto body shops, a flat top, strong overhang, clamps, magnets, and removable stops are enough.
Grind, Level, and Finish the Welding Table
Start by grinding the welded top only where needed to remove sharp edges, slag, spatter, and small high spots. Use controlled passes and keep the grinder moving so you do not gouge the plate or heat one area too much.
Next, level the table. Lock the casters, adjust leveling feet if installed, and check the top with a straightedge or precision level. Check front to back, side to side, and diagonally. If the table rocks, fix the base before using it for panel alignment.
After that, use a flap disc or 7-inch grinder to refine the finish. Smooth the edges where your hands, panels, and clamps will contact the table. Recheck flatness and stability after grinding because heavy-duty auto body work demands a table that will not wobble, twist, or shift.
Finally, apply a protective coating or paint to the frame, legs, shelf, and non-working surfaces to resist rust. Leave the tabletop bare, waxed, or lightly protected with a weld-safe rust preventative that you remove before welding.
Final Stability and Quality Checks
Before your first repair job, inspect the table like a finished tool. Look for sharp edges, weak welds, caster movement, frame twist, shelf sag, and any area where the top does not sit tight to the frame.
| Problem | Likely Cause | Fix |
| Table rocks | Uneven caster height, twisted frame, or uneven floor | Add leveling feet, shim during setup, or correct the frame before final use |
| Top pulls out of flat | Too much weld heat in one area | Use short stitch welds, alternate sides, and let the plate cool between passes |
| Welds look porous | Dirty steel, poor shielding, damp electrodes, or wrong settings | Clean to bright metal, check gas or electrode condition, and test settings on scrap |
| Casters move during work | Weak locks or overloaded wheels | Upgrade to higher-rated locking casters or add leveling feet |
Frequently Asked Questions
Is 3/8 inch thick enough for a welding table?
Yes. A 3/8-inch steel top is thick enough for a welding table if the frame supports it well. It gives strong rigidity and heat resistance, but it also adds weight and cost. For most auto body work, a well-braced 1/4-inch top is usually enough.
What is the best material for a welding table top?
Mild steel plate is the best practical choice for most welding table tops. It is conductive, fire-resistant, grindable, durable, and easy to weld to a steel frame. A 3/16-inch plate works for lighter jobs, while 1/4 inch or thicker is better for heavier work.
What is the best type of welder for auto body work?
A MIG welder is usually the easiest choice for thin auto body sheet metal because it offers good control and speed. TIG gives cleaner precision for skilled users, while flux-cored welding can work outdoors. Stick welding is better suited to building the table frame than welding thin body panels.
How thick should a welding table top be?
Use at least 3/16-inch steel for light-duty welding table work. Choose 1/4-inch steel if you want better stiffness, more clamping strength, and a heavier surface for auto body fabrication. Use 3/8 inch or thicker only when you need extra mass and can handle the added weight.
Should a welding table have casters or leveling feet?
Casters are helpful if you work in a small garage and need to move the table. Leveling feet are better for precision and stability. The best setup is often both: roll the table into place, lock the casters, then lower the leveling feet before welding or hammering.
Conclusion
When you finish your table, you should have a steady steel platform that supports cleaner auto body work. A flat top, square frame, plumb legs, strong cross supports, safe casters, and careful finishing all work together like a chassis. Level the surface, lock or unload the casters, clear the work area, and verify stability before you weld. With the right setup, your table will keep panels true, welds cleaner, and fabrication work more controlled.
Sources
- OSHA 29 CFR 1910.252 General Requirements — fire prevention, eye protection, hot-work precautions, and fire-watch guidance.
- OSHA Welding, Cutting, and Brazing Hazards and Solutions — welding hazards, PPE, fume exposure, burns, eye damage, and electrical shock.
- CDC/NIOSH Welding Fumes and Manganese — welding fume composition, manganese exposure, and confined-space risk.
- NFPA 51B Standard Development — fire prevention framework for welding, cutting, and other hot work.


