Before welding, shut the vehicle off, remove the key, and disconnect the negative battery terminal first, then the positive. Isolate both cables so they can’t touch the posts. If you’re welding near the ECU or other modules, unplug sensitive connectors as needed. Keep the welding ground clamp on clean bare metal close to the repair, and route cables away from wiring. Reconnect the battery in reverse order, then test the car and note a few more safeguards.
How to Disconnect Your Car Battery Before Welding
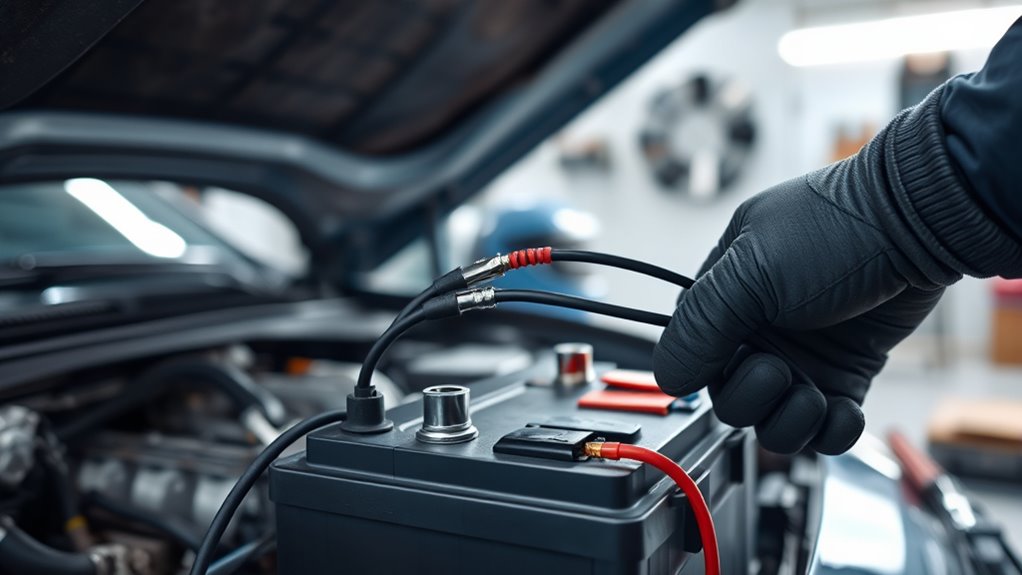
Before you weld, shut off the vehicle and remove the key so every electrical system is powered down.
Then you can disconnect the battery safely for welding on a car. Use a wrench to loosen the battery negative terminal clamp first; this cuts the chance of sparks and short circuits.
Lift the negative cable clear and secure it away from the post. Next, remove the positive terminal and keep both leads isolated from the battery.
If you’re working on a hybrid or electric model, follow the manufacturer’s procedure for any high-voltage service disconnects before you proceed. You need each circuit opened, not partly separated, so the vehicle can’t feed current into the work area.
Place the disconnected cables where they can’t swing back or touch the terminals. That simple discipline protects your tools, your vehicle, and your freedom to weld without hidden electrical risk. Remember to wear protective clothing to shield yourself from potential hazards during the welding process.
Protect the ECU Before You Weld
Disconnect the battery first, then confirm the ECU is fully isolated so it can’t see a weld-induced voltage spike.
Place the ground clamp as close to the weld zone as possible and keep it away from the ECU and other sensitive modules to reduce current flow through the vehicle body.
If you’re welding near electronics, unplug sensitive modules before you strike an arc and note each connection so you can reinstall everything correctly. Additionally, ensure that all zinc residues are removed to prevent contamination during welding.
Products Worth Considering

♛ HIGH QUALITY ---- High quality Zinc Plated Steel hose clamp, plating zinc, Can resist the corrosion and rust in marine environments. The hole technology makes its screw...
Disconnect Battery First
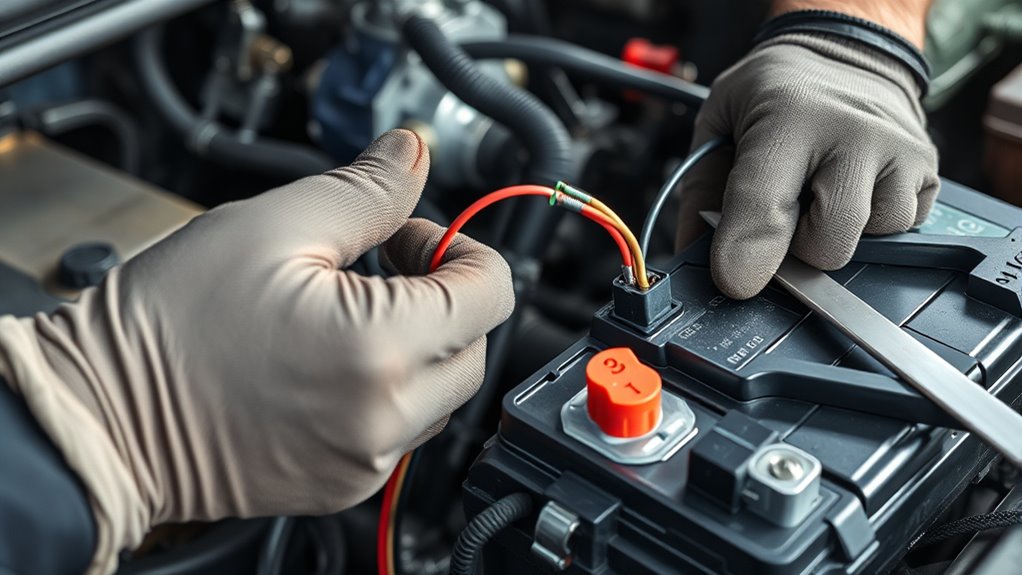
A single mistake here can turn a simple welding job into an expensive ECU repair, so you should always remove the negative battery terminal first.
To disconnect the battery, loosen the negative cable and lift it clear before any welding starts. This breaks the main path for stray current and cuts the risk of surges hitting the ECU or other sensitive modules.
If you’re welding within 12 inches of the unit, unplug the ECU too, because battery isolation alone doesn’t remove chassis-ground exposure.
Keep your process documented so you can reinstall every connection correctly and restore full function after the repair. Skipping this step can mean serious damage and repairs that reach £4200 on some models.
Protect your control system, stay precise, and weld with freedom.
Ground Clamp Placement
Place the ground clamp as close to the weld area as you can so you keep the current path short and reduce the chance of stray voltage reaching the ECU or other sensitive modules. Put it on clean, bare metal, not paint, rust, or a panel with hidden corrosion. That direct bond helps the current return efficiently and keeps electrical noise away from sensitive electronic parts.
| Check | What you want | Why it matters |
|---|---|---|
| Clamp point | Bare metal near weld | Shortens current path |
| Cable route | Straight, tight, secure | Reduces voltage spikes |
| Connection | Solid, inspected | Protects vehicle electronics |
While disconnecting the battery helps, your ground clamp placement still decides whether you protect the car or invite damage. Recheck the clamp and cables before each weld.
Unplug Sensitive Modules
Even with the ground clamp set correctly, sensitive modules can still be exposed to welding spikes, especially the ECU.
With the battery disconnected, you should still unplug the ECU if the weld area is within 12 inches of it. The ECU stays tied to chassis ground, so a voltage surge can travel through its circuits and damage other sensitive modules.
Check the service manual first, then document every connector you remove so you can reinstall it correctly after the job.
If your vehicle allows it, add surge protection to reduce risk further. You’re not depending on luck or old habits here; you’re controlling the electrical path and protecting the system.
That’s how you keep the car free from avoidable damage and stay in command.
Place the Ground Clamp Close to the Weld
For welding work, you should clamp the ground lead as close to the weld site as possible, ideally within 12 inches, so stray current doesn’t travel through sensitive vehicle electronics.
Put the ground clamp on clean, bare metal, and if you can, place it on the same panel you’re welding. That shortens the electrical path from the welding machine and lowers the chance of voltage spikes, electrical noise, and collateral damage.
Clamp to clean, bare metal on the same panel if possible to shorten the path and reduce electrical noise.
Before you strike an arc, confirm the battery disconnect is complete, then inspect the clamp for tight contact and corrosion-free metal. A loose or painted contact forces current to wander through the vehicle’s electrical system, which can harm modules and sensors.
You’re not just making a weld; you’re protecting the machine and the car’s nervous system. By grounding smartly, you keep power where it belongs and weld with more control, safety, and freedom. Additionally, ensuring a clean surface reduces the risk of defects and improves weld quality.
Unplug Nearby Modules and Sensors
Before you weld, unplug nearby modules and sensors, especially the ECU, if they’re within about 12 inches of the work area. Unplugging nearby modules reduces the chance that electrical surges will reach sensitive components and trigger costly failures. Check the service manual first, because it tells you which units need removal before you strike an arc. Document every connector you pull so you can reinstall each part in the right location after the repair. If the vehicle has aftermarket electronics, consider anti-surge devices for added protection. Additionally, ensure proper ventilation to minimize the risk of harmful fumes during the welding process.
| Action | Purpose |
|---|---|
| Unplug modules | Shield sensitive components |
| Follow manual | Confirm required disconnections |
| Record connections | Speed correct reassembly |
Products Worth Considering

Leading Manufacturer Of High-Quality Products

【LED Indicator】Clamps across the battery, when the green LED is illuminated, the system is protected from spikes while the vehicle is being worked on. No protection when the red light is on.
Keep Welding Cables Away From Wiring
Route your welding cables at least 12 inches away from wiring, sensor harnesses, and electronic modules to reduce the chance of shorts and induced current.
Don’t let the cables cross or rest against sensitive circuits, since that can create unintended current paths and damage nearby electronics.
If clearance is tight, use protective coverings and keep checking cable position as you work. Regularly inspect your setup for proper grounding to ensure safety and reduce electrical risks.
Cable Routing Distance
Keep welding cables at least 12 inches away from sensitive wiring and electronic components to reduce electrical interference and prevent damage. This cable routing distance matters even more if the battery is connected, so always disconnect before you strike an arc.
You should run leads along the vehicle’s frame, not across modules or harnesses, to block stray current paths and lower short-circuit risk. Add protective coverings where cables might rub or brush nearby parts. Secure the full run with clamps or ties so it won’t tangle, sag, or shift as you move.
Check routing before and during welding, because a cable that drifts too close can compromise electronics fast. Keep control of your setup, and you keep your vehicle’s systems safe.
Avoid Sensor Harnesses
Avoid sensor harnesses by running welding cables well clear of any wiring, connectors, or modules so you don’t induce electrical interference or damage sensitive components. Before you weld, verify the battery before welding is disconnected, then route leads at least 12 inches from every electronic part. Use protective covers on cables to prevent incidental contact with sensor harnesses and wiring. Keep the ground clamp close to the weld zone, but never on top of harnesses or loom paths. Check cable position during the job; movement can create a conductive path, shorts, or erratic behavior.
| Check | Action |
|---|---|
| Cable route | Keep clear |
| Distance | 12+ inches |
| Covering | Use shield |
| Ground clamp | Place near weld |
| Monitoring | Recheck often |
Protect Electronics Nearby
To protect nearby electronics, keep welding cables at least 12 inches away from computers, sensors, and wiring so you don’t create stray current paths or electrical surges.
Before you strike an arc, disconnect the car battery and route the work clamp and leads so they never cross harnesses or control modules. Place the ground clamp on clean, bare metal close to the weld site; that short return path helps keep current out of delicate circuits.
Use insulated covers or wraps on cables where contact is possible. While you work, watch cable position and move it if it drifts toward sensors, wiring, or ECUs.
That disciplined setup protects components and keeps your repair process controlled, efficient, and free from avoidable damage.
Reconnect the Battery and Test the Car
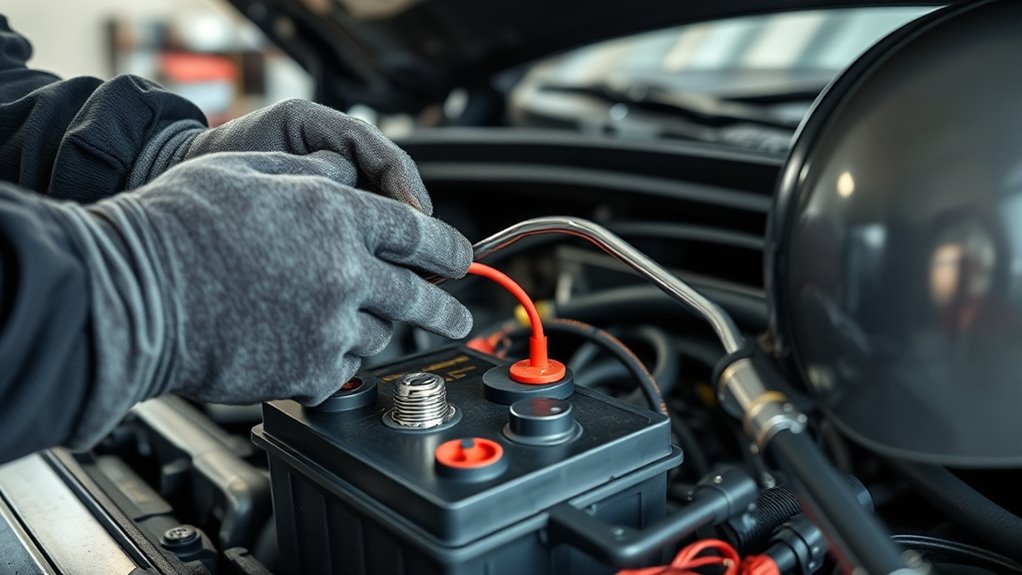
Reattach the negative battery terminal first to restore power safely, then make sure the clamp is tight and free of corrosion before you proceed.
With the battery secure, reconnect the battery and switch on the ignition. Watch the dash carefully and check for any warning lights that stay illuminated after the systems initialize. A brief light check helps you spot an electrical fault before you drive away.
Next, test the vehicle’s functionality in a controlled way. Start the engine and confirm it cranks normally, idles smoothly, and responds as expected.
Then verify key electronics one by one: radio, navigation, windows, locks, lights, and climate controls. This quick validation confirms the weld work hasn’t interrupted power delivery or module communication.
Additionally, ensure proper grounding techniques to avoid any erratic behavior in electrical systems during the welding process.
If anything acts irregularly, stop and consult the service manual or a qualified technician. You’re protecting your freedom to move by confirming the vehicle is fully operational before you return it to service.
Common Welding Mistakes to Avoid
Even when you’ve disconnected the battery, a few welding mistakes can still damage vehicle electronics. You need disciplined grounding techniques and respect for sensitive electronic components if you want clean repairs and freedom from costly failures. Don’t rely on luck or surge protectors alone; poor current paths can still spike the ECU and other modules.
- Don’t ground the clamp far from the weld. Keep it close so current doesn’t travel through vulnerable wiring.
- Don’t use dirty or loose ground points. Clean metal contact reduces electrical noise and arc instability.
- Don’t weld near electronics without isolating them. If a module sits within 12 inches, disconnect it or remove it first.
- Don’t assume surge devices replace proper grounding techniques. They’re backup tools, not shields.
If you fail to disconnect the battery before welding or skip these steps, you can trigger faults, corrupt control units, and face repair bills that crush your budget. Additionally, ensure that you select the right disc for your angle grinder to prevent accidents and maintain efficiency.
Frequently Asked Questions
Do I Need to Disconnect My Car Battery Before Welding?
Yes, you should disconnect it for welding safety. Pull the negative terminal first to protect electrical systems, support battery maintenance, and avoid expensive ECU damage. If you can, isolate the ECU too before you weld.
What to Disconnect Before Welding on a Vehicle?
Disconnect the negative battery cable first; you’ll isolate vehicle electrical systems and lower short-circuit risk. About 1 in 3 welding damage claims involve electronics, so follow welding safety tips, check battery terminal types, and remove sensitive modules.
How Do You Avoid Electrical Shock When Welding?
Ground the welder properly, wear insulated gloves and boots, and use insulated tools. Disconnect the battery, keep the area dry, and stay clear of live parts. These welding safety tips stress electrical grounding techniques and protective gear importance.
When Disconnecting a Battery, What Should You Disconnect First?
You should disconnect the negative battery terminal first, the safer handshake. In battery terminal types, this follows welding safety tips and car maintenance basics: loosen the clamp, remove it, then secure it away from metal.
Conclusion
Before you weld, disconnect your car battery, protect the ECU, and keep the ground clamp as close to the weld as possible. If you’re working near sensors or modules, unplug them and route welding cables away from wiring. For example, if you’re patching a floor pan on a late-model sedan, one stray surge can trigger costly electrical faults. Follow these steps, then reconnect the battery and test the car before driving.


