How to Make an Exhaust Flange From Pipe
Small flange mistakes can turn into exhaust leaks, rattles, and poor fitment. To make a clean exhaust flange from pipe, you need accurate measurements, square cuts, smooth edges, and even gasket pressure. This guide shows you how to choose the pipe, mark the cut, shape the edge, install the doughnut gasket, and check the final exhaust route.
What’s in This Article
Quick Answer
To make an exhaust flange from pipe, match the pipe to your exhaust diameter, mark a square cut, cut the pipe cleanly, and deburr the edges. Shape the pipe edge slowly with a hammer over a firm backer, then install a matching doughnut gasket and tighten the bolts evenly in a crisscross pattern.
Key Takeaways
- Match the pipe diameter to the exhaust system before you cut or shape anything.
- Mark a square cut line so both flange pieces align with the exhaust path.
- Deburr every cut edge because sharp edges can damage the gasket or affect fitment.
- Tighten the flange bolts in stages to spread pressure across the gasket.
- Check clearance before final assembly so heat, vibration, and movement do not cause contact.
Before You Begin
Estimated total time: Plan on about 1 to 2 hours for measuring, cutting, shaping, fitting, and final checks. The time can change based on pipe thickness, tool choice, and how much adjustment your exhaust route needs.
Gather your pipe, tape measure, marker, straight edge, saw or cutoff wheel, deburring tool, hammer, firm backer, matching doughnut gasket, and flange hardware. You should also use eye protection, gloves, hearing protection, and safe work support before cutting or shaping metal.
Warning: Never cut, grind, or shape exhaust pipe without proper eye, hand, and hearing protection.
Follow these steps in order:
- Choose a pipe that matches the exhaust diameter.
- Measure the pipe and mark a square cut line.
- Shape the flange edge with controlled hammer blows.
- Cut the pipe into two even flange pieces.
- Install the doughnut gasket and tighten the hardware evenly.
- Check the final exhaust route for clearance and alignment.
Choose Pipe for the Exhaust Flange
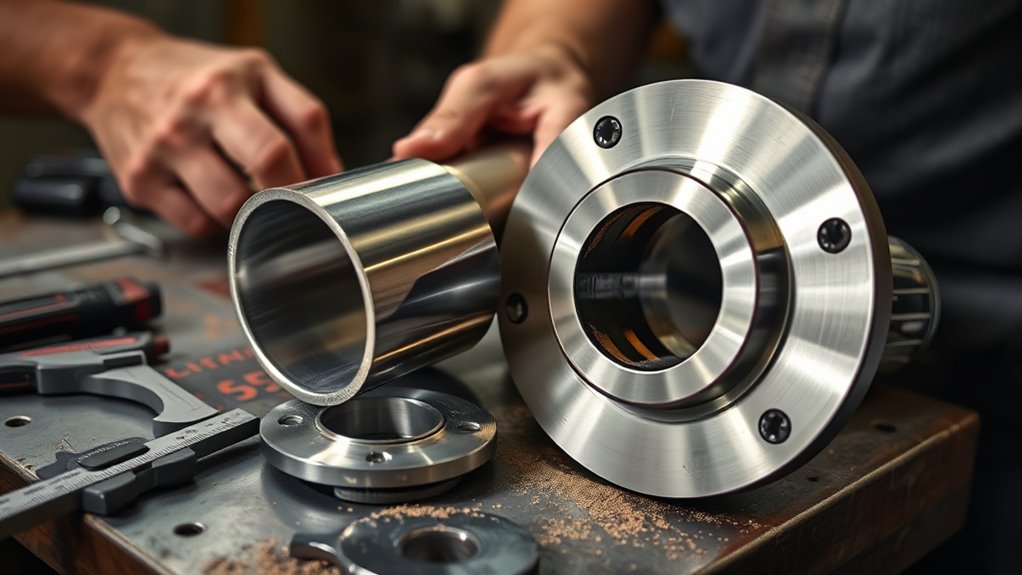
Start by selecting a pipe that matches the exhaust system diameter so the flange fits accurately. Choose a piece with enough length to form two flanges, with extra room for cutting, shaping, and clean separation.
Inspect the tubing for dents, pits, or corrosion. Any flaw can weaken the finished part and make alignment harder.
Before you move on, confirm the wall thickness suits your plan to bend the edge for a tighter seat. When you form a flange, the material should stay even so the seal can handle heat and vibration.
Keep your measurements exact and use a center reference that matches your pipe length. Proper weld sizing can also help your exhaust parts handle stress when welding enters the job.
Products Worth Considering

【HIGH-QUALITY CONSTRUCTION】: Crafted from durable 304 stainless steel, these 90-degree exhaust elbows resist rust and corrosion for long-lasting performance in demanding automotive environments.

Pipe Specification: Pipe Type: 45 Degree Bend Elbow. Outer Diameter: 152mm / 5.98", Back Arc Length: 204mm / 8.03", Wall Thickness: 2mm / 0.079"

1.Value Package and Size:Including 4PCS 4 inch 45 degree stainless steel elbow, the OD size of the 304 Stainless Elbow Exhaust is 3.98 inch. The ID is 2.86 inch, the arc length is 4.45inch/113mm , the short arc length is 1.34inch/34mm , the thickness is 0.06inch/1.5mm.
Measure and Mark the Cut Line
Use a measuring tape to find the pipe’s center point. Confirm half the total length so the flange pieces stay symmetrical.
Mark the cut line clearly at that center point. Account for any extra material you need for rolling or shaping the flange edges.
Double-check the measurement before you cut so you get a precise fit and proper alignment. Keep the work area clean, and remove any zinc coating before welding or heating coated metal.
Products Worth Considering

Strong Magnetic Grip for Hands-Free Use: Built-in high-strength magnets allow secure attachment to metal surfaces, freeing your hands for easier, more accurate pipe alignment. No more juggling tools while adjusting measurements.

Enhanced Magnetic Grip:Developed through iterations of the first-generation product, Nuvium pipe center finder’s Y-shaped legs now feature fully embedded magnets. Tested to deliver 3x stronger magnetic force, freeing your hands for easier and more convenient use.
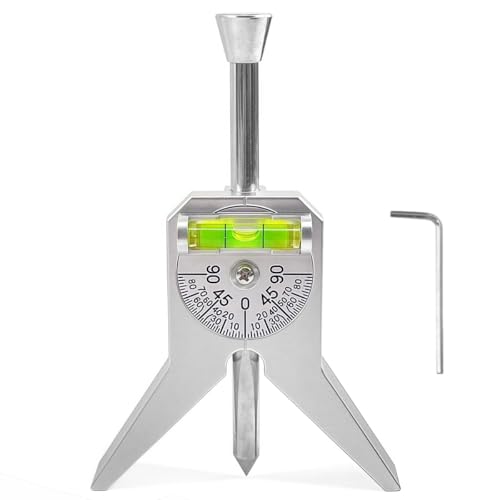
Precision: Our pipe marker centering tool is tailored for pipe fitters and welders, enabling easy measurements on pipes or tanks, setting centerlines, calculating angles, and precise marking and locating.
Find the Center Point
Measure the pipe’s total length with a tape measure, then divide that number in half. Use that result as your true center, not a rough guess.
Place a clear center dot on the pipe with a permanent marker. Check it again against your tape before you draw the full line.
Next, lay a straight edge or ruler across the pipe and confirm the line stays square to the surface. A square line helps each piece align during assembly.
Double-check each measurement before you move on. A small error can waste material and delay your build.
Mark the Cut Line
With the center point confirmed, transfer the measurement cleanly across the pipe surface. Use a straight edge or wraparound guide to keep the line square.
Make the line dark and easy to see so your cutting tools follow it without drift. Before cutting, verify the measurement again to protect your material and reduce waste.
If you want a cleaner final shape, mark extra reference points for edge rolling. These secondary marks help you keep the flange profile even as you shape the pipe.
When the line reads true, you can cut with better control. The finished flange will fit better and seal more reliably.
Shape the Flange Edge With a Hammer
Gently shape the pipe’s edge with a hammer to build an even flange profile and improve fitment. Place the pipe on a firm backer so you support the wall and keep it round.
Use measured hammer techniques and work in small increments around the full circumference. Do not strike one spot hard, because uneven force can bend the flange out of shape.
Work in small increments around the circumference to roll the edge smoothly and strengthen the flange.
Keep your alignment tools close and check the flange against the exhaust fitting as you go. Small corrections now can prevent leaks and misalignment later.
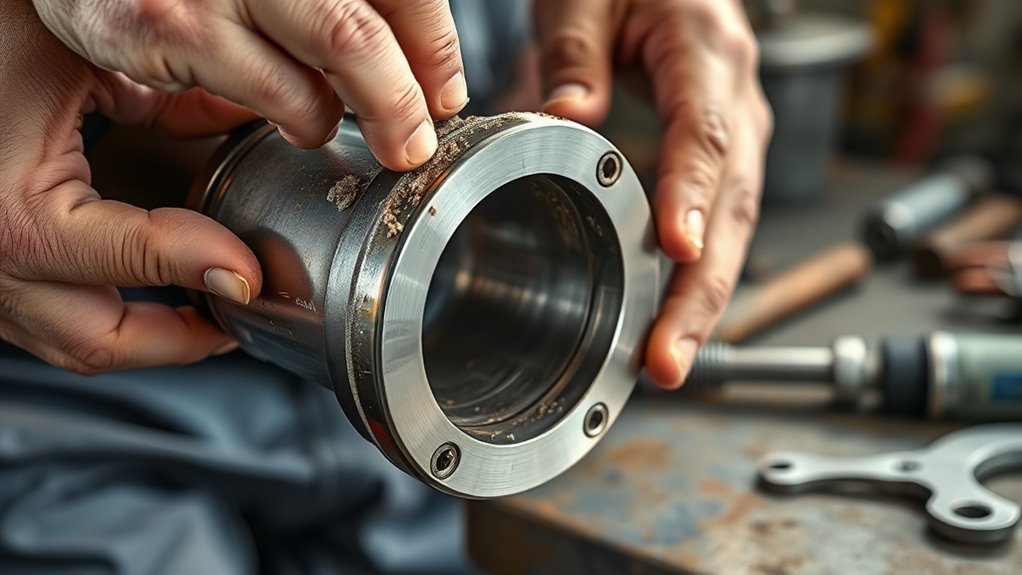
When the profile looks uniform, inspect the edge for burrs or sharp spots. Smooth anything rough so the flange seats cleanly and does not damage the gasket.
Use proper cleaning tools to remove rust, scale, or debris before shaping. Clean metal gives you a better fit and a more consistent finish.
Pro tip: Test-fit the flange often while shaping so you can correct small bends before they become larger problems.
Cut the Pipe Into Two Flanges
Once the edge profile looks even, cut the pipe into two equal flanges. Confirm the tube material and wall thickness before you choose the cutting method.
Measure from the end to the center point, then mark the half measurement clearly. Scribe the line squarely, check the layout, and leave any final allowance your flange shape requires.
Select a cutting tool that matches the wall thickness, such as a chop saw, band saw, or cutoff wheel. Keep the cut controlled and true so both sections stay even.
Wear proper personal protective equipment during this process to reduce injury risk.
After you separate the pipe, deburr the edges, then straighten and roll them as needed. Clean geometry helps the flange fit the exhaust path and seal correctly in the next step.
Install the Doughnut Gasket
Select a doughnut gasket that matches the custom flange and exhaust pipe. If the gasket maker instructions allow it, apply a thin film of high-temperature gasket maker to the correct surface.
Center the gasket snugly between the flange and pipe so it seats evenly. Tighten the flange bolts in a crisscross pattern, then verify the system’s alignment and gasket seating before you finish.
Keep nearby materials away from hot exhaust parts. Use flame-resistant materials and safe work clothing when heat, sparks, or welding may be involved.
Check Gasket Fitment
Before you install the doughnut gasket, verify that its diameter and thickness match the custom flange. A poor match can create a leak path.
Choose gasket materials rated for exhaust heat and vibration. Clean the flange face so the gasket seats on a smooth mating surface.
Place the gasket evenly between the flange and exhaust pipe. Align any holes or slots so the gasket fits without distortion.
Tighten the bolts evenly in a crisscross pattern to spread clamping force. This helps reduce the risk of flange warping.
After assembly, check the gasket for wear, crushing, or cracking during service intervals. Replace it when it no longer seals well.
Align the Exhaust Seal
With the flange face cleaned and the gasket verified, center the doughnut gasket over the fabricated outlet. Make sure it matches the flange diameter and seats flat.
Keep the gasket concentric, then bring the mating pipe into line without forcing it. Tighten the fasteners in stages so pressure builds evenly across the seal.
Do not crush the gasket, because over-torque can distort it and cause leaks. As you secure the assembly, watch for exhaust vibrations that could shift the joint.
After tightening, inspect routing and clearance again. A correctly aligned seal helps prevent leaks, heat loss, and unwanted restriction.
Figure Out the Final Exhaust Route
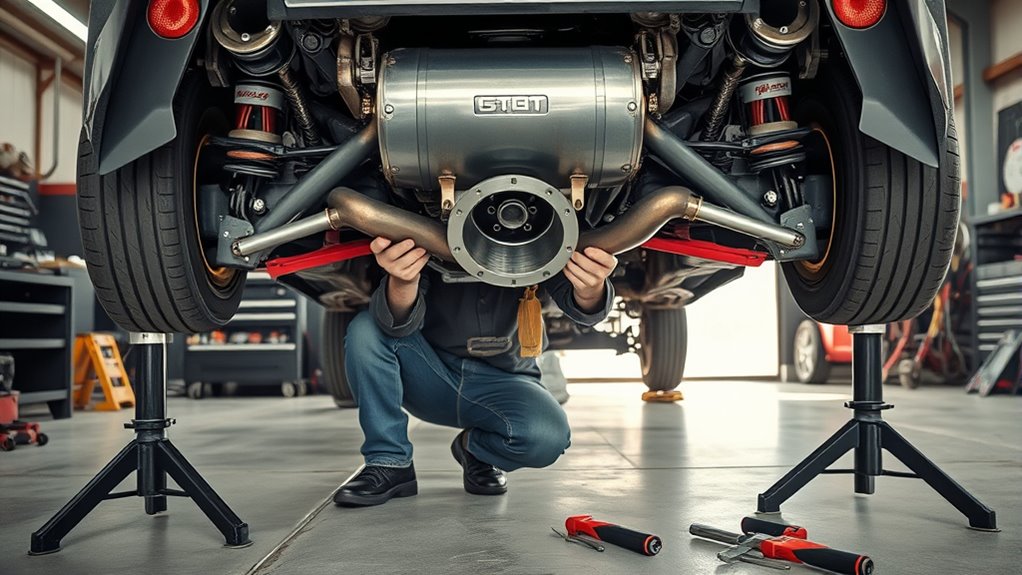
Map the final exhaust route by checking the available space around the flange. Trace the path past nearby parts so nothing interferes with the system.
Check clearance around the body, frame, suspension, wiring, hoses, and heat-sensitive parts. Measure the distance from the flange to the outlet so your layout stays accurate.
Choose pipe angles and lengths that keep flow smooth and reduce sharp restrictions. Test each option with temporary fittings before you commit to the final cut.
If the connection needs extra support, plan the joint so the doughnut gasket stays centered and tight.
- Verify alignment at every bend.
- Mark tight zones before cutting.
- Recheck fitment with the final parts.
- Leave clearance for heat, movement, and vibration.
Plan your route so exhaust flow and pressure stay consistent through the system. Learn more about heat and airflow behavior in this guide to gas flow and pressure.
Common Mistakes to Avoid
Rushing the measurement step causes many flange problems. Always measure twice, mark clearly, and check the pipe against the mating parts before cutting.
Another common mistake involves uneven hammering. Work slowly around the pipe edge so the flange forms evenly and does not pull out of round.
Do not overtighten the gasket during final assembly. Tighten in stages, check alignment, and stop before the gasket crushes or the flange begins to distort.
Frequently Asked Questions
Can I Fabricate My Own Exhaust?
Yes, you can fabricate your own exhaust if you use proper materials, careful measuring, and safe cutting methods. You also need solid welding skills or professional help for any welded joints that affect fit, strength, or safety.
How Do You Create an Exhaust Flange?
You create an exhaust flange by matching the pipe diameter, marking a square cut, shaping the pipe edge, and checking the fit against the mating surface. Then you install the gasket and tighten the hardware evenly so the joint seals.
What Is the Formula for Flange Design?
Simple exhaust flange design starts with the pipe outside diameter, gasket size, bolt spacing, and material thickness. For exact flange design under high load, heat, or pressure, use a proper engineering drawing or consult a qualified fabricator.
How Thick Should an Exhaust Flange Be?
Many custom exhaust flanges use about 1/4-inch steel, but the right thickness depends on heat, pipe size, gasket type, and mounting stress. High-heat or turbo setups may need thicker material and stronger hardware.
Should I Use Gasket Maker on a Doughnut Gasket?
Use gasket maker only when the gasket or sealant instructions allow it. Some exhaust gaskets seal best dry, while others can use a thin layer of high-temperature sealant on the correct surface.
Conclusion
A good exhaust flange starts with accurate measurement, clean cuts, smooth shaping, and even gasket pressure. Before you finish, verify alignment, torque the hardware evenly, and confirm the doughnut gasket seats correctly.
Check the exhaust route for heat, vibration, and movement so the flange does not contact nearby parts. When every measurement holds and every joint seals, your custom flange can support a stronger and cleaner exhaust connection.
Finish with a final inspection, then recheck the joint after the first heat cycle if the system allows safe access.


