Inspect the broken weld, clear rust, soot, and paint to bare metal, and confirm whether the part is stainless or mild steel. Drill stop holes at the crack ends if it’s spreading, then clamp the pieces flush with no gaps. Use MIG or TIG with matching filler, make short tack welds to control heat, and let it cool between passes. Grind the repair smooth, check for leaks, and test-drive carefully—there’s more to verify if you want a lasting fix.
Assess the Broken Exhaust Weld

Start by inspecting the broken exhaust weld closely for cracks, gaps, or any separated joints, and make sure you can access the full damaged area before you begin repairs.
You should trace the entire seam and look for distortion, soot marks, and fatigue around the break. Use a wire brush or grinder to clear rust, dirt, and loose debris so you can judge the metal accurately and prepare for sound welding later.
Identify whether the exhaust is stainless steel or mild steel, since each metal needs different heat and filler choices. Plasma cutting techniques for stainless steel can be useful if you need to remove any surrounding material.
Measure the damaged section carefully and decide if a localized repair will hold or if you need to replace the section for safe performance.
Document what you find, including the condition of the joint and any notes on fit-up. Clear assessment gives you control, protects your work, and keeps the repair aligned with your freedom to move without failure.
Get Tools, Safety Gear, and Patch Metal
You’ll need a MIG or TIG welder, an angle grinder, clamps, and a full set of safety gear, including a welding helmet, gloves, and a jacket. Cut patch metal from the same material as the original part, then shape it so it fits the damaged area with minimal gap. Clean the joint surfaces and secure the components so they stay aligned for welding. Additionally, ensure the patch is properly prepared metal to enhance the quality of the weld.
Products Worth Considering
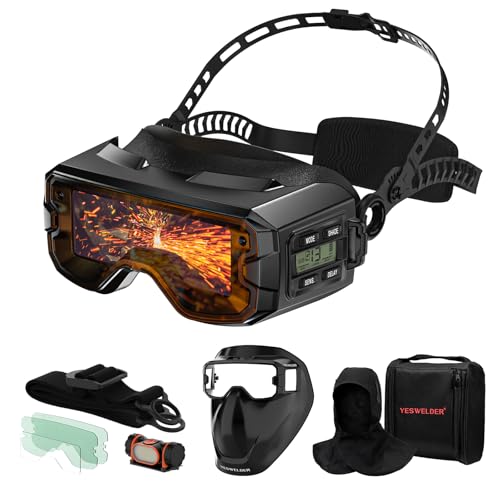
Perfect Eye Protection:Auto darkening filter switches from light to dark in 1/25000 sec, eliminating dangerous arc flashes during welding. Adjustable sensitivity and delay ensure precise protection.

【Flux-Cored MIG with PULSE】 Delivers a smoother, more stable arc for improved weld formation, producing finer, more uniform beads and stronger joints. With excellent portability, it enhances the quality and versatility of gasless welding—ideal for efficient, high-quality field work.

3 IN 1 MULTI-PROCESS WELDER: The FEMEROL MIG140R mig welder delivers a reliable 140A output, enabling seamless welding of materials up to 1/8 inch in thickness. With its versatile Flux Core MIG, Lift TIG, and Stick welding capabilities, this machine is designed to handle a wide range of tasks, from home repairs to professional projects.
Gather Tools and Gear
Before you strike an arc, gather the right tools and materials: a MIG or TIG welder, welding helmet, clamps, and a grinder for prep work.
When you gather tools, choose welding gear that fits your process and protects your body. Put on gloves, a welding jacket, and safety glasses before you start; sparks and fumes don’t negotiate.
Use a wire brush or grinder to clean the weld zone until bare metal shows, then keep a fire extinguisher within reach. Match patch metal to the original steel or aluminum thickness so the repair holds under load.
- Helmet lowered, lens dark
- Clamps biting cleanly into place
- Grinder sparks tracing the floor
- Gloves gripping cool metal
- Extinguisher standing ready nearby
Cut and Fit Patch Metal
With your safety gear on, cut the damaged section cleanly using a grinder or cutting torch. Then trim a patch from matching metal that’s the same thickness and type as the original panel. Use a welding helmet, gloves, and protective clothing to block sparks and UV.
In this cut and fit patch metal step, remove rust, paint, and contaminants from both edges so the joint seats tightly. Match the patch to the panel’s profile, and choose high-strength steel for structural areas.
Clamp the piece in place before you weld; firm alignment prevents warping and keeps the repair true. Keep your tools ready—grinder, clamps, and welder—so you can move efficiently.
Precise prep gives your Welding Repair the strength to hold and the freedom to last.
Clean the Crack and Stop It Spreading
Start by cleaning the crack thoroughly with a wire brush or grinder to remove rust, dirt, and paint so the weld can bond to clean metal. When you clean the crack, expose bare steel around the full repair zone.
Inspect the opening for signs of movement, then drill a small stop hole at each of the ends of the crack to slow further spreading. This simple step helps you protect the part and keep control of the repair.
Hold the panel steady and make sure the joint edges stay aligned so the break doesn’t shift as you work.
- Bright metal showing along the fracture
- Tiny drilled holes at the crack tips
- Loose dust and rust swept away
- Clamped edges kept flush
- A stable repair zone ready for welding
If you see thin gaps, you can use adhesive later as support, but stay focused on preparing the metal cleanly now. Additionally, ensuring the surfaces are clean before welding is crucial to prevent porosity issues.
Tack-Weld the Exhaust Repair
Set the exhaust back in alignment and tack-weld it with a MIG welder to hold the repair in place without overheating the thin metal. Clean the joint until you’ve removed rust, paint, and soot; contamination weakens the bond and can cause blowholes. Proper arc formation issues can lead to weak welds, so ensure your setup is optimal. Put on your helmet and gloves, then use short tack welding bursts at key points along the break. This lets you control the heat and keep the pipe from warping while you lock the parts in position.
| Step | Action |
|---|---|
| Prep | Clean both edges thoroughly |
| Safety | Wear helmet and gloves |
| Weld | Place short tacks strategically |
| Control | Let the metal cool between tacks |
Keep each tack small and deliberate, using the MIG welder’s fine control to secure the exhaust without crushing its freedom to flex. By anchoring the repair this way, you build a stable base for the permanent weld while preserving the shape of the pipe.
Products Worth Considering

【LOW SPATTER & EASY CLEANUP】Minimal Spatter, Flawless Beads: Experience exceptionally low spatter and minimal post-weld cleanup. This ER70S-6 solid wire allows you to achieve smooth, visually appealing beads with ease, saving both time and grinding effort on your metal fabrication.

【LOW SPATTER & EASY CLEANUP】Minimal Spatter, Flawless Beads: Experience exceptionally low spatter and minimal post-weld cleanup. This ER70S-6 solid wire allows you to achieve smooth, visually appealing beads with ease, saving both time and grinding effort on your metal fabrication.

【LOW SPATTER & EASY CLEANUP】Minimal Spatter, Flawless Beads: Experience exceptionally low spatter and minimal post-weld cleanup. This ER70S-6 solid wire allows you to achieve smooth, visually appealing beads with ease, saving both time and grinding effort on your metal fabrication.
Grind the Weld and Check the Fit
Grind away the old weld until you reach clean, shiny metal, then remove any rust, paint, or debris around the joint.
Test fit the pieces and clamp them in place so you can verify alignment before welding.
Check for gaps or misalignment now, because they’ll weaken the new weld and make distortion more likely. Ensure that any zinc residues are completely removed to maintain weld integrity and prevent contamination.
Grind Away Old Weld
Carefully remove the old weld with a grinder or flap disc, taking only enough material to clear the failed joint without thinning, warping, or otherwise damaging the surrounding metal. As you grind away the bead, keep the tool flat and controlled for better results.
- Bright sparks tracing the seam
- Bare steel emerging cleanly
- A steady hand on the grinder
- Thin rust dust lifted off
- Edges opening for a tighter joint
Stop often and inspect the area for rust, paint, or slag. Clean any contamination with a wire brush or sandpaper.
Recheck alignment as you work so the parts stay true. If the metal edges need it, dress them with a slight bevel. That prepares the joint for stronger penetration and helps you reclaim a precise, liberated repair.
Test Fit the Pieces
Smooth the broken weld area with a grinder or file until the edges are clean and even, then test-fit the parts to confirm they align snugly with no gaps. Clean away rust, paint, and debris so the metal can seat properly and you can align the pieces with confidence. Use light pressure, then adjust until the joint feels true. If needed, clamp the parts in place to keep them from shifting while you work.
| Check | Tool | Result |
|---|---|---|
| Edge | Grinder | Smooth |
| Surface | File | Clean |
| Fit | Hands | Snug |
| Hold | Clamp | Stable |
A precise test fit gives you control, reduces frustration, and sets up a stronger weld.
Check Alignment And Gaps
With the pieces test-fit, grind down the broken weld so you’re working with clean metal and a better bonding surface.
Now check alignment carefully; any twist or offset can open gaps that weaken the repair. Use a straight edge or ruler to measure the seam, and adjust if the gap exceeds 1/16 inch.
Clamp the parts together so they stay flush while you inspect the joint. You want the edges touching evenly, with no high spots or daylight showing through.
- Straight edge against the seam
- Ruler marking a narrow gap
- Clamps holding both panels tight
- Flush edges meeting cleanly
- Bright metal ready for weld
Test the Repair Before Driving
Before you drive, inspect the repaired weld visually for any cracks or signs of incomplete fusion to verify the joint is secure. This first check helps you test the repair and confirm that the joint is secure before you move the car.
Next, tap lightly around the weld with a hammer or similar tool. You shouldn’t hear hollow tones, vibration, or sharp ringing that suggests weakness.
Start the engine and listen for exhaust leaks, rattles, or uneven pulses near the repair. If the system sounds different, stop and recheck the weld.
Use a smoke machine to trace any leaks around the area; escaping smoke shows where sealing failed.
Then drive at low speeds on a smooth road and feel for changes in handling, noise, or performance. Keep your attention sharp and reclaim control through careful verification.
If anything feels off, park the vehicle and inspect the weld again before trusting it. Additionally, wearing proper safety gear during the repair process can help prevent injuries and ensure a safe working environment.
Frequently Asked Questions
Can Welds Be Repaired?
Yes, you can repair welds by removing the damaged area, cleaning rust, and re-welding with proper repair techniques. You’ll restore weld strength faster when you assess damage, prep surfaces, and choose MIG or TIG wisely.
How Much Would It Cost for Weld Work on a Car?
Welding costs usually run $75–$150 hourly. You’ll see repair estimates from $50 for a tiny leak to $1,000 for frame work; like patching a cracked bridge, you’re paying for strength, precision, and freedom.
How to Fix a Broken Weld Without Welding?
Use metal epoxy for adhesive bonding after you clean, roughen, and degrease the joint. Clamp it tight, reinforce with metal straps or wire ties, and let it cure fully before stressing the part.
Can You Weld Over an Existing Weld?
Yes, you can, but why risk a weak joint? Use proper welding techniques and thorough metal preparation, grind the old bead, inspect for cracks, and guarantee full penetration so your repair’s strong and free.
Conclusion
A solid exhaust weld is like stitching a tear in a jacket: if you rush it, the rip spreads. I once saw a cracked pipe fail again because the crack wasn’t drilled and cleaned first. By checking the damage, welding in short tacks, grinding the bead smooth, and testing for leaks before you drive, you give the repair a real chance to hold. Take your time, follow the steps, and you’ll save the part.


