You can protect your welder from moisture, condensation, and corrosion by storing it indoors in a dry area, keeping ventilation openings clear, raising it off damp floors, and checking it before every use. Keep electrodes and wire in the packaging or storage system specified by their manufacturer. If water enters the machine, disconnect it from power and keep it out of service until a qualified person confirms it is safe.
Quick Answer
Store your welder indoors, off concrete, and away from leaks, rain, and rapid temperature changes. Control humidity, let a cold machine warm up before use, and keep vents unobstructed. Store each consumable as its manufacturer directs. Never energize wet or water-damaged equipment until it has been inspected and cleared for service.
Key Takeaways
- Keep the welding power source dry, elevated, cool, and able to ventilate as its manual requires.
- Treat visible condensation as a warning to wait, dry the area, and find the moisture source.
- Store low-hydrogen electrodes according to the exact manufacturer instructions; do not bake every rod type.
- Inspect plugs, extension cords, leads, clamps, guns, torches, and connectors before use.
- Remove wet, corroded, burnt, cracked, or repeatedly tripping equipment from service.
At a Glance
| Time Required | 5 to 10 minutes for a routine check; 30 to 60 minutes for a monthly storage and cable inspection |
| Difficulty | Easy for storage and visual checks; professional service is required for internal water exposure or electrical damage |
| Tools Needed | Hygrometer, clean dry cloths, soft brush, raised cart or shelf, fitted cover, sealed consumable containers, fresh desiccant, and a dehumidifier when needed |
| Cost | Low for basic cleaning, covers, and desiccant; moderate if the shop needs a dehumidifier or an approved electrode oven |
How to Protect Your Welder From Moisture
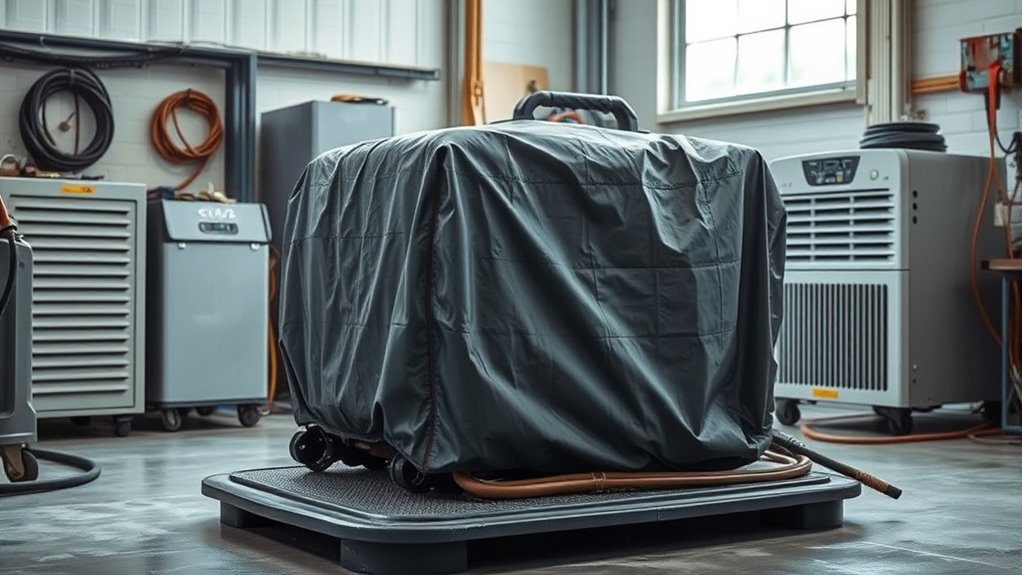
Start with the storage location. Keep the power source indoors whenever possible and away from rain, roof leaks, wash areas, open exterior doors, damp concrete, and places where hot and cold air meet. Electrical equipment that is not identified for wet or damp locations should not be treated as weatherproof.
- Raise the machine. Put it on a stable cart, shelf, or stand so the base does not sit on wet concrete or collect splash water.
- Leave cooling paths open. Keep the clearance required by the owner’s manual around fans, louvers, and air inlets.
- Cover it only when cool and dry. Use a fitted, breathable, or manufacturer-approved cover. Do not trap a damp machine under plastic.
- Control the room. Use a hygrometer, ventilation, air conditioning, or a dehumidifier to reduce persistent humidity and condensation.
- Inspect before use. Check the case, plug, cord, leads, terminals, gun or torch, work clamp, and surrounding floor.
Clean the exterior with a dry cloth or soft brush. Grinding dust and flux residue can hold moisture against painted and bare metal. Follow the manual before using compressed air because excessive pressure can drive conductive dust deeper into the machine or damage components.
If exterior paint is chipped, clean and dry the spot and use the manufacturer’s recommended touch-up coating. Do not spray oil, WD-40, solvent, or rust inhibitor into vents, wire-feed compartments, connectors, drive rolls, liners, torches, contact tips, work clamps, or any surface that must carry current or remain clean for welding.
Warning: Do not energize a welder that is wet inside, has been submerged, has standing water on it, smells burnt, shows damaged insulation, or repeatedly trips a breaker. Disconnect power only when you can do so safely, keep the unit out of service, and have it inspected by a qualified technician.
Let a Cold Welder Acclimate Before Use
A cold welder brought into a warm, humid shop can collect condensation on its case and internal parts. Leave it unplugged in the dry operating area until it reaches room temperature and no condensation remains. There is no universal waiting time because machine size, temperature difference, and humidity all matter.
Do not speed the process with an open flame, space heater aimed into the vents, heat gun, or hair dryer. Localized heat can damage insulation and push moisture into places you cannot inspect. Use normal room conditions, dry airflow, and the instructions in the owner’s manual.
What to Do After Rain, Leaks, or Flooding
Surface droplets from brief condensation are different from water entering the case. Wipe the exterior, correct the humidity source, and wait before use. If rain, a plumbing leak, or floodwater entered the machine, do not remove covers or test internal circuits unless you are qualified and the service manual authorizes the work.
| Condition | Safe Response |
|---|---|
| Light exterior condensation only | Keep unplugged, wipe dry, improve room conditions, and wait until the unit is fully acclimated. |
| Water entered vents or wire-feed area | Remove from service and arrange inspection, drying, and electrical testing by a qualified person. |
| Floodwater, saltwater, sewage, or chemical exposure | Do not energize. Contamination may remain after drying, so obtain a professional repair or replacement assessment. |
| Burnt smell, arcing, heat damage, or breaker trips | Stop use immediately. Do not keep resetting the breaker; have the machine and supply circuit checked. |
Moisture control protects the machine, but it does not replace preparation of the workpiece. If you weld galvanized steel, handle zinc coating and contamination as a separate surface-preparation and fume-control issue.
Store Welding Rods Dry and Ready
Your consumables need their own moisture plan. Damp or contaminated electrodes can contribute to unstable arcs, porosity, excessive spatter, and hydrogen-assisted cracking in susceptible steels. Keep unopened products in intact original packaging and store them away from rain, spray, wet floors, oil, and damaged cartons.
Do not use one storage rule for every stick electrode. Low-hydrogen electrodes such as many E7018 products normally require controlled storage after their hermetically sealed package is opened. Cellulosic electrodes such as E6010 and E6011 contain designed-in moisture and generally should not be baked like low-hydrogen rods. Follow the product data sheet, package label, welding procedure, and applicable code.
- Keep unopened electrodes in intact manufacturer packaging until needed.
- Move opened low-hydrogen electrodes to the approved holding oven or storage system specified for that product.
- Do not guess at holding or rebaking temperatures; classifications and brands differ.
- Do not repeatedly recondition rods beyond the manufacturer’s limit.
- Discard rods with cracked, flaking, swollen, soft, contaminated, or rusty coatings when the manufacturer’s instructions do not permit recovery.
For long-term readiness, label opened containers with the classification, brand, lot, date opened, and any required exposure deadline. Proper handling reduces moisture absorption in low-hydrogen electrodes and helps you avoid mixing rods with different storage needs.
Pro Tip: Keep a printed or digital copy of the filler-metal data sheet near the storage area. The product-specific instructions are more reliable than a temperature copied from a different electrode classification.
Protect MIG, Flux-Cored, and TIG Consumables
Moisture protection is not limited to stick rods. Store solid MIG wire, metal-cored wire, flux-cored wire, submerged-arc flux, and TIG filler rods in clean, dry conditions and in their original packaging when practical. Do not leave a spool on the feeder for long periods in a damp shop.
- Inspect wire for surface rust, white corrosion, dirt, and oil before feeding it through the liner.
- Keep spool covers closed and protect partly used spools in sealed packaging with suitable desiccant.
- Store TIG rods in clean tubes so they do not collect moisture, shop dust, or grinding residue.
- Do not try to save contaminated wire by spraying it with oil or solvent.
Keep Your Shop Dry
Control the room instead of waiting for rust to appear. A relative-humidity target of roughly 30% to 50% is a practical indoor moisture-control range when your equipment manuals and local conditions allow it. The most important signs are persistent condensation, musty storage, wet cardboard, rusty tools, and repeated dampness on the machine.
Measure humidity with a hygrometer. If the shop remains damp, use a properly sized dehumidifier or air conditioner and drain it as directed. Small thermoelectric units may help inside a small cabinet or enclosed room, but they often cannot control a full garage. Keep the dehumidifier filter and drain clean.
Seal roof, door, and window leaks, but do not confuse building ventilation with welding fume control. You still need suitable work-area ventilation during welding and cutting. Avoid pulling warm, moisture-heavy outdoor air into a cool shop when it will condense on metal surfaces.
| Control | Action | Why It Helps |
|---|---|---|
| Humidity | Use a hygrometer and aim for a stable, dry range, often 30% to 50% indoors | Reduces the chance of condensation and slows corrosion |
| Temperature | Avoid rapid moves between cold storage and warm humid air | Limits dew forming on cold equipment |
| Leaks | Repair roof, plumbing, door, and drainage problems | Removes the moisture source instead of hiding it |
| Storage | Use raised shelves, closed consumable containers, and clean dry covers | Separates equipment from floor moisture and airborne contamination |
If you keep equipment in a shed, trailer, or jobsite box, use a dry enclosure that sits off the ground and does not leak. Use manufacturer-approved protective caps where supplied, but do not tape over cooling vents or seal damp air inside the machine. In coastal areas, inspect more often because salt deposits can speed corrosion and remain conductive when damp.
Protect Cables, Guns, and Metal Parts From Rust
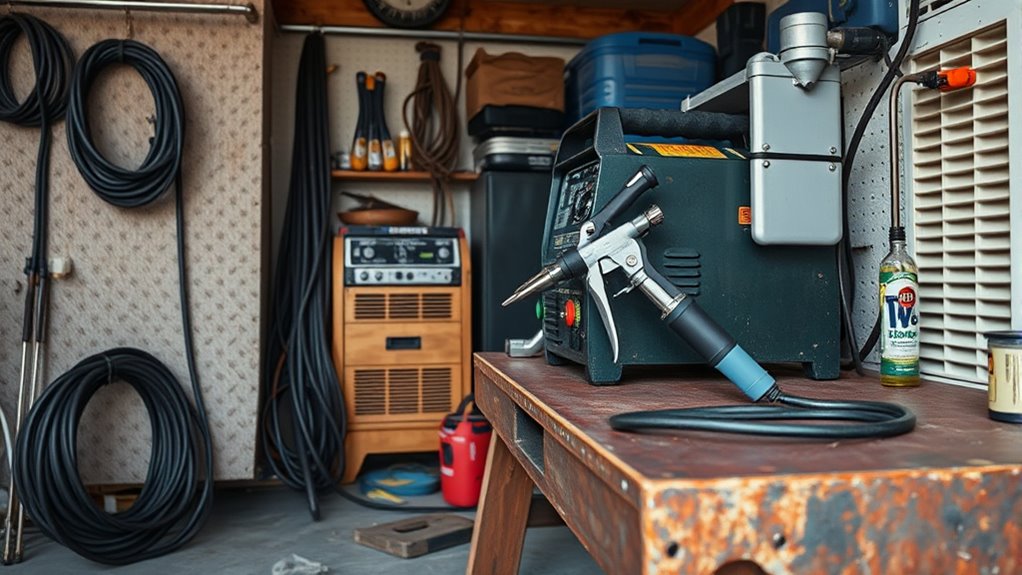
Once the room is dry, inspect the parts that are handled, dragged, flexed, and exposed to spatter. This includes the input cord, extension cord, welding leads, gun or torch cable, electrode holder, work clamp, lugs, plugs, receptacles, gas fittings, and exposed hardware.
Before use, look for cracked insulation, flattened cable sections, exposed conductor, loose lugs, missing plug pins, green or white corrosion, overheated terminals, burnt plastic, stiff cable, and rust that prevents clean metal-to-metal contact. Remove damaged electrical items from service until they are repaired and tested.
For bare exterior steel that does not conduct welding current, a manufacturer-approved touch-up coating may help after the part is cleaned and dried. Keep paint and corrosion products off work-clamp jaws, terminals, connector pins, drive rolls, liners, contact tips, gas passages, cylinder valves, and the workpiece.
Rust on a clamp or terminal is not only cosmetic. It can increase resistance, create heat, reduce arc stability, and hide a weakened connection.
- Wipe and inspect cables after each dirty or humid shift.
- Hang leads in wide loops without sharp bends, tight coils, or contact with wet floors.
- Store guns, torches, holders, clamps, and foot controls in a dry cabinet or rack.
- Keep connector caps clean and installed when the manufacturer provides them.
- Replace damaged parts instead of covering serious defects with tape or paint.
Use the right gloves and eye protection while cleaning or inspecting sharp, rusty, or abrasive parts. This is a separate personal-safety step; appropriate PPE does not stop corrosion, but it can reduce injury while you service the work area.
Spot Moisture Damage Before Weld Defects Start
Moisture may contribute to weld problems, but it is not the only cause. Porosity, pits, excessive spatter, an unstable arc, and an inconsistent bead can also come from dirty base metal, incorrect settings, poor work-clamp contact, shielding-gas leaks, drafts, worn contact parts, or technique.
Inspect SMAW electrodes before welding. Set aside rods with chipped, swollen, cracked, powdery, soft, rusty, or contaminated coatings. For critical work, use properly stored consumables that match the welding procedure rather than trying to guess whether an exposed rod is still acceptable.
For MIG, flux-cored, and TIG work, inspect wire, filler rods, nozzles, diffusers, liners, collets, gas lenses, and contact tips. Rusty wire can damage a liner and feed poorly. Moisture or dirt in the gas path can create problems that look like a machine fault.
| Checkpoint | What to Look For | Next Step |
|---|---|---|
| Machine and floor | Condensation, water stains, rust, leaks, or wet cords | Keep power off, dry the area, correct the source, and inspect before use |
| Stick electrodes | Damaged coating, rust, unknown exposure time, or mixed classifications | Follow the product data sheet; replace questionable rods for critical work |
| Wire and feeder | Rusty wire, dirty drive rolls, clogged liner, or corroded contacts | Replace contaminated wire and clean or replace affected feed parts |
| Weld bead | Porosity, pits, erratic arc, excess spatter, or inconsistent profile | Check moisture, cleanliness, settings, gas coverage, connections, and technique |
Note: Cold weather can also extend some adhesive and epoxy curing times, but that is a separate issue. An epoxy cure schedule is not a safe method for deciding when electrical welding equipment is dry enough to energize.
Daily and Monthly Moisture Prevention Checklist
A short routine is easier to follow than an occasional deep cleanup. Adjust the frequency for your climate, storage building, welding process, and equipment manual.
Daily Checks
- Look for condensation on the case, cart, cylinders, cables, bench, and nearby metal.
- Check the floor for leaks, puddles, damp cardboard, and wet extension cords.
- Inspect plugs, leads, gun or torch connections, holders, and clamps before use.
- Wipe dust, grinding debris, and moisture from exterior surfaces.
- Seal or return rods, wire, flux, and filler metal to the correct storage system.
- Hang leads in wide loops off the floor.
- Cover the machine only after it is cool and dry.
Monthly Checks
- Review hygrometer readings and check for repeated humidity spikes.
- Inspect the input cord, extension cords, plug pins, terminals, lugs, and insulation.
- Check work-clamp jaws and contact surfaces for rust, heat damage, and weak spring pressure.
- Clean storage boxes and replace or recharge desiccant as directed.
- Inspect partly used spools, electrode containers, and TIG-rod tubes.
- Check under the cart for rust, water stains, blocked drains, or damp materials.
- Clean the dehumidifier filter and test its drain or tank shutoff.
Seasonal and High-Risk Checks
- Inspect before and after the rainy season, winter storage, or long transport.
- Check trailers and jobsite boxes after storms and large temperature changes.
- In coastal shops, remove salt deposits from exterior surfaces using the method approved by the equipment manufacturer.
- Review electrode exposure records before structural, pressure, or other code-controlled work.
Note: A basement, unheated shed, coastal shop, or trailer may need checks more often than once a month. Base the schedule on actual condensation and corrosion, not the calendar alone.
What Not to Do When Protecting a Welder From Moisture
Some shortcuts trap moisture, contaminate consumables, or hide unsafe damage. Avoid these mistakes:
- Do not seal a damp welder under plastic.
- Do not block fans, louvers, or cooling-air clearances.
- Do not spray oil, WD-40, or solvent on rods, wire, flux, drive rolls, liners, contact tips, terminals, clamp jaws, gas passages, or weld surfaces.
- Do not use a heat gun, open flame, or direct space-heater blast to dry the machine.
- Do not bake E6010, E6011, or any other electrode unless its manufacturer specifically permits it.
- Do not store opened low-hydrogen rods loose on a bench or in an unheated container when controlled storage is required.
- Do not leave cables, foot controls, gloves, holders, or consumables on wet concrete.
- Do not treat green corrosion, cracked insulation, loose terminals, or a rusty work clamp as cosmetic.
- Do not use wet hands to connect or disconnect energized cord-and-plug equipment.
- Do not keep resetting a breaker after the welder trips it.
Frequently Asked Questions
Should welders coat welding rods with WD-40?
No. Oil can contaminate the coating, arc, and weld. Keep rods in their original packaging or the approved dry-storage system for that classification. Follow the manufacturer’s instructions for holding and reconditioning low-hydrogen electrodes.
Why do welders not last long in damp shops?
Persistent moisture can corrode metal, weaken electrical contacts, damage insulation, contaminate consumables, and create conductive deposits. Temperature swings also cause condensation. Dry storage, clean cooling paths, and early replacement of damaged parts help extend service life.
What are the 5 C’s of welding?
There is no single, widely recognized welding standard called the “5 C’s.” Some instructors create their own memory aids, so the words vary. For moisture prevention, focus on clean equipment, correct consumable storage, sound connections, controlled shop conditions, and compliance with the manual and welding procedure.
Can a welder be stored outside?
Outdoor storage is a poor choice unless the exact machine and enclosure are rated for that environment. A cover alone does not make a welder weatherproof and may trap condensation. Store it indoors when possible, off the ground, with clear vents and protection from leaks and temperature swings.
What does God say about welding?
The Bible does not address modern welding machines directly. Many readers connect skilled workmanship with principles of diligence, honesty, and care for other people. In a welding shop, that means working safely, maintaining equipment, and refusing shortcuts that could create a weak or dangerous weld.
How long should a cold welder sit before use?
There is no fixed time. Leave it unplugged in the dry operating area until it reaches room temperature and no condensation is visible. A large machine moved from freezing storage may need much longer than a small unit. Follow the owner’s manual.
Can I dry a wet welder with compressed air?
Do not use compressed air as a substitute for inspection after internal water exposure. For routine dust removal, use only the pressure and method allowed by the manual, with the machine disconnected. Air must be clean and dry, and it should not drive moisture or metal dust deeper into the unit.
Does every E7018 electrode need the same oven temperature?
No. Storage and reconditioning instructions can vary by manufacturer, product designation, package type, welding code, and exposure history. Use the data sheet for the exact electrode instead of applying one temperature to every E7018 product.
Conclusion
Moisture can act like silent rust, damaging the machine and consumables before the problem becomes obvious. Keep your welder dry by controlling the storage area, preventing condensation, protecting cables and consumables, and responding quickly to leaks or corrosion. The machine needs dry air and clear ventilation, while rods, wire, and flux need the storage method specified for their classification.
Do not energize water-damaged equipment, do not hide cable defects, and do not apply one oven rule to every electrode. A few minutes of inspection and correct storage can prevent unsafe electrical conditions, feed problems, wasted consumables, and avoidable weld defects.
Sources
- OSHA 29 CFR 1910.252, General Requirements for Welding: wet-condition shock protection and general welding safety.
- OSHA 29 CFR 1910.254, Arc Welding and Cutting: wet-condition electrical hazards and welding-equipment requirements.
- OSHA 29 CFR 1910.334, Use of Electrical Equipment: cord inspections, wet plug handling, and removal of damaged equipment from service.
- U.S. EPA, A Brief Guide to Mold, Moisture and Your Home: indoor humidity, condensation, ventilation, and dehumidifier guidance.
- Lincoln Electric, Storing and Redrying Electrodes: classification-specific storage and reconditioning guidance.
- Hobart Brothers, Choosing the Right Stick Electrode for the Job: differences between low-hydrogen and cellulosic electrode storage.


