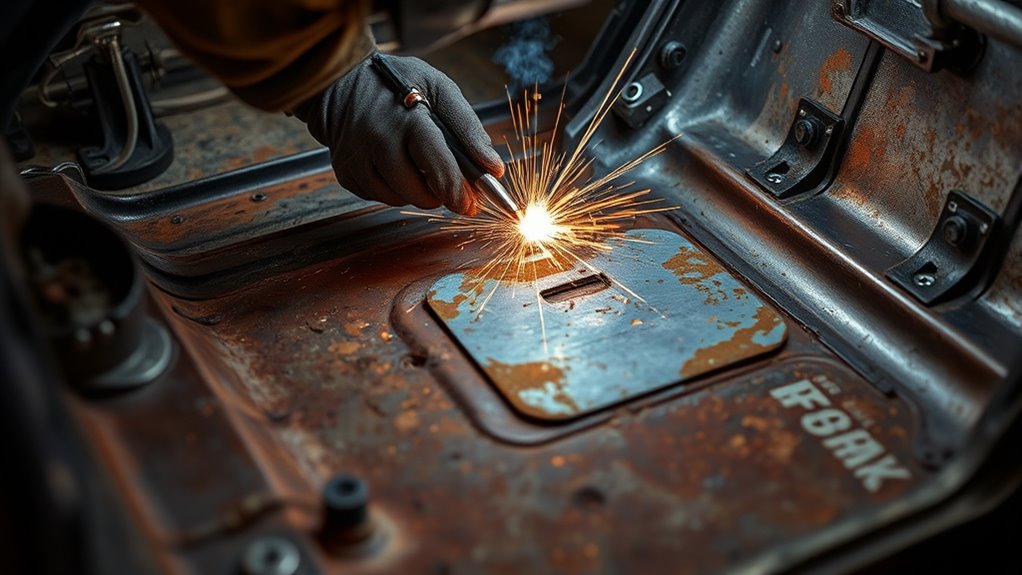
Rust in a vehicle floor pan rarely stops at the hole you can see. Moisture can spread beneath seam sealer, insulation, braces, and factory coatings, leaving thin steel around the visible damage. A lasting repair starts by finding the full rust area, checking the vehicle maker’s repair instructions, and removing every weak section without damaging nearby structural or safety components.
Quick Answer
To repair a rusty floor pan, first find and stop the moisture source, then remove the interior and inspect both sides. Follow the vehicle maker’s body-repair procedure, cut back to sound steel, fit a matching patch, and weld with spaced tacks or specified plug welds. Finish with primer, seam sealer, coating, and cavity protection.
Key Takeaways
- Check the vehicle-specific body-repair manual before cutting, especially near braces, rails, seat mounts, belt anchors, or a high-voltage battery.
- Remove rust until the remaining metal has its original thickness and strength, not merely until it looks clean.
- Match the patch material and thickness to the undamaged original panel or use the specified replacement part.
- Use the OEM-specified joint and attachment method, then control heat with spaced tacks or correctly placed plug welds.
- Restore primer, seam sealer, topcoat, underbody coating, and cavity protection in the correct product sequence.
- Find and repair the leak, blocked drain, damaged seam, or missing coating that caused the rust, or corrosion may return.
At a Glance
| Time Required | Several hours to a full day for a small nonstructural patch; larger repairs may take several days. |
| Difficulty | Advanced. You need safe vehicle-support, cutting, sheet-metal fitting, MIG welding, and corrosion-protection skills. |
| Tools Needed | MIG welder, grinder or saw, clamps, measuring tools, body hammer and dolly, PPE, fire extinguisher, jack stands, and coating supplies. |
| Cost | Varies widely. A fabricated patch mainly requires metal and consumables, while a stamped panel, extensive trim removal, or structural professional repair costs much more. |
Warning: Do not cut or weld until the vehicle is securely supported and you have inspected both sides of the floor. Remove or protect carpet, insulation, wiring, fuel and brake lines, modules, batteries, factory foam, seam sealer, and other combustible material. Keep a suitable fire extinguisher ready and use a fire watch on the opposite side of the panel.
How to Repair a Rusty Floor Pan
Before you begin a floor pan replacement or patch repair, determine whether the damaged section is only a floor skin or part of a larger structural assembly. Check nearby braces, rockers, rails, seat mounts, belt anchors, suspension mounting areas, and factory seams.
Use the vehicle-specific body-repair manual to identify the approved cutting locations, attachment method, corrosion protection, and high-voltage precautions. I-CAR notes that front floor-pan replacement is commonly performed at factory seams, although the exact procedure depends on the vehicle.
The basic repair sequence is:
- Find the full rust area and the moisture source.
- Remove the interior and inspect the top and underside of the floor.
- Support and isolate the vehicle according to the service procedure.
- Cut the damage back to sound, full-thickness steel.
- Make or obtain a patch that matches the original material and shape.
- Use the specified joint and attachment method.
- Weld gradually while controlling heat and checking the backside.
- Inspect, prime, seal, coat, leak-test, and protect enclosed cavities.
Clean steel and a close-fitting patch are essential, but the repair also needs the correct OEM joint, weld method, and corrosion-protection sequence.
Use an air saw, cutoff wheel, sheet-metal tool, or plasma cutter for controlled trimming. A plasma cutter can work quickly, but you must keep heat and the kerf under control. Review these tips for making clean plasma cuts in thin steel before using one near finished body panels.
Keep a body hammer and dolly nearby so you can correct small bends and flange-shape problems. Do not force a poorly shaped patch into position with screws and expect the weld to hold it flat.
Before You Begin: Time, Tools, and Safety
Estimated total time: Plan for at least several hours to a full working day for a small patch. Large panels, hidden rust, structural attachments, or extensive interior removal can extend the job over several days.
Decide Whether the Repair Is Suitable for DIY Work
Stop and arrange a qualified collision-repair inspection when rust reaches a seat or belt mounting point, rocker reinforcement, frame rail, crossmember, suspension area, battery enclosure, or another load-carrying structure. You should also stop if you cannot identify the metal type or approved repair procedure.
Modern vehicles may use high-strength steel, adhesives, resistance spot welds, rivets, MIG brazing, or model-specific sectioning locations. A generic welded patch may not reproduce the original crash performance.
Find Why the Floor Pan Rusted
Dry the area and look for the source of the water before installing new metal. Common causes include damaged door or window seals, windshield leaks, blocked body drains, failed seam sealer, missing floor plugs, damaged undercoating, or road debris that opened the coating from below.
Repair the leak or drainage problem as part of the job. New steel can rust again if water continues to enter or remains trapped under carpet and insulation.
Prepare and Isolate the Vehicle
- Park on a hard, level surface and support the vehicle at approved lifting points with correctly rated stands.
- Remove seats, carpet, padding, sound deadener, trim, and other material far enough from the hot-work area.
- Inspect underneath for fuel lines, brake lines, wiring, exhaust parts, heat shields, braces, and hidden coatings.
- Follow the vehicle maker’s battery-disconnection and system-shutdown procedure. Observe any specified waiting period for airbags, backup power supplies, or retained electrical energy.
- Do not work on a hybrid or electric vehicle until the high-voltage system has been disabled and verified according to the OEM procedure by a properly trained person.
- Place the welding return clamp on clean metal as close to the repair as practical, and keep current paths away from bearings, modules, wiring, and electronic components.
- Provide effective ventilation without blowing away the shielding gas, and keep your head outside the welding-fume plume.
- Keep a suitable extinguisher immediately available and assign someone to watch the opposite side whenever hidden material could ignite.
I-CAR’s vehicle-protection guidance for welding recommends shutting down electrical systems, disconnecting the battery as directed, removing nearby electronics, and keeping the ground clamp close to the work. OSHA also requires precautions for combustible material on the opposite side of welded metal and suitable fire-extinguishing equipment in the work area.
Tools and Materials
- Safety glasses, welding helmet, welding gloves, hearing protection, and suitable work clothing
- Respiratory or ventilation controls selected for the coating, metal, and workplace conditions
- Approved jack stands, wheel chocks, and adequate work lighting
- Grinder, cutoff wheel, air saw, sheet-metal cutter, or plasma cutter
- Replacement floor pan panel or matching sheet metal
- Marker, straightedge, clamps, temporary fasteners, and measuring tools
- Body hammer, dolly, file, and deburring tools
- MIG welder, correct solid wire, regulator, and shielding gas
- Flap disc or file-belt tool for controlled weld finishing
- OEM-approved or product-compatible cleaner, primer, seam sealer, paint, underbody coating, and cavity protection
- Suitable fire extinguisher and noncombustible welding blankets
Note: Factory foam, seam sealer, undercoating, and cavity wax may burn or release hazardous fumes. Remove them from the heat-affected area before cutting or welding. Do not apply new cavity wax or flammable coatings until all hot work has finished and the panel has cooled.
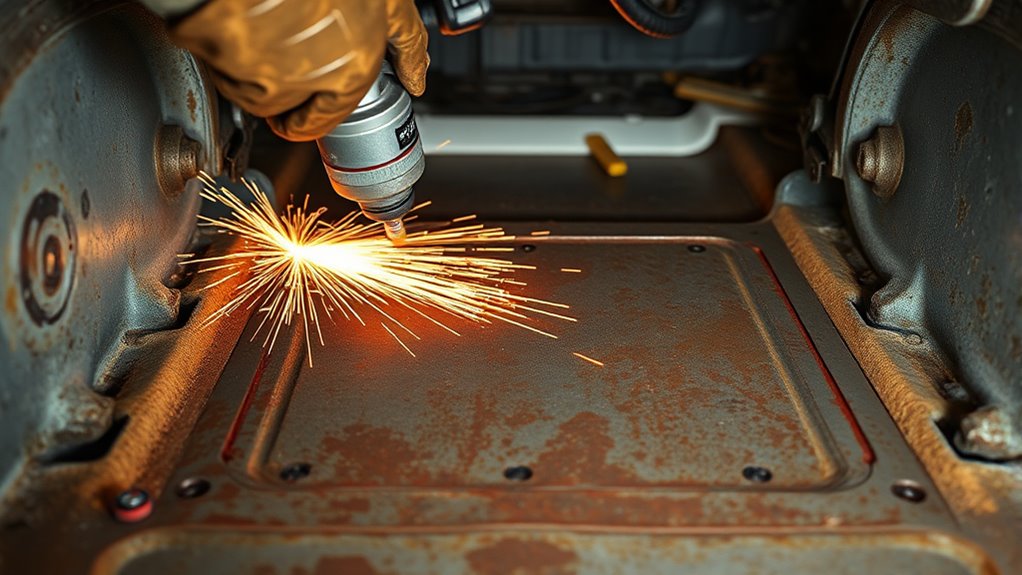
Cut Out Rust and Fit the Floor Pan Patch
Remove loose scale and inspect the floor from above and below. Probe suspicious areas carefully. Metal that flexes, flakes, perforates, or has lost much of its original thickness does not provide a dependable welding edge.
Mark a simple cutting line around the damage while staying clear of braces, wiring, lines, and factory joints. When possible, use straight sections and gentle corners because they are easier to reproduce in a patch than an irregular opening.
Cut conservatively at first. You can enlarge the opening after inspecting the newly exposed edge, but you cannot restore an accidental cut through a reinforcement or hidden line.
Remove paint, rust, seam sealer, oil, and contamination far enough from the joint to expose sound steel. Do not treat paint-over-rust products as a substitute for removing weak metal. This guide to whether you can apply Rust-Oleum over rust explains why coating decisions begin with the condition of the base metal.
Trace the opening or use a cardboard template to shape the patch. Add only the flange or overlap required by the selected repair method. For a butt joint, leave a small, consistent welding gap only if your process and skill level require it. Avoid wide or changing gaps.
| Step | Tool | Goal |
|---|---|---|
| Inspect | Light, pick, and visual check | Find the full rust boundary |
| Cut out | Saw, snips, or cutoff wheel | Reach sound steel safely |
| Deburr | File or abrasive | Remove sharp and cracked edges |
| Template | Cardboard and marker | Copy the opening and contours |
| Trim | Snips, saw, or wheel | Create an even joint |
| Dry fit | Clamps and temporary fasteners | Confirm shape and alignment |
| Clean | Abrasive and approved cleaner | Prepare the weld and coating areas |
Test-fit the patch repeatedly. It should follow the floor contours without springing away from the opening or needing heavy clamp pressure. Confirm that drain holes, floor plugs, beads, seat brackets, and nearby components remain in their correct positions.
Choose the Correct Patch, Joint, and Weld Method
Match the Original Metal
Use the specified service panel whenever one is available and the OEM procedure calls for it. For a fabricated patch, measure sound original metal with an appropriate gauge or micrometer and match its thickness as closely as practical.
Do not rely on a universal 16-, 18-, or 20-gauge recommendation. The floor skin, reinforcement, crossmember, and mounting areas may use different thicknesses or steel grades. Do not weld an unidentified high-strength reinforcement as though it were ordinary mild-steel sheet.
Select the Joint
| Joint or Attachment | Best Use | Main Concern |
|---|---|---|
| Butt joint | Nonflanged patch where the OEM procedure permits it | Requires close fit and careful heat control |
| Lap or flanged joint | Only where the approved repair design uses an overlap | The overlap must receive complete corrosion protection so it does not trap moisture |
| Plug weld | Replacing factory spot welds on an approved flange | Hole size, spacing, penetration, and weld count must follow the repair procedure |
| Other OEM method | Resistance spot welding, MIG brazing, adhesive, rivets, or a combined process | Do not substitute ordinary MIG welding without authorization |
Use Weld-Through Primer Correctly
Follow the OEM body-repair manual and the primer manufacturer’s instructions. Weld-through primer is normally reserved for clean mating surfaces that will become inaccessible after assembly. It is not a general topcoat or a substitute for final corrosion protection.
I-CAR’s weld-through-primer guidance says excessive material can increase electrical resistance, heat, and spatter. It also notes that the coating should be removed from the direct GMAW weld zone when required to prevent porosity. Apply only the specified amount and let it dry as directed.
Weld the Floor Pan Without Warping It
Practice on scrap cut from steel that closely matches the floor and patch. Confirm the machine setting, wire feed, voltage, wire diameter, gas flow, joint gap, and plug-weld technique before you touch the vehicle.
A gas-shielded, solid-wire MIG welder in short-circuit transfer is a common choice for thin mild-steel automotive work. Miller Electric identifies a 75% argon and 25% carbon-dioxide blend as a common automotive MIG shielding gas. A small solid wire, often 0.023 inch for very thin mild steel, can improve control, but your machine chart, wire specifications, OEM procedure, and test welds must determine the final setup.
Self-shielded flux-core wire often produces more spatter and can make thin-panel heat control harder. When it is the only available process, review these flux-core welding tips for beginners and prove the complete setup on scrap before deciding whether it is suitable.
Clamp the patch in place so the joint remains even and the panel follows the original contours. Attach the return clamp to clean steel close to the repair, while keeping the current path away from electronics, bearings, lines, and modules.
Use this sequence unless the OEM procedure specifies another method:
- Place widely spaced tacks at the corners and along the perimeter.
- Recheck the patch height, floor contour, and gap before adding more welds.
- Add tacks between the first set while moving to distant or opposite areas.
- Allow each area to cool naturally before welding beside it again.
- Continue filling between tacks until the required seam is complete.
- For plug welds, confirm fusion to the lower panel and reproduce the required number, location, and spacing.
- Inspect the top and underside for pinholes, missed fusion, excessive penetration, or fire damage.
- Correct defects before grinding or applying any coating.
Do not run one long bead around a thin floor-pan patch unless the approved procedure specifically requires it. Concentrated heat can shrink the panel, pull the patch out of alignment, or burn through the edge.
Although interpass temperature is often discussed in other welding applications, the practical rule here is to avoid stacking heat in one small area. Stop when the panel becomes too hot to maintain control, then let it cool naturally before continuing.
Pro Tip: If you keep burning through an edge, stop changing controls at random. Recheck the metal thickness, joint gap, contamination, contact-tip distance, and scrap-test results. A wide or uneven gap often causes more trouble than a small setting error.
Grind the Welds and Seal the Floor Pan
Remove spatter and reduce high welds with a controlled abrasive, file belt, or flap disc. Keep the tool moving and check your work often. Grinding a weld completely flat can remove sound weld metal or thin the surrounding floor, so stop as soon as the joint is smooth enough for inspection and coating.
Inspect every weld from both sides where access allows. Look for:
- Pinholes or incomplete sections in a continuous seam
- Plug welds that did not fuse to the lower panel
- Cracks at the edge of the heat-affected area
- Sharp points, heavy spatter, or accidental cuts
- Distortion that affects seats, trim, plugs, brackets, or nearby parts
- Heat damage to wiring, hoses, coatings, insulation, or factory adhesive
A smooth-looking weld is not automatically a sound weld. Inspect for fusion, pinholes, thinning, and backside damage before hiding the repair under sealer or undercoating.
Restore Corrosion Protection in the Correct Order
Remove abrasive dust and clean the repair with a residue-free product approved for the primer and seam sealer you plan to use. Do not leave rust-treatment residue, oil, silicone, or an incompatible acid-etch primer beneath the sealer.
The exact sequence varies by vehicle and product, so follow both the OEM corrosion-protection procedure and each technical data sheet. A typical sequence may include:
- Prepare the bare metal to the abrasive specification required by the primer or sealer.
- Apply the specified epoxy, urethane, or other corrosion-resistant primer.
- Apply seam sealer over the approved substrate and reproduce the factory coverage.
- Allow the material to cure or reach its stated paint time.
- Apply the required topcoat, interior coating, and underbody protection.
- Apply cavity wax or another specified internal corrosion treatment only after hot work and refinishing are complete.
The 3M OEM Match Epoxy Seam Sealer technical data sheet lists floor pans as an intended application and recommends an appropriate 2K epoxy or urethane primer beneath the seam sealer. Other products may require a different sequence, so never transfer one manufacturer’s instructions to another product.
Seal every approved seam and lap from the side specified in the repair procedure. Protect the underside against road spray and abrasion, and restore cavity protection where welding disturbed inaccessible factory coatings.
Inspect your grinder, leads, gas hose, regulator, clamps, and protective equipment before and after the job. These cutting-equipment safety and inspection points can also help you identify damaged cables, poor work areas, and missing PPE before they create another hazard.
Leak-Test and Reassemble
After all products have reached the cure stage specified on their labels, direct a gentle flow of water over the exterior leak area while someone checks the dry interior. Do not use high-pressure water that can force its way past seals that would normally remain dry.
Confirm that the repaired floor stays dry, drains remain open, plugs fit correctly, and no coating contacts the exhaust or moving parts. Reinstall insulation, carpet, seats, wiring, and trim only after the repair has passed the leak and quality checks.
How to Fix Common Floor Pan Welding Problems
| Problem | Likely Causes | Correction |
|---|---|---|
| Burn-through | Wide gap, thin rusted edge, excessive heat, long arc, or too much dwell time | Cut back to stronger metal, improve the fit, verify settings on scrap, and use shorter separated tacks |
| Porosity or dirty welds | Rust, oil, paint, excess weld-through primer, poor gas coverage, wind, or a leaking gas system | Remove the defect, clean the joint, check gas flow and leaks, shield the work area, and keep primer out of the direct weld zone as required |
| Patch distortion | Long welds, poor tack sequence, forced fit, or grinding heat | Correct the fit, spread the tacks, allow natural cooling, and grind in short controlled passes |
| Weak plug weld | Wrong hole size, coating in the weld area, poor clamp pressure, or no fusion to the lower panel | Follow the OEM plug-weld specification, clean the contact area, clamp tightly, and confirm the nugget from both sides |
| Pinholes after grinding | Missed tack locations, porosity, or overgrinding | Return the area to clean metal, reweld the defect with controlled heat, and inspect again before coating |
| Rust returns | The leak remains, an overlap was not sealed, backside metal is bare, or underbody coating was damaged | Repair the moisture source and restore all primer, seam sealer, coating, and cavity protection specified by the OEM |
Do not hide welding defects with body filler, seam sealer, or heavy undercoating. These products can keep out water only after the metal repair and weld quality are acceptable.
Warning: Stop immediately if you smell fuel, see smoke from a closed cavity, find heat-damaged wiring, or cannot account for a component beneath the floor. Disconnecting a battery does not remove fuel-vapor, retained-energy, airbag, or high-voltage hazards.
Frequently Asked Questions
Can You Weld a Floor Pan Over Rust?
No. Rust, scale, paint, and thin metal interfere with fit and fusion. Remove the damage until you reach sound steel with enough original thickness to support the approved joint and weld.
What Welder Works Best for Floor Pan Repair?
Gas-shielded short-circuit MIG is common for thin mild-steel patches because it supports short, controlled welds. The vehicle-specific repair manual may instead require resistance spot welding, MIG brazing, adhesive, rivets, or another attachment method.
Should You Use a Lap Joint or Butt Joint on a Floor Pan?
Use the joint specified by the vehicle maker. A butt joint needs close fit and careful heat control. A lap joint can be easier to position, but the overlap creates a corrosion risk unless the mating surfaces, seam, backside, and cavity receive the required protection.
What Gauge Steel Is Used for Floor Pans?
There is no universal floor-pan gauge. Thickness and steel grade can change between the floor skin, braces, reinforcements, and mounting areas. Use the specified replacement panel or measure sound original steel and confirm the material in the body-repair manual.
How Do You Stop Rust After Welding a Floor Pan?
Repair the water source, prepare the metal, and restore the OEM-specified primer, seam sealer, paint, underbody coating, and cavity protection. Coat the backside and enclosed joints where the factory corrosion protection was disturbed.
Should You Disconnect the Battery Before Welding a Floor Pan?
Follow the vehicle maker’s welding and battery-disconnection procedure. Modern vehicles may have battery-management sensors, backup power, airbag waiting periods, multiple low-voltage batteries, or a high-voltage system. Battery disconnection alone does not make every vehicle safe to weld.
When Should a Professional Repair a Rusted Floor Pan?
Use a qualified collision-repair professional when rust reaches seat or belt anchors, braces, rails, rockers, suspension areas, high-strength steel, a battery enclosure, or another structural section. Professional help is also appropriate when no OEM repair procedure is available or you cannot inspect and protect both sides.
Safety Disclaimer: This article provides general educational information and does not replace the vehicle maker’s body-repair procedure, product instructions, workplace safety requirements, or an inspection by a qualified automotive repair professional. Repairs involving structural panels, seats, restraints, fuel systems, airbags, or high-voltage components require appropriate training and equipment.
Conclusion
A lasting floor-pan repair depends on more than covering the visible rust hole. You need to identify the moisture source, confirm the OEM repair method, cut back to sound steel, and fit a patch that matches the original panel.
Control heat with a planned tack sequence or specified plug welds, then inspect both sides before grinding. Avoid removing sound weld metal simply to make the seam look perfectly flat.
Finish the repair with the correct primer, seam sealer, paint, underbody coating, and cavity protection. Leak-test the area after the products cure and inspect the repair again before reinstalling the interior or returning the vehicle to service.
Sources
- I-CAR: Front Floor Pan Replacement Guidance — supports checking vehicle-specific procedures and factory-seam replacement requirements.
- I-CAR: Vehicle Protection When Welding — supports battery, electronics, component-removal, and ground-clamp precautions.
- I-CAR: How to Use Weld-Through Primer — supports mating-surface preparation and removal from direct GMAW weld zones.
- OSHA 29 CFR 1910.252: Welding, Cutting, and Brazing — supports fire prevention, combustible-material removal, and opposite-side fire-watch precautions.
- Miller Electric: MIG Basics for Automotive Welding Repair — supports short-circuit MIG and 75% argon/25% carbon-dioxide guidance for mild steel.
- 3M OEM Match Epoxy Seam Sealer Technical Data, July 2024 — supports floor-pan use, surface preparation, primer compatibility, and cure guidance.


