| Shielding Gas Options for Lincoln 140 | Pros | Cons |
|---|---|---|
| 75/25 Argon-CO2 (C25) for Mild Steel | Smooth arc, low spatter, great penetration on 18-14 gauge | Needs calm air; $0.50/hour runtime |
| 100% CO2 for Deeper Penetration | Cheaper ($30 fill), handles thicker stock | More spatter, aggressive arc—tricky for beginners |
| Argon-He mix for Aluminum (with spool gun) | Fluid puddle, pretty beads | Expensive; requires add-on gun |
Installing the Wire Spool on Your Lincoln 140 MIG Welder
The heart of any MIG setup is the wire—get the spool wrong, and your feed jams like a bad carburetor. The Lincoln 140 handles 2- or 4-inch spools up to 12 pounds, with a friction brake to prevent overrun.
Open the side door, slide the spool onto the 2-inch spindle—retainer clip locks it. For flux-core, use .030-inch E71T-GS; solid wire? .023-.035 ER70S-6. I stock both: flux for quick trailer patches, solid for clean chassis work.
Tension the brake: Unwind a few feet by hand; it should pay off smooth, not bird-nest. Too loose? Wire tangles mid-weld. Tighten the wingnut a quarter-turn at a time.
My first spool was cheap no-name stuff—kinked like crazy. Splurged on Lincoln’s Innershield after, and feeds like butter. Pro move: Label your spools by type to avoid mix-ups.
Threading the Wire Through the Drive System and Gun Liner
This step trips up half the new guys—thread wrong, and you’re fighting “wire birds” all day. Think of it as loading a fishing reel: smooth path equals smooth cast.
Release the drive roll tension knob (top arm lifts). Cut 6 inches off the spool end straight—kinks cause jams. Feed from the bottom of the spool (payout direction), through the inlet guide, between the grooved rolls (knurled for flux, V for solid), and out the gun bushing.
Re-engage tension: Start low, squeeze trigger to feed a foot, then snug until it grips without slipping. Slide the gun liner back, insert wire, push until it hits the tip, then power on and trigger-feed till it pokes 1/2 inch out.
Common mistake: Wrong drive rolls. Flux needs knurled to bite the tubular wire; solid wants smooth to avoid flattening. Swap ’em with the hex key—takes 2 minutes.
In the shop, I always lube the liner lightly with graphite spray for longer life. Keeps that .035 wire gliding on 1/4-inch plate jobs.
Choosing Polarity for MIG vs Flux-Core Welding on the Lincoln 140
Polarity’s the unsung hero—flip it wrong, and your arc sputters like a flooded engine. For gas MIG with solid wire, set electrode negative (gun to -, work to +)—it heats the wire for droplet transfer. Flux-core? Reverse it: gun positive, work negative—for the slag-forming flux to burn hot.
On the Lincoln 140, it’s tool-less: Lift the hinged cover, slide the leads to the labels. I mark mine with tape for quick swaps—saves fumbling in low light.
Why it matters: Wrong polarity on flux-core? Weak penetration, like welding butter. I learned this welding a gate frame outdoors; reversed it, and the beads stacked perfect despite the breeze.
Quick check: Power on, trigger squeeze—no arc? Swap polarity first.
Dialing in Voltage and Wire Speed Settings for Different Materials
Settings are where the magic happens—too hot, you burn through; too cold, no fusion. The Lincoln 140’s door chart is your bible, but let’s break it down for real jobs.
For 18-gauge mild steel: .023 wire, 15-18 volts, 40-60 IPM (inches per minute) feed. Bumps to 20 volts, 100 IPM for 1/8-inch plate. Flux-core? Crank voltage 2 points higher for the extra resistance.
I tweak by ear: Crisp “frying bacon” sizzle? Spot on. Rattly? Up the speed. Test on scrap—adjust 10% at a time.
Here’s a handy chart I sketched from years of trial-and-error:
| Material Thickness | Wire Type/Diameter | Voltage | Wire Speed (IPM) | Gas Flow (CFH) |
|---|---|---|---|---|
| 18-16 Gauge Sheet | Solid .023″ | 16-18 | 50-70 | 20 |
| 1/8″ Mild Steel | Flux .030″ | 19-21 | 90-120 | N/A |
| 3/16″ Plate | Solid .035″ | 20-23 | 110-150 | 25 |
| 1/4″ Max | Flux .035″ | 22-24 | 140-180 | N/A |
Pro insight: For stainless, drop to 90% argon mix; aluminum needs a spool gun and 100% argon at 25-30 volts.
Preparing Your Workpiece and Joints for Optimal Welds
Setup’s only half—prep your metal like you’re prepping for a date. Rusty or oily joints? Welds pop off like bad glue.
Grind or wire-brush to bright metal, bevel thick edges for V-grooves (30-45 degrees). Clamp square—use magnets for odd angles. For lap joints on auto panels, tack three points first.
In my fab shop, I hit everything with acetone wipe—removes fab oil that causes porosity. And preheat thick stock 100-200°F to dodge cracks.
Mistake alert: Welding over mill scale? It hides hydrogen cracks later. Grind it gone.
Step-by-Step Guide to Making Your First Weld with the Lincoln 140
Alright, gloves on—time to weld. This sequence’s burned into my brain from teaching apprentices.
- Set polarity, load wire, flow gas (if using). Clip ground tight.
- Don gear, strike an arc on scrap: Hold gun 45 degrees, 3/8-inch stick-out, pull or push (push for MIG, drag for flux).
- Squeeze trigger steady—listen for that sizzle. Weave side-to-side for fat beads, straight for fillets.
- Pause every 10 seconds to cool; duty cycle’s 20% at 90 amps—don’t redline it.
- Chip slag (flux only), inspect: Convex? Good fusion. Concave? More heat.
My first weld? Ugly porcupine. Dialed settings, practiced 20 feet of bead—suddenly, stacks of dimes. You’re next.
Common Setup Mistakes and Quick Fixes for the Lincoln 140
Here’s the dirt on pitfalls I’ve dodged (and face-planted into).
Bird’s nest jams: Cause? Over-tension or kinked liner. Fix: Loosen knob, straighten wire, replace liner every 100 spools ($10 part).
Porous holes: Dirty metal or low gas. Scrub better, bump flow to 25 CFH.
Spatter city: Wrong voltage—drop 1-2 volts, clean tip.
Erratic feed: Worn rolls. Inspect grooves; swap if grooved.
Fan not spinning? Dust-clogged vents—blow out with compressed air monthly.
These tweaks turn frustration into flow. Keep a log; patterns emerge.
Advanced Tips and Tricks for Pro-Level Welds with the Lincoln 140
Once basics click, level up. For wind-resistant flux-core, angle the gun 15 degrees into the breeze. Short-circuit transfer on thin stuff? Feather the trigger for pulse-like control.
Add a spool gun for aluminum trailers—runs .035 wire silky. And inductance knob (if your model has it)? Dial low for tight arcs on sheet.
Shop hack: Mount on a rolling cart with gas bottle holder—mobility for garage-to-yard jobs. I’ve welded fences to frames without breaking stride.
For students: Film your beads, compare to AWS D1.1 visuals. Pros: Sequence multiple passes on thick joints for code-compliant strength.
Wrapping It Up: You’re Ready to Weld Strong with Your Lincoln 140
There you have it— from unboxing to that satisfying bead laydown, setting up your Lincoln 140 MIG welder is straightforward when you take it step by step. You’ve got the safety smarts to protect yourself, the know-how for flawless wire and gas feeds, and the settings tweaks for any project from sheet metal art to beefy repairs. This isn’t just about a machine; it’s about building welds that last, saving time and cash, and gaining that shop-floor confidence that turns hobbyists into heroes.
Prioritize prep and safety every time, test on scrap before the real deal, and adjust based on what your ears and eyes tell you. Now, grab some mild steel, fire it up, and make something solid—you’re more prepared than you think. Always end your session with a quick cleanup—wipe the gun, coil cables neat. It makes next time a breeze and extends your gear’s life.
What Gas Should I Use with My Lincoln 140 MIG Welder?
For most mild steel work, go with a 75/25 mix of argon and CO2—it’s affordable, provides good penetration without too much spatter, and flows steady at 20 CFH. If you’re on a budget or welding thicker stuff, straight CO2 works but expect more cleanup.
Can I Run Flux-Core Wire Without Gas on the Lincoln 140?
Absolutely, and it’s my go-to for outdoor or quick fixes. Set polarity to DC electrode positive, use .030-inch E71T-GS wire, and crank voltage 2-3 points higher than solid wire settings. No bottle means portability, but watch for more slag.
How Do I Know If My Wire Tension is Right on the Lincoln 140?
Squeeze the trigger and watch: Wire should feed smooth without slipping or bunching. Tug the outgoing wire—if it pulls with moderate resistance but doesn’t bird-nest, you’re golden. Start low, adjust up quarter-turns while testing.
What’s the Best Starting Settings for 1/8-Inch Steel on the Lincoln 140?
For gas MIG with .030 solid wire: 19-20 volts, 100 IPM feed, 20 CFH gas. Flux-core? 21 volts, 110 IPM. Always scrap-test and tweak for your angle and speed—thinner stick-out for hotter arc.
Why Is My Lincoln 140 Not Feeding Wire Properly?
Usually tension, dirty rolls, or liner issues. Loosen the knob, clean grooves with a brush, and feed a test length. If it binds, snip the wire end square and retry. Worn liner? $15 fix at the supply shop.
When I first got my Lincoln 140 MIG welder, I was excited — until I realized setting it up wasn’t as plug-and-play as I thought. Between figuring out the right wire feed speed, voltage settings, and choosing between solid wire with gas or flux core wire, it’s easy to get lost in the details. Many new welders struggle with finding that perfect balance, especially when switching between different metal thicknesses, doing joint prep, or comparing MIG vs TIG for certain projects.
The Lincoln 140 is a fantastic machine — reliable, versatile, and ideal for everything from light stainless welding to basic fabrication — but only if it’s set up correctly. Get it wrong, and you’ll end up with spatter, weak welds, or constant burn-throughs. In this guide, I’ll walk you through how to set up your Lincoln 140 MIG the right way — step-by-step — so you can start welding clean, strong beads like a pro in no time.
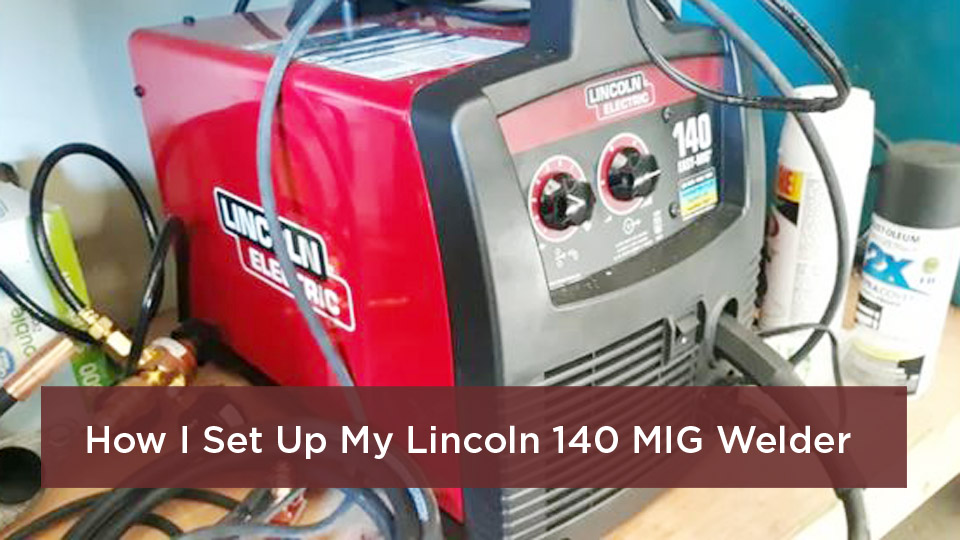
Image by reddit
As an Amazon Associate, I earn from qualifying purchases.
How to Set Up a Lincoln 140 MIG Welder
Why the Lincoln 140 MIG Welder is a Game-Changer for Everyday Welders
The Lincoln 140—whether it’s the Easy MIG, Weld-Pak, or Power MIG variant—is built tough for 120-volt household outlets, pumping out up to 140 amps for welding up to 1/4-inch steel without breaking a sweat. It’s compact, weighs under 60 pounds, and runs both gas-shielded MIG for smooth, spatter-free beads or flux-cored wire for no-gas jobs in windy outdoors.
I love it because it’s forgiving for beginners but scales up for hobbyists tackling custom frames or pros doing quick repairs. The two-knob controls keep things simple: voltage for heat and wire speed for feed rate. But here’s the rub—skip the proper setup, and you’re looking at bird’s nests of tangled wire or porous welds that crack under load.
Done right, though? It’s cost-efficient, versatile across mild steel, stainless, even light aluminum with a spool gun add-on, and compliant with basic AWS codes for non-critical fab work.
Think about your last project: that trailer hitch that wobbled because the old welds gave out? A dialed-in Lincoln 140 prevents that heartache, ensuring joint integrity from the ground up.
Essential Safety Precautions Before Firing Up Your Lincoln 140
Safety isn’t a checkbox—it’s the foundation of every good weld. I’ve seen too many close calls in shops where folks rushed this part, like the time a buddy ignored grounding and got a nasty zap chasing a loose connection. So, let’s lock this down first.
Start with your workspace: clear a dry, well-ventilated area away from flammables. MIG welding throws off fumes, so crack a window or hook up exhaust—especially if you’re flux-coring without gas. Wear the basics: auto-darkening helmet (shade 10-13 for MIG), leather gloves, flame-resistant jacket, and closed-toe boots. No shortcuts; arc rays can fry your retinas faster than you think.
Electrically, double-check your 120V outlet— it needs a dedicated 20-amp circuit to avoid trips. Ground everything: the machine’s clamp to your workpiece, and never weld on painted or rusty metal without prepping it clean. For gas setups, chain that cylinder upright to a cart, away from heat sources—leaks can turn explosive quick.
Pro tip from the field: Run a quick “air test” with the trigger squeezed, no wire, to check for shorts. And always unplug before tweaking connections. These habits? They’ve kept me welding for 15 years without a single ER visit.
Unboxing and Checking Components for Your Lincoln 140 MIG Welder
Unboxing day is exciting, but treat it like inventorying tools before a big job—miss a part, and you’re hunting hardware stores mid-setup. I remember hauling mine home from the supplier, ripping the tape off, and laying everything out on the bench. Took 10 minutes, but it saved hours later.
Your box should include the welder unit, 10-foot MIG gun with trigger, work clamp and cable, sample spool of .030-inch flux-core wire, drive rolls (knurled for flux, smooth for solid), contact tips (.030 and .035 sizes), gas hose fitting, regulator (if gas kit), and the all-important owner’s manual. Peek inside the door for the quick-reference chart—it’s gold for settings.
Inspect for damage: bent gun liner? Dented spool holder? Call Lincoln support pronto; their warranty’s solid. Lay out the manual open—it’s your roadmap. If you’re flux-core only (no gas), you’re set; for MIG with shielding, grab a 75/25 argon-CO2 mix bottle from your local supplier.
One common goof: Folks toss the extra tips aside. Don’t—swap ’em based on wire size for better arc stability.
Lincoln 140 MIG Welder
How to Connect Power and Ground Your Lincoln 140 MIG Welder
Powering up sounds basic, but get it wrong, and your machine hums but won’t arc—or worse, overloads the breaker. In my early days, I daisy-chained outlets and popped three circuits before learning the hard way.
First, flip the power switch to OFF. Plug the 6-foot cord into a grounded 120V, 20A receptacle—no extensions unless they’re heavy-duty 12-gauge. The Lincoln 140 draws about 15 amps at full tilt, so shared circuits invite trips.
Attach the ground clamp: Bolt the cable to the positive (+) terminal on the machine (for flux-core; we’ll flip for gas MIG later). Clip the clamp to clean, bare metal on your workpiece, as close to the weld joint as possible—10 feet away? Forget stable arc.
Test it: Power on, listen for the fan whir. Squeeze the trigger; the drive motor should jog without wire loaded yet. If it buzzes erratic, check connections—loose ones cause voltage drops and bird’s nests.
Field fix: If your shop’s wiring is iffy, upgrade to a 20A GFCI outlet. It’s $20 and peace of mind for wet-location welding.
Setting Up Shielding Gas for Clean MIG Welds on the Lincoln 140
If you’re chasing those mirror-smooth beads on thin sheet metal, shielding gas is your ticket—no more flux-core splatter. The Lincoln 140 shines here with its quick-connect fittings, but setup’s where newbies stumble.
Grab a 20-40 cubic foot cylinder of 75/25 argon-CO2 (C25)—perfect for mild steel, costs about $50 fill-up at welding supply shops. Secure the tank to a dolly with a chain; tip-overs are a comedy of errors waiting to happen.
Attach the regulator: Screw the inlet nut to the cylinder valve (righty-tighty, but hand-snug first). Connect the green hose to the regulator outlet, then the other end to the machine’s gas inlet—it’s the barbed fitting on the back panel. Open the cylinder valve slowly, set flow to 20-25 CFH (cubic feet per hour) via the regulator knob. Purge by cracking the torch trigger for 10 seconds—clear old air.
I once forgot to purge and got ozone-tainted welds that pitted like Swiss cheese. Lesson learned: Always test flow with soapy water on fittings for leaks.
For flux-core fans, skip this—self-shielded wire means outdoor freedom, but gas MIG’s cleaner for indoor fab.
| Shielding Gas Options for Lincoln 140 | Pros | Cons |
|---|---|---|
| 75/25 Argon-CO2 (C25) for Mild Steel | Smooth arc, low spatter, great penetration on 18-14 gauge | Needs calm air; $0.50/hour runtime |
| 100% CO2 for Deeper Penetration | Cheaper ($30 fill), handles thicker stock | More spatter, aggressive arc—tricky for beginners |
| Argon-He mix for Aluminum (with spool gun) | Fluid puddle, pretty beads | Expensive; requires add-on gun |
Installing the Wire Spool on Your Lincoln 140 MIG Welder
The heart of any MIG setup is the wire—get the spool wrong, and your feed jams like a bad carburetor. The Lincoln 140 handles 2- or 4-inch spools up to 12 pounds, with a friction brake to prevent overrun.
Open the side door, slide the spool onto the 2-inch spindle—retainer clip locks it. For flux-core, use .030-inch E71T-GS; solid wire? .023-.035 ER70S-6. I stock both: flux for quick trailer patches, solid for clean chassis work.
Tension the brake: Unwind a few feet by hand; it should pay off smooth, not bird-nest. Too loose? Wire tangles mid-weld. Tighten the wingnut a quarter-turn at a time.
My first spool was cheap no-name stuff—kinked like crazy. Splurged on Lincoln’s Innershield after, and feeds like butter. Pro move: Label your spools by type to avoid mix-ups.
Threading the Wire Through the Drive System and Gun Liner
This step trips up half the new guys—thread wrong, and you’re fighting “wire birds” all day. Think of it as loading a fishing reel: smooth path equals smooth cast.
Release the drive roll tension knob (top arm lifts). Cut 6 inches off the spool end straight—kinks cause jams. Feed from the bottom of the spool (payout direction), through the inlet guide, between the grooved rolls (knurled for flux, V for solid), and out the gun bushing.
Re-engage tension: Start low, squeeze trigger to feed a foot, then snug until it grips without slipping. Slide the gun liner back, insert wire, push until it hits the tip, then power on and trigger-feed till it pokes 1/2 inch out.
Common mistake: Wrong drive rolls. Flux needs knurled to bite the tubular wire; solid wants smooth to avoid flattening. Swap ’em with the hex key—takes 2 minutes.
In the shop, I always lube the liner lightly with graphite spray for longer life. Keeps that .035 wire gliding on 1/4-inch plate jobs.
Choosing Polarity for MIG vs Flux-Core Welding on the Lincoln 140
Polarity’s the unsung hero—flip it wrong, and your arc sputters like a flooded engine. For gas MIG with solid wire, set electrode negative (gun to -, work to +)—it heats the wire for droplet transfer. Flux-core? Reverse it: gun positive, work negative—for the slag-forming flux to burn hot.
On the Lincoln 140, it’s tool-less: Lift the hinged cover, slide the leads to the labels. I mark mine with tape for quick swaps—saves fumbling in low light.
Why it matters: Wrong polarity on flux-core? Weak penetration, like welding butter. I learned this welding a gate frame outdoors; reversed it, and the beads stacked perfect despite the breeze.
Quick check: Power on, trigger squeeze—no arc? Swap polarity first.
Dialing in Voltage and Wire Speed Settings for Different Materials
Settings are where the magic happens—too hot, you burn through; too cold, no fusion. The Lincoln 140’s door chart is your bible, but let’s break it down for real jobs.
For 18-gauge mild steel: .023 wire, 15-18 volts, 40-60 IPM (inches per minute) feed. Bumps to 20 volts, 100 IPM for 1/8-inch plate. Flux-core? Crank voltage 2 points higher for the extra resistance.
I tweak by ear: Crisp “frying bacon” sizzle? Spot on. Rattly? Up the speed. Test on scrap—adjust 10% at a time.
Here’s a handy chart I sketched from years of trial-and-error:
| Material Thickness | Wire Type/Diameter | Voltage | Wire Speed (IPM) | Gas Flow (CFH) |
|---|---|---|---|---|
| 18-16 Gauge Sheet | Solid .023″ | 16-18 | 50-70 | 20 |
| 1/8″ Mild Steel | Flux .030″ | 19-21 | 90-120 | N/A |
| 3/16″ Plate | Solid .035″ | 20-23 | 110-150 | 25 |
| 1/4″ Max | Flux .035″ | 22-24 | 140-180 | N/A |
Pro insight: For stainless, drop to 90% argon mix; aluminum needs a spool gun and 100% argon at 25-30 volts.
Preparing Your Workpiece and Joints for Optimal Welds
Setup’s only half—prep your metal like you’re prepping for a date. Rusty or oily joints? Welds pop off like bad glue.
Grind or wire-brush to bright metal, bevel thick edges for V-grooves (30-45 degrees). Clamp square—use magnets for odd angles. For lap joints on auto panels, tack three points first.
In my fab shop, I hit everything with acetone wipe—removes fab oil that causes porosity. And preheat thick stock 100-200°F to dodge cracks.
Mistake alert: Welding over mill scale? It hides hydrogen cracks later. Grind it gone.
Step-by-Step Guide to Making Your First Weld with the Lincoln 140
Alright, gloves on—time to weld. This sequence’s burned into my brain from teaching apprentices.
- Set polarity, load wire, flow gas (if using). Clip ground tight.
- Don gear, strike an arc on scrap: Hold gun 45 degrees, 3/8-inch stick-out, pull or push (push for MIG, drag for flux).
- Squeeze trigger steady—listen for that sizzle. Weave side-to-side for fat beads, straight for fillets.
- Pause every 10 seconds to cool; duty cycle’s 20% at 90 amps—don’t redline it.
- Chip slag (flux only), inspect: Convex? Good fusion. Concave? More heat.
My first weld? Ugly porcupine. Dialed settings, practiced 20 feet of bead—suddenly, stacks of dimes. You’re next.
Common Setup Mistakes and Quick Fixes for the Lincoln 140
Here’s the dirt on pitfalls I’ve dodged (and face-planted into).
Bird’s nest jams: Cause? Over-tension or kinked liner. Fix: Loosen knob, straighten wire, replace liner every 100 spools ($10 part).
Porous holes: Dirty metal or low gas. Scrub better, bump flow to 25 CFH.
Spatter city: Wrong voltage—drop 1-2 volts, clean tip.
Erratic feed: Worn rolls. Inspect grooves; swap if grooved.
Fan not spinning? Dust-clogged vents—blow out with compressed air monthly.
These tweaks turn frustration into flow. Keep a log; patterns emerge.
Advanced Tips and Tricks for Pro-Level Welds with the Lincoln 140
Once basics click, level up. For wind-resistant flux-core, angle the gun 15 degrees into the breeze. Short-circuit transfer on thin stuff? Feather the trigger for pulse-like control.
Add a spool gun for aluminum trailers—runs .035 wire silky. And inductance knob (if your model has it)? Dial low for tight arcs on sheet.
Shop hack: Mount on a rolling cart with gas bottle holder—mobility for garage-to-yard jobs. I’ve welded fences to frames without breaking stride.
For students: Film your beads, compare to AWS D1.1 visuals. Pros: Sequence multiple passes on thick joints for code-compliant strength.
Wrapping It Up: You’re Ready to Weld Strong with Your Lincoln 140
There you have it— from unboxing to that satisfying bead laydown, setting up your Lincoln 140 MIG welder is straightforward when you take it step by step. You’ve got the safety smarts to protect yourself, the know-how for flawless wire and gas feeds, and the settings tweaks for any project from sheet metal art to beefy repairs. This isn’t just about a machine; it’s about building welds that last, saving time and cash, and gaining that shop-floor confidence that turns hobbyists into heroes.
Prioritize prep and safety every time, test on scrap before the real deal, and adjust based on what your ears and eyes tell you. Now, grab some mild steel, fire it up, and make something solid—you’re more prepared than you think. Always end your session with a quick cleanup—wipe the gun, coil cables neat. It makes next time a breeze and extends your gear’s life.
What Gas Should I Use with My Lincoln 140 MIG Welder?
For most mild steel work, go with a 75/25 mix of argon and CO2—it’s affordable, provides good penetration without too much spatter, and flows steady at 20 CFH. If you’re on a budget or welding thicker stuff, straight CO2 works but expect more cleanup.
Can I Run Flux-Core Wire Without Gas on the Lincoln 140?
Absolutely, and it’s my go-to for outdoor or quick fixes. Set polarity to DC electrode positive, use .030-inch E71T-GS wire, and crank voltage 2-3 points higher than solid wire settings. No bottle means portability, but watch for more slag.
How Do I Know If My Wire Tension is Right on the Lincoln 140?
Squeeze the trigger and watch: Wire should feed smooth without slipping or bunching. Tug the outgoing wire—if it pulls with moderate resistance but doesn’t bird-nest, you’re golden. Start low, adjust up quarter-turns while testing.
What’s the Best Starting Settings for 1/8-Inch Steel on the Lincoln 140?
For gas MIG with .030 solid wire: 19-20 volts, 100 IPM feed, 20 CFH gas. Flux-core? 21 volts, 110 IPM. Always scrap-test and tweak for your angle and speed—thinner stick-out for hotter arc.
Why Is My Lincoln 140 Not Feeding Wire Properly?
Usually tension, dirty rolls, or liner issues. Loosen the knob, clean grooves with a brush, and feed a test length. If it binds, snip the wire end square and retry. Worn liner? $15 fix at the supply shop.


