

You can weld faster without losing quality when you remove wasted motion, prevent rework, and make controlled changes to your settings and technique. The goal is not to rush the puddle. It is to set up the job, choose the right filler, keep wire feeding smoothly, protect the arc, and check each change against bead shape, penetration, and defects.
Quick Answer
To weld faster without losing quality, organize the work area, follow the correct procedure or machine chart, match filler and settings to the material, maintain steady wire feed, keep cables and grounds tight, use a consistent travel angle, and inspect test welds before increasing speed on production parts.
Key Takeaways
- Speed comes from fewer delays, fewer defects, and less cleanup, not from rushing beyond the process limit.
- Run a test coupon before raising travel speed, wire feed speed, voltage, or amperage on real parts.
- Smooth wire feed, clean grounding, correct gas coverage, and stable torch position help you weld faster with less rework.
- Track arc-on time, rework, cleanup time, and defect causes so you fix the real bottleneck.
At a Glance
| Time Required | 10 to 30 minutes to reset the station and check consumables; ongoing tracking for production improvements. |
| Difficulty | Beginner to intermediate, depending on process, joint type, position, and code requirements. |
| Tools Needed | Approved PPE, welder manual or WPS, clamps, wire brush, grinder, contact tips, liner gauge, drive rolls, flowmeter, fire extinguisher, and a simple productivity log. |
| Cost | Usually $0 to $50 for layout and consumable checks; more if you add fixtures, ventilation, cable upgrades, or production monitoring tools. |
Warning: Never trade safety for speed. Use proper eye and face protection, gloves, clothing, ventilation, fire controls, and approved procedures. OSHA requires helmets or hand shields for arc welding, and welding fumes can require ventilation or respiratory controls depending on the work area and material.
Start With Safety and Job Requirements
Before you chase faster travel speed, confirm the job requirements. If the weld is structural, pressure-related, code-regulated, or customer-specified, follow the approved welding procedure specification instead of guessing at settings.
Check the material, thickness, joint design, welding position, filler classification, shielding gas, preheat requirement, and inspection standard. These details decide how fast you can move before defects appear.
Control the safety side first. Keep combustibles away from sparks, keep fire extinguishing equipment ready, and follow hot-work rules for the area. OSHA’s welding, cutting, and brazing requirements explain fire prevention, eye protection, and ventilation requirements for many workplace situations.
Also control fumes. Welding fumes can vary by wire, rods, flux, base metal, coatings, and confined-space conditions. The CDC/NIOSH welding guidance notes that exposure can increase in confined spaces, so use ventilation, local exhaust, or approved respiratory protection when the job calls for it.
Set Up Your Weld Area for Faster Work
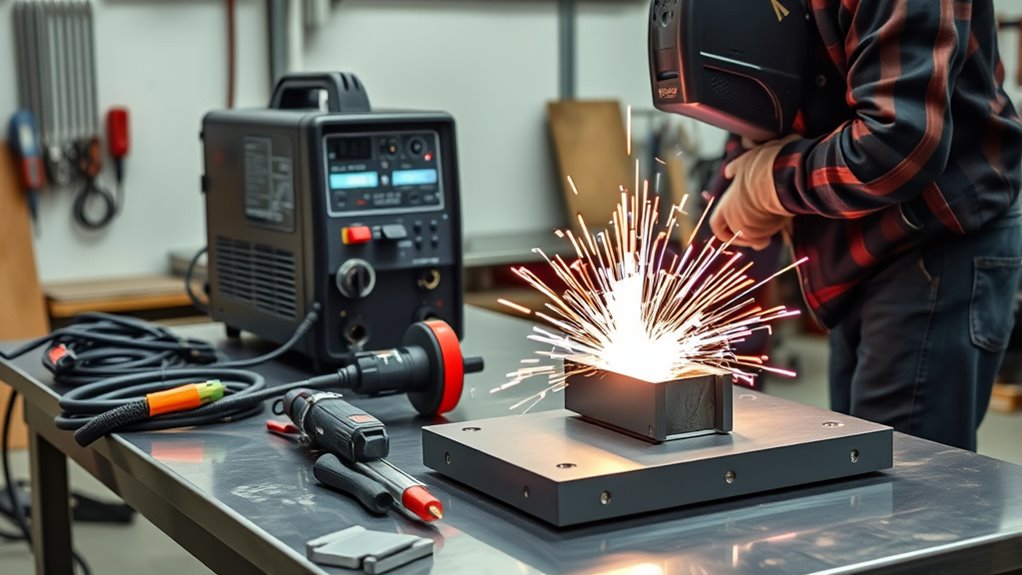
To weld faster, start by setting up your work area so every movement counts. Keep tools, materials, clamps, filler, and equipment within arm’s reach, because tight organization cuts wasted motion and helps you focus on the arc.
Put lighting where it clearly shows the weld pool, joint line, and tack locations. Better visibility helps you correct travel speed, torch angle, and bead placement before they create rework.
Set your workstation at a comfortable height so you can hold position longer without fatigue. A stable stance and relaxed shoulder position help you keep the torch steady, especially on longer beads.
Keep the area clean by removing debris and contaminants as they appear. Dirt, oil, rust, paint, mill scale, zinc coatings, and moisture can lead to porosity, spatter, weak fusion, or extra cleanup.
Use dedicated zones for preweld preparation, welding, inspection, and postweld cleanup. If cutting is slowing the job, a properly sized portable plasma cutter can speed part preparation before the weld begins.
Pro Tip: Put the grinder, wire brush, spare contact tips, anti-spatter, nozzle pliers, marker, square, and clamps on the same side as your welding hand. Saving a few steps on every joint adds up across a shift.
Choose Filler and Settings to Reduce Rework
Choose filler metals that match your base material, joint design, service condition, and target strength. The right filler improves weld integrity and cuts rework because it supports the mechanical properties the weld needs.
The fastest weld is the one you do not have to grind out and redo. Match the filler, gas, amperage, voltage, wire feed speed, and travel speed before you start production.
Treat filler metal as a design choice, not an afterthought. For example, when welding 304 stainless steel, an appropriate stainless filler such as ER308L filler wire is commonly used for compatibility. For other materials, confirm the filler classification with the job procedure, material data, or manufacturer guidance.
Pair the filler with correct welding parameters. Amperage, voltage, wire feed speed, gas flow, electrode stickout, and travel speed must work together. If one setting is too aggressive, you may gain speed for a few inches but lose more time to undercut, porosity, spatter, lack of fusion, or failed inspection.
Use a test coupon when changing wire size, gas mix, transfer mode, or material thickness. Look for smooth tie-in at the toes, consistent bead width, proper penetration, limited spatter, and no visible porosity before moving to the real part.
Products Worth Considering

This solid wire REQUIRES a shielding gas

Premium Low Carbon Mig Wire: Achieve high-grade welding results with our ER308L stainless steel MIG wire. Featuring a low carbon content, it minimizes intergranular carbide precipitation, enhancing corrosion resistance without the need for stabilizers.

ER308L WIRE: A low-carbon stainless steel wire engineered to minimize intergranular carbide precipitation. This enhances corrosion resistance without the need for stabilizers, making it ideal for critical applications.
Dial In Machine Settings Before You Chase Speed
Use the machine chart, filler manufacturer recommendations, or approved WPS as your starting point. Then make one change at a time so you know what improved the weld and what created defects.
Products Worth Considering

ER70S-6 MIG WIRE: It's the most common wire of the copper-coated mild steel GMAW (MIG) wires for single or multiple pass welding.

Commonly used for general shop applications with poor fit-up
Match Settings to Process and Material
MIG, flux-core, TIG, stick, short-circuit transfer, spray transfer, and pulsed processes all have different productive ranges. A setting that works well for flat MIG on mild steel may fail on vertical flux-core, thin stainless, galvanized steel, or overhead work.
Material thickness matters too. Thin material may need lower heat input, shorter beads, stitch welding, or faster movement to avoid burn-through. Thick material may need more heat, beveling, preheat, multi-pass planning, or slower travel to avoid lack of fusion.
Run a Test Bead and Read the Results
Before increasing speed on production parts, run a short bead on scrap of the same material and thickness. If the bead is tall and ropey, you may be moving too slow or running too cold. If the bead is narrow, undercut, or poorly tied in, you may be moving too fast, using too much voltage, or holding the wrong angle.
Do not judge speed by appearance alone when the weld is critical. Use the inspection method required for the job, such as visual inspection, bend tests, macroetch, or nondestructive testing when specified.
Keep Wire Feeding Smooth and Steady
You need to match the contact tip, liner, drive rolls, and wire to avoid drag, slippage, bird-nesting, and burnback. Smooth feeding protects arc stability, bead shape, and deposition rate.
Trim liners to the proper length and use clean inlet guides to keep the feed path consistent. When you cut wire feed resistance, you maintain steady feed speed and get a faster, more stable weld. A solid work connection also matters, especially when following flux-core welding tips for stable arc performance.
Correct Tip and Liner Sizing
Even with the right machine settings, wire feed can turn erratic if the contact tip and liner are not matched to the wire diameter. Use the tip size recommended for the wire and process, and replace worn tips before they create poor electrical contact.
Select liner sizing that corresponds to the wire type and diameter. A liner that is too short, too long, kinked, dirty, or worn can create chatter, drag, and inconsistent wire movement.
Inspect both parts often. Wear raises resistance and degrades arc stability, which directly affects weld quality and your ability to weld faster with control.
Reduce Wire Feed Resistance
Once the tip and liner are sized correctly, focus on the rest of the feed path so wire moves with minimal drag. To reduce wire feed resistance, control every contact point in the wire feeding system.
- Match drive rolls to the wire diameter and type so they grip without crushing or slipping.
- Set spool tension so the spool stops cleanly without pulling against the drive system.
- Keep the gun cable as straight as practical to reduce friction inside the liner.
- Replace damaged liners, worn tips, clogged nozzles, and incorrect drive rolls before they cause burnback or bird-nesting.
- Check the ground clamp and work lead so the arc does not hunt or sputter under load.
When you remove friction and electrical loss, the wire feeds steadily, burnbacks drop, and the arc stays easier to control at higher output.
Reduce Voltage Drop and Arc Instability
Voltage drop in the welding circuit can quietly undermine speed by destabilizing the arc and forcing the machine to work harder for inconsistent output.
Protect arc stability by sizing cables correctly, keeping them as straight as practical, and checking every connection for tight, corrosion-free contact. Lower resistance means steadier current flow and more predictable weld quality.
If your setup includes cable-length compensation or power-management features, use them according to the manufacturer’s instructions. These features can help maintain consistent output when long leads or input-power changes affect arc behavior.
Monitor voltage and amperage regularly, then fine-tune them for the joint, process, and position. Stable power management reduces arc instability, improves deposition, and helps you weld faster without surrendering control. If the arc is unstable even when the power side is correct, check shielding gas flow, nozzle condition, and drafts. Proper gas flow is a key part of solving many MIG welding problems and solutions.
Note: Long, coiled, undersized, or damaged leads can make good machine settings act like bad settings. Check the full circuit before blaming the welder.
Improve Technique to Increase Travel Speed
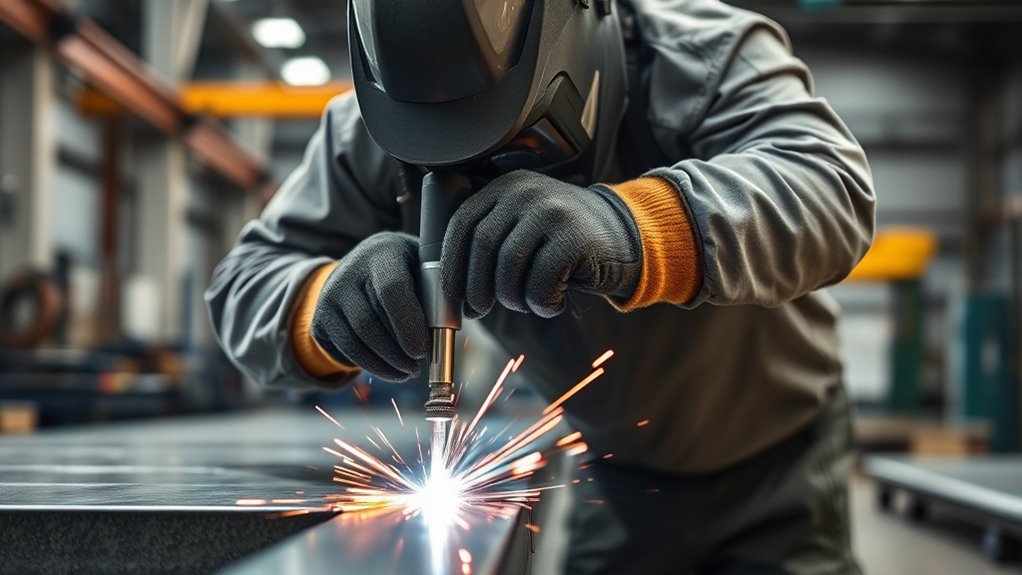
You should optimize weld positioning so you can maintain a stable gun angle, shorten reach, and keep the puddle under control.
You can reduce overwelding time by matching pass size to the joint requirement and avoiding unnecessary buildup that slows production.
Use the proper travel speed for the process and filler metal. Small speed corrections can improve deposition efficiency, but only if bead profile, tie-in, penetration, and inspection results stay acceptable. When welding coated material, understand zinc fume risks before increasing output.
Optimize Weld Positioning
Dial in your weld positioning to maximize travel speed without sacrificing quality. Place the work so you can see the joint, hold a short and consistent reach, and keep your body balanced through the whole bead.
For many wire-feed welds, a slight push or drag angle is used depending on the process, transfer mode, gas, and joint. Do not treat one angle as universal. Follow the procedure, then adjust only enough to keep penetration, bead shape, and shielding gas coverage under control.
- Secure the workpiece so it stays stable.
- Keep a steady hand and avoid erratic motion.
- Watch the leading edge and sides of the puddle, not only the arc.
- Maintain ergonomic posture to limit fatigue.
When you control position, your movement becomes more efficient, your arc stays predictable, and you avoid the extra resistance that comes from awkward reach or poor visibility.
Reduce Overwelding Time
Trim overwelding by matching technique to the joint’s actual demand. Oversized welds use more wire, gas, time, and cleanup while adding heat input and distortion.
Use stringer beads where they fit the joint and procedure. Limit filler volume to what the joint needs, and avoid unnecessary weaving on joints that do not require it.
Tune voltage and amperage so you can raise travel speeds without sacrificing penetration or weld quality. Choose advanced filler metals or higher-deposition processes only when the application allows them.
Check material thickness and alloy type before each pass, then adjust to prevent overwelding and wasteful heat input. Keep arc length and angle stable because a consistent arc supports efficient travel and a cleaner bead shape.
Use Proper Travel Speed
One steady travel speed can make a noticeable difference in weld output, because the right pace helps the puddle flow evenly and lets you deposit metal faster without losing control.
Do not chase a single inches-per-minute number for every job. Instead, match travel speed to process, transfer mode, metal thickness, joint fit-up, weld position, shielding gas, and required bead size.
- Move faster only if the weld still ties in smoothly at both toes.
- Slow down if the bead is too narrow, undercut appears, or penetration looks weak.
- Reduce heat or move faster if thin material overheats, warps, or burns through.
- Keep contact-tip-to-work distance steady so wire feed and heat input remain consistent.
This lets you weld faster with precision instead of guessing your way into defects.
Cut Down Postweld Cleanup and Grinding
Reducing postweld cleanup starts with producing a cleaner weld bead in the first place. Tune voltage, wire feed speed, gas flow, and travel speed so the weld deposits smoothly and needs less grinding later.
Choose filler metal and gas that fit the process. Some wires and transfer modes create more spatter or slag than others. The right choice can reduce cleanup time, especially on repeat production parts.
Apply anti-spatter compound only where needed. Controlled use keeps buildup off the workpiece, fixture, nozzle, and contact tip without contaminating the joint.
When you select wires that create easy-to-remove slag, or no slag at all, you reduce manual finishing and keep the process moving.
Inspect your technique regularly and correct any variation that harms bead appearance. A stable arc, consistent angle, correct stickout, and proper gas coverage help you preserve the initial weld profile, so you do not have to reclaim quality with extra grinding. Maintaining proper gas flow also helps keep the weld pool protected and reduces avoidable cleanup.
Track Welding Productivity to Find Bottlenecks
Once you cut cleanup time, the next gain comes from measuring where the job still slows down. To track welding productivity, log arc-on time, amperage, voltage, wire feed speed, gas flow, rework, and cleanup time.
- Compare arc-on time to total shift time to find waiting, setup, fit-up, or travel losses.
- Match parameters to defect rates, then use root cause analysis to stop rework at the source.
- Track wire changes, contact tip changes, grinding time, and fixture delays so you can see which small losses repeat.
Review trends daily or weekly. You may find that the real delay is not welding speed at all. It may be poor fit-up, missing clamps, dirty material, slow part handling, bad tack spacing, or repeated grinding.
Precise tracking gives you leverage: fewer delays, cleaner welds, and a process that serves you instead of forcing you to guess.
Troubleshooting Speed-Related Weld Defects
If quality drops after you try to weld faster, use the defect as feedback. The table below gives a practical starting point.
| Problem | Likely Cause | Fix |
| Undercut | Travel speed too fast, voltage too high, wrong angle, or poor edge control. | Slow slightly, lower voltage if needed, hold steadier angle, and watch the toes of the weld. |
| Lack of fusion | Moving too fast, heat too low, joint not prepared, or bead not aimed into the root. | Clean and prep the joint, increase heat within the procedure, adjust angle, or slow down. |
| Porosity | Contamination, poor gas coverage, drafts, wet material, or excessive stickout. | Clean the metal, check gas flow, block drafts, shorten stickout, and inspect the nozzle. |
| Burnback | Wire feeding drag, wrong tip, low wire feed speed, or poor contact tip condition. | Replace worn tips, check liner, set drive rolls correctly, and confirm wire feed speed. |
| Excessive spatter | Voltage mismatch, poor ground, wrong gas, dirty metal, or unstable arc. | Clean the work, tighten the ground, adjust settings, verify gas, and clean the nozzle. |
Frequently Asked Questions
How do you improve weld quality while welding faster?
Improve weld quality by cleaning the joint, using the correct filler, setting voltage and wire feed speed correctly, keeping a steady travel speed, and checking each test bead before production. Faster welding only helps when it reduces idle time and rework, not when it creates defects.
Why do welders not live long?
It is not accurate to say welders automatically do not live long. Welding can involve hazards such as fumes, heat, ultraviolet light, fire risk, electrical shock, awkward posture, and noise. Good ventilation, PPE, fire controls, training, and medical guidance help reduce those risks.
What does God say about welding?
Modern welding is not mentioned directly in the Bible. For a practical welding article, the better takeaway is to work honestly, protect yourself and others, avoid shortcuts that create danger, and take pride in skilled craftsmanship.
What is the golden rule in welding?
The golden rule in welding is to control heat input. Balance amperage, voltage, wire feed speed, travel speed, angle, and joint preparation so the weld fuses properly without undercut, porosity, burn-through, distortion, or excessive buildup.
Can you weld too fast?
Yes. Welding too fast can cause narrow beads, poor tie-in, undercut, lack of fusion, and weak penetration. If the puddle does not wet into both sides of the joint, slow down or adjust heat and angle before continuing.
What is the easiest way to increase welding productivity?
The easiest gain usually comes from reducing setup time, cleaning time, and rework. Organize tools, prep parts before welding, use fixtures, keep consumables fresh, and track why the arc is off instead of focusing only on travel speed.
Should beginners try to weld faster?
Beginners should focus on clean setup, correct settings, steady motion, and safe habits first. Once bead shape and penetration are consistent, they can increase speed slowly and compare each test weld with the previous one.
Conclusion
When you set up your weld area efficiently, choose the right filler and machine settings, maintain smooth wire feeding, minimize voltage drop, refine your technique, and reduce cleanup, you can increase travel speed without sacrificing quality. The real goal is not simply to move faster. It is to make more acceptable welds with fewer delays, fewer defects, and less grinding.
Track your productivity metrics, inspect test beads, and fix the bottleneck that costs the most time. Small, measured changes in layout, consumables, settings, and technique can produce faster output while keeping the weld sound.
Sources
- OSHA Welding, Cutting, and Brazing — supports the general safety framing for welding hazards and controls.
- OSHA 29 CFR 1910.252 General Requirements — supports fire prevention, eye protection, ventilation, and welding workplace safety requirements.
- CDC/NIOSH Welding Fumes and Manganese — supports the fume exposure and confined-space risk discussion.




