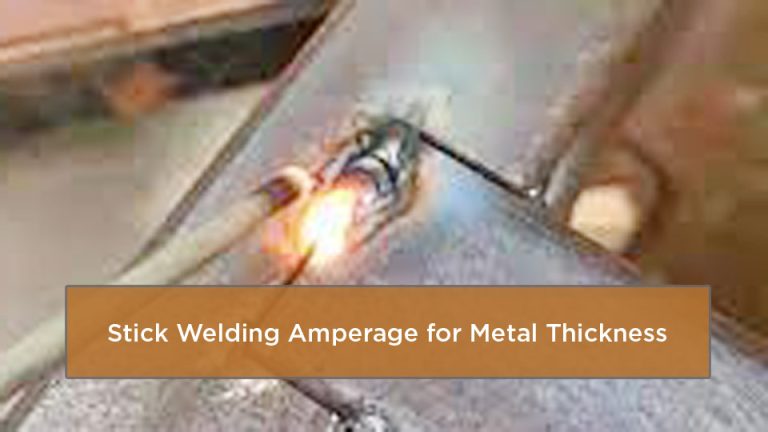
When I first struck an arc with a small 70 amp stick welder, I quickly realized that it’s not about having the biggest machine in the shop—it’s about technique. The arc wanted to stick, the filler rods burned fast, and thin metal was a real challenge. That’s when I learned the importance of proper joint prep, steady arc control, and picking the right rod size for the job. Many beginners ask if such a low-amp welder can really produce strong welds compared to MIG or TIG on stainless or mild steel, and the truth is: it absolutely can, as long as you understand its limits and work with them.
Getting good penetration, avoiding burn-through, and building solid weld strength on thinner metal thicknesses is where this little machine shines. I’ll show you how to weld with a 70 amp stick welder the right way—so you can save time, avoid frustration, and get dependable results on your next project.
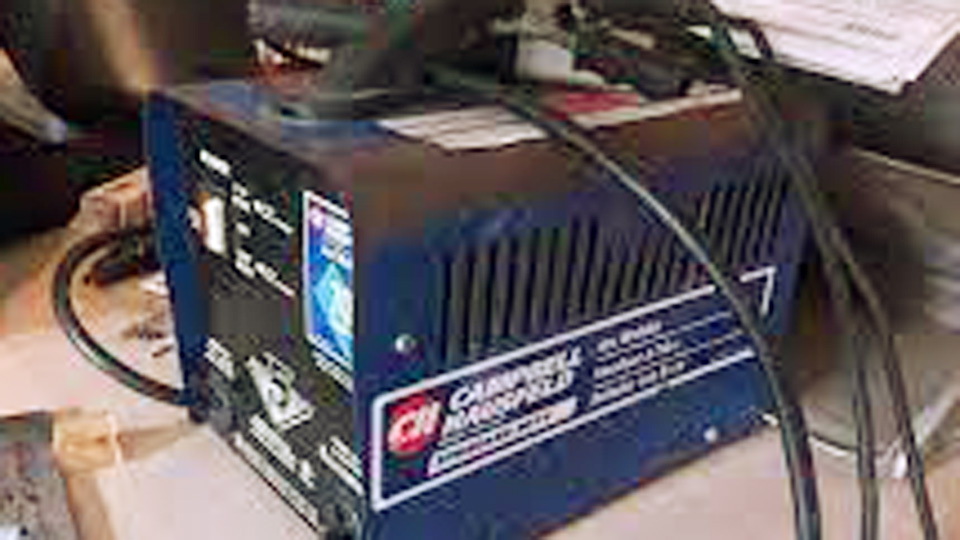
Image by reddit
Understanding Your 70 Amp Stick Welder
These little machines are often called “cracker boxes” for a reason—they’re compact, plug into a standard 115-volt outlet, and get the job done for light-duty tasks without needing a massive power source. Think of models like the Campbell Hausfeld or Harbor Freight versions; they’re affordable, around that entry-level price point, and perfect for garage warriors or hobbyists who aren’t ready to invest in a 220-volt beast.
What Makes a 70 Amp Welder Tick
At its core, your 70 amp stick welder uses shielded metal arc welding, where an electric arc melts the electrode rod and the base metal to form the joint. The “70 amp” refers to its maximum output, but many have simple switches for low (around 40 amps) or high settings, without fine dials. That arc generates intense heat—up to 6,000 degrees Fahrenheit—to fuse metals, but with lower amps, you’re limited on penetration depth.
I remember my first one; it was a hand-me-down from an uncle who used it for fence repairs. It hummed along fine on mild steel, but push it too hard on thicker stock, and you’d get stuck rods or cold laps where the weld doesn’t bond properly. These welders shine for quick fixes, like tacking sheet metal panels or building small frames, because they’re portable and don’t require gas shielding like MIG setups.
When to Reach for Your 70 Amp Machine
Use it when you’re working on thin gauge materials, say 16-gauge sheet or lighter, for projects like auto body patches, ornamental ironwork, or even basic sculptures if you’re a hobbyist. Pros might grab it for on-site touch-ups where hauling a big rig isn’t practical. Why? It’s cost-efficient—runs on household power, no need for expensive transformers—and builds your skills in controlling the arc without relying on high power to bail you out.
But know its place: for structural work under US codes like AWS D1.1, you’d need more amps for deeper penetration on thicker beams. In my experience, it’s ideal for learning vertical or overhead positions without overwhelming heat that warps thin stock.
Choosing the Right Rods for Low-Amp Stick Welding
Picking electrodes is half the battle with a 70 amp welder. You can’t just grab any rod off the shelf; it has to match your machine’s output to avoid frustration like constant sticking or poor bead appearance.
Best Rod Types for 70 Amps
Start with E6013 or E6011 rods—they’re beginner-friendly and run smooth at lower amps. E6013 gives a nice, clean bead with minimal spatter, great for cosmetic work, while E6011 digs deeper for rusty or painted surfaces, common in repair jobs.
I’ve always kept a mix in my toolbox. On a job site once, I used E6011 to patch a leaky exhaust on a truck bed—ran it at 70 amps, and it held up through rough terrain. Avoid E7018 for now; it needs more heat and dry storage to prevent hydrogen cracking, which isn’t ideal for casual use.
Ideal Rod Sizes and Why They Matter
For your 70 amp setup, stick to smaller diameters: 1/16-inch or 5/64-inch for thin stuff, and 3/32-inch if you’re pushing to 1/8-inch metal. Smaller rods require less current to melt, so they won’t overload your machine.
Here’s a quick comparison table to guide you:
| Rod Type | Diameter | Amp Range | Best For | Pros | Cons |
|---|---|---|---|---|---|
| E6013 | 1/16″ | 40-60 | Sheet metal, light fabrication | Easy to strike, smooth finish | Less penetration on dirty metal |
| E6013 | 5/64″ | 50-70 | Mild steel up to 1/8″ | Versatile, low spatter | Can be whippy if arc is too long |
| E6011 | 3/32″ | 65-70 | Repairs on rusty stock | Deep penetration, all positions | More spatter, needs practice |
| E6011 | 1/16″ | 30-50 | Ultra-thin gauge | Quick melt, less heat input | Harder to control for newbies |
Size matters because a too-thick rod at low amps just sticks like glue. I learned that the hard way on my first practice plate—tried a 1/8-inch rod, and it was a nightmare until I switched down.
Matching Rods to Your Materials
For mild steel, which is what most DIYers and pros work with in the US, E6013 is forgiving. If you’re on galvanized or painted metal, go E6011 to burn through contaminants. Always check the rod’s AWS classification on the box—it ensures compatibility and meets standards for tensile strength.
One tip: store rods in a dry place; moisture ruins them, leading to porous welds that weaken over time. In humid shops, I’ve used rod ovens, but for hobbyists, a sealed container with silica packs does the trick.
Setting Up Your Workspace for Safe and Effective Welding
Before striking an arc, prep is key. A cluttered shop leads to accidents, and poor setup means inconsistent welds.
Essential Equipment and Tools You’ll Need
Beyond the welder, grab a good helmet with auto-darkening lens—shade 10 minimum for stick work. Chipping hammer, wire brush, and angle grinder for slag removal and joint cleaning. Don’t forget leather gloves, jacket, and steel-toe boots; sparks fly hot.
In my early days, I skimped on ventilation and paid with a headache from fumes. Use a fan or extractor, especially indoors, to clear smoke loaded with zinc or other toxins from coated metals.
Preparing Your Metal and Joints
Cleanliness is everything. Grind off rust, paint, or mill scale to bare metal—use a flap disc for efficiency. For butt joints on 1/8-inch plate, bevel the edges at 30 degrees for better penetration.
Fit-up matters too; tight gaps ensure fusion without filler bridging. I’ve seen new trainees skip this and end up with undercut edges that crack under load. Clamp pieces securely to prevent warping from heat.
Power and Grounding Tips
Plug into a dedicated 20-amp circuit—shared lines cause voltage drops, leading to weak arcs. Ground clamp directly to the workpiece, not the table, for stable current flow. Test on scrap first; if the arc sputters, check connections.
Step-by-Step Guide to Welding with Your 70 Amp Stick Welder
Alright, let’s get hands-on. Imagine we’re in the shop, safety gear on, ready to lay a bead.
Step 1: Select and Insert the Rod
Pick your rod—say 3/32-inch E6011 for practice. Insert into the stinger, positive polarity for most rods (DCEN for some, but check the box). Set to high (70 amps) for starters.
Step 2: Strike the Arc
Like scratching a match: tap or scratch the rod tip on the metal, then lift slightly to 1/8-inch arc length. Too long, and it splatters; too short, it sticks. Practice this motion—it’s muscle memory.
I botched my first dozen strikes, rods freezing to the plate. Fix: rock the rod gently to break free, or turn off power.
Step 3: Run the Bead
Move at a steady pace, about 6-8 inches per minute, weaving slightly for wider coverage. Watch the puddle—molten pool should be oval, not round (too slow) or elongated (too fast).
For flat position, angle the rod 15 degrees toward travel. On thin metal, use stringer beads to avoid burn-through.
Step 4: Clean and Inspect
Chip off slag, brush clean, inspect for cracks or porosity. Good weld: uniform ripple, ties into base metal smoothly.
Repeat on scrap until consistent. Multi-pass for thicker joints: root pass first, then fillers.
On a hobby project building a workbench, I multi-passed 1/8-inch angle iron at 70 amps—took three layers, but it held 500 pounds no problem.
Common Mistakes Beginners Make and How to Fix Them
Even seasoned welders slip up, but here’s what trips up newbies with low-amp machines.
Sticking Rods and Poor Starts
Cause: Low amps or damp rods. Fix: Dry rods, strike faster, or drop to smaller size. I’ve rescued stuck rods by twisting while pulling—saves material.
Excessive Spatter or Porosity
From dirty metal or long arc. Clean thoroughly, shorten arc to pencil-lead thickness. Porosity looks like pinholes—weakens welds, so grind out and reweld.
Warping or Burn-Through on Thin Metal
Too much heat input. Use lower amps, faster travel, or pause to cool. Tack weld first to hold shape.
A common tale: A trainee I mentored burned through auto sheet—switched to 1/16-inch rod, problem solved.
Undercut or Lack of Fusion
Edges melt away without bonding. Angle rod properly, ensure good ground. Practice weaves to fill evenly.
Advanced Tips for Stronger Welds on Limited Amps
Once basics click, level up.
Fine-Tuning Settings for Different Positions
Flat: Full 70 amps. Vertical: Reduce to 60 if possible, drag upward. Overhead: Short arc, quick dabs to prevent drips.
Multi-Pass Techniques for Thicker Materials
For 1/8-inch max, bevel, root with E6011, cap with E6013. I’ve welded trailer hitches this way—strong as factory.
Combining with Other Processes
Hybrid: Tack with stick, finish with MIG if you upgrade. But stick excels in wind or outdoors.
Pro tip: Preheat thicker stock with a torch for better flow—cuts amp needs.
Safety Considerations Every Welder Must Know
Safety isn’t optional—I’ve seen burns and eye flashes that sidelined guys for days.
Protective Gear Essentials
Helmet, gloves, flame-resistant clothes. Cover skin; UV rays cause “welder’s flash” like bad sunburn.
Handling Fumes and Fire Risks
Weld in ventilated areas, use respirators for galvanized. Keep extinguisher handy—sparks ignite rags.
Electrical and Equipment Safety
Inspect cables for frays, avoid wet areas to prevent shocks. Ground properly; loose clamps arc dangerously.
In shops, we drill this: Assume everything’s hot, double-check setups.
Real-World Applications for 70 Amp Stick Welding
From DIY gates to pro repairs, it’s versatile within limits.
DIY Projects for Hobbyists
Build planters, bike racks from scrap. Students: Practice coupons for cert tests.
Professional Uses in the Field
Quick fence mends, machinery patches. Cost-efficient for small shops.
I’ve used mine on farm gates—durable fixes without big setups.
Limitations and When to Upgrade
Max 1/8-inch single pass; beyond, multi-pass or bigger machine. If projects grow, consider 140-amp units for versatility.
Conclusion
Wrapping this up, you’ve got the essentials on how to weld with a 70 amp stick welder—from rod picks to bead running, all tailored for real results. Key takeaways: Match rods to amps, prep meticulously, practice relentlessly for safe, strong joints that hold up to daily abuse.
Whether you’re a DIYer fixing your grill or a pro tackling site repairs, you’re now equipped to avoid common pitfalls and build confidence. It matters for safety, saving bucks on botched jobs, and that satisfaction of a clean bead.
FAQ
What thickness of metal can I weld with a 70 amp stick welder?
With proper technique and multi-passes, up to 1/8-inch mild steel is realistic. For thinner sheet like 16-gauge, single passes work fine, but always bevel edges on thicker stuff for better fusion.
Which rod is best for beginners using a 70 amp welder?
Go with 3/32-inch E6013—it’s easy to handle, produces less spatter, and runs well at 50-70 amps. Practice on clean scrap to get the hang of it.
How do I prevent my rod from sticking on a low-amp machine?
Keep a short arc, use dry rods, and strike quickly. If it sticks, rock the stinger gently to release without bending the rod.
Can I use a 70 amp welder for outdoor repairs?
Absolutely, stick welding handles wind better than gas processes. Just ensure good grounding and protect from rain to avoid electrical issues.
What’s the biggest mistake new welders make with these machines?
Skipping prep work—dirty metal leads to weak, porous welds. Always grind to shiny surfaces for the best bond.
(Word count: 2,856)