You’ve probably heard the claim that a plasma cutter always beats an angle grinder for cutting metal. It’s not that simple. You’ll weigh thickness, cut quality, speed, and cleanup against cost and PPE. You’ll also factor in kerf width, the heat-affected zone (HAZ), and edge prep for welding. Safety drives each choice: sparks, fumes, grounding, and wheel selection matter. By the end, you’ll know when to cut clean and when to grind smart, especially if you use the right sequence.
Quick Answer
- For thicker steel (around 4–5 mm and up) or complex shapes, a plasma cutter is usually faster and leaves a narrower kerf, but plan on light slag (dross) cleanup.
- For thin sheet and quick trims, an angle grinder with a thin cutoff wheel is inexpensive and versatile, but it typically leaves a wider kerf and more burrs.
- For weld-ready work, the common workflow is plasma for the cut, then a grinder to remove dross, deburr, and prep the edge.
- Let safety lead: control sparks and fumes, confirm solid grounding, and match the wheel or consumables to the job.
Tool Capabilities at a Glance
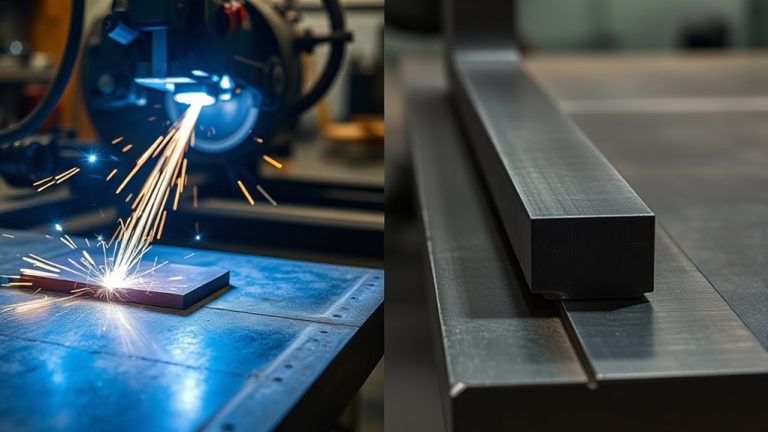
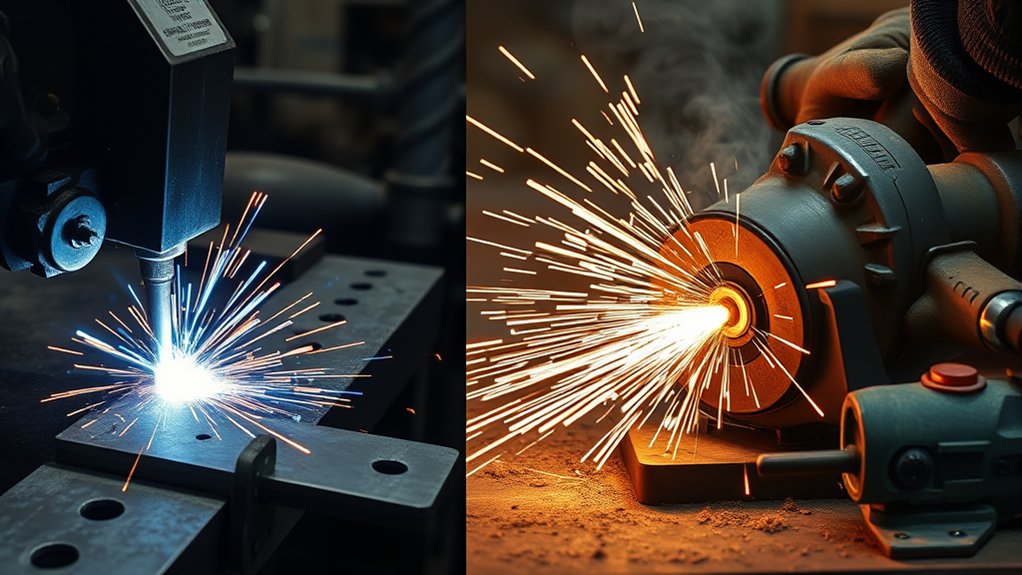
Although both tools cut metal, their strengths diverge. A plasma cutter shines on fast, long, straight cuts and patterns with a narrow kerf. Many compact hobby units are most comfortable on roughly 1/4 inch to 5/16 inch steel, while larger machines go much thicker. An angle grinder favors quick, simple cuts and broader day-to-day utility.
Plasma excels at precise, narrow-kerf cuts, while angle grinders bring quick, simple versatility.
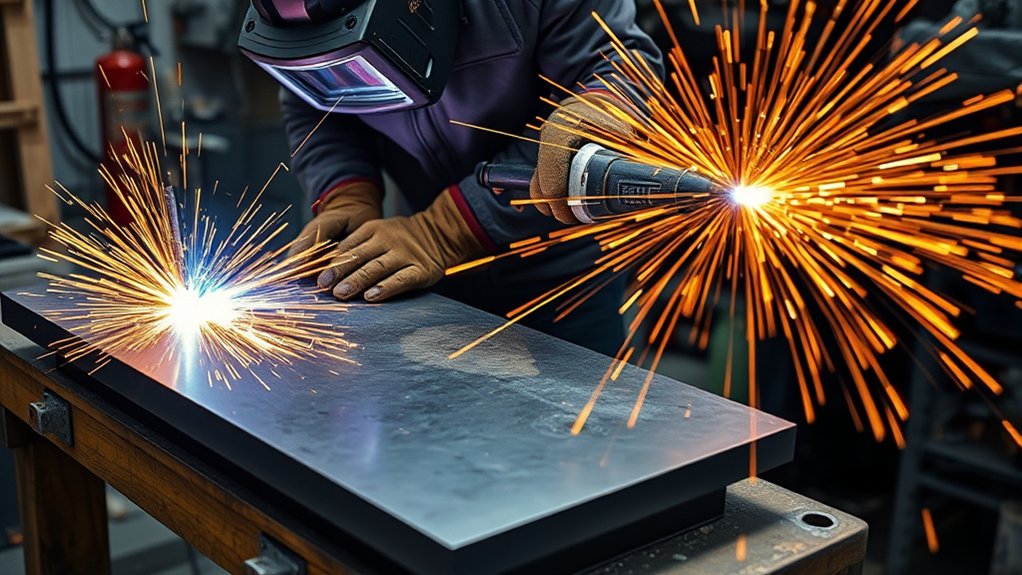
You’ll choose based on cut geometry, thickness, and finish requirements. For precision, the plasma’s constricted arc can leave cleaner edges and a narrower kerf, which often means less rework. Light cleanup is still common, and line quality depends on steady control and practice.
With an angle grinder, you can mount a 1 mm cutting disc and start cutting right away. Its biggest advantage is versatility. Swap discs and the same tool can cut, grind, bevel, or prep surfaces without changing machines.
Expect a wider kerf and more burr formation with a grinder, so plan for edge dressing.
On setup, confirm dry, clean air and moisture traps on the plasma system. For grinders, inspect discs, flanges, and guards before every cut to maintain performance and control.
Safety and PPE Essentials
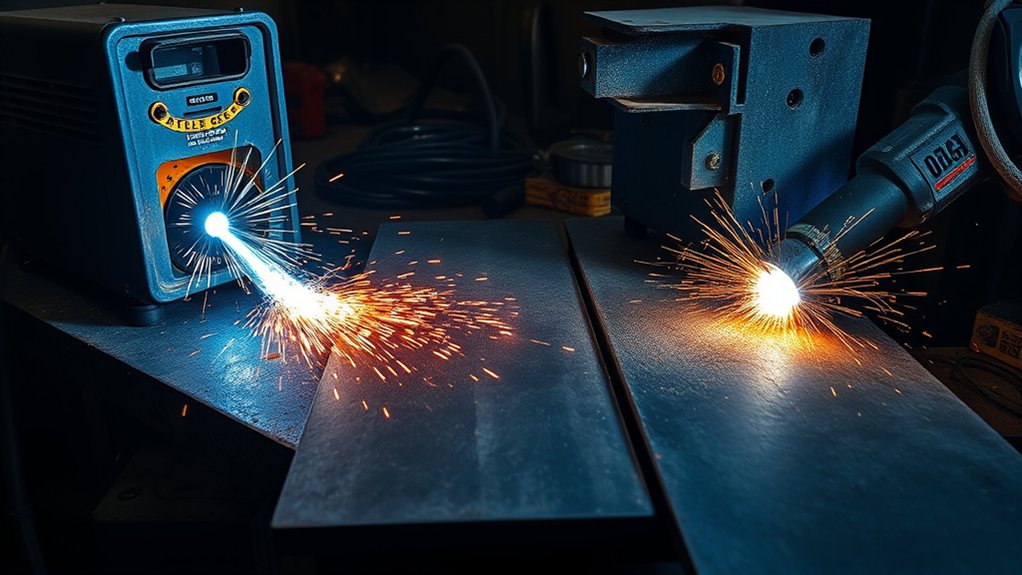
Start with essential protective gear. Wear safety glasses, gloves, and a face shield, and use nonflammable clothing and closed-toe footwear to protect against sparks and debris.
Before powering up, clamp the workpiece, inspect the grinder and discs for cracks, verify cords and leads, and keep your body out of the cutting line so you can control kickback and spark spray.
During operation, keep a safe standoff, direct sparks and hot slag away from combustibles, and follow correct procedures to reduce electrical and fire risks.
Essential Protective Gear
Sparks and metal shards demand disciplined PPE. Match your gear to the hazards, then verify fit and condition before power-up. Prioritize safety glasses with side shields, a rated face shield, heat-resistant gloves, and flame-resistant clothing. Add steel-toed boots for impact protection. For fumes and dust, especially on stainless or aluminum, use a properly fitted respirator. Protect hearing with earmuffs or plugs rated for the tool’s dB levels. Inspect lenses for scratches, gloves for heat damage, boots for sole integrity, and replace compromised items before starting.
| Hazard | Primary PPE | Specification |
|---|---|---|
| Impact/sparks | Safety glasses + face shield | ANSI Z87.1 |
| Heat/splatter | FR clothing, heat gloves | ASTM F1506 (arc-rated where needed) |
| Noise/fumes | Hearing protection, respirator | NRR-matched, NIOSH-approved |
Store PPE clean and dry, and keep a simple inspection habit so you do not rely on damaged gear.
Safe Operating Practices
Before powering up a plasma cutter or angle grinder, set up the work area so you can cut without rushing.
Put on PPE: safety glasses, gloves, and a face shield to protect against sparks and debris. Keep clothing snug and nonflammable.
Perform tool maintenance: inspect cords, housings, and guards. For grinders, check the wheel condition and mounting, and follow guarding and safe-use requirements in OSHA 29 CFR 1910.215. For plasma, check consumables and confirm the air supply is clean and dry.
Secure the workpiece with clamps or a bench vise so it cannot shift. Stand to the side of the discharge path and direct sparks into a safe zone.
Route cables and hoses to prevent entanglement. Keep the area tidy, and keep a fire extinguisher within reach.
Bring tools up to speed before contacting the metal, then maintain a controlled, steady feed.
Choosing the Right Tool by Material and Thickness
Start by matching thickness to the tool. Use an angle grinder with a 1 mm cutting disc for thin sheet to keep cuts fast and control heat, then switch to a plasma cutter once you reach 4–5 mm or when you need tighter shapes and cleaner kerfs.
For heavy plate, choose a plasma cutter for cleaner edges and better control. If you must grind, use a metal-cutting wheel, keep a steady feed, and avoid overheating the edge.
Always match consumables to the material. Use aluminum oxide discs for general steel, specialized discs for harder alloys, and adjust technique to reduce warping or kickback.
Thin Sheet Scenarios
When you’re working with thin sheet metal up to 1/8 inch, choose the tool by balancing cut quality, heat input, and consumable cost.
Clamp the work, mark a clear line, and support the sheet close to the cut to reduce vibration. An angle grinder with a thin cutting disc can produce clean edges with manageable heat, helps keep panels flatter, and keeps consumable costs down.
Use a non-ferrous disc on aluminum to reduce loading. Plasma cuts fast and tracks straight lines well, but it can leave light slag and heat tint on thin stock, so expect a quick cleanup pass.
- Verify PPE: face shield, cut-resistant gloves, hearing protection, and a clear spark zone.
- For long straight cuts, plasma is efficient. For quick trims and small openings, a grinder is often simpler.
- Deburr immediately and confirm edge quality before fit-up.
Heavy Plate Choices
Thin sheet habits do not carry far once the stock gets past 1/4 inch. Tool choice shifts to power, cut control, and heat management on heavy plate.
For heavy plate considerations, prioritize a plasma cutter. It produces faster, more consistent kerfs and can leave cleaner edges on 4–5 mm and thicker steel, especially on shapes and templates. Set a solid ground, confirm dry air, choose the correct amperage and standoff, then plan for a brief post-cut grind to remove dross.
Reserve the angle grinder, especially with 1 mm discs, for thinner stock and straightforward trims.
On heavy steel, grinders slow down, wander more easily, and can build excess heat and burrs. Confirm thickness, edge tolerance, and shape complexity before you cut, and choose the safer, more controlled option.
Speed, Cut Quality, and Cleanup
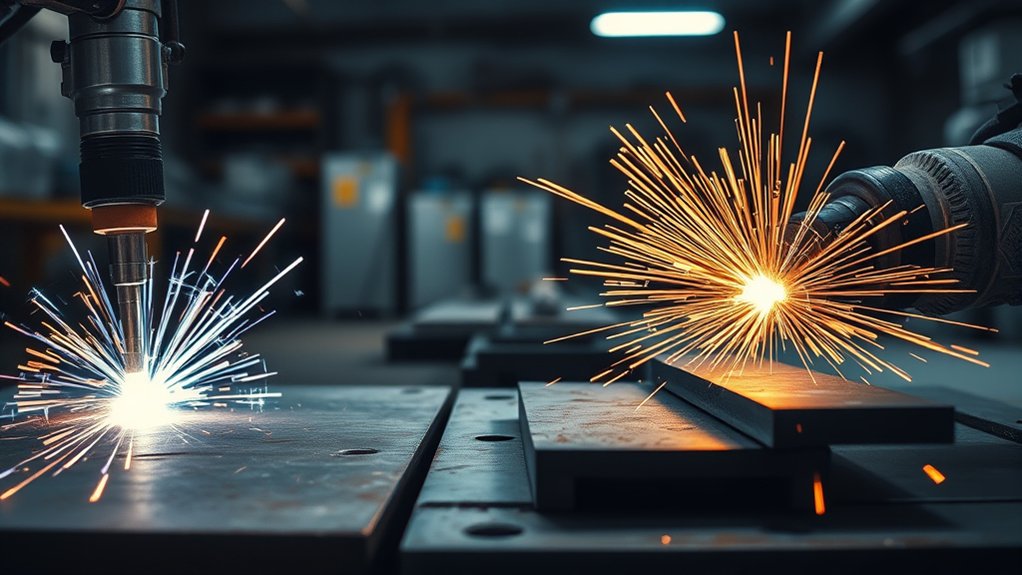
Both tools can slice steel effectively, but a plasma cutter is usually faster on longer cuts and thicker stock. It also handles curves and templates more easily. An angle grinder can track a straight edge reliably, but it tends to slow down as cuts get longer or thicker.
For cutting efficiency, plasma generally wins on straight lines, curves, and patterns. Keep travel speed steady and maintain the right torch height to reduce dross. With grinders, keep pressure consistent and let the wheel do the work to reduce wandering and burrs.
Cut quality depends heavily on technique. Plasma can produce a narrow kerf and a relatively small HAZ, but you still plan for edge refinement. Chip slag, then lightly grind or file as needed.
- Confirm grounding, clear flammables, and direct sparks into a safe zone before cutting.
- Inspect consumables: fresh plasma tips and quality discs improve cut consistency.
- Stage cleanup tools: chipping hammer, flap disc, file, and a vac for debris control.
Cost, Consumables, and Long-Term Value
Before you choose a cutter, map the real costs: purchase price, consumables, duty cycle, and the time you spend per foot of cut.
Start with the initial investment. A plasma unit usually costs more than an angle grinder, even for budget models. Then factor operating expenses. Plasma tips and electrodes wear with amperage, pierces, and airflow quality. Grinders mostly consume discs, which are cheaper and can serve multiple tasks.
Match costs to your project profile. If you’re cutting thicker steel or complex contours, plasma’s speed and precision can reduce labor time and rework, improving cost per part.
For occasional, simple cuts, a grinder’s lower entry price and broad utility often keep total spend down.
Account for duty cycle and power needs to prevent overheating, lost time, and unsafe shortcuts. Include air supply and PPE in your totals.
Consider depreciation. Quality plasma cutters can hold resale value better than many small, heavily used grinders. Choose the tool that fits your workload and minimizes lifetime cost.
Techniques, Tips, and When to Switch Tools
You’ve weighed costs. Now set up for clean, safe cuts by matching technique to the job. Choose your tool by thickness and tolerance. For stock over 1/8 inch or complex profiles, prioritize a plasma cutter for speed, accuracy, and less distortion.
Hold the torch at 90 degrees, set amperage to the material, and use a straightedge or circle guide to steady your motion. For thin sheet or quick trims, an angle grinder with the right cutoff wheel delivers simple lines and fast touch-up.
Use disciplined cutting techniques: steady travel speed, consistent standoff, and planned exits to minimize dross. Deburr and verify edge quality before fit-up. Switch tools on purpose: rough cut with plasma, then blend edges and remove slag with a grinder for final fit.
- Match tool to thickness, tolerance, and geometry, and do not force either tool past its comfort zone.
- Prioritize PPE, stable workholding, and controlled sparks.
- Inspect edges and switch tools early to reduce rework and waste.
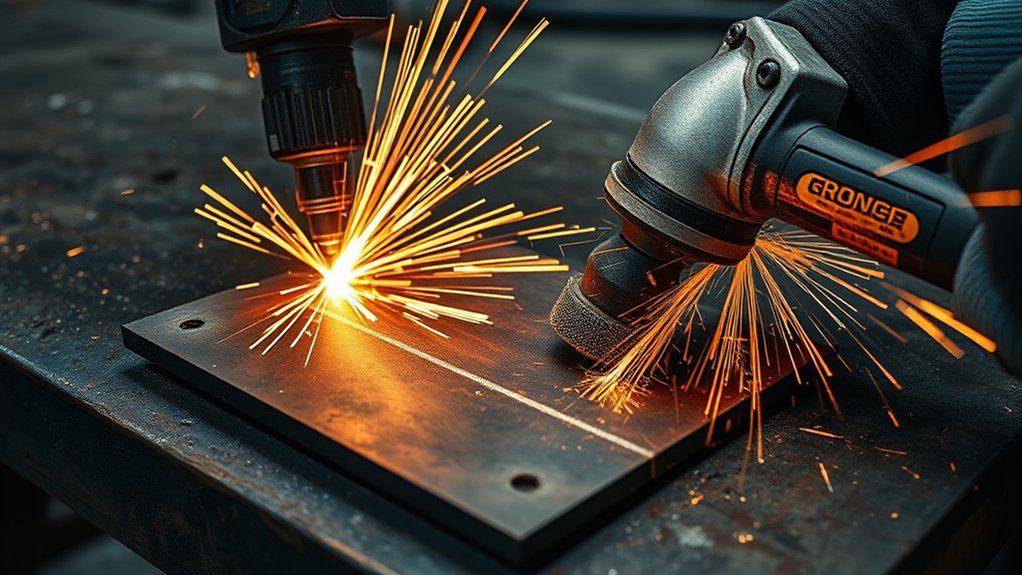
Best Sequence for Weld-Ready Edges
If the cut edge will be welded, plan the workflow before you strike an arc or spin up a wheel. The cleanest results usually come from using both tools in sequence.
- Cut to shape: Use plasma for longer cuts, thicker stock, and templates, or use the grinder for quick trims on thin sheet.
- Remove dross and burrs: Chip or scrape plasma dross, then dress the edge lightly with a flap disc or file. After grinding cuts, deburr and knock off sharp corners.
- Prep the weld edge: If the joint needs a bevel, use the grinder to set the angle and keep it consistent. Keep heat under control so you do not distort thin parts.
- Final fit-up: Check kerf impact on dimensions, confirm tight fit, and clean the weld area before tacking.
Frequently Asked Questions
Can Either Tool Run off a Standard Household Circuit Without Tripping Breakers?
Yes, but it depends. Verify power requirements, compare them to your circuit capacity, then choose the right settings. An angle grinder usually fits 15A circuits. Small inverter plasma cutters may need 20A, while larger units often need dedicated 240V circuits.
How Does Cold Weather Affect Plasma Cutter Performance and Arc Stability?
Cold weather can reduce gas ionization, thicken lubricants, and stiffen leads, which can make arc stability harder. Preheat workpieces, keep the air supply dry and warm, keep consumables warm, shorten lead lengths, increase amperage slightly when needed, verify duty cycle, and wear insulated, dry PPE.
What Power Generators Are Suitable for Mobile Cutting or Grinding Setups?
You’ll want portable generators with clean inverter output, appropriate continuous power, and enough surge capacity. Grinders are usually modest loads. Plasma cutters vary widely by model, and many mid-size machines call for roughly 8–10 kVA or more from auxiliary power. Check the cutter’s nameplate and manual, confirm 120/240V availability, low THD, GFCI protection, bonding compliance, and proper grounding, then size the generator with headroom.
Are There Environmental or Ventilation Requirements for Indoor Plasma Cutting?
Yes. You need robust fume extraction, adequate air changes per hour, and clear airflow direction. Implement spark and slag containment, combustible clearance, grounded tables, and fire watch. Monitor gases and particulates, enforce PPE, and document indoor safety procedures and inspections. For baseline requirements on ventilation and related precautions for welding and cutting work, see 29 CFR 1910.252.
How Do Plasma Cutters and Grinders Impact Nearby Electronics or Wi-Fi?
They can cause electromagnetic interference and signal disruption. Isolate power circuits, ground equipment, and route leads away from antennas. Use shielded cables, ferrites, surge protection, and distance from sensitive devices. Test and adjust placement, duty cycle, and shielding as needed.
Conclusion
In the shop’s dim light, you hold two keys: the plasma’s lightning and the grinder’s whetstone. Choose by thickness, tolerance, and time. For steel over 4–5 mm and tighter profiles, plasma cutting is often the faster, cleaner path. For thin sheet to 1/8 inch and simple chops, a grinder can be the practical choice. Verify ground, clamp the work, check PPE, set parameters, control sparks, and deburr. When kerf, heat, or edge quality drift, switch tools. Precision first, safety always.