
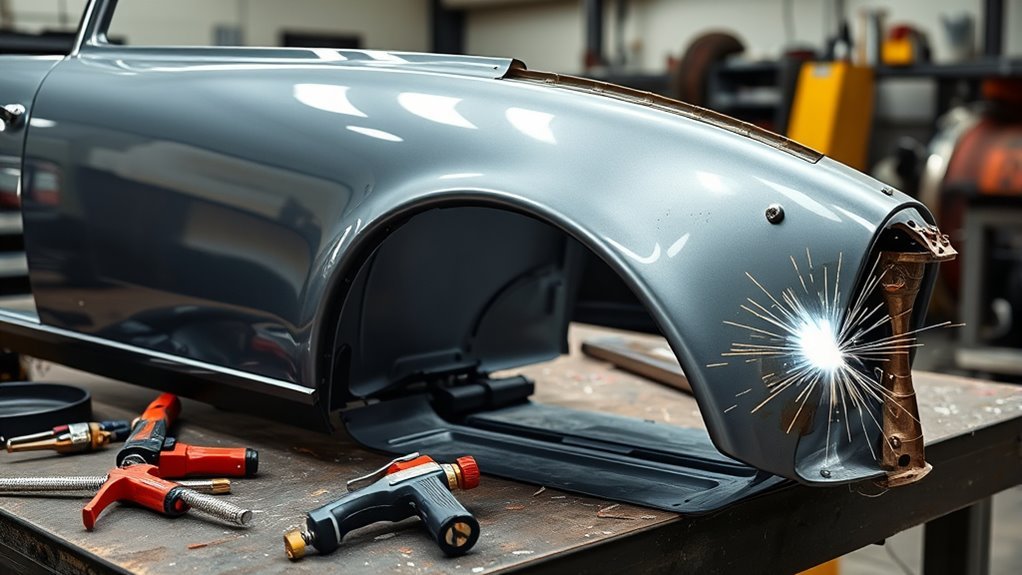
Pop rivets and welding can both join car body metal, but they are not interchangeable. A hand-installed blind rivet may be suitable for a splash shield, access panel, or cosmetic skin. A structural repair may instead require spot welds, MAG welding, MIG brazing, structural adhesive, self-piercing rivets, approved blind rivets, or a combination. For any safety-critical repair, the vehicle-specific body repair procedure must control the decision.
Quick Answer
Use pop rivets for trim, splash shields, access panels, and non-load-bearing cosmetic work. For pillars, rails, crash-management parts, structural panels, or areas near suspension and restraint mountings, follow the vehicle maker’s exact repair procedure. It may specify welding, structural rivets, adhesive, rivet bonding, or a combination—not ordinary hardware-store pop rivets.
Key Takeaways
- Ordinary pop rivets are not the same as OEM-approved structural blind rivets or self-piercing rivets.
- Use pop rivets only where the panel does not carry crash, suspension, seat-belt, steering, or other structural loads.
- Do not assume welding is always correct. Advanced steels, aluminum structures, adhesives, and factory joints may require a different process.
- Restore primer, seam sealer, paint, backside protection, and cavity protection after either method.
- For structural work, identify the exact vehicle, panel, material, and OEM repair procedure before cutting or drilling.
At a Glance
| Time Required | About 15–30 minutes for a simple trim attachment; several hours or longer for panel replacement, welding, finishing, and corrosion protection |
| Difficulty | Beginner for removable non-structural trim; advanced or professional for welded, bonded, or structural repairs |
| Tools Needed | Drill, deburring tools, clamps, approved rivet tool and fasteners, or the specified welder, wire, gas, adhesive system, PPE, and corrosion-protection materials |
| Cost | Low for basic riveting; moderate to high for approved welding, structural riveting, adhesive equipment, refinishing, or professional collision repair |
What’s in This Article
- When Pop Rivets Make Sense
- When Welding Is the Better Fix
- Pop Rivets vs Structural Rivets
- Pop Rivets vs Welding Strength
- Best Repairs for Rivets vs Welding
- Tools, Skill, and Cost Compared
- Joint Design and Rivet Selection
- Corrosion Protection After Repair
- Safety, Rust, and MOT Issues
- How to Decide Between Rivets and Welding
- Decision Table
- Frequently Asked Questions
- Sources
- Conclusion
When Pop Rivets Make Sense
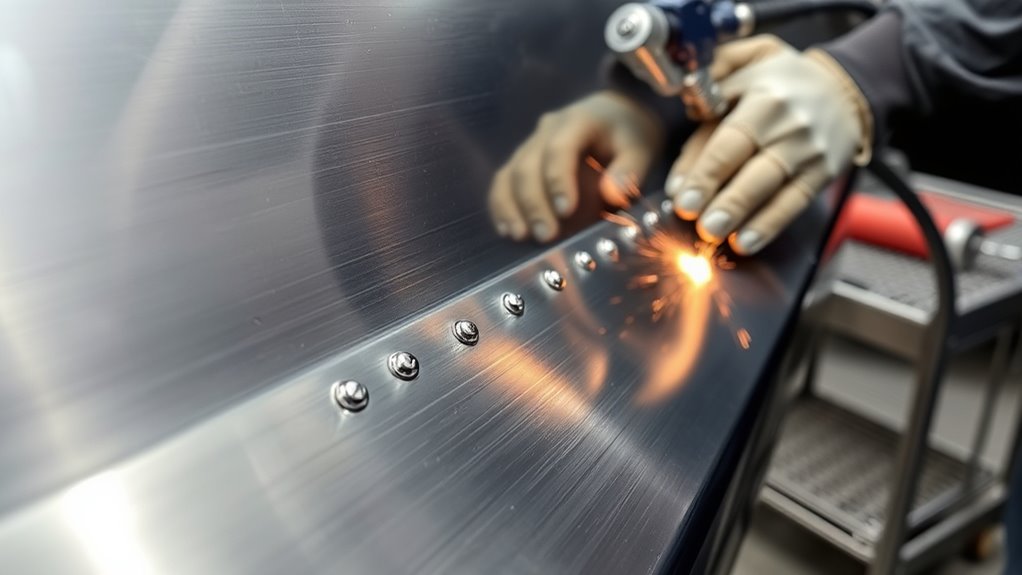
Pop rivets make sense for lightweight, non-stressed parts that do not form part of the vehicle’s load path or crash structure. Because a blind rivet can be installed from one side, it is useful in cavities where you cannot place a nut, bucking bar, or tool behind the panel.
A pop rivet is a practical attachment for light body hardware, but it is not a substitute for the vehicle maker’s specified structural joint.
Reasonable uses may include:
- Interior or exterior trim that originally used a similar mechanical fastener
- Splash shields, lightweight covers, and non-structural brackets
- Removable inspection or access panels
- Utility repairs to non-load-bearing skins where appearance is secondary
- Temporary positioning of a non-structural part before an approved permanent process
Pop riveting uses little or no heat, so it reduces the risk of paint damage and panel distortion around the joint. A basic rivet gun, drill, deburring tool, measuring tools, and clamps may be enough for simple work.
However, the fastener still has to match the materials, total grip thickness, hole size, expected vibration, and environment. A loose-fitting rivet, oversized hole, weak mandrel, or poorly supported thin panel can allow movement and early failure.
Note: A visible lap patch held by pop rivets can trap water between the sheets. Use this approach only where it is suitable for the panel, and seal and protect both sides of the joint.
Flux-core welding can be useful for some heavier mild-steel fabrication, but it normally produces more heat and spatter than a controlled automotive MIG/MAG process. It should not be treated as the default alternative for thin body panels. Review flux-core welding basics only for work where that process is appropriate.
When Welding Is the Better Fix
Welding may be the correct choice when the approved repair procedure requires a fused joint, factory spot-weld replacement, plug weld, butt weld, or welded sectioning joint. It can transfer load efficiently and provide a smooth finish when the metal, joint, equipment, and process are suitable.
Common automotive joining processes include squeeze-type resistance spot welding, MAG plug welding, MAG butt welding, MIG brazing, weld bonding, and limited TIG welding. The correct process is not interchangeable. It depends on the panel material, steel strength, factory joint, access, and model-specific repair procedure.
For example, Honda and Acura’s current welding guidance allows or restricts different welding processes according to steel strength and the exact repair location. It also requires specific wire strength, shielding gas, surface preparation, and welder settings for some repairs.
MIG or MAG welding is commonly used on mild-steel body repairs because the process is fast and controllable. TIG offers precise heat control for certain fabricated parts and materials, but it is slower and is not automatically an approved replacement for the factory joining method.
A welded body joint still needs corrosion protection. Spot welds and plug welds do not seal the full seam, so the repair normally requires the specified primer, adhesive where required, seam sealer, paint, backside coating, and cavity protection.
Warning: Do not weld, section, drill, heat, or straighten a structural or crash-critical part until you have identified the exact vehicle, material, and OEM repair procedure. The wrong heat or joining process can weaken advanced-high-strength steel and alter crash performance.
Pop Rivets vs Structural Rivets
The term pop rivet usually refers to a general-purpose blind rivet installed by pulling a mandrel from one side. This is not the same as every rivet used by vehicle manufacturers and collision-repair facilities.
| Fastener or joint | Typical feature | Automotive use |
| General-purpose blind pop rivet | Installed from one side with a hand or powered puller | Trim, covers, access panels, and other approved non-structural attachments |
| Structural blind rivet | Designed for higher and more controlled joint performance | Used only when the OEM procedure specifies the exact rivet and installation tool |
| Self-piercing rivet | Driven with high clamping force without a conventional through-hole | Common in specified aluminum, steel, and mixed-material factory joints |
| Solid rivet | Normally requires access and tooling on both sides | Used only where the procedure, access, and tooling support it |
| Rivet-bonded joint | Specified adhesive works with approved rivets as one joint system | Structural or non-structural repair only where the OEM procedure permits it |
I-CAR’s guidance on automotive rivet guns explains that repairers may need separate equipment for self-piercing and blind structural rivets. The rivet type, installation force, die, head orientation, adhesive, and hole preparation can all be part of the approved repair.
Do not replace an OEM structural rivet with a similar-looking hardware-store rivet. Appearance alone does not show material, mandrel retention, grip range, shear capacity, or compatibility with the approved joint.
Pop Rivets vs Welding Strength
A suitable weld will usually carry more load than a few ordinary light-duty pop rivets in a simple sheet-metal lap joint. That comparison does not prove that welding is stronger than every riveted automotive joint.
Joint performance depends on:
- The materials and their thicknesses
- Fastener type, diameter, grip range, and spacing
- Hole quality and edge distance
- Joint overlap and panel support
- Weld type, penetration, spacing, wire, gas, and heat input
- Adhesive type, bond-line thickness, preparation, and cure
- Vibration, fatigue, impact, peel, tensile, and shear loads
- Corrosion protection and environmental exposure
Joint Strength Comparison
A fusion weld transfers load through fused metal. A riveted joint transfers load at separate fastener points. An adhesive-bonded or rivet-bonded joint can spread load over a larger bonded area while the fasteners clamp and stabilize the panels.
Because the failure modes differ, a single pull or shear number does not tell you whether a repair is safe. Thin sheet may tear around a strong rivet, a poorly made weld may lack fusion, and excessive heat may weaken the surrounding steel.
Use published repair information rather than generic fastener ratings to decide which joint will reproduce the original load path.
Structural Load Limits
Structural load limits matter most in pillars, rails, rockers, crossmembers, suspension and steering mounting areas, seat-belt and seat mounting areas, roof rails, and crash-management structures.
Some structural parts can be sectioned and welded only within specified zones. Other assemblies must be replaced at factory seams or as complete parts. Ultra-high-strength steel may require special spot-welding or MIG-brazing procedures and may prohibit ordinary butt welding or straightening.
Therefore, “structural” does not automatically mean “weld it.” It means the repair must follow the approved procedure that restores the intended strength, stiffness, energy management, and corrosion protection.
Vibration, Fatigue, and Panel Movement
Vehicle panels experience vibration, twisting, temperature changes, and repeated road loads. A loose rivet can fret against the hole, enlarge it, and allow the panels to move. A rigid weld placed in the wrong location can also create a stress concentration or crack beside the heat-affected zone.
Good joint design uses the correct number and position of attachments, keeps the sheets clamped together, and protects the joint from moisture. Do not rely on one or two rivets where a larger load-distributing flange or approved attachment pattern is required.
Best Repairs for Rivets vs Welding
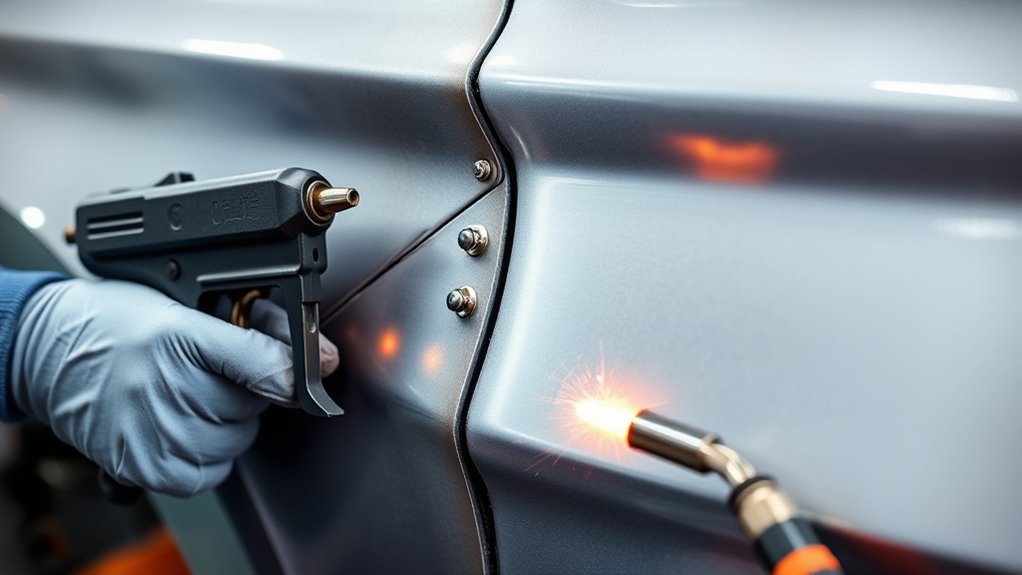
You should use ordinary pop rivets only for parts whose failure would not compromise occupant protection, steering, braking, suspension, restraints, or the load-bearing body structure.
Use general-purpose pop rivets for suitable non-structural attachments. Use the OEM-specified joining system for every structural or crash-related repair.
Suitable pop-rivet jobs may include trim, access covers, lightweight brackets, splash guards, or a removable utility panel. A properly sized backing washer or wider-head rivet may help distribute load on a thin non-structural sheet, but only when that hardware is suitable for the application.
Welding may suit a mild-steel cosmetic patch, an approved plug-welded flange, or a permitted sectioning joint. The exact weld pattern and process must come from the repair information rather than from a generic spacing rule.
Modern exterior panels may also use panel adhesive, weld bonding, rivet bonding, or hem-flange adhesive. The 3M collision-repair panel-bonding procedure emphasizes panel preparation, test fitting, adhesive application, clamping, and sealing while following OEM recommendations.
Note: Structural adhesive is not a universal substitute for welding. Use it on a pillar, rocker, rail, or other structural member only when the vehicle maker specifically approves that adhesive and joint process.
Tools, Skill, and Cost Compared
Pop riveting has a lower equipment barrier for simple non-structural work. A basic setup may include:
- A hand, pneumatic, battery, or hydraulic rivet tool suitable for the fastener
- A drill and the specified drill-bit size
- A deburring tool
- Clamps and panel-alignment tools
- Measuring and marking tools
- Primer, seam sealer, paint, and cavity protection
- Suitable PPE for drilling, grinding, coating, and finishing
A structural blind-rivet or self-piercing-rivet repair may require an expensive OEM-approved gun, dies, adapters, calibration, and technician training. It should not be grouped with basic hand-riveter work simply because both processes use rivets.
Welding normally requires a suitable MIG/MAG, TIG, or squeeze-type resistance spot welder; the correct wire and shielding gas; weld-through or epoxy primer as specified; clamps; extraction; PPE; test coupons; and fire-control equipment.
Some vehicle makers require weld testing before work begins. The technician may need to reproduce the joint on matching test material and confirm proper nugget size or destructive tear-out before welding the vehicle.
Products Worth Considering

Non-Scratch Pry Tools: Made from durable nylon, this auto trim removal tool kit protects your car’s surfaces from scratches while offering strong leverage for trims, panels, and dashboards

Universal fit kit - Great assortment push retainer kit with 12 popular size, fitting for door trim, radiator shield yoke, fender, bumper and splash shield retainer’s replacement for Ford, GM, Chrysler, Toyota, Honda and more..Note : If the size of the earbud tips does not match the size of your ear canals or the headset is not worn properly in your ears, you may not obtain the correct sound qualities or call performance. Change the earbud tips to ones that fit more snugly in your ear

3 Pcs Clip Pliers Set and Fastener Remover Set Includes:1 pcs 2 in 1 clip pliers of 9 inches and 2 pcs fastener removal tool of 8.7 & 11.8 inches
Tool Requirements
Riveting is the simpler path only when the repair uses ordinary non-structural blind rivets. Structural riveting can demand just as much procedure control as welding.
Welding equipment must be capable of producing the required current, clamping force, pulse control, wire strength, and shielding-gas coverage. A machine that can melt the panels is not necessarily capable of making the approved automotive joint.
Weld-through primer rules also vary. For example, Honda’s 2025 guidance calls for zinc-rich weld-through primer on specified resistance-spot-weld mating surfaces but says not to use it for certain MAG and MIG-brazed joints. Always follow the exact procedure rather than applying one primer rule to every weld.
Skill and Cost
Basic pop riveting is usually the lower-cost, lower-skill option. It can be appropriate for DIY trim or utility work when the panel is clearly non-structural.
Welding thin body steel requires control of fit-up, heat, burn-through, penetration, distortion, wire selection, and corrosion restoration. Structural rivet bonding requires equally careful material preparation, adhesive timing, rivet selection, clamping, and equipment setup.
Professional labor costs more because a safe repair may involve damage analysis, measuring, disassembly, OEM procedure research, test welds, panel replacement, corrosion protection, refinishing, scanning, and calibration—not only the time spent making the joint.
Joint Design and Rivet Selection
Before installing any blind rivet, confirm that the fastener matches the total thickness of every layer in the joint. That total is the rivet’s required grip range. A rivet that is too short may not form a proper backside bulb; one that is too long may clamp poorly or leave excessive movement.
Also check:
- Hole size: Use the fastener maker’s specified drill size. An oversized or damaged hole reduces support.
- Hole condition: Deburr both sides where accessible and remove chips that could hold the panels apart.
- Edge distance: Keep the hole far enough from the sheet edge to avoid tearing. Use the approved drawing or fastener data instead of guessing.
- Spacing: Follow the original pattern or repair procedure. Too few fasteners increase the load at each hole.
- Panel contact: Clamp the sheets tightly so the rivet does not bridge a gap.
- Head orientation: Install the manufactured head and formed side in the orientation required by the procedure.
- Material compatibility: Avoid creating a galvanic couple between incompatible metals.
- Mandrel condition: Check that the mandrel breaks and retains as designed.
For a solid rivet, you must normally reach both sides of the joint and form the shop head with suitable tooling. The same rules for material compatibility, spacing, edge distance, and panel support still apply.
Products Worth Considering

Black nylon blind rivet 3/16",Replaces for GM: 20432975 VW:175-853-57701C for Chrysler: 6503800 for Ford: N804343S

With a variety of 14-sizes 900pcs aluminum rivets (100pcs 3/32”x 1/4”, 100pcs 3/32” x 5/16”, 97pcs 1/8” x 1/4”, 90pcs 1/8” x 5/16”, 90pcs 1/8” x 3/8”, 65pcs 1/8” x 1/2”, 70pcs 5/32” x 3/8”, 60pcs 5/32” x 1/2”, 50pcs 3/16” x 5/16”, 50pcs 3/16” x 3/8”, 40pcs 3/16” x 1/2”, 45pcs 3/16” x 5/8”, 30pcs 1/4” x 3/8”, 13pcs 1/4” x 1/2”, total 900pcs.), this kit is a versatile solution for a range of applications

With a variety of 210Pcs 8-sizes SAE aluminum rivets (As shown picture 2), this kit is a versatile solution for a range of applications
Corrosion Protection After Riveting or Welding
Drilling and welding remove factory coatings and expose fresh metal. If the protection is not restored, corrosion can begin inside a lap joint or enclosed cavity before it becomes visible on the outside.
Use the repair procedure and product instructions to restore the complete system:
- Remove contamination, loose rust, damaged coatings, and drilling debris.
- Apply the specified primer to bare metal and mating surfaces at the correct stage.
- Use the required structural or panel adhesive where the procedure calls for it.
- Seal seams and fastener penetrations after the joint is complete.
- Refinish the outer surface with compatible primer, paint, and clear coat.
- Protect the backside and enclosed cavity with the specified coating or cavity wax.
- Keep drain paths open so water cannot remain trapped behind the repair.
When joining dissimilar metals, use the specified coating, adhesive, isolator, washer, or fastener system to reduce galvanic corrosion. Do not assume that a coat of paint on the exposed rivet head protects the metal hidden inside the overlap.
Pro Tip: Inspect and protect the backside of every drilled or welded joint whenever access allows. Many repairs rust from inside the overlap or cavity because only the visible face was painted.
Safety, Rust, and MOT Issues
Welding, brazing, cutting, and grinding create risks from fumes, ultraviolet radiation, burns, electrical shock, flying particles, noise, and fire. The OSHA welding-hazard guidance recommends suitable work practices, ventilation, and personal protective equipment.
Before hot work on a vehicle:
- Follow the manufacturer’s electrical power-down and battery-disconnection procedure.
- Locate and protect fuel tanks, fuel and brake lines, refrigerant lines, wiring harnesses, modules, sensors, and ground paths.
- Identify airbags, seat-belt pretensioners, inflators, and other pyrotechnic devices near the repair.
- Remove or shield glass, trim, carpet, insulation, seam sealer, undercoating, adhesives, and other combustible materials.
- Remove coatings from the weld zone as required and control fumes from zinc, paint, primer, adhesive, and underseal.
- Use suitable local exhaust ventilation and respiratory protection selected for the actual hazard.
- Keep an appropriate fire extinguisher ready and inspect both sides of the panel for smoldering material.
- Continue a fire watch after hot work for the period required by the shop procedure and conditions.
Warning: Hybrid and electric vehicles contain high-voltage components that can remain energized after the vehicle is switched off. Pyrotechnic restraints can also deploy unexpectedly. Use the model-specific shutdown, isolation, verification, and waiting procedure; do not rely on disconnecting the 12-volt battery alone.
UK MOT Repair Rules
The following guidance applies to the UK MOT test. Other countries and states use different inspection rules.
The DVSA MOT inspection manual, updated June 1, 2026, says a structural repair must be properly carried out and appear as strong as the original structure.
For ordinary metal patch repairs, the manual generally requires continuous seam welding unless an original spot-welded panel or section has been removed and replaced using an acceptable spot-, stitch-, or plug-weld approach. The manual also recognizes manufacturer-recommended processes using MIG brazing, adhesive bonding and riveting, or combinations of joining methods, provided the repair is not clearly inadequate.
This means a generic pop-riveted patch on a load-bearing sill, rail, floor reinforcement, prescribed area, or other structural member should not be assumed to pass. At the same time, an OEM-approved rivet-bonded structural repair is not automatically unacceptable merely because it uses rivets and adhesive.
Inspection results depend on the repair location, structural function, materials, attachment, continuity, and apparent strength. Have a qualified repairer or MOT professional assess uncertain structural work before the vehicle returns to service.
How to Decide Between Rivets and Welding
Use this process before choosing a joining method:
- Identify the exact vehicle. Record the VIN, model year, body style, drivetrain, and relevant option package.
- Identify the part’s function. Determine whether it is trim, an outer cosmetic skin, a closure, a floor panel, a reinforcement, a pillar, a rail, or a mounting area.
- Find the OEM repair procedure. Check the exact replacement, sectioning, adhesive, rivet, weld, corrosion-protection, scan, and calibration requirements.
- Identify the material. Confirm whether the part is mild steel, high-strength steel, ultra-high-strength steel, aluminum, magnesium, composite, or a mixed-material assembly.
- Match the approved joint. Use the required spot weld, plug weld, butt weld, MIG braze, structural adhesive, rivet, screw, or combined process.
- Plan safety and access. Check both sides of the panel for wiring, fuel, restraints, trim, coatings, and high-voltage components.
- Restore corrosion protection. Include primer, seam sealer, paint, backside coating, cavity wax, and drain paths in the repair plan.
- Verify the finished joint. Inspect weld quality, rivet seating, adhesive cure and squeeze-out, panel fit, seam sealing, water tightness, and any required scan or calibration.
Rivets are useful when one-sided access, low heat, mixed materials, or future removal matters. Welding is useful when the approved procedure requires a fused joint and the material can safely accept the heat. Neither process should be selected only because it is cheaper or already available in the garage.
Simple Decision Table for Auto Body Repairs
| Repair situation | Likely choice | Important condition |
| Trim, splash shield, or lightweight cover | Pop rivets or original-style fasteners | The part must be non-structural, and the rivet must suit the material and grip range |
| Removable access panel | Rivets, rivet nuts, screws, or approved reusable fasteners | Do not drill into hidden wiring, fuel lines, restraints, or structural reinforcements |
| Cosmetic patch on a non-structural mild-steel skin | Pop rivets for utility work or an approved welded/bonded repair for a smooth finish | Seal the overlap and protect both sides from corrosion |
| Outer replacement panel or door skin | OEM-specified weld, adhesive, hem flange, rivet, or combined method | Do not substitute a generic attachment method |
| Aluminum-to-steel or another mixed-material joint | OEM-approved mechanical fastening and adhesive system | The joint may require electrical isolation to control galvanic corrosion |
| Pillar, rocker, rail, reinforcement, crash box, or structural floor | Exact OEM procedure | May require welding, rivet bonding, complete replacement, or a prohibited-repair decision |
| Suspension, steering, seat, or seat-belt mounting area | Professional OEM-compliant repair | Do not use a generic pop-riveted patch |
Frequently Asked Questions
When should you rivet instead of weld?
Use ordinary pop rivets for suitable non-structural attachments when one-sided access, low heat, or future removal matters. Use an OEM-specified rivet system whenever the repair procedure calls for structural blind rivets, self-piercing rivets, or rivet bonding. Weld only when the material and repair procedure approve that weld type and location.
Are structural blind rivets the same as ordinary pop rivets?
No. Both can be installed from one side, but an automotive structural blind rivet may have a specific body material, mandrel, head, grip range, installation force, and approved tool. Never substitute a similar-looking general-purpose rivet for the exact OEM-specified fastener.
Can you weld aluminum and steel together?
Ordinary MIG or TIG fusion welding is not a suitable body-shop method for directly joining aluminum to steel. The metals melt, expand, and react differently. Vehicle makers commonly use an approved combination of mechanical fasteners, adhesive, coatings, or specialist joining methods for mixed-material assemblies.
Why don’t body shops use pop rivets for every repair?
Ordinary pop rivets concentrate load at drilled holes and may not reproduce the strength, stiffness, sealing, fatigue resistance, or crash behavior of the original joint. Body shops use the vehicle maker’s specified welds, adhesives, structural rivets, screws, or combined methods instead.
Is welding always the strongest way to join car body panels?
No. A suitable weld may be stronger than a few ordinary pop rivets, but strength alone does not determine the correct repair. Rivet-bonded, weld-bonded, spot-welded, and adhesive joints are engineered for different materials and loads. Welding with the wrong process or heat can weaken advanced steel.
Can panel adhesive replace welding?
Only where the vehicle maker permits it. Some exterior panels use panel adhesive, while some structural joints use an approved impact-resistant adhesive together with welds or rivets. Do not use adhesive alone on pillars, rails, rockers, or reinforcements unless the exact repair procedure approves it.
Can pop rivets pass an MOT on body repairs?
A non-structural trim attachment may not affect the MOT, but a generic pop-riveted structural patch should not be assumed acceptable. The DVSA manual generally requires suitable welded patch repairs while also accepting manufacturer-recommended methods that use riveting, adhesive, MIG brazing, or combined joining systems when the repair is adequate.
Do rivets cause rust on car panels?
Rivets do not automatically cause rust, but drilling removes protective coatings and a lap joint can trap moisture. Incompatible metals can also create galvanic corrosion. Use compatible fasteners, protect bare metal, seal the joint, coat the backside, and restore cavity protection.
What is the strongest way to permanently join two pieces of metal?
There is no single strongest method for every joint. The result depends on the metals, thickness, joint shape, load direction, fatigue, environment, weld quality, fastener pattern, and adhesive system. For an automotive body repair, the strongest appropriate method is the one the vehicle maker specifies and the technician installs correctly.
Safety Disclaimer: This article provides general information and does not replace the vehicle maker’s repair procedure, technician training, workplace safety rules, or an inspection by a qualified collision-repair professional. Do not attempt structural, restraint-adjacent, suspension-mount, fuel-system, hybrid, electric-vehicle, or crash-critical repairs without the required information, equipment, and training.
Sources
- Honda Collision Repair Information — manufacturer body-repair manuals, position statements, material guidance, and collision-repair information
- Honda/Acura Body Repair Manual Welding and Sectioning Guideline Revisions — approved welding methods, steel-strength limits, wire selection, primer rules, shielding gas, and sectioning guidance
- I-CAR: Rivet Guns—Does My Shop Need Them? — structural blind-rivet and self-piercing-rivet tooling and OEM-procedure requirements
- 3M Collision Repair Panel Bonding SOP — panel preparation, adhesive application, clamping, and sealing practices
- OSHA Welding, Cutting, and Brazing Hazards and Solutions — welding fumes, radiation, burns, electrical hazards, PPE, and work controls
- DVSA MOT Inspection Manual: Structural Integrity and Corrosion — UK structural-repair, welding, riveting, bonding, and inspection guidance
Conclusion
The safest choice is not based on whether rivets or welds sound stronger. It depends on the exact panel, material, joint, load, vehicle, and approved repair method.
Use ordinary pop rivets for suitable trim, covers, access panels, lightweight brackets, and other clearly non-structural attachments. Use welding only where the vehicle maker approves the process, joint location, wire, settings, and heat input. When the procedure specifies structural blind rivets, self-piercing rivets, adhesive, or rivet bonding, use that complete system instead.
After either method, restore the factory corrosion protection on the visible face, inside the overlap, and behind the panel. Inspect the finished repair for movement, poor seating, incomplete fusion, adhesive problems, water entry, and exposed metal.
If the damage reaches a pillar, rail, rocker, restraint mounting, suspension mounting, crash structure, advanced steel, aluminum structure, or high-voltage vehicle area, have a qualified collision-repair professional inspect and repair it.




