
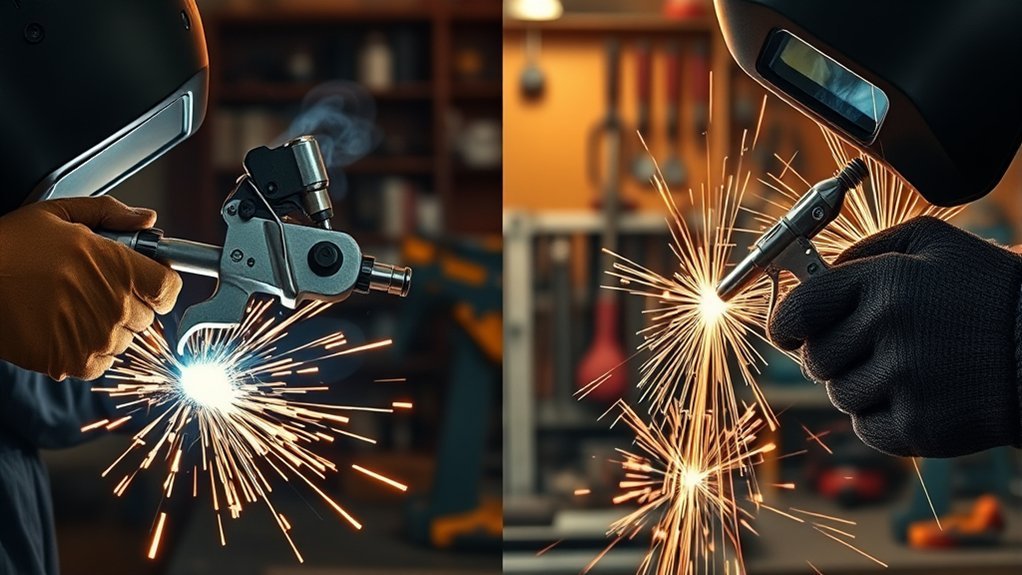
Choosing whether to push or pull a MIG weld depends on the wire, material, joint, welding position, and bead profile you need. For most gas-shielded solid-wire MIG welding, a small push angle is the best starting point. Drag flux-cored wire, push aluminum MIG, and always follow the wire data sheet or welding procedure for critical work.
Quick Answer
For gas-shielded solid-wire MIG, start by pushing the gun about 5 to 15 degrees for better joint visibility and a wider, flatter bead. Pulling usually makes the bead narrower and more convex, with a tendency toward greater penetration. Drag flux-core wire, and use a 10- to 15-degree push angle for aluminum MIG.
Key Takeaways
- Push, or forehand, points the gun toward the direction of travel and usually produces a wider, flatter bead with a clear view of the joint.
- Pull, drag, or backhand, points the gun back toward the puddle and usually produces a narrower, more convex bead with more buildup.
- Keep travel angle modest. A 5- to 15-degree angle is a common starting range; steep angles can reduce penetration, disturb shielding, and increase spatter.
- Drag flux-cored wire and push aluminum MIG unless the filler-metal manufacturer or welding procedure gives different instructions.
- Gun direction cannot fix poor setup. Voltage, wire feed speed, polarity, contact-tip-to-work distance, travel speed, joint preparation, and fit-up have a larger effect on weld soundness.
At a Glance
| Time Required | 5 to 10 minutes to compare push, pull, and near-neutral beads on matching scrap |
| Difficulty | Beginner to intermediate |
| Tools Needed | MIG or flux-core welder, correct wire and shielding gas, clean scrap, clamps, wire brush or grinder, welding pliers, helmet, safety glasses, gloves, and flame-resistant clothing |
| Cost | No special cost beyond normal wire, shielding gas, consumables, and practice scrap |
Warning: Welding creates intense light, hot metal, sparks, fumes, electric-shock risk, and fire hazards. Wear a properly selected welding helmet, safety glasses, gloves, hearing protection when needed, and flame-resistant clothing. Use effective ventilation and keep your head out of the fume plume. Never weld on a tank, drum, pipe, wheel, or closed hollow part that contains or previously contained fuel, solvent, gas, combustible dust, or another hazardous substance unless it has been professionally cleaned, vented, tested, and made safe for hot work. Follow OSHA welding requirements and OSHA hot-work guidance.
Comparing Push and Pull Techniques in MIG Welding
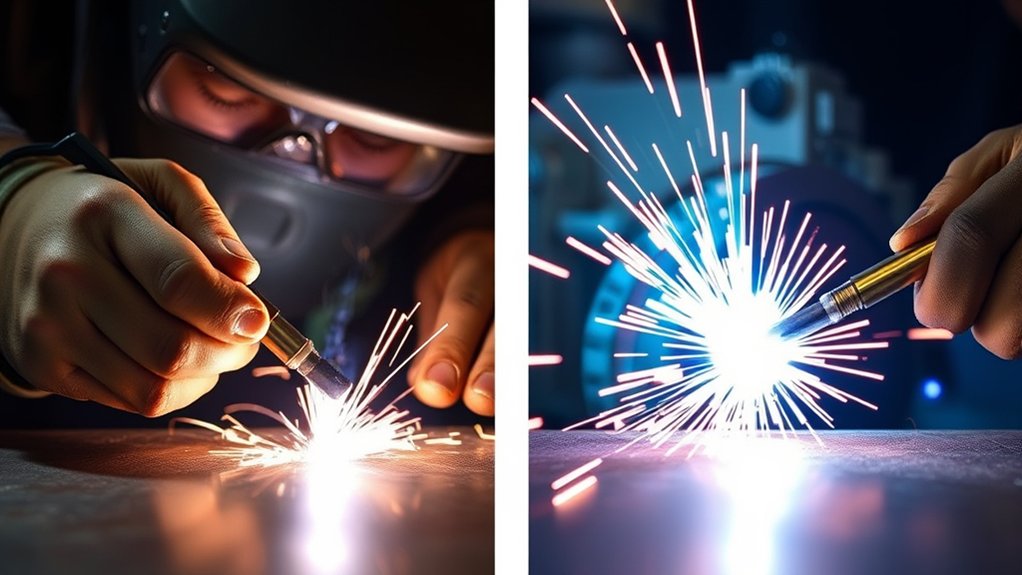
In MIG welding, push and pull describe the travel direction of the gun angle. They do not describe the direction that the machine feeds the wire. Weld quality still depends on voltage, wire feed speed, polarity, transfer mode, contact-tip-to-work distance, shielding gas, travel speed, joint fit-up, material thickness, and how steadily you control the puddle.
Push welding means the gun points slightly toward the direction of travel. You move the arc ahead of the puddle. This is also called forehand welding. It usually gives you a wider, flatter bead and a clearer view of the unwelded joint. It is a common starting choice for gas-shielded solid-wire MIG on mild steel and for aluminum MIG.
Pull welding means the gun points back toward the completed weld as you travel. You drag the puddle behind the arc. This is also called drag, trailing, or backhand welding. It usually produces a narrower, more convex bead with more buildup and may produce greater penetration than a comparable push angle.
The best technique is the one that produces complete fusion at both toes, adequate root fusion, stable shielding, and the bead shape required by the joint. For structural, pressure-containing, load-bearing, or code work, follow the approved welding procedure specification rather than choosing by appearance alone.
Push for visibility and a flatter bead; drag slag-producing wire; use the procedure, not a slogan, when weld strength is critical.
Travel Angle vs. Work Angle: Do Not Mix Them Up
Beginners often call every gun position “the angle,” but two different angles matter:
- Travel angle is the forward or backward tilt in the direction of travel. Push and pull refer to this angle.
- Work angle is the gun position across the joint. It directs the wire between the two pieces being joined.
For normal MIG welding conditions, Miller recommends a 5- to 15-degree travel angle. Travel angles beyond roughly 20 to 25 degrees can increase spatter, reduce penetration, and make the arc unstable. Start near perpendicular, add only a small push or drag angle, and keep it consistent.
| Joint | Typical Starting Work Angle | Purpose |
|---|---|---|
| Butt joint | About 90 degrees to the plate | Directs the wire into the center of the joint |
| T-joint fillet | About 45 degrees between both pieces | Balances the weld legs and toe fusion |
| Lap joint | About 60 to 70 degrees, biased toward the lower or thicker piece | Helps fuse the lower plate without melting away the upper edge |
Note: A “push-pull gun” is an aluminum wire-feeding system with drive rolls at the feeder and gun. It is not a travel-angle instruction. You can use a push-pull gun while still pushing the weld puddle.
Key Differences Between Push and Pull Techniques
Push and pull are not good or bad techniques by themselves. Each changes how the arc enters the joint, how the puddle freezes, and how the bead is shaped.
| Factor | Push / Forehand | Pull / Drag / Backhand |
|---|---|---|
| Gun direction | Gun points toward the direction of travel | Gun points back toward the finished weld |
| Typical bead shape | Wider and flatter | Narrower and more convex |
| Penetration tendency | Usually lower than a comparable drag angle | Usually greater than a comparable push angle |
| Visibility | Better view of the joint ahead of the puddle | Better view of the deposited bead and trailing puddle |
| Common starting uses | Gas-shielded solid wire, aluminum MIG, thin sheet, and flatter cosmetic beads | Flux-cored wire, joints needing more buildup, and some thicker-material applications |
| Main risk | A wide, shallow-looking bead if settings, fit-up, or preparation are inadequate | A tall, narrow, rope-like bead if the angle is steep or travel is poorly controlled |
Penetration is not controlled by gun direction alone. Lincoln Electric lists current, voltage, polarity, travel speed, electrode diameter, shielding gas, stickout, and travel angle among the variables that affect penetration. A modest drag angle may deepen the profile compared with a modest push angle, but a steep angle in either direction can reduce penetration.
Note: Push and pull do not replace proper setup. If the weld lacks fusion, correct the joint preparation, voltage, wire feed speed, polarity, gas flow, travel speed, and contact-tip-to-work distance before blaming gun direction.
Choosing by Wire Type and Transfer Mode
| Wire or Process | Best Starting Direction | Reason |
|---|---|---|
| Gas-shielded solid steel wire | Slight push | Good joint visibility and a flatter bead; drag remains usable when the joint needs a different profile |
| Aluminum MIG | 10- to 15-degree push | Keeps shielding gas ahead of the puddle and helps avoid dirty, porous welds |
| Self-shielded or gas-shielded flux-cored wire | Drag | Keeps slag behind the arc instead of allowing it to run ahead of the puddle |
| Metal-cored, pulsed, spray, or procedure-qualified work | Follow the wire data sheet or WPS | The approved technique may depend on transfer mode, position, joint, and mechanical-property requirements |
Miller’s flux-cored guidance says to drag slag-producing flux-cored wire. However, always confirm polarity, usable positions, stickout, and travel-angle limits on the wire label or manufacturer data sheet because those details vary by electrode classification.
Products Worth Considering

COMPATIBILITY: Designed for Lincoln Magnum 100L (K530 series) and Tweco Mini/#1 welding torches. This kit is also a direct fit for YESWELDER FLUX-135PRO Old Version/MIG-140DS PRO/YWM-160/MIG-165DS PRO/MIG-185DS PRO/MIG-205DS PRO/MIG-250PRO/MCT-520.

MIG welding gun accessory kit (0.035") for Miller Millermatic M-25/M-40 and Hobart H MIG gun.

Material Thickness Considerations for MIG Welding
Material thickness affects heat input, filler-metal volume, joint preparation, and the required penetration. It should not be reduced to a simple “thin equals push” or “thick equals pull” rule. On thin sheet, the priority is preventing burn-through and distortion. On thick steel, the priority is root and sidewall fusion.
| Material or Setup | Best Starting Technique | What to Watch |
|---|---|---|
| Thin steel under about 1/8 inch | Slight push or near-neutral gun angle | Use short welds, controlled travel, tight fit-up, and settings matched to the sheet to limit burn-through and distortion. For more detail, see this guide on MIG welding thin metal without burning through. |
| Medium steel from about 1/8 to 1/4 inch | Push, pull, or near-neutral based on the joint and required bead | Push for a flatter profile; pull for a narrower, more convex profile. Confirm fusion at both toes rather than judging only the bead face. |
| Thick steel over about 1/4 inch | Technique depends on preparation, transfer mode, position, and procedure | Bevel when required, use adequate power, maintain the root opening, and use multiple passes when needed. Do not rely on drag angle to replace joint preparation. |
| Aluminum MIG | Push | Use a 10- to 15-degree push angle, clean the oxide with a dedicated stainless-steel brush, use the correct filler alloy and shielding gas, and avoid dragging contamination into the puddle. If you are comparing unusual aluminum wire processes, read this separate guide on welding aluminum with flux-core, but do not assume ordinary steel flux-core equipment or wire is suitable for aluminum. |
| Flux-cored wire | Pull / drag | Drag so the slag stays behind the puddle. Flux-core can tolerate some surface contamination better than solid wire, but the metal should still be cleaned as thoroughly as practical. For thin work, review these tips on welding thin metal with flux-core. |
Paint, rust, oil, moisture, mill scale, plating, and coatings can cause porosity, spatter, unstable arc behavior, and poor fusion. Remove coatings from the weld zone using a safe method and provide suitable fume control. Zinc oxide from galvanized steel can cause metal fume fever, and some paints or plated surfaces may contain more serious hazards. This guide to MIG welding galvanized steel explains the preparation concerns, while OSHA’s welding hazard guidance covers fume and radiation risks.
Products Worth Considering

Portable: pulling this metal gauge tool out of your pocket to measure metal is quicker and easier than using a tape measure
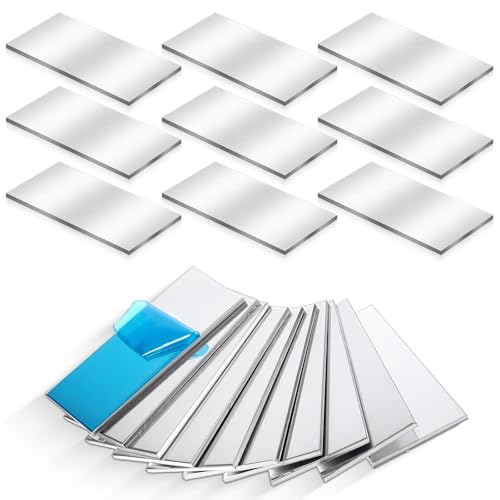
Detailed Dimensions with Ample Quantity: Our package includes 20 pieces of aluminum sheet welding kit, each crafted to precise dimensions of 2 x 4 inches (5 x 10 cm) with a thickness of 1/8 inches (3 mm). These plates are perfect for tasks demanding precision, such as laser cutting and professional welding, delivering consistent results every time.

🎲Superior Processing: Our steel plates are all laser-cut, providing edge and overall flatness that is unmatched by other stamped and sheared components.
How Joint Design and Position Affect Welding Techniques
Joint design affects whether the weld must spread, reach a root, bridge a gap, or build a fillet. Welding position affects how gravity moves the puddle. Match the travel direction and work angle to both factors instead of using the same motion for every weld.
- Butt joints: Use a slight push or near-neutral angle for thin sheet. On thicker beveled joints, direct the wire into the root and follow the required pass sequence.
- Fillet welds: Start with a work angle near 45 degrees. A slight push can flatten and wash the bead into both legs; a slight drag can add crown and buildup.
- Lap joints: Bias the work angle toward the lower or thicker piece. A slight push can help protect the upper edge on thin sheet, but fusion into the lower plate must still be visible and verified.
- Vertical-down welding: Commonly used on thinner material because faster travel limits heat input and penetration. Keep the arc on the leading edge of a small puddle.
- Vertical-up welding: Commonly used when thicker material needs greater penetration and deposition. Use a controlled puddle and the motion required by the procedure.
- Overhead welding: Push, drag, or near-perpendicular techniques can all work with solid-wire MIG. Keep the puddle small, use controlled parameters, limit weaving, and travel fast enough to prevent molten metal from sagging.
- Aluminum joints: Push the puddle to keep shielding gas ahead of the arc and reduce contamination.
Pro Tip: Before welding the real part, run three beads on matching scrap with identical settings: one slight push, one near-neutral, and one slight pull. Label them, then compare bead width, crown, toe tie-in, undercut, porosity, and the back or cut section for penetration.
How to Choose Push or Pull Before You Weld
Use this decision process before striking the arc:
- Identify the process and wire. Gas-shielded solid wire often starts with a push. Flux-cored wire usually starts with a drag. Aluminum MIG uses a push.
- Read the wire label or data sheet. Confirm polarity, usable positions, recommended stickout, shielding gas, and any technique limits.
- Check the material and coating. Clean the weld zone and identify galvanized, plated, painted, stainless, or unknown material before heating it.
- Check the joint preparation. Confirm bevel, root opening, alignment, tack spacing, and access to both toes.
- Set the work angle. Aim the wire where fusion is needed across the joint.
- Set the travel angle. Start around 5 to 15 degrees and avoid a steep push or drag angle.
- Set contact-tip-to-work distance and parameters. Use the machine chart, filler-metal guidance, or WPS as a starting point.
- Watch the leading edge and both toes. The puddle should tie into both pieces without rolling ahead, undercutting, or piling up.
- Test on matching scrap. For strength-critical work, use the inspection or test method required by the procedure rather than relying on bead appearance.
If the bead sits high and narrow, reduce the travel angle, verify voltage and wire feed speed, and try a slight push. If the bead is excessively wide, underfilled, or lacks root fusion, review travel speed, stickout, parameters, and joint preparation before switching directions.
How to Read the Bead and Correct the Technique
| What You See | Possible Causes | What to Check |
|---|---|---|
| Tall, narrow, rope-like bead | Steep drag angle, low voltage, excessive wire feed for the voltage, slow travel, or poor wetting | Reduce the angle, verify parameter balance, and confirm both toes are fusing |
| Very wide, flat bead | Steep push angle, high voltage, slow travel, or excessive heat input | Return closer to perpendicular, verify settings, and check for undercut or burn-through |
| Undercut at a toe | Too much voltage, excessive travel speed, wrong work angle, steep travel angle, or poor pause at the toe | Correct the work angle and parameters; keep the puddle tied into both edges |
| Porosity or pinholes | Wind, gas leak, dirty nozzle, contaminated metal or wire, wrong gas, excessive stickout, or poor gun angle | Stop and correct shielding and cleanliness before continuing |
| Slag inclusions with flux-core | Pushing the puddle, poor cleaning between passes, low heat, or bad bead placement | Drag the wire, remove all slag between passes, and verify procedure settings |
| Cold-looking bead with poor toe fusion | Low heat, long stickout, travel too fast, poor preparation, or arc placed on the puddle instead of the leading edge | Correct settings and arc placement; do not assume a drag angle alone will solve it |
Common Mistakes That Ruin Push or Pull MIG Welds
A poor weld often comes from setup problems rather than the basic choice between push and pull. Watch for these common mistakes:
- Using too steep a travel angle: This can cause undercut, spatter, reduced penetration, poor shielding, and an uneven bead.
- Confusing travel angle with work angle: The travel direction can be correct while the wire is still aimed at the wrong side of the joint.
- Letting stickout get too long: Excessive contact-tip-to-work distance can make the arc unstable and reduce heat at the joint.
- Moving too slowly: Slow travel can overheat thin metal, create a wide bead, and increase burn-through or distortion.
- Moving too fast: Fast travel can create a narrow, underfilled bead with poor toe fusion.
- Welding dirty or coated metal: Rust, paint, oil, moisture, plating, and coatings can create porosity, fumes, and weak fusion.
- Pushing flux-cored wire: Slag can run ahead of the puddle and become trapped in the weld.
- Ignoring gas coverage: Wind, leaks, a blocked nozzle, the wrong flow setting, or excessive stickout can cause porosity even when the gun angle looks correct.
- Using the wrong polarity: Some solid wires and flux-cored wires require different polarity. Follow the machine and wire instructions.
- Trying to fix thick welds with gun angle alone: Thick joints may need bevels, adequate root opening, higher-capacity equipment, multiple passes, and a qualified procedure.
If your MIG weld still looks rough after correcting the gun angle, check wire feed, voltage, polarity, gas flow, contact-tip-to-work distance, travel speed, and preparation. This troubleshooting guide on MIG welding problems and solutions can help you narrow down the cause.
Mastering MIG Welding Techniques: Tips for Push and Pull
Mastering push and pull technique comes down to consistency. Keep the gun angle, work angle, stickout, and travel speed steady. Change one variable at a time so you can see what caused the result.
- Start with a slight push on gas-shielded solid-wire MIG. It gives you a clear view of the joint and a flatter bead while you dial in the settings.
- Try a modest pull when the weld needs more crown or a narrower profile. Keep the angle small so the bead does not become tall and rope-like.
- Drag flux-cored wire. Let the slag form behind the puddle and clean it fully between passes.
- Push aluminum MIG. Keep shielding gas ahead of the puddle and clean the oxide before welding.
- Keep the nozzle and contact tip in good condition. Spatter buildup and worn consumables can disturb gas coverage and wire placement.
- Control travel speed. The bead should wet into both edges without piling up, undercutting, or washing out too wide.
- Use sound fit-up. Gaps, poor clamps, and uneven edges can make either technique fail.
- Inspect more than the bead face. A smooth-looking weld can still lack root or sidewall fusion.
For practice, weld several straight beads on the same plate using identical settings. Push one, pull one, and run one nearly perpendicular. Label them, inspect the profiles, and then repeat with one controlled setting change. That comparison teaches more than memorizing one rule.
Frequently Asked Questions
When MIG welding, should I push or pull?
For gas-shielded solid-wire MIG, start with a slight push angle of about 5 to 15 degrees. It usually provides a clear view of the joint and a flatter bead. Use a modest pull when the joint needs a narrower, more convex bead, or when the welding procedure calls for it.
Is push or pull better for welding?
Neither is always better. Push is a common default for gas-shielded solid wire and aluminum because it improves joint visibility and produces a flatter profile. Pull is required for most flux-cored wires and can produce more buildup. The wire, position, joint, and procedure decide the correct technique.
Does pulling a MIG weld give more penetration?
A modest pull angle commonly produces more penetration than a comparable push angle, but the difference is only one part of the weld. Current, voltage, polarity, travel speed, stickout, shielding gas, electrode diameter, joint preparation, and transfer mode also affect penetration. A steep angle in either direction can reduce it.
What angle should I hold a MIG gun?
Use the work angle required by the joint, then add a travel angle of about 5 to 15 degrees. Avoid laying the gun down at a steep angle. Keep the contact-tip-to-work distance steady and aim the wire at the leading edge of the puddle and the area that needs fusion.
Should you push or pull 7018?
7018 is a stick electrode, not MIG wire. In flat and horizontal work, it is commonly run with a slight drag angle and a short arc. Other positions may require a different electrode angle and motion, so follow the electrode data sheet, welding procedure, and position-specific training.
Do you push or pull overhead MIG?
For overhead solid-wire MIG, push, pull, or near-perpendicular techniques can work. Keep the puddle small, use controlled settings and a steady stickout, avoid a wide weave, and travel fast enough to keep molten metal from sagging. Follow the WPS for critical welds.
Should you push or pull flux-core wire?
Pull or drag flux-cored wire unless the wire manufacturer or procedure gives different instructions. Flux-cored welding creates slag, and dragging helps keep that slag behind the puddle instead of allowing it to run ahead and become trapped.
Should you push or pull aluminum MIG?
Push aluminum MIG welds with about a 10- to 15-degree travel angle. Pushing keeps shielding gas ahead of the puddle and helps reduce dirty, porous welds. Clean the oxide, use the correct filler alloy and pure argon or the specified shielding gas, and use a suitable aluminum wire-feed setup.
Is a push-pull MIG gun the same as pushing the weld?
No. A push-pull gun is a wire-feeding system, usually used to feed soft aluminum wire through a longer cable. Pushing or pulling the weld describes the travel angle of the gun. A welder can use a push-pull gun and still use a push travel technique.
Conclusion
Push and pull MIG welding techniques both have a place. For most gas-shielded solid-wire MIG work, a slight push angle is the best starting point because it gives you good joint visibility and a flatter bead. Use a modest pull when the joint needs more crown or a narrower profile, drag flux-cored wire, and push aluminum MIG. The strongest result comes from matching travel angle, work angle, wire, polarity, settings, preparation, position, and the welding procedure instead of relying on one rule for every job.
Sources
- Miller Welds — Understanding the Basics of MIG Welding for Mild Steel — supports push-versus-drag bead tendencies, travel angles, joint work angles, and welding-position guidance.
- Miller Welds — Flux-Cored Welding: The Basics for Mild Steel — supports dragging flux-cored wire, normal travel-angle ranges, preparation, and slag control.
- Miller Welds — How to Successfully MIG Weld Aluminum — supports the 10- to 15-degree push angle, cleaning, gas coverage, and aluminum technique.
- Lincoln Electric — Variables That Affect Weld Penetration — supports the many setup and technique variables that control penetration.
- OSHA 29 CFR 1910.252 — Welding, Cutting, and Brazing — supports eye protection, protective clothing, ventilation, confined-space, and hot-work precautions.
- OSHA — Hot Work and Welding — supports fire and explosion precautions for tanks, drums, containers, fuel residue, and other combustible hazards.




