
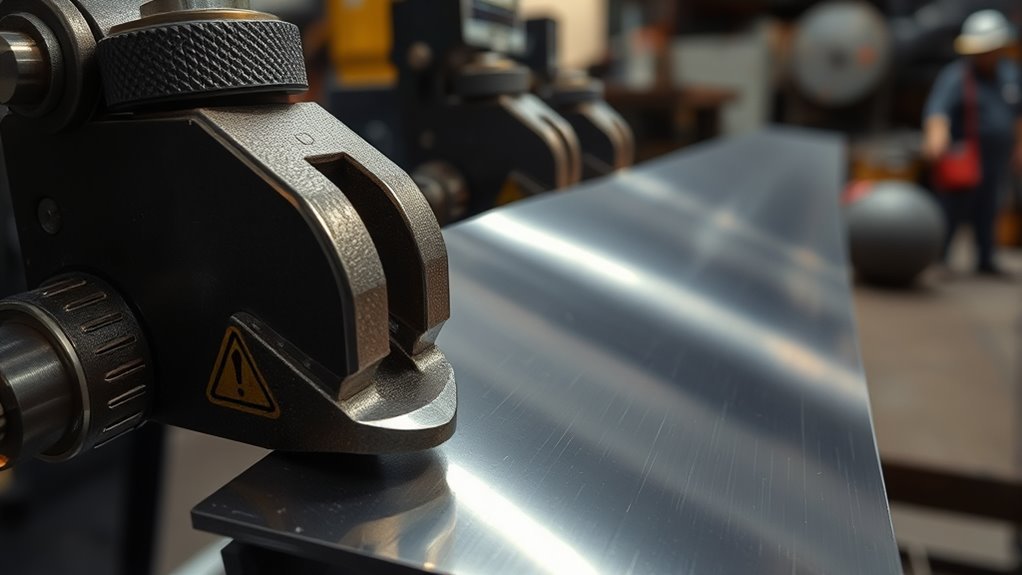
A sheet metal shrinker stretcher helps form curved flanges, wheel-opening lips, patch-panel edges, door-skin returns, brackets, and other shaped sheet-metal parts. The shrinker shortens an edge, while the stretcher lengthens it. The tool works best when you prepare a flange, use light repeated bites, and compare the part with a template as the curve develops.
Quick Answer
A sheet metal shrinker stretcher grips a flange with toothed jaws. Shrinker jaws move the metal inward to shorten the edge and form an inside curve. Stretcher jaws move it outward to lengthen the edge and form an outside curve. Use many light bites, not one hard squeeze.
Key Takeaways
- Shrink an edge to tighten an inside curve; stretch it to open an outside curve.
- A shrinker stretcher works mainly on an edge or pre-bent flange, not across the broad center of a flat panel.
- Secure the machine, install the correct jaws, clean the workpiece, and test the setup on matching scrap before shaping the final part.
- Use small, evenly spaced bites and check the curve after each pass to limit waves, cracks, thinning, and deep tooth marks.
- Material capacity, throat depth, flange depth, and maintenance rules vary by machine, so the model manual controls.
At a Glance
| Time Required | About 15–60 minutes for a small flange or patch-panel edge, plus setup and test fitting |
| Difficulty | Beginner to intermediate; thin, soft sheet and gentle curves are easiest |
| Tools Needed | Securely mounted shrinker stretcher, correct jaw set, sheet-metal brake or flange-forming tools, marker, template, deburring tool, eye protection, and suitable hand protection for sharp sheet |
| Cost | Low per part once the machine is available; purchase cost varies widely by capacity, throat depth, and manual, pneumatic, or electric operation |
Getting to Know Shrinker Stretchers
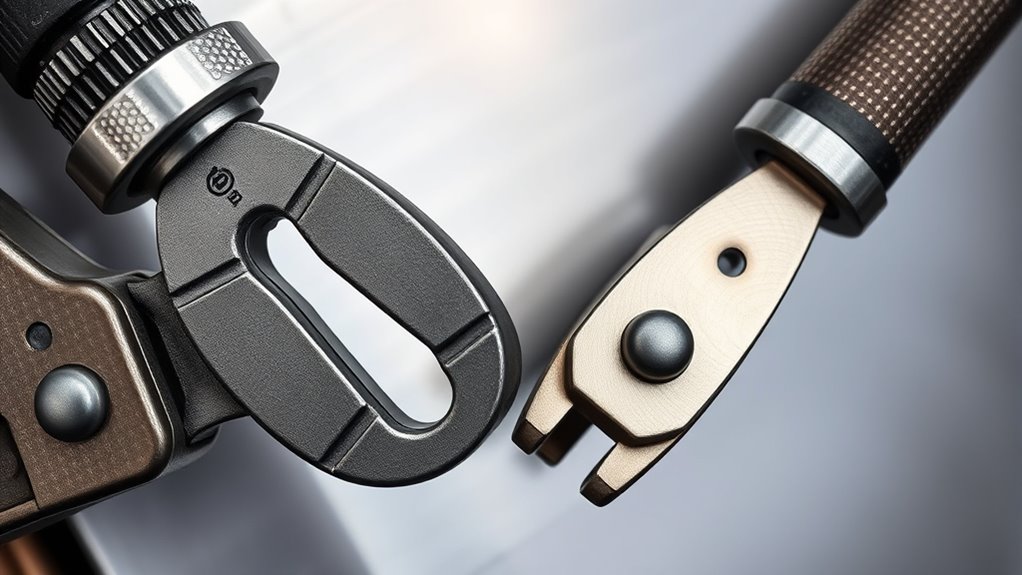
A shrinker stretcher is an edge-forming tool. Instead of bending the whole panel at once, its jaws change the length of a narrow area along the edge. That length difference makes the panel turn into a curve.
The shrinker jaws grip the flange and move small areas of metal toward one another. This shortens the worked edge and draws it into an inside curve. The stretcher jaws grip and move the metal apart. This lengthens the edge and opens it into an outside curve.
Many jobs begin with a straight flange formed on a sheet-metal brake. The shrinker stretcher then changes the flange length while the main panel follows the new radius. Manufacturer instructions for common bench tools recommend making a template, pre-bending the flange, and shaping the edge in several passes rather than trying to reach the final curve in one bite. See the Eastwood Shrinker Stretcher Combo Set instructions for one model-specific example.
Some machines use interchangeable jaw sets in one body. Others have separate shrinker and stretcher heads, which avoids repeated tooling changes. Hand levers, foot pedals, pneumatic actuators, and electric drives are all available, but the drive type alone does not determine capacity. The machine’s rated material, gauge, throat depth, and jaw design matter more.
Foot operation is often convenient for long or awkward panels because both hands remain available to support and guide the workpiece. Hand-operated machines are compact and useful for small brackets, short flanges, and occasional repairs. Powered machines can speed repeated production work, but they also require the manufacturer’s guarding and energy-isolation procedures.
Distortion is still possible. Heavy pressure can leave deep jaw marks, create local waves, thin stretched areas, buckle a flange, or crack material that is hard, damaged, or already work-hardened. Small steps give you more control than brute force.
If the shaped panel will later be welded, good fit-up and controlled heat input management can help limit added warping during assembly.
Warning: The jaws and linkage create crushing and pinch hazards. Secure the machine to a solid bench or stand, keep fingers out of the point of operation, wear eye protection, control sharp sheet edges, and never exceed the manufacturer’s rated capacity. OSHA also requires protection from point-of-operation and ingoing nip-point hazards in workplaces.
How a Sheet Metal Shrinker Stretcher Works
A shrinker stretcher changes a panel’s shape by changing edge length. The worked flange becomes shorter or longer than the nearby sheet, so the panel must curve to accommodate the difference.
- Shrinking compresses the edge: The jaw motion gathers small areas of metal together. The shortened flange pulls the panel toward an inside curve.
- Stretching lengthens the edge: The jaw motion spreads small areas of metal apart. The lengthened flange pushes the panel toward an outside curve.
- Repeated bites build the radius: A smooth curve usually comes from several light passes across the full work area.
- Jaw marks show where the metal moved: Light tooth marks are normal on many machines. Deep marks suggest excessive pressure, contamination, damaged jaws, or a soft material that needs gentler handling.
- The throat limits reach: Throat depth is the distance the machine can reach in from the panel edge. It is not the same as the maximum flange depth or material capacity.
Shrinking makes a flange shorter, stretching makes it longer, and the panel curves because the worked edge no longer has the same length as the nearby sheet.
Choose Shrinking or Stretching
Look at the direction the flange must travel before choosing the jaws. The terms “inside” and “outside” describe the resulting curve, not which face of the sheet is up.
| Desired Result | Jaw Set | What Happens |
|---|---|---|
| Tighten a flange around an inside corner or concave curve | Shrinker | The flange edge becomes shorter and draws the panel inward. |
| Open a flange around an outside corner or convex curve | Stretcher | The flange edge becomes longer and pushes the panel outward. |
| Correct a small amount of over-shaping | Opposite jaw set, used lightly | A few light bites may bring the radius back, but repeated reversing can mark, thin, or work-harden the edge. |
Prepare the Machine and Workpiece
Good shaping begins before the first bite. Set up the machine and metal so the jaws can grip evenly and the workpiece can move without hitting a wall, stand, or nearby tool.
- Read the model manual: Confirm the approved materials, maximum gauge or thickness, throat depth, flange limits, mounting method, jaw-change procedure, and lubrication points.
- Secure the machine: Bolt it to a stable bench, pedestal, or manufacturer-approved stand. A loose tool can twist, tip, or move under lever force.
- Inspect the jaws and linkage: Look for packed metal, rust, chips, loose fasteners, damaged teeth, binding, or uneven jaw movement.
- Isolate powered equipment: Before changing jaws or servicing pneumatic or electric machines, disconnect and control all energy sources according to the manufacturer’s procedure. Workplace servicing may also fall under OSHA’s hazardous-energy control requirements.
- Prepare the sheet: Deburr sharp edges and remove loose scale or debris that could prevent even grip. Do not shape across weld beads, heavy dents, or damaged areas unless the machine manufacturer permits it.
- Form the flange: Most common jobs require a straight flange before shrinking or stretching. Use a brake, tipping tool, hammer form, or other suitable method. Keep the flange within the machine’s reach and model limits.
- Make a template: Trace the intended radius from cardboard, thin MDF, flexible pattern material, or a matching body opening.
- Test matching scrap: Use the same alloy, thickness, temper, coating, and flange width when possible. The test shows how quickly the material moves and how visible the tooth marks will be.
Warning: Do not cycle toothed shrinker or stretcher jaws with no metal between them unless the machine manual expressly allows it. Some manufacturers warn that dry cycling can damage the hardened gripping teeth.
How to Shrink and Stretch Sheet Metal Step by Step
To shape metal cleanly, control four things: jaw choice, bite pressure, bite spacing, and the number of passes. There is no universal number of strokes or fixed pressure setting because machines and materials respond differently.
Use the stretch jaws to lengthen the flange. The worked area may become slightly thinner, so stop before the edge tears or feels weak. Use the shrink jaws to shorten the flange. The edge may bunch or pocket as it gathers, which can often be blended with lighter passes, support from a dolly, or careful planishing after the main radius is formed.
Use stretcher jaws for outside curves and shrinker jaws for inside curves, then build the radius with light passes across the full marked area.
- Control pressure with the foot pedal or hand lever so each bite is repeatable.
- Keep the panel supported and level so its weight does not twist the flange in the jaws.
- Correct only small errors with the opposite jaw set; repeated back-and-forth forming can overwork the metal.
- If the shaped metal will later be welded into a structural joint, consider the practical maximum fillet weld size and joint design before finalizing the flange.
Basic Shrinking Steps
- Mark the work area: Show where the curve begins, where it ends, and any areas that need extra movement.
- Install the shrinker jaws: Follow the machine’s jaw-change procedure and make sure the upper and lower tooling is fully seated and secure.
- Insert the flange consistently: Start near the outer edge of the flange. Do not push the sheet deeper than the model allows or farther than needed for the first pass.
- Apply a light bite: Press the pedal or lever only enough to move the metal slightly, then release fully.
- Move and repeat: Advance the panel a small, even distance. Work across the complete marked area instead of concentrating on one spot.
- Make another pass if needed: Return to the start and repeat with similar pressure. Increase jaw depth gradually only when the shape calls for it and the manual permits it.
- Check the radius: Compare the panel with the template after every pass. Account for a small amount of springback when the load is released.
- Blend high spots: Use controlled planishing or a soft mallet and dolly after the basic curve is correct.
Basic Stretching Steps
- Install the stretcher jaws: Relax the manual mechanism or isolate power and stored energy before changing tooling.
- Support the workpiece: Hold the panel so the flange enters squarely and the sheet does not lever sideways against the jaws.
- Start with shallow, light bites: Stretch a little at a time and move through the work area with even spacing.
- Watch the surface: Stop if you see edge cracks, tearing, severe necking, or a sudden change in resistance.
- Test the curve: Compare it with the template and stop before the radius opens too far.
- Blend the marks: Light planishing can smooth minor high spots. Avoid aggressive grinding that removes meaningful sheet thickness.
Pro Tip: Number your passes with a marker and keep the bite depth consistent within each pass. This makes it easier to repeat a successful curve on a matching left- or right-side part.
Materials, Gauge, and Machine Capacity
A shrinker stretcher works best on ductile sheet that the machine is designed to handle. Capacity is model-specific. Never assume that a powered unit, a deeper throat, or a longer handle automatically means the machine can form thicker metal.
As one example—not a universal limit—Eastwood lists its standard combo model for up to 18-gauge mild steel, 16-gauge aluminum, and 20-gauge stainless steel. Its deep-jaw model has different reach and capacity. Always use the specifications for the exact machine in front of you rather than copying another model’s numbers.
| Material | How It Usually Behaves | Best Practice |
|---|---|---|
| Mild steel sheet | Common for automotive patches and generally predictable within the tool’s rated gauge. | Use steady pressure, clean bare contact areas, and several light passes. |
| Aluminum sheet | May move readily but can pick up tooth marks, work-harden, or crack depending on alloy and temper. | Use lighter bites, clean aluminum buildup from the jaws as directed, and stop at the first sign of cracking. |
| Copper and brass | Some grades form well, while others harden quickly or mark easily. | Confirm the machine allows the alloy, test scrap, and avoid guessing at an annealing process. |
| Stainless steel | Usually requires more force and may work-harden faster than mild steel. | Use only within the stated stainless capacity and stop if resistance rises sharply. |
| Painted, coated, or galvanized sheet | Coatings can mark, flake, contaminate jaws, or hide cracking. | Follow the material and machine instructions. Do not heat or grind coatings without the correct hazard controls. |
Note: “Gauge” is not one universal thickness across all metals. Check the actual thickness and material listed in the machine manual, especially when switching between steel, stainless steel, and aluminum.
Products Worth Considering

[Two-in-One Shrinker & Stretcher]: Switch between shrinking and stretching instantly without swapping jaws. This metal shrinker stretcher for auto body repair features two independently mounted jaws—one for shrinking and one for stretching—that work simultaneously. Simply step on the left pedal to shrink metal for curved panels, or press the right pedal to stretch metal for flanges and edges

【2-in-1 Dual Jaw Design】This metal shrinker stretcher features independent shrinking and stretching jaws that work simultaneously without jaw changes, making it a versatile 2-in-1 sheet metal shrinker stretcher for efficient work.

Dual-Function Combo Set – Includes both a metal shrinker and a stretcher in one package, allowing you to effortlessly curve, bend, or form sheet metal with precision—ideal for shaping wheel arches, door panels, and custom projects.
Practical Techniques for Cleaner Curves
Good results come from repeatable setup and frequent checking. Align the jaws so they close evenly, keep the panel supported, and apply gradual pressure with the pedal or lever. If one side of the bite receives more force, the flange can twist instead of curving smoothly.
For automotive projects, use shrinking and stretching as controlled corrections rather than as a constant back-and-forth process. Light stretching can correct a small over-shrink, and light shrinking can tighten a slightly over-stretched edge. Large corrections are more likely to damage or weaken the flange.
Keep the jaw teeth and workpiece clean. Dirt, filler dust, paint chips, and aluminum pickup can reduce grip or emboss debris into the panel. Understanding related skills, such as flux core welding, can also help when the shaped piece later needs to be attached to a noncritical repair panel or fabrication project.
| Technique | Why It Helps |
|---|---|
| Jaw alignment | Promotes even grip and reduces twisting, slippage, and one-sided tooth marks. |
| Gradual pressure | Makes each bite easier to control and lowers the risk of overshooting the radius. |
| Clean surface | Improves grip and keeps trapped debris from creating dents or scratches. |
| Full-pass shaping | Spreads movement across the curve instead of making one tight, lumpy spot. |
Spacing Your Bites
Bite spacing matters. If bites are too far apart, the curve may become faceted or lumpy. If they overlap too heavily, the edge can wrinkle, thin, or become overworked. Start with even spacing and similar pressure, then add another complete pass only where the template shows that more movement is needed.
Controlling Bite Depth
Start near the outer edge of the flange, where less material must move. On machines whose manuals permit it, later passes can reach farther into the jaws to blend pocketing and distribute the shape. Do not treat another machine’s “halfway into the jaws” instruction as universal; use the depth guidance for your model.
Using Templates and Test Pieces
Before shaping the final part, test the machine on scrap of the same material and thickness. A test piece shows how much pressure the sheet can take, how quickly the radius changes, whether the jaw marks will remain visible, and how much springback to expect.
Smoothing After Shrinking or Stretching
After the main curve is formed, use a soft mallet, dolly, planishing hammer, or English wheel as appropriate for the panel and finish. Support the metal and use light blows. Do not remove deep jaw marks by grinding away substantial material, because excessive stock removal can thin and weaken the edge.
Types of Shrinker and Stretcher Machines
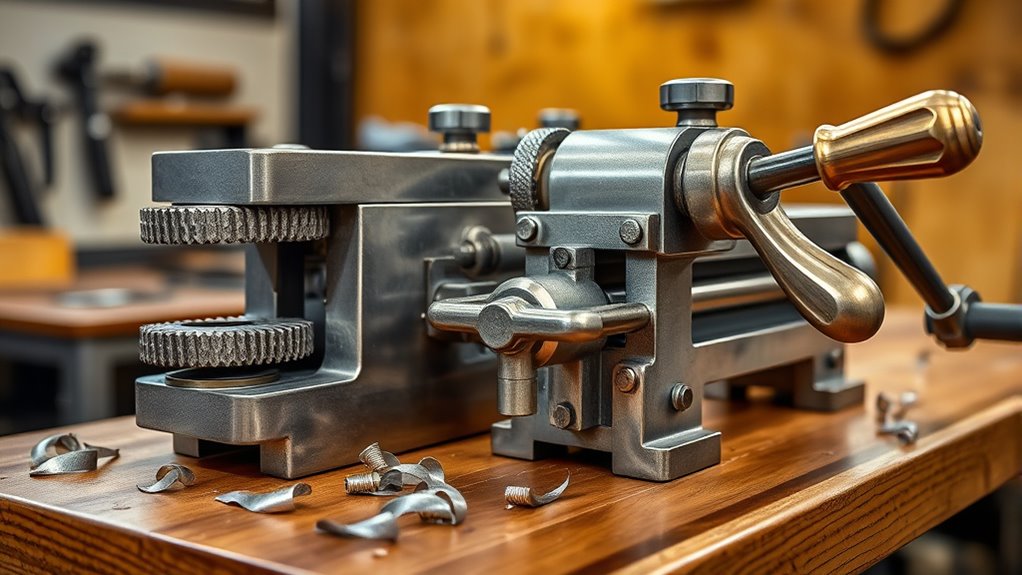
Shrinker stretcher machines differ in drive method, throat depth, frame stiffness, jaw style, and rated capacity. Choose the tool around the material and the parts you actually plan to form.
Choose a shrinker stretcher by verified material capacity, usable throat depth, jaw availability, mounting needs, and control—not by drive type alone.
- Foot-operated machines: These leave both hands free to guide the sheet. They are useful for longer curves and larger workpieces, provided the stand is stable and the machine is rated for the material.
- Hand-operated machines: These are compact and straightforward for short flanges, small repair pieces, and occasional shop use.
- Pneumatic and electric models: These can improve speed and consistency in higher-volume work. Their actual thickness capacity is model-specific, and powered operation adds guarding, setup, and energy-control requirements.
Some machines require you to swap jaws. Others use separate shrinker and stretcher bodies so both operations remain ready. If your shop also cuts or welds metal, learning about tools such as a plasma cutter welder combo can help you plan a broader fabrication setup.
Products Worth Considering

Includes two body and two jaws

16 Gauge Sheet Metal Capacity: The FSM-16 sheet metal shrinker stretcher is designed for mild steel sheet metal up to 16 gauge / 1.5 mm, helping form curved flanges, radius panels, and custom sheet metal shapes.

【Great Durability】Metal sheet shrinker stretcher is made of hard and durable iron and will not be easily deformed or damaged. We have also coated the metal surface with high-quality paint. So this machine will have a long service life and you can use it with confidence.
Hand vs. Foot-Operated Shrinker Stretcher
| Machine Type | Best Use | Main Advantage |
|---|---|---|
| Hand-operated | Small brackets, short flanges, light repair pieces, and limited shop space | Simple, portable, and easy to store |
| Foot-operated | Automotive panels, longer curves, repeated shaping, and larger workpieces | Leaves both hands free to support and guide the metal |
| Pneumatic or electric | Higher-volume work and repeatable forming within the machine’s rating | Faster cycling with less operator effort |
Common Projects for a Sheet Metal Shrinker Stretcher
A shrinker stretcher is especially useful when a flat sheet needs a curved flange or lip. It is common in automotive restoration, custom fabrication, HVAC-style sheet work, metal art, motorcycle panels, and some aircraft-style panel fabrication. Critical aircraft, vehicle-structure, or safety-related repairs must follow the approved repair data for that application.
- Wheel-arch repair panels: Shrinking and stretching help a flange follow the fender-opening radius.
- Door and quarter-panel patches: The tool can shape returns that match an existing body line.
- Window and windshield flanges: Controlled edge movement can reproduce a curved reveal or opening.
- Curved trim pieces: Light-gauge metal can be formed into smooth decorative curves.
- Motorcycle fenders and guards: Gradual stretching or shrinking can tune the edge while other forming tools shape the broader crown.
- Custom brackets and channels: Shrinking can tighten a flange around a corner, while stretching can open it.
Note: A shrinker stretcher is not a substitute for a brake, bead roller, English wheel, power hammer, or planishing tools. It controls edge length; other tools may still be needed to form the panel face, crown, beads, and straight bends.
Troubleshooting Common Issues With Shrinker Stretchers
If the tool is not producing a clean curve, check the setup before increasing force. Inspect machine mounting, jaw cleanliness, jaw alignment, material condition, flange width, bite spacing, and the rated capacity.
Maintain the foot pedal or hand lever so it moves smoothly and returns as designed. A sticking pedal, loose pivot, binding linkage, or unstable stand can make pressure feel unpredictable.
Watch for excessive curling or pocketing while shrinking. Reduce pressure, distribute the bites across a wider area, and make complete passes rather than concentrating force in one spot.
If you see pronounced jaw marks after stretching, reduce pressure and inspect the jaws for dirt, damage, aluminum pickup, or an overly aggressive tooth pattern for the finish you need.
Keep abrasive dust away from the jaws. If you grind or cut metal at the same bench, use suitable grinder-rated accessories, control sparks and debris, and clean the forming tool before use.
If these checks do not solve the problem, stop and consult the instructions or service support for the exact machine. Do not extend the handle or improvise extra leverage to force material beyond the tool’s design.
| Problem | Likely Cause | Fix |
|---|---|---|
| Deep jaw marks | Too much pressure, dirty or damaged jaws, trapped debris, or very soft sheet | Reduce pressure, clean and inspect the jaws, and test matching scrap first |
| Cracking at the edge | Material is overworked, too hard for the process, damaged, or stretched too far | Stop, inspect the part, use smaller bites, verify alloy and temper, or replace the material |
| Uneven or faceted curve | Irregular bite spacing, uneven pressure, or too much work in one zone | Mark the work area and use even bites in complete passes |
| Panel twists | Workpiece is unsupported, flange enters at an angle, or jaws are misaligned | Support the sheet, keep it square to the jaws, and inspect jaw alignment |
| Machine feels weak or binds | Loose mounting, wrong jaws, dirty linkage, damaged components, or material beyond capacity | Stop, secure the stand, verify tooling and capacity, then inspect and service the mechanism |
| Curve springs back | Normal elastic recovery or a material condition that resists forming | Use another light, even pass and test frequently instead of adding one heavy bite |
Maintenance and Safety Tips
Good maintenance keeps the machine predictable and protects the panel from slips, scratches, and uneven jaw contact.
- Clean the jaw teeth often: Remove metal chips, paint, filler dust, scale, and aluminum pickup with the method approved by the manufacturer.
- Keep oil off gripping teeth: Lubricate pivots and sliding parts only where directed. Oil on the teeth can reduce grip.
- Inspect hardware and mounting: Tighten loose fasteners and stop using a stand or bench that shifts under load.
- Check for binding: A sudden increase in force may indicate damaged material, dirty tooling, misalignment, or a machine fault.
- Deburr sheet edges: Sharp sheet can cut hands and snag clothing while you guide the part.
- Use eye protection: Rust, scale, coatings, or small debris can break loose during forming.
- Control the point of operation: Keep hands, loose clothing, jewelry, and hair away from the jaws and moving linkage. OSHA’s general machine-guarding rule addresses point-of-operation and nip-point hazards in workplaces.
- Store the tool dry: Protect bare steel from corrosion without contaminating the gripping surfaces.
Warning: Do not place fingers between the sheet and the jaws to feel alignment. Use layout marks, a stop, a guide line, or a template. Never add a pipe or extension to the handle unless the manufacturer specifically supplies and approves it.
Sources
- Eastwood Shrinker Stretcher Combo Set Instructions — operating sequence, model capacity, secure mounting, jaw care, and safety warnings
- Eastwood Elite Deep Jaw Shrinker Stretcher Instructions — deep-jaw setup, model-specific reach, operation, and maintenance
- Eastwood Shrinker/Stretcher Combo Set Product Information — example materials, rated gauges, mounting, and separate jaw housings
- OSHA 29 CFR 1910.212: General Requirements for All Machines — point-of-operation, nip-point, and machine-guarding requirements
- OSHA 29 CFR 1910.147: Control of Hazardous Energy — energy isolation during servicing, setup, and tooling changes on powered equipment
Frequently Asked Questions
What does a metal shrinker stretcher do?
A metal shrinker stretcher changes the length of a sheet-metal edge or flange. Shrinking shortens the edge and forms an inside curve. Stretching lengthens the edge and forms an outside curve. It is useful for curved flanges, wheel arches, patch panels, trim, and custom metalwork.
How do you use a sheet metal shrinker stretcher?
Secure the machine, install the correct jaws, prepare a flange, and mark the work area. Place the flange in the jaws, apply one light bite, release, and move the sheet a small distance. Continue across the full area, then compare the curve with a template before making another pass.
Do you need to bend a flange before using a shrinker stretcher?
For most common shrinker-stretcher jobs, yes. The jaws work on an edge or flange, so a straight bend is usually formed first with a brake, tipping tool, or hammer form. The allowed flange depth depends on the machine’s throat and manufacturer instructions.
What materials can a shrinker stretcher work with?
Many machines can form rated gauges of mild steel, aluminum, and stainless steel, while some also list copper or brass. Capacity varies by model. Check the exact material and thickness in the manual instead of assuming one gauge limit applies to every metal.
How do shrinker jaws work?
Shrinker jaws grip the flange and move small areas of material toward one another. The shortened edge draws the sheet into an inside curve. Too much movement in one spot can create bunching, wrinkles, deep marks, or cracks.
How do stretcher jaws work?
Stretcher jaws grip the flange and move small areas of material apart. This lengthens the edge and opens the panel into an outside curve. Because stretching can thin the worked area, use light bites and stop if the edge begins to crack or neck down.
How deep should the metal go into the jaws?
Use the depth stated in your machine manual. A common method is to begin near the outer edge and work deeper in later passes, but throat depth and jaw geometry vary. Consistent insertion matters more than copying a fixed measurement from another model.
Why is my shrinker stretcher leaving marks?
Some tooth marks are normal because the jaws must grip the sheet. Deep marks usually point to excessive pressure, dirty or damaged jaws, trapped debris, or soft material. Reduce pressure, clean the tooling, and test matching scrap before shaping the final part.
Can a shrinker stretcher fix a panel that was shaped too far?
A few light bites with the opposite jaw set can sometimes correct a small error. Stop if the metal is cracked, badly thinned, or heavily distorted. Repeated shrinking and stretching can work-harden or weaken the edge, so replacement may be safer than forcing a damaged part back into shape.
Can a shrinker stretcher make compound curves?
It can help create compound shapes by controlling a curved flange, but it does not shape the entire panel face by itself. A brake, mallet and dolly, English wheel, bead roller, or other forming tools may be needed to create the crown and blend the surrounding sheet.
Conclusion
Mastering sheet metal manipulation with a shrinker stretcher gives you precise control over curved flanges, lips, and repair-panel edges. The basic rule is simple: shrink to shorten an edge, stretch to lengthen it, and build the curve with light, even passes.
Secure the tool, stay within its rated capacity, keep the jaws clean, support the workpiece, and compare the part with a template after every pass. Practice on matching scrap before working on the final panel. A careful sequence produces a smoother curve and makes cracks, waves, deep tooth marks, and over-shaping much easier to avoid.




