Start with DOM steel or chromoly tubing that matches your sanctioning rules, usually 1.5-inch OD with .120-inch wall. Use a bender and die sized for that tube, with at least a 3x diameter CLR to prevent kinks. Mark bends carefully, measure with an angle finder, and overbend 5-10% for springback. Keep each bend within your cage layout and clearance limits, and you’ll build safer, cleaner tubing with better fit and control.
Pick the Right Tube for a Roll Cage
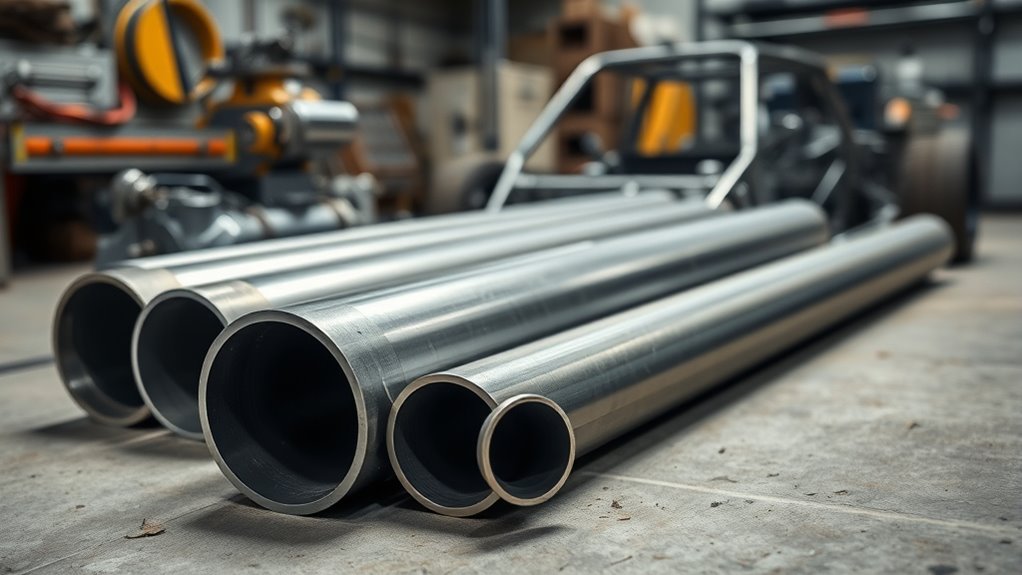
When you’re choosing tubing for a roll cage, start with DOM steel or chromoly, since both deliver the strength and durability motorsports demand.
You should size the tube from actual measurements, not guesses; 1.5-inch diameter with .120-inch wall thickness is common in many racing builds. Check your sanctioning body’s rules before you cut, because tube material and dimensions can vary.
DOM steel gives you predictable formability and rugged structural integrity, while chromoly cuts weight but asks for tighter welding control and cleaner fit-up.
DOM steel bends predictably and stays tough, while chromoly trims weight but demands cleaner welds and tighter fit-up.
When you plan a bend, match the tube to the load path so the roll cage can protect you under impact. A proper tubing bender helps you place accurate arcs without crushing the wall or weakening the section.
Choose the material that lets you build safely, move freely, and stay within regulation. Additionally, consider the welding processes for different metals to ensure compatibility and strength in your design.
Products Worth Considering

High-Quality Steel Construction: Manufactured from 1020 DOM (Drawn Over Mandrel) steel for reliable strength and uniform wall thickness.

Allstar Round DOM Steel Tubing 1-5/8in x .120in x 7.5ft

Allstar Round DOM Steel Tubing 1-3/4in x .120in x 7.5ft
Choose the Right Bender and Die CLR
Choose a tube bender made for the exact tubing you’re bending, because a true tube bender supports the wall and preserves strength, while a pipe bender can kink the tube and expand the section.
Match the die to the tube’s outside diameter so the bend stays true and the structure stays safe. Check the Center Line Radius before you commit; a practical minimum is three times the tube diameter, but roll cages may need a CLR that satisfies sanction rules.
If the bend is tight, use a proper mandrel to keep the section round during bending tube work. Anchor the bender firmly so it can’t shift, then mark the tube clearly before you start. That simple discipline cuts waste, protects material, and gives you repeatable results.
When you choose the right die CLR, you bend with control, not guesswork, and you build the chassis with real intent. Additionally, ensure that your welds are sized according to the thinner member in joints to maintain structural integrity.
Products Worth Considering

Fitment: for Die 1.50 in. Round Tubing 5 in. Radius Each; WFB2 and WFPB1000

Exceptional Bending Capability: This manual bending machine supports up to 2-inch wide flat steel or steel plates, 0.65-inch O.D. hollow round pipes, and 1-inch O.D. round steel tubes. It can smoothly bend low-carbon steel under 0.2'' thick and aluminum under 0.4'' thick, with a maximum bending angle of 200-degree to meet diverse bending needs.

【Specification】: Bender Die OD: 1-5/8"; Round Tubing: 5"; Minimum Wall Thickness .090"; Maximum Wall Thickness .134"; Material: High Quality Mild Steel; Tube and Metal Bender Die Type: Round
Understand Bend Angles, Offset, and Springback
Accurate bend angles keep a roll cage or chassis aligned, so you need to set each bend carefully and verify it with an angle finder or bending gauge. Every degree matters; a small error can create misalignment, stress points, or weak joints.
You also need to account for offset, because the bend’s start and finish won’t line up unless you plan the tube path around the available space. Springback changes the result too, so you should overbend by roughly 5-10% to land on target after release. Understanding flux core welding techniques can enhance your ability to attach components securely.
Your Center Line Radius sets bend tightness, and a smaller CLR demands sharper control to avoid kinks or wall thinning. Watch the inside diameter as you bend, since excessive compression can distort it.
Reliable measurement techniques let you repeat bends with confidence, building a chassis that fits cleanly and gives you freedom to execute the design exactly.
Mark and Measure Tube Bends Accurately
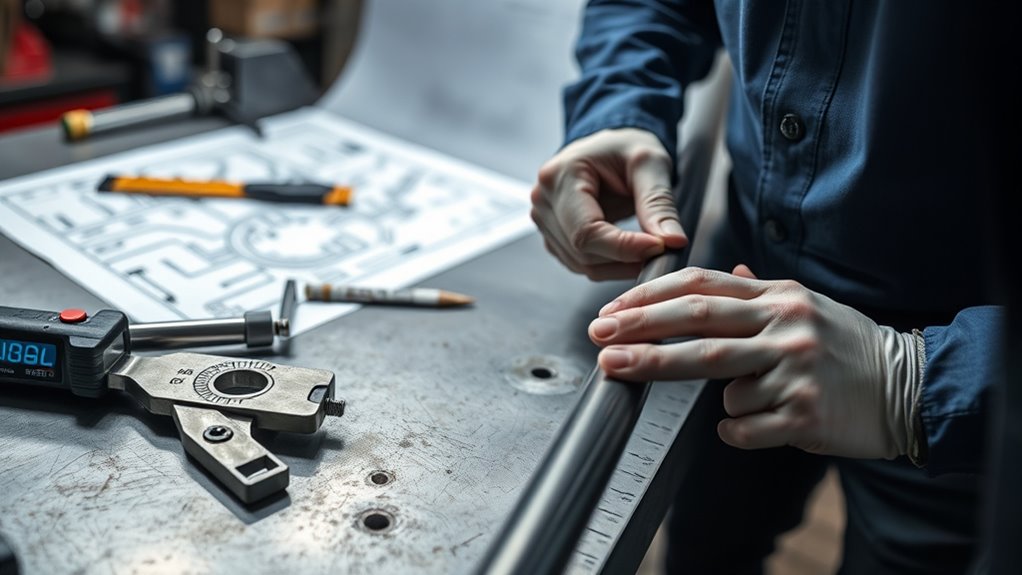
Start every bend by marking the tube’s bend point clearly and lining it up with the die’s reference line so the bend lands where you planned. Use an angle finder to measure the target angle, then add 5° for snapback so your gauge reflects the real bend you need.
Cut the tube a little long; that extra length gives you room for adjustments during fitment without forcing bad geometry. Before you commit, lay the bent piece beside the original tube and compare the mark locations, centerlines, and alignment. If anything drifts, re-mark it now, not later.
Keep each measure, angle, and bend noted in a log so you can repeat the same results on future parts. Precise documentation frees you from guesswork, supports consistent roll cage work, and helps every tube fit with control, confidence, and clean structure. Additionally, ensuring adequate air pressure during the bending process can help maintain the integrity of the tube and prevent deformation.
Keep Bends Inside Your Cage Layout
As you lay out a roll cage, keep every bend inside the specified boundaries so the structure stays strong and safe. Use your bender to place each bend where your cage layout demands it, and make sure the inside of the bend clears the vehicle’s sheet metal, roof, and dash. In metal fabrication, freedom comes from control: a precise main hoop and matching bars protect you better than a rushed fit.
| Check | Action | Result |
|---|---|---|
| Bend point | Mark it | Accurate start |
| Gauge | Measure tube | Correct length |
| Mock-up | Test on flat surface | Clear fit |
| Reference | Document each mark | Consistent bends |
Build a scrap-tube mock-up on a flat surface, then adjust before you commit. Measure starting points carefully, because small errors compound fast. Record every reference point on the tube so later bends align with the full layout, giving you a cage that fits cleanly and performs with confidence. Additionally, ensure that the welding electrode issues are addressed to maintain a strong bond during assembly.
Frequently Asked Questions
How Do I Prevent Tube Collapse During Tight Bends?
Use thicker tube wall thickness, respect bending radius limits, and apply mandrel bending techniques. Choose material selection tips wisely, consider heat treatment methods, and inspect stress distribution analysis so you won’t collapse tubes during tight bends.
What Lubricant Should I Use for Bending DOM Tubing?
Use a high-pressure, non-chlorinated bending lubricant or drawing compound for DOM tubing; you’ll reduce galling and wrinkling. Match lubricant types to tube materials, your bending equipment, and bending angles, then apply maintenance tips for cleaner bending techniques.
How Often Should I Inspect Bending Dies for Wear?
Inspect bending dies every job or after 50 bends; increase inspection frequency if you see wear indicators. Follow die maintenance tips, compare bending die materials, watch for troubleshooting wear, and replace dies at die replacement signs.
Can I Reuse Tube Sections With Minor Bend Imperfections?
You can reuse them only after a strict bend assessment confirms tube integrity. Minor imperfections may hide material fatigue, so apply approved repair techniques, weigh cost implications, and never compromise structural safety.
What Safety Gear Is Essential When Operating a Tube Bender?
You need eye protection, hearing protection, gloves usage, and protective clothing; follow safety standards while practicing bending techniques. You’ll prevent debris, noise, and pinch injuries, and you’ll keep your work controlled and efficient.
Conclusion
In the end, you’re not just bending tube—you’re shaping the structure that keeps your cage true and your chassis honest. Choose the right material, match the bender and die CLR, and account for angle, offset, and springback before you pull the handle. Measure twice, mark cleanly, and keep every bend inside your layout. Do that, and you’ll build with the calm certainty of a craftsman, not the luck of Sisyphus.


