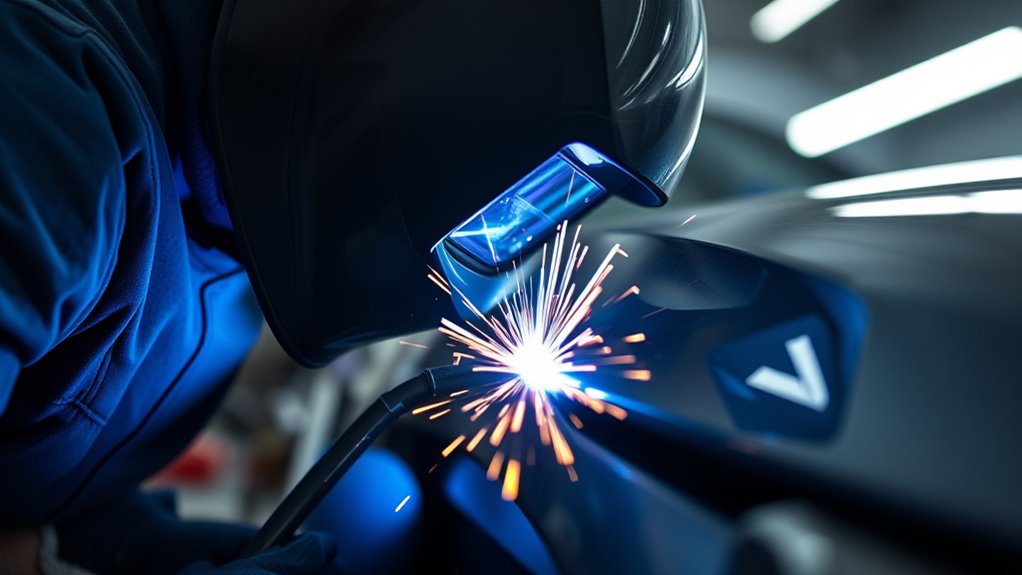
For auto body welding, the best helmet shade depends on the welding process, amperage, and how clearly you can see the weld puddle. Most light auto body TIG work starts around shade 8 to 10. Most MIG and flux-cored body repairs start around shade 10 to 12. Heavier stick welding can need shade 10 to 14. Always stay at or above the minimum shade for the process you are using.
Quick Answer
For most auto body welding, use shade 10 to 12 for MIG or flux-cored welding and shade 8 to 10 for low-amperage TIG. Start darker than you think you need, then step lighter only if you can still stay above the required minimum and clearly see the weld pool.
Key Takeaways
- Use the welding process and amperage first. Comfort comes second, but never go below the required minimum shade.
- Low-amperage TIG on thin sheet metal often works well around shade 8 to 10.
- Auto body MIG and flux-cored welding usually need shade 10 to 12 for a safer balance of visibility and protection.
- Stick welding varies more. Use the electrode size, amperage, and arc brightness to decide whether shade 10, 11, 12, or darker is needed.
- Wear safety glasses with side shields under your hood and replace scratched, cracked, or pitted lenses before welding.
At a Glance
| Time Required | 5 to 10 minutes to check the process, amperage, lens condition, and visibility before welding |
| Difficulty | Beginner to intermediate |
| Tools Needed | Welding helmet, clean cover lens, safety glasses with side shields, welder manual, scrap test metal, and task lighting |
| Cost | Usually no extra cost if your helmet has the right shade range; replacement cover lenses are low-cost maintenance items |
What Shade for Auto Body Welding?
For auto body welding, choose a shade that protects your eyes while still letting you see the joint, puddle, and panel edges. Thin sheet metal usually runs at lower amperage than heavy fabrication, so you often need a slightly lighter shade than you would use for thick plate.
A good starting point is shade 8 to 10 for low-amperage TIG and shade 10 to 12 for most MIG or flux-cored body repairs. If you move to brighter, hotter stick welding, start around shade 10 to 12 and go darker as current and electrode size increase.
Warning: Never choose a shade only because the puddle is easier to see. A lens that is too light can expose your eyes to intense arc light. Follow the shade table for your process, then adjust only within a safe range.
The OSHA eye and face protection standard lists minimum protective shade numbers by welding process and arc current. OSHA also gives a simple rule: start with a shade that is too dark to see the weld zone, then move lighter until you can see the work without going below the minimum.
Welding Helmet Shade Chart by Process
Use this chart as a practical starting point for auto body work. It is not a replacement for your employer’s safety rules, the helmet manual, or the applicable OSHA table.
| Welding process | Practical starting shade | Best use in auto body work |
|---|---|---|
| Low-amperage TIG | 8 to 10 | Thin sheet metal, small tabs, precise repairs, and aluminum detail work |
| MIG / GMAW | 10 to 12 | Most panel repairs, patch panels, brackets, and general body shop welding |
| Flux-cored / FCAW | 10 to 12 | Outdoor repair work and jobs where shielding gas is not practical |
| Stick / SMAW | 10 to 14 | Heavier brackets, frames, mounts, and non-panel repair work |
For thin auto body panels, do not assume darker is always better. If the lens is too dark, you may lose the puddle edge and overheat the panel before you notice it. If the lens is too light, glare and radiation become the problem. The right shade lets you see the puddle without discomfort.
Process-Based Shade Selection
Process matters because each arc has a different brightness level. TIG often gives you a small, controlled arc, so a lower shade may work well at low current. MIG and flux-cored arcs are usually brighter and commonly need shade 10 or darker. Stick welding can be brighter still, especially as electrode size and amperage rise.
For most home and shop auto body MIG welding, shade 10 is the common starting point. Move to shade 11 or 12 if the arc feels harsh, the puddle looks washed out, or your eyes feel strained after a short test pass.
Auto Body Welding Needs
Auto body work depends on clean visibility. You need to see tight gaps, thin edges, tack welds, and early signs of heat distortion. That is why many welders prefer an auto-darkening helmet with a variable shade range instead of a fixed shade lens.
- TIG on thin sheet: start around shade 8 to 10.
- MIG bodywork: start around shade 10, then adjust to 11 or 12 if needed.
- Flux-cored work: start around shade 10 to 12 because the arc and spatter can be harsher.
- Stick welding: use the electrode size and current to decide whether shade 10, 11, 12, or darker is needed.
Pick the Right Welding Helmet Shade by Amperage
Amperage is one of the most important shade-selection factors. Higher current usually means a brighter arc and more radiant energy. Lower current often allows a lighter shade, especially for TIG, but you still need to stay at or above the minimum shade for that process.
OSHA’s general industry table lists minimum shades by process and current. For example, gas tungsten arc welding below 150 amps uses minimum shade 8, while gas metal arc welding and flux-cored arc welding from 60 to 500 amps use minimum shade 10. In construction settings, OSHA’s construction eye protection standard gives a separate guide table for welding filter shade selection.
Amperage Shade Chart
| Process and current | OSHA general industry minimum shade | Practical note |
|---|---|---|
| GTAW / TIG, less than 50 amps | 8 | Good for delicate sheet metal when you need clear puddle visibility. |
| GTAW / TIG, 50 to 150 amps | 8 | Use shade 8 as the floor, then go darker if glare bothers you. |
| GTAW / TIG, 150 to 500 amps | 10 | Use darker settings as amperage and arc brightness rise. |
| GMAW / MIG or FCAW, less than 60 amps | 7 | Many welders still prefer shade 9 or 10 for comfort and glare control. |
| GMAW / MIG or FCAW, 60 to 500 amps | 10 | This is the main range for many auto body MIG jobs. |
| SMAW / Stick, 60 to 160 amps | 8 | A darker practical shade, such as 10 or 11, may feel better with a bright arc. |
| SMAW / Stick, 160 to 250 amps | 10 | Use a darker shade if the arc washes out the puddle. |
| SMAW / Stick, 250 to 550 amps | 11 | Heavy work may call for shade 12 to 14 for comfort. |
Use these values as minimums, not as comfort settings. Many welders choose a shade one or two steps darker when the arc feels harsh, especially on longer welds.
Minimum vs. Comfort Shade
The minimum shade is the lowest protective shade listed for the operation. Your comfort shade is the shade that still protects you while giving a clear view of the puddle. On thin auto body metal, the best choice is usually the lowest safe shade that lets you see detail without glare.
Start darker than needed, then move lighter only until the weld puddle becomes clear. Never go below the minimum shade for the process and amperage.
MIG, TIG, and Stick Shade Ranges
MIG, TIG, and stick welding do not use the same shade range on every job. The arc type, amperage, wire or electrode size, base metal, and lighting all change what you see through the lens.
- MIG welding: shade 10 is the usual starting point for many auto body repairs. Move to 11 or 12 if the arc feels too bright.
- TIG welding: shade 8 to 10 often works well for low-amperage detail work, especially on thin panels.
- Flux-cored welding: shade 10 to 12 is a better starting range because the arc can be brighter and dirtier.
- Stick welding: shade 10 to 14 may be needed as current and electrode size increase.
If you are also cutting or grinding near the weld, remember that cutting shades and grinding protection are different from arc-welding shades. Do not use ordinary sunglasses, gas-welding goggles, or modified lenses as a substitute for a proper welding helmet.
Why Auto Body Work Needs a Lighter Shade
Auto body work often uses lower amperage because the metal is thin. A shade that is too dark can hide the edge of the puddle, the gap between panels, and the first signs of heat distortion. That can lead to burn-through, poor fusion, or uneven tack placement.
This is especially important when you MIG weld thin metal without burning through. You need enough darkness to protect your eyes, but enough clarity to control short welds, skip welds, and tack spacing.
Lighter Shade Visibility
A lighter safe shade helps you see the puddle edge and the base metal around it. That improves travel speed, tack placement, and heat control. It also helps you catch problems sooner, such as the panel edge starting to melt away.
Do not confuse “lighter” with “unsafe.” A shade 8 TIG setting can be appropriate at low current, but a shade 8 MIG setting may be too light once current rises. Process and amperage still decide the safe floor.
Low-Amperage Welding Needs
Low-amperage TIG is where shade 8 to 10 usually makes the most sense. You can see small movements, fine filler control, and puddle edges without losing protection. For MIG, shade 10 is usually the better starting point once you are in normal body shop amperage ranges.
Pro Tip: Add clean task lighting to the work area instead of dropping below a safe shade. Better lighting can make the joint easier to see before the arc starts.
Precision on Thin Metal
Thin metal gives you less room for error. You need to see the joint line, tack spacing, and the heat-affected area. If the lens is too dark, you may slow down or dwell too long. If the lens is too light, glare can hide the puddle and strain your eyes.
A variable-shade auto-darkening helmet is helpful here because you can adjust the lens for TIG, MIG, and flux-cored work without changing helmets.
Balance Visibility and Arc Protection
The goal is simple: protect your eyes and still see the weld. Too dark, and you lose puddle detail. Too light, and the arc can cause glare, eye fatigue, and unsafe exposure.
Start with the minimum shade for your process and current. Then choose a practical shade that feels comfortable during a short test weld. If you cannot see the puddle, do not immediately jump to a lighter shade. First check the cover lens, task lighting, helmet fit, and lens clarity.
CCOHS recommends wearing safety glasses or goggles with side shields even when other welding eye and face protection is used. It also recommends replacing pitted, cracked, or damaged lenses. You can review those PPE basics in the CCOHS welding PPE guide.
Choose Fixed or Variable Shade Helmets
Fixed-shade helmets are simple. Many fixed lenses use shade 10, which can work well if you mostly do the same MIG work at similar amperage. The downside is that you have less flexibility when switching between low-amperage TIG, MIG body panels, flux-cored repair work, and stick welding.
Variable-shade helmets give you more control. A common auto-darkening range such as shade 8 to 13 lets you adjust for low-amperage TIG, regular MIG, and heavier arc work. This is useful if your auto body projects change often.
- Choose fixed shade if you weld the same process and amperage almost every time.
- Choose variable shade if you switch between TIG, MIG, FCAW, and stick.
- Choose a clear lens rating if you weld for long sessions and need better puddle detail.
Understand 1/1/1/1 Lens Ratings
Some auto-darkening welding helmets list a 1/1/1/1 optical rating. This rating is tied to lens clarity categories such as optical class, light diffusion, shade consistency, and angle performance. A 1 rating is the best score in each category.
In real shop use, a clearer lens can make it easier to see the weld pool, panel edge, and tack location. It may also reduce eye fatigue during long sessions because you are not fighting distortion or uneven shading.
A high optical rating does not let you use an unsafe shade. Think of it as a clarity upgrade, not a shortcut around proper shade selection.
Avoid Common Welding Shade Mistakes
The most common mistake is using a shade that is too light because it makes the puddle easier to see. The second mistake is using a shade that is too dark, then welding blind and overheating the panel.
- Do not use shade 3 or 5 for arc welding. Those shades are for limited torch, brazing, or cutting tasks, not MIG, TIG, FCAW, or stick arcs.
- Do not weld through a scratched cover lens. A hazy cover lens can make a safe shade feel too dark.
- Do not ignore helmet fit. Light leaking behind the helmet can cause glare and eye strain.
- Do not skip safety glasses. A welding hood protects your face and eyes from the arc, but safety glasses help protect against particles when the hood is raised.
- Do not assume one shade fits every job. Thin TIG work, MIG body panels, and stick welding need different settings.
For broader body protection, review the basics of protective clothing for arc welding before you weld near sparks, hot metal, or freshly ground panels.
Test Your Welding Shade Before You Weld
Before welding the actual panel, test the shade on scrap metal with the same thickness, process, wire or electrode, and amperage. This keeps you from guessing on the vehicle.
| What you notice | What to do |
|---|---|
| The puddle is too dim to track | Clean the cover lens, add task lighting, then step lighter only if you remain above the minimum shade. |
| The arc feels painfully bright | Go darker one shade step and check helmet fit for light leaks. |
| The lens flickers or does not darken | Stop welding. Check sensors, battery, sensitivity, delay, and the helmet manual. |
| Your eyes feel strained after a short weld | Go darker, check for damaged lenses, improve fit, and take a break before continuing. |
| You are welding higher amperage than usual | Recheck the shade table and increase shade before welding. |
Note: Auto-darkening helmets still need clean sensors, a sound battery or power source, and a clear cover lens. If the filter does not darken reliably, stop and fix the helmet before striking another arc.
Shade Selection Checklist
Run through this quick checklist before you weld on a vehicle panel:
- Confirm the welding process: TIG, MIG, flux-cored, or stick.
- Check the amperage range on the machine.
- Use the minimum shade table as your safety floor.
- Start darker, then adjust lighter only if needed.
- Clean or replace the cover lens if the view is cloudy.
- Wear safety glasses with side shields under the helmet.
- Check that the helmet shell, lens, and gasket are not cracked or damaged.
- Do a short test weld on scrap before welding the vehicle.
Frequently Asked Questions
Is shade 10 or 11 better for welding?
Shade 10 is a common starting point for many MIG auto body jobs. Shade 11 gives a darker view and may feel better if the arc is harsh or your eyes feel strained. Use the darker shade if you can still see the puddle clearly.
Is shade 3 dark enough to weld?
Shade 3 is not dark enough for arc welding such as MIG, TIG, flux-cored, or stick. It may appear in guidance for limited torch brazing or light cutting tasks, but it is not an arc-welding shade.
What shade is an auto-darkening welding helmet?
Many auto-darkening welding helmets let you adjust across a range, often around shade 8 to 13 for welding modes. Some also have lighter grind or cut modes. Set the helmet for the process and amperage, then test it on scrap.
Is shade 5 enough for welding?
Shade 5 is usually not enough for arc welding. It can be used for some gas welding, cutting, or brazing work, but MIG, TIG, flux-cored, and stick welding normally require darker protection.
Do I still need safety glasses under a welding helmet?
Yes. Wear safety glasses with side shields under your hood. They help protect your eyes from grinding dust, slag, wire ends, and flying particles when the helmet is raised.
Why can’t I see the weld puddle even with the right shade?
The shade may not be the only problem. Clean the cover lens, add task lighting, check for smoke in your view, adjust your head angle, and make sure the helmet lens is not scratched, pitted, cracked, or hazy.
Conclusion
For auto body welding, start with the process and amperage. Low-amperage TIG often fits shade 8 to 10. Most MIG and flux-cored body repairs usually start around shade 10 to 12. Stick welding can need shade 10 to 14 as current and electrode size rise. Test on scrap, keep your lens clean, wear safety glasses under your hood, and never go below the minimum shade for the job.
Sources
- OSHA 1910.133 Eye and Face Protection — minimum protective shade numbers by welding process and arc current.
- OSHA 1926.102 Eye and Face Protection — construction welding filter shade selection guidance.
- CCOHS Welding PPE and Clothing — safety glasses, helmet fit, filter shade selection, damaged lens replacement, and protective clothing guidance.


