You can weld near fuel lines only after you drain the tank, run the vehicle dry, and disconnect fuel lines at both the tank and rail so vapors can’t migrate. Clean the area, remove rags and solvents, and cover the tank, lines, and nearby parts with a fire-resistant blanket or steel shield. Keep a charged extinguisher and a fire watch in place throughout the job. Then inspect for leaks, heat damage, and loose fittings for more detail.
Can You Weld Near a Fuel Tank Safely?

Welding near a fuel tank is never something to treat casually, because even an “empty” tank can hold flammable vapors that ignite from sparks or heat. You can weld there only if you control every ignition source and barrier.
Run the vehicle out of gas, disconnect the fuel lines at the tank and rail, and verify the area is clear of gasoline residue. Cover the tank and nearby components with a fire resistant welding blanket or steel heat shield to block sparks and radiant heat.
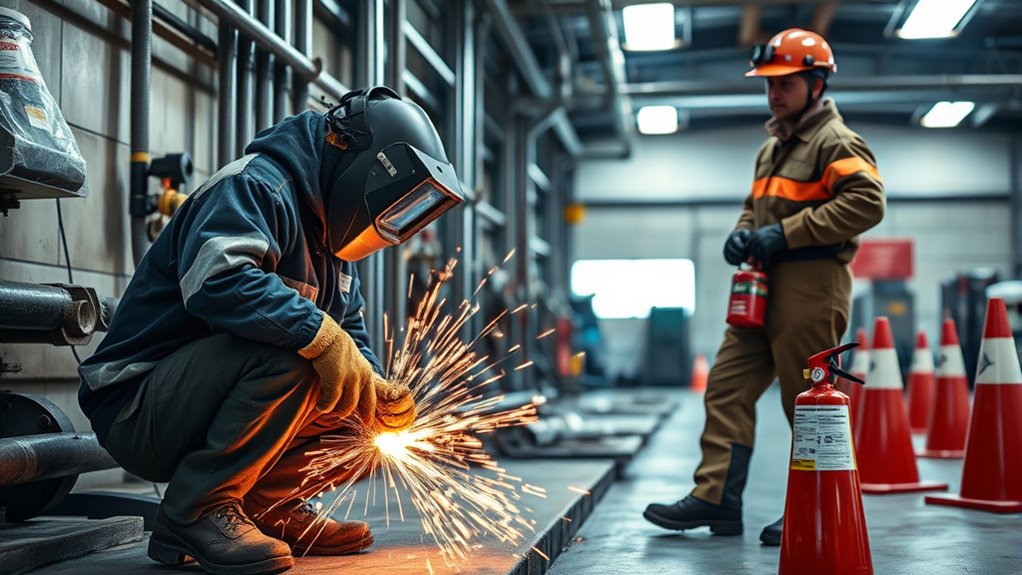
Keep a charged fire extinguisher within reach; water won’t suppress a gasoline fire. Inspect the workspace for rags, solvent, or debris that could catch.
Assign a fire watch within 35 feet, and keep that person on duty for at least 30 minutes after you finish. If you can’t meet these conditions, don’t weld.
Your safety and freedom demand disciplined control, not bravado, around fuel systems. Always ensure proper ventilation in the work area, especially in confined spaces, to reduce inhalation of toxic fumes.
Products Worth Considering

Extreme Heat Resistance (3000°F+) – Carbon Fiber Welding Blanket Made of high-density carbon felt welding blanket, our fireproof welding blanket certified to ASTM D6413 and UL94-V0, withstands extreme temperatures over 3000°F — Outperforms standard fiberglass welding blankets (1000°F limit)Much more effective at stopping spatter than fiberglass offerings, and doesn't shed glass fibers!

Well-woven Fiberglass Blanket: Constructed from 24.7 oz/yd² fiberglass material, this welding blanket serve as an excellent shield against heat and fire. Tight stitching and exquisite weaving. Our heat resistant mat shield is a nice addition to welding equipment. Standard size : 4x6 ft (122x183cm), thickness: 0.31” (8mm)

🔥FIRE RETARDANT BLANKET : Made of heat resistant carbon fiber with a low thermal conductivity of 0.13 W/(m-K), the fireproof welding blanket can withstand temperatures up to 1800°F (982°C), provides maximum thermal protection for most welding jobs.
Drain the Fuel Lines and Prep the Truck
Before you strike an arc, drain the truck’s fuel tank completely so you’re not working around gasoline vapors, which are far more dangerous than the liquid itself.
Then disconnect the fuel lines at the tank and at the rail so no fuel can migrate during welding.
Disconnect the fuel lines at the tank and rail to stop any fuel migration before welding.
Let every trace of residual fuel evaporate; don’t assume a line is safe because it looks dry. Inspect the system for hidden damage before you commit to heat.
- Drain the tank fully.
- Disconnect both fuel lines.
- Verify the lines are dry and intact.
This prep frees you from preventable risk and lets you work with discipline.
Use welding blankets to cover nearby surfaces, but keep your focus on elimination first: no liquid, no vapor, no surprise ignition source.
When you control the fuel path, you control the job.
Additionally, ensure that any zinc residues are thoroughly removed to avoid contamination during welding.
Shield the Tank, Lines, and Heat Sources
Once the fuel system is disconnected and dry, cover the tank, lines, and nearby heat-sensitive surfaces with welding blankets or steel heat shields to limit radiant heat and stray spark exposure.
When you’re doing welding and cutting near fuel plumbing, you must shield the tank and every exposed line, rail fitting, and bracket that could absorb heat. Position the blankets tightly, leaving no gaps where sparks can drop through, and extend coverage beyond the immediate weld zone.
Clear the area of rags, solvents, plastic trim, and any other flammable material before you strike an arc. Inspect the tank and lines for leaks again; a small seep can turn heat into ignition. Ensure proper ventilation to manage toxic fumes that may arise during the welding process.
Use heat shields that won’t sag or burn through, and secure them so they won’t shift as you work. This isn’t about caution for its own sake—it’s about taking control of the hazard and keeping your workspace free, open, and safe.
Products Worth Considering

🔥FIRE RETARDANT BLANKET: Made of heat resistant carbon fiber with a low thermal conductivity of 0.13 W/(m-K), the fireproof welding blanket can withstand temperatures up to 1800F (982C), provides maximum thermal protection for most welding jobs

🔥 Heavy-Duty Heat Protection: Tightly weave pattern ensures tear-resistant and maximum durability for long term repeated use. Standard size : 4x6 ft (120x180 cm), thickness: 0.31” (8mm). Designed to withstand extreme heat, sparks, and flames, our fiberglass welding blanket is fireproof, heat-resistant, and flame retardant, offering unmatched safety for welding, grilling, smokers, and fire protection at home or in industrial settings. Rated Up to 1,000°F

🔥High Temp & Fire Resistance : The Kanhiro Welding Blanket, certified to ASTM D6413 and UL94-V0, withstands temperatures up to 1800°F. Compared to fiberglass, leather, silicone, and Kevlar, this blanket ensures safe welding, protecting against sparks and extreme heat.
Weld Safely and Keep a Fire Watch
With the tank and lines shielded, you can start welding only after you’ve cleared every flammable material from the work area and confirmed there’s no residue, vapor, or loose debris left to ignite.
During welding or cutting, keep the process controlled and deliberate; your freedom depends on disciplined execution. Set a welding blanket or steel heat shield over exposed surfaces, then assign a fire watch within 35 feet to track sparks, slag, and flare-ups.
Keep welding deliberate: shield exposed surfaces, and place a fire watch within 35 feet for sparks and flare-ups.
Keep the extinguisher in reach and verify the nearest fire exit before you strike an arc. It’s crucial to monitor for toxic fumes that may arise during the process.
- Monitor the area continuously while welding.
- Keep the fire watch alert for hidden ignition points.
- Wait at least 30 minutes after the job, then recheck for smoldering.
Never rely on water for gasoline fires; use the extinguisher you staged.
You’re not just meeting procedure—you’re protecting your crew, your tools, and the right to work without preventable fire.
Inspect for Leaks and Heat Damage
Run a full leak and heat-damage check before you weld: sniff around the tank and fuel lines for gas vapor, then inspect the entire fuel system for wear, corrosion, prior damage, and loose connections.
You need to inspect for leaks with discipline because residual vapors can ignite fast. Work methodically along every hose, fitting, clamp, and seam, and don’t accept any odor, stain, wetness, or blistering as minor.
Check tanks and lines for heat damage or softening that could mean the metal or polymer has already weakened. Tighten loose connections before you strike an arc, and replace anything compromised.
Use a welding blanket or heat shield to block sparks and radiant heat from the fuel system. This isn’t caution for caution’s sake; it’s control over risk. Additionally, ensure that your protective clothing includes flame-resistant clothing, as it provides essential protection against potential ignition during the welding process.
When you verify integrity first, you protect your workspace, your machine, and your freedom to weld without preventable fire or leak hazards.
Frequently Asked Questions
Can You Weld Near a Fuel Tank?
No, you shouldn’t weld near a fuel tank without strict welding precautions. Fuel tank hazards include vapor ignition, even when it’s empty. You must disconnect lines, ventilate, shield, and keep a fire extinguisher ready.
What Is the Skip Welding Technique?
Skip welding is a welding technique where you weld short, separated sections in sequence, letting each cool before continuing. You’ll control heat input, reduce distortion, and improve fuel line safety around flammable materials.
What Are 5 Welding Safety Precautions?
You should run a diesel truck dry first: 1) inspect welding equipment, 2) ventilate well, 3) wear PPE, 4) use fire shields, 5) keep extinguishers ready. These steps cut fire hazards and protect your freedom.
What Is the Golden Rule in Welding?
The golden rule in welding is simple: you always prioritize safety. You inspect the area, remove hazards, wear safety gear, and use proper welding techniques so you can work confidently and protect everyone nearby.
Conclusion
Welding near fuel lines isn’t the time to improvise; it’s the time to control risk. Drain the system, shield every vulnerable component, weld with discipline, and keep a fire watch until the metal cools and the threat is gone. Then inspect for leaks and heat damage before you call it done. You don’t just finish the job—you prove it’s safe. Because when fuel and flame meet, caution isn’t optional; it’s survival.


