Best Welding Rod Size for Auto Repair
Choosing the wrong welding rod can burn through thin panels or leave weak welds on thicker parts. For automotive welding, you should match rod size to metal thickness and welding process. Use 1/16 inch rods for thin sheet metal like fenders and floors at 20–40 amps. Choose 3/32 inch rods for general repairs on 1/8 to 1/4 inch steel at 40–125 amps. Use 1/8 inch rods for heavier brackets and frame sections at 75–160 amps. Smaller rods give tighter control and less burn-through, and the right setup makes every weld easier to dial in.
What’s in This Article
- Best All-Around Welding Rod Size for Auto Repair
- Welding Rod Size Chart for Automotive Sheet Metal
- Match Rod Size to Metal Thickness
- Best Rod Sizes for Frames and Brackets
- How Rod Size Affects Penetration and Bead Width
- Choose Rod Size by Welding Process
- Common Welding Rod Size Mistakes in Auto Repair
- Frequently Asked Questions
Quick Answer
For most auto repair, a 3/32 inch welding rod gives the best balance of control and strength. Use 1/16 inch rods for thin sheet metal and 1/8 inch rods for heavier brackets or frame sections. Always match the rod size, amperage, and process to the metal thickness before welding.
Key Takeaways
- Use 1/16 inch rods when thin automotive sheet metal needs low heat and tight control.
- Use 3/32 inch rods for most general auto repairs on light to medium steel.
- Use 1/8 inch rods for heavier brackets, mounts, and some frame-related work.
- Match amperage to rod size so you avoid burn-through, poor fusion, and unstable arcs.
- Test your settings on scrap metal before welding any important automotive part.
Best All-Around Welding Rod Size for Auto Repair
For most auto repair work, a 3/32 inch (2.4 mm) welding rod gives you the best all-around choice. It handles thin to medium metal, often from 1/8 to 1/4 inch thick, without too much spatter when you set the machine correctly.
You can run E6011 or E7018 rods in this range with a recommended amperage of about 40–125 amps. The exact setting depends on joint fit-up, rod type, machine output, and weld position. This size gives you control, penetration, and a cleaner bead, so you reduce avoidable rework.
When you work on thin sheet metal, step down to a 1/16 inch rod for tighter heat control and less burn-through risk. For heavier brackets or structural sections, move up to a 1/8 inch rod to drive deeper fusion. Match welding rod sizes to the metal, and you’ll weld with more precision.
If you’re doing TIG welding, use the same thickness logic to guide filler choice and protect the repair from weak joints. Good heat input management also helps reduce distortion and support a stronger joint.
Products Worth Considering

MODEL: E6013 is a mild-steel general purpose rod. It operates on AC or DC welding current and works well on low voltage AC machines.

MODEL: E308L-16 is for stainless steel welding, widely used in metal fabrication, maintenance and repair work.

The product is 5LB 3/32 6011 Weld Rod
Welding Rod Size Chart for Automotive Sheet Metal
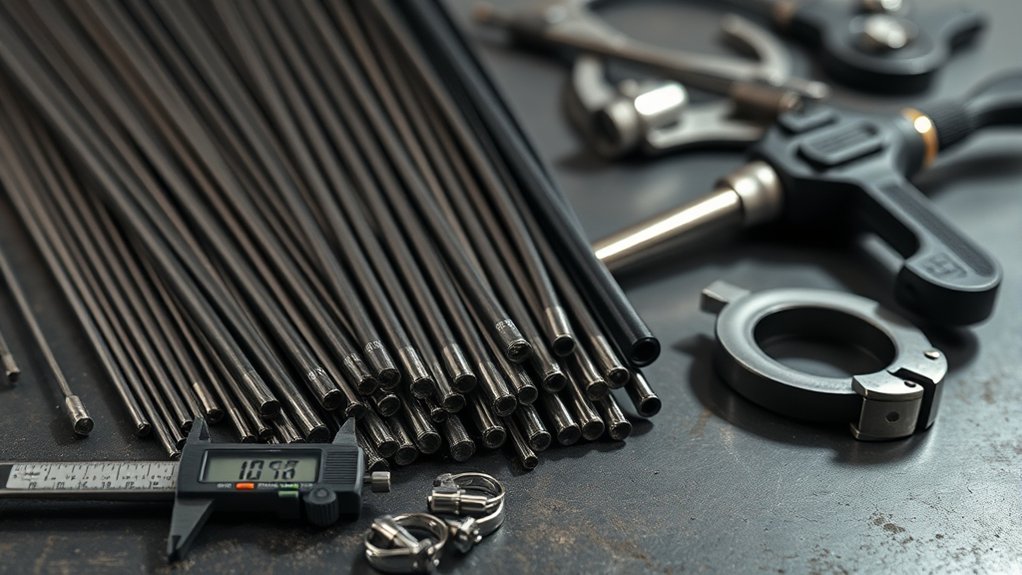
When you repair automotive sheet metal, you’ll usually choose between 1/16, 3/32, 1/8, and 5/32 inch rods. Smaller diameters give you tighter control and less warping. Larger rods carry more heat and suit thicker steel.
For thin panels, a 1/16 inch rod like E6013 or E7014 can work at 20–40 amps when the metal and machine allow it. A 3/32 inch rod, such as E6011 or E7018, suits moderate thickness at about 40–125 amps. For heavier sections, you can move to 1/8 or 5/32 inch rods and adjust amperage to match the added penetration and bead width you need.
Keep rods dry and clean before use. Good moisture protection helps rods perform better and lowers the risk of poor arc starts or weak welds.
Common Rod Sizes
A practical welding rod size chart for automotive sheet metal starts with 1/16 inch (1.6 mm) rods for very thin panels and light repairs. Use 3/32 inch (2.4 mm) rods for moderate-thickness metal. Use 1/8 inch (3.2 mm) rods for thicker components and general structural work.
- 1/16 inch rods: use 20–40 amps for precise, low-distortion work.
- 3/32 inch rods: use 40–125 amps for medium sections and stronger joints.
- 1/8 inch rods: use 75–160 amps for heavier repairs and deeper fusion.
These common sizes help you match welding rods to material thickness without wasting heat or filler metal.
Thin Metal Selection
On thin automotive sheet metal, start with a 1/16 inch (1.6 mm) rod such as E6013 or E7014 when stick welding makes sense for the repair. This smaller rod runs at about 20–40 amps and helps reduce burn-through on delicate panels.
You’ll get better control on thinner materials because the smaller rod size keeps heat input manageable. That makes it easier to hold a steady welding position and lay down clean welds along fenders, floors, and patch panels.
If the sheet is a bit heavier, move up to a 3/32 inch rod for moderate thickness work. Save 1/8 inch rods for thicker components where you need deeper penetration. Matching rod size to the metal’s thickness lets you protect the panel and keep repairs strong.
Automotive Weld Settings
For automotive sheet metal, rod size and amperage need to match the panel thickness. You can reduce guesswork by choosing the right welding rod size for the job. Start small when the metal looks thin or easy to overheat.
- Use 1/16 inch (1.6 mm) rods at 20–40 amps for thin automotive sheet metal.
- Use 3/32 inch (2.4 mm) rods at 40–125 amps for general repairs and moderate thickness.
- Use 1/8 inch (3.2 mm) rods at 75–160 amps for structural welding where penetration matters.
E6011 and E7018 electrodes give you useful options for different repair needs. If the joint is awkward or the panel is delicate, choose the smaller rod first. That keeps heat focused, reduces burn-through, and helps you weld with more confidence.
Match Rod Size to Metal Thickness
You should match rod diameter to the metal thickness so you get proper penetration without overheating the joint. For thin sheet metal around 1.5–2.0 mm, use a 1.6–2.0 mm rod when the process supports it. Thicker panel work in the 2.0–6.5 mm range often calls for 2.4–3.2 mm rods.
For materials over 8.0 mm, step up to larger electrodes only when your welder, joint design, and repair type call for it. The correct amperage range helps you keep a stable arc and avoid problems like burn-through or poor fusion.
Warning: Structural frame welding can affect vehicle safety, so get a qualified repair professional involved when the repair carries load or affects crash protection.
Thin Sheet Metal
When welding thin sheet metal, choose a smaller rod size to control heat and reduce burn-through. A 1/16 inch (1.6 mm) rod works well at about 20–40 amps on light metal when your setup allows stable control. A 3/32 inch (2.4 mm) rod can work when you need a wider amp range across light-gauge material.
For TIG or MIG work, match filler or wire size to thin sheet metal with the same idea:
- Use 1/16 inch filler for minimal penetration and narrow beads.
- Choose 3/32 inch filler when you need more control on slightly thicker metal.
- Use smaller electrodes in vertical or overhead positions to limit excess heat and distortion.
Test settings on scrap first, then dial in your technique before touching critical joints. This approach keeps your work clean and precise.
Thicker Panel Welding
As the metal gets thicker, rod size needs to increase so you can keep penetration and weld strength where they belong. Match rod diameter to the base metal so you don’t undercut strength or overheat the joint.
Use a 2.4 mm rod for material from about 2.0 mm to 5.0 mm when you need controlled penetration without burn-through. On panels from about 4.0 mm to 6.5 mm, step up to 3.2 mm to drive a sound bead into the joint.
For heavy-gauge work, a 5/32 inch rod can give you a practical balance of heat and control. Use larger rods only when the metal, machine, joint design, and repair standard support that choice.
Best Rod Sizes for Frames and Brackets
For automotive brackets and some frame-related repairs, 1/8 inch (3.2 mm) rods give a solid all-around choice because they balance penetration and bead width for strong structural welds. You can use this size for many heavier brackets when you want dependable fusion without overcomplicating setup.
If you need finer control on lighter members, move down to 3/32 inch (2.4 mm). It handles thinner materials and vertical or overhead positions with less sag. For thicker materials and heavy-duty repairs, step up to 5/32 inch (4.0 mm) only when your welder and joint design support it.
Clean metal preparation plays a major role in weld strength.
- 1/8 inch: general bracket and heavier repair work
- 3/32 inch: light repairs and tighter control
- 5/32 inch: thicker sections and high-heat work
When steel has rust, paint, or scale, clean it as much as possible before welding. E6011 electrodes can help on less-than-perfect steel, but clean metal still gives you a better repair.
Products Worth Considering

AWS A 5.1-04 : E7018

Reliable for Maintenance & Repairs – The E6013 1/8" welding rods provide strong, clean welds, making them ideal for farm equipment repair, fences, gates, and general metal maintenance tasks

MODEL: E7018 is a low-hydrogen iron powder type electrode that produces high quality x-ray welds. It can be used in all positions on AC or DC reverse polarity welding current.
How Rod Size Affects Penetration and Bead Width
Rod diameter directly shapes how your weld behaves. Smaller rods concentrate the arc and help you create shallower penetration with a narrower bead. Larger rods carry more heat and filler metal, so they can create deeper penetration and a wider bead.
When you match rod size to material thickness, you control penetration depth and bead width with more precision. For thin sheet metal in automotive applications, a 1/16 inch or 3/32 inch rod helps you avoid burn-through and keeps panels intact. It also lets you place heat where you need it, which reduces distortion.
For thicker sections, 1/8 inch and 5/32 inch rods carry more current into the joint, build broader beads, and support stronger fusion. Use rod size as a deliberate setup choice, not a guess. That’s how you get clean, durable welds and avoid unnecessary damage.
Learning how flux core welding works can also improve your overall welding technique across different materials.
Choose Rod Size by Welding Process
The right rod size also depends on the welding process you’re using. MIG, stick, and TIG each handle heat and filler metal in a different way. That means the best size changes with the machine and repair type.
With a MIG welder, you’ll often choose 0.030 to 0.035 inch wire for thin to medium automotive sheet. For thinner panels, some setups may work better with smaller wire. In stick welding, a 3/32 inch electrode suits many repairs, while a 1/8 inch 6011 rod gives stronger penetration on heavier joints.
A TIG welder gives you the most control, and you’ll often run 1/16 to 1/8 inch filler rods based on part thickness. Proper material compatibility helps you reduce rework and avoid weak welds.
- MIG: use wire size that matches panel thickness, often 0.030–0.035 inch for light to medium auto work.
- Stick welding: use 3/32 inch for many repairs or 1/8 inch for heavier penetration.
- TIG: use 1/16–1/8 inch filler based on the part thickness and joint fit-up.
When you match rod size to process, you weld with better control and fewer defects.
Pro tip: Write down the rod size, amperage, polarity, and metal thickness when a test weld looks good, so you can repeat the setup later.
Common Welding Rod Size Mistakes in Auto Repair
Even when you know the rod size chart, mistakes in auto repair can still ruin a weld. You may choose a rod that’s too large for thin sheet metal, ignore the weld position, or run the wrong amperage. Rod size must match the job, not your guess.
Too much rod on body panels drives heat up and causes burn-through and distortion. Vertical or overhead work needs smaller electrodes and controlled technique. Bigger rods can trap slag and leave rough beads when the position calls for more control.
Use this quick check before you weld:
| Mistake | Result | Fix |
|---|---|---|
| Oversized rod | Burn-through | Downsize rod |
| Wrong position | Slag buildup | Match angle and rod size |
| Wrong amperage | Unstable arc | Set the correct range |
| Wrong rod type | Weak weld | Match base metal |
| Poor prep | Poor repair | Clean the joint first |
For thick steel, choose a stronger rod type when the repair requires it. Properly matching amperage to thickness helps you create a strong and stable weld.
Frequently Asked Questions
Is 6011 or 7018 Stronger?
E7018 usually has higher tensile strength than E6011 when you compare common mild steel electrodes. Choose E6011 when you need deeper penetration on dirty or less-prepared steel. Choose E7018 when the job needs a cleaner bead and stronger weld deposit on properly prepared steel.
What Size Welder for Automotive?
A 130–180 amp welder can handle many automotive body and light repair jobs. Heavier frame or bracket work may need more output, better duty cycle, and the right repair method. Match the welder, rod selection, and settings to the steel thickness.
Should You Coat Welding Rods With WD-40?
No, you should not coat welding rods with WD-40 before welding. Oil can contaminate the weld area and create poor arc behavior or weak welds. Keep rods clean, dry, and stored as the rod manufacturer recommends.
What Amperage for a 3/32 6013 Welding Rod?
You can often run a 3/32 inch 6013 rod at about 70–85 amps. Use the lower end on thinner steel and raise the setting only when the arc needs more heat. Test on scrap first so you don’t overheat the repair area.
Can You Stick Weld Automotive Sheet Metal?
You can stick weld some automotive sheet metal, but it takes careful heat control. Thin panels burn through fast, so many body repairs work better with MIG or TIG. If you use stick welding, start with a small rod and short test welds.
What Rod Size Is Best for Auto Body Panels?
For auto body panels, a 1/16 inch rod gives better heat control than larger rods. A 3/32 inch rod can work on slightly thicker panels or patch sections. Keep amperage low and make short welds to reduce warping.
Conclusion
The best welding rod size for auto repair depends on metal thickness, weld position, and the process you use. Smaller rods help you control heat on sheet metal, while larger rods support stronger fusion on brackets and heavier steel. Before you weld, test your rod size and amperage on scrap from the same material. A careful setup gives you cleaner welds, fewer mistakes, and stronger repairs.


