A nibbler tool is made for controlled cuts in thin sheet material. It is most useful when you need curves, notches, interior openings, or detailed shapes that are hard to make with snips or a straight-cut shear. The tool removes a narrow path of material as you guide it along a marked line.
Nibblers are common in roofing, heating, ventilation, and air conditioning (HVAC), auto body work, metal signs, brackets, vents, and custom panels. The right model can leave the surrounding sheet flatter than many blade-style tools, but the cut still needs inspection and often light deburring.
Quick Answer
A nibbler cuts sheet metal with a fast-moving punch and a fixed die. Each stroke removes a small chip, creating a narrow kerf that can follow straight lines, curves, and interior cutouts. It works best within the exact material and thickness limits listed in the tool manual.
Key Takeaways
- A powered nibbler uses a punch and die to remove small chips rather than slicing the sheet with two long blades.
- Nibblers are strong choices for curves, corrugated panels, notches, and interior openings.
- Capacity changes with the metal type and strength, so a gauge label is not a universal limit.
- The cut creates sharp chips and edges. Wear eye protection, handle waste carefully, and deburr the finished part.
- Do not force the tool. A rough cut, chatter, or binding often points to worn tooling, poor support, excessive thickness, or an incorrect feed angle.
At a Glance
| Time Required | About 10–30 minutes for a small cut; longer for long or complex profiles |
| Difficulty | Beginner to intermediate |
| Tools Needed | Nibbler, clamps, marker, safety glasses, suitable gloves, hearing protection as needed, and a file or deburring tool; interior cuts also need a drill and the starter-hole size listed in the manual |
| Cost | Varies by nibbler type, power source, replacement punch and die, and any lubricant required by the manufacturer |
What Is a Nibbler Tool?
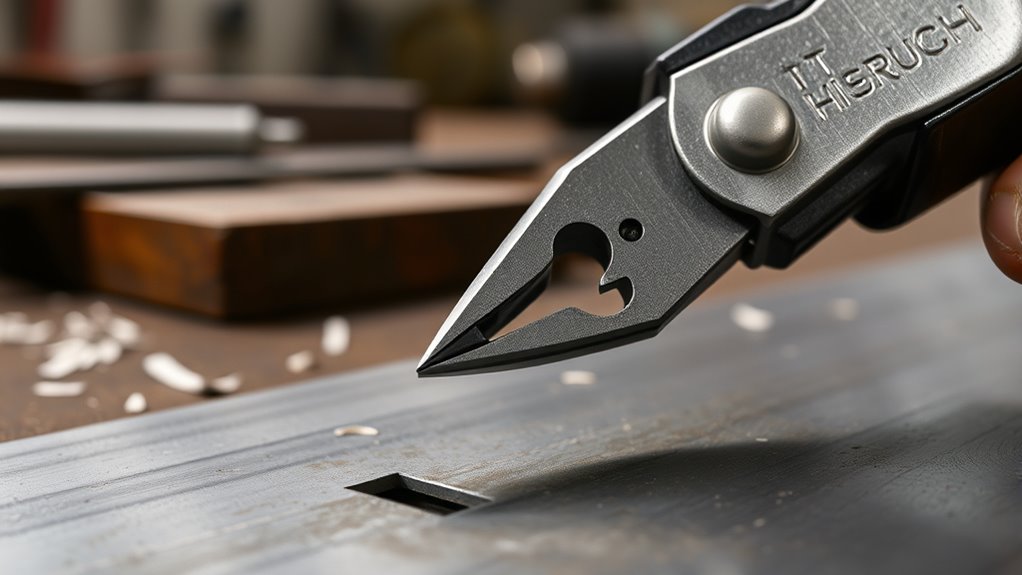
A nibbler tool cuts sheet material by removing a narrow strip or a series of small chips. On common powered models, a reciprocating punch moves through a die at high speed. The operator guides the cutting head along a line while the tool makes repeated overlapping cuts.
This action is different from the long slicing motion of shears or snips. Because the cutting load is concentrated at the punch and die, a nibbler can follow curves and cutouts while putting relatively little side pressure on the panel. That helps control distortion, although it does not guarantee a perfectly flat or burr-free edge.
Most portable nibblers are designed for sheet metal. Some specialty models or drill attachments may list plastic or other sheet materials, but you should not assume that a metal nibbler is safe for acrylic or plastic. Check the exact manual for approved materials, thickness, tooling, and speed.
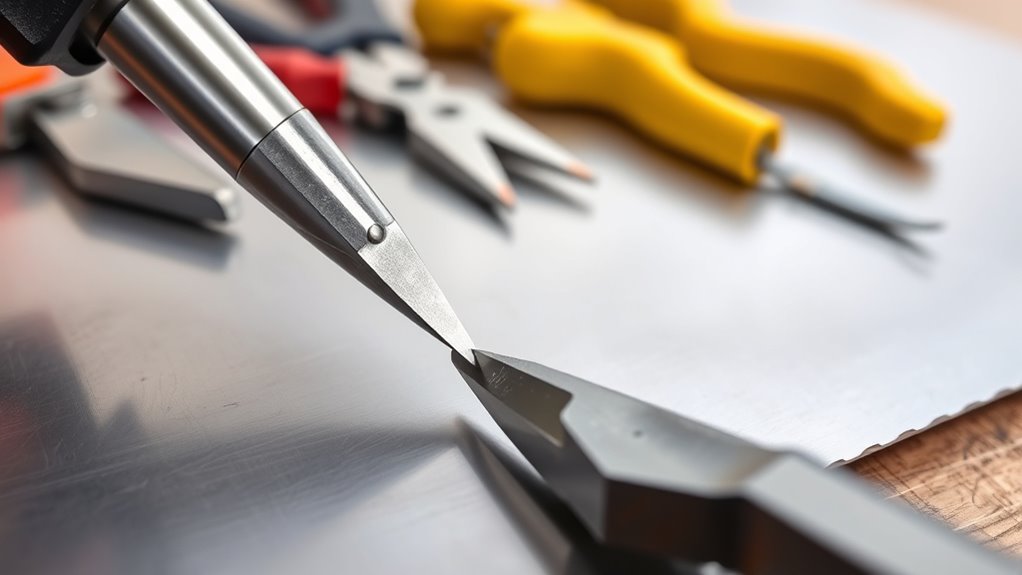
How Does a Nibbler Work?
The motor, air drive, drill, or hand mechanism moves the punch up and down through the die. Each stroke shears away a small piece of material. The removed path is called the kerf, and its width depends on the cutting head.
- The punch enters the sheet: The moving punch presses the material against the die.
- A chip separates: The punch and die shear out a small piece of sheet.
- The tool advances: You move the head slightly forward while the punch repeats the cycle.
- The cuts overlap: Repeated strokes form a continuous straight or curved cut.
The Bosch GNA 2.0 manual, for example, identifies the punch and die as the cutting parts and explains that the cut occurs during the punch’s upward motion. Tool designs vary, so always follow the operating direction and setup instructions for your model.
A nibbler trades a small amount of material for control: it creates a real kerf and sharp chips, but that waste path lets the tool turn through shapes that are difficult for many straight-cut tools.
Types of Nibbler Tools
The best type depends on how often you cut, where you work, and how thick or strong the material is.
- Hand nibblers: Manual models suit short cuts, small repairs, and thin sheet. They are slower but need no power source.
- Corded electric nibblers: These provide steady power for shop work and longer cuts, but the cord must stay clear of sharp edges and chips.
- Cordless nibblers: Battery models are portable and useful on roofs, vehicles, and job sites where outlets are limited.
- Pneumatic nibblers: Air-powered tools can be compact and productive in a shop with a correctly sized compressor and air supply.
- Drill-powered attachments: These convert a compatible drill’s rotation into a cutting action. Their capacity, turning radius, and control vary widely, so use only the drill speed and material limits stated by the attachment maker.
Note: “Nibbler” can describe more than one cutting-head design. Confirm whether your tool removes chips with a punch and die or uses a different shearing head before choosing replacement parts or following maintenance advice.
Where Nibblers Excel in Sheet Metal Cutting
A nibbler is most useful when the cut shape matters more than maximum straight-line speed. It can help you make cleaner-fitting parts before welding, fastening, riveting, or forming.
- Curves and patterns: Many models can follow arcs and irregular outlines within their minimum turning radius.
- Interior cutouts: The head can enter a drilled starter hole to make a closed opening.
- Corrugated and profiled sheet: Some nibblers are designed to cross ribs and raised profiles used in roofing and deck plate. Makita lists this use for its JN1601 nibbler.
- Notches and edge trimming: The narrow head can remove local sections without making a long cut through the whole panel.
- Detailed fit-up: Controlled trimming can improve panel alignment before checking proper fillet weld sizing or other joint requirements.
Nibblers are useful on thin mild steel, stainless steel, and aluminum when the exact model is rated for the material. They are not general-purpose tools for plate, bar, tubing, or material beyond the stated cutting capacity.
Benefits and Limitations of a Nibbler
A nibbler gives you strong control for corners, cutouts, curves, and detailed patterns. Its punch-and-die action can limit panel distortion, which matters when a part must keep its shape for auto body repair, signs, vents, brackets, or custom covers.
| Feature | What a Nibbler Does Well | Trade-Off |
|---|---|---|
| Curves | Follows curved and irregular lines within the tool’s turning radius | Very tight corners may need relief cuts or a different tool |
| Panel shape | Usually creates less side distortion than blade tools that curl or push the offcut | Thin or poorly supported sheet can still vibrate or bend |
| Interior openings | Can start inside a panel after drilling the required access hole | The starter-hole size is model-specific |
| Edge finish | Can make a controlled edge with sharp tooling and steady feed | The edge may be scalloped, burred, or sharp and usually needs inspection |
| Heat and sparks | Does not use an abrasive wheel or thermal arc | Sharp chips, coating debris, electrical hazards, and nearby flammables still require control |
| Waste | The kerf makes turning and closed shapes possible | The tool removes usable material and scatters small chips |
Because a nibbler does not use an abrasive wheel, it normally avoids the same grinding dust and continuous abrasive heat. However, it still exposes bare metal and can release coating chips. Review the material and coating before cutting, especially when working with galvanized or painted sheet. This guide to cutting and preparing coated steel safely explains related precautions.
For welding prep, controlled trimming can help preserve a clean fit-up before you join parts. That is useful when preparing mild steel for flux-core welding in windy conditions, but you still need to remove burrs, contamination, paint, and unsuitable coatings from the weld area.
Nibbler vs. Shears, Snips, Grinders, and Jigsaws
Nibblers, shears, snips, grinders, and jigsaws can all cut metal, but each tool handles the sheet and waste differently. Choose the tool from the cut shape, material thickness, required finish, access, and safety controls.
| Tool | Best For | Main Trade-Off |
|---|---|---|
| Nibbler | Curves, corrugated sheet, notches, and interior cutouts | Creates a kerf and many sharp chips; straight cuts can be slower |
| Power shears | Fast straight or sweeping cuts in compatible sheet | May curl or deform an offcut and can be less agile on small closed shapes |
| Hand snips | Short trims, small repairs, and thin sheet without power | Slow on long cuts and tiring on tougher material |
| Angle grinder | Heavier cuts, rough removal, and work where a perfect sheet edge is not the first concern | Produces sparks, abrasive debris, noise, and more heat at the cut |
| Jigsaw with metal blade | Long curves and interior shapes when the sheet is well supported | Can vibrate thin sheet and may leave saw marks or burrs |
Choose a nibbler for detailed sheet-metal shapes; shears for faster straight cuts; snips for short manual trimming; and a grinder for heavier work where its spark, heat, and finish limits are acceptable. Before using any cutting tool, review the tool-specific fire-risk controls for metal cutting.
How to Choose the Right Nibbler
Start with the strongest and thickest material you expect to cut. Then compare that requirement with the tool’s stated capacity, minimum cutting radius, cutting-head design, power source, and replacement-part availability.
- Material and strength: Mild steel, high-strength steel, stainless steel, and aluminum do not place the same load on the punch.
- Actual thickness: Use the millimeter or inch value in the manual when possible. Do not rely on a gauge number without confirming the material.
- Cutting radius: The tool must be able to follow your smallest curve.
- Profile shape: Choose a head made for flat, corrugated, trapezoidal, or other profiled sheet as required.
- Power source: Choose manual, corded, cordless, pneumatic, or drill-powered operation based on access and run time.
- Tooling support: Confirm that the correct punch, die, wear plate, and service parts are available.
- Ergonomics: Check tool weight, grip, head visibility, vibration, and whether the head can rotate for the direction of cut.
Capacity is material-specific. The Makita JN1601 manual rates that model for 1.6 mm mild steel, 1.2 mm stainless steel, and 2.5 mm aluminum. Those figures are an example for one tool, not a universal nibbler limit.
Warning: Never test capacity by forcing the tool into an unknown sheet. Excess thickness or strength can damage the punch and die, jam the tool, spoil the workpiece, and increase the chance of losing control.
How to Use a Nibbler Safely and Effectively
Read the manual before the first cut because control direction, lubrication, starter-hole size, die adjustment, and capacity vary by model. Set up the work so the sheet stays stable and the waste chips cannot fall into footwear, equipment, upholstery, or finished surfaces.
Warning: Nibblers create flying particles, sharp chips, and sharp cut edges. Wear safety glasses with side protection and the other personal protective equipment required by your tool and hazard assessment. OSHA requires suitable eye or face protection where flying particles can injure the eyes. Disconnect the plug, air hose, or battery before changing or inspecting cutting parts.
- Inspect the tool: With power disconnected, check the punch, die, fasteners, cord, battery, air hose, and guards or covers listed in the manual. Do not use damaged or loose parts.
- Confirm the material: Identify the metal, thickness, strength, and coating. Verify that each falls within the tool’s rating.
- Mark the cut: Draw a clear line. Mark the waste side so you remember that the nibbler removes a strip rather than cutting on a zero-width line.
- Plan the entry: Start from an outside edge when possible. For an interior opening, drill the starter-hole diameter required by your manual. One model may need a different hole than another.
- Secure and support the sheet: Clamp the workpiece so it cannot shift or vibrate. Support both the finished part and any large offcut without blocking the tool path.
- Put on suitable protection: Use safety glasses, suitable gloves for sharp sheet and chips, close-fitting work clothing, and hearing protection when the manual or noise level calls for it. Keep hair, jewelry, cords, and loose clothing away from moving parts. More detail is available in this guide to protective clothing around metalwork.
- Start the tool as directed: Many powered models should be running before the punch enters the sheet. Hold the cutting head at the angle stated in the manual; the Bosch GNA 2.0 instructions call for holding the tool vertical to the sheet.
- Feed at a steady pace: Follow the marked line without twisting or forcing the head. Slow down before curves and let the punch complete each stroke.
- Manage chips safely: Stop as needed and use a brush, scraper, or suitable vacuum to collect chips. Do not wipe them away with bare hands. A magnet works only on ferrous chips and will not collect aluminum or many stainless chips.
- Finish the edge: Disconnect power, then inspect, file, or deburr sharp spots before handling, painting, fastening, or welding the part.
Pro Tip: Practice on scrap from the same material and thickness. A short test cut shows the true kerf, turning radius, feed speed, chip direction, and edge finish before you touch the finished panel.
How to Cut Straight Lines, Curves, and Interior Openings
For a straight line, use a bold mark or clamp a guide where the tool body can follow it without rubbing the cutting head. Keep the same offset from the guide because the punch removes a strip of material.
For a curve, stay outside the final line on the first pass if the part must fit precisely. Use smooth hand movement and respect the tool’s minimum radius. Do not pivot the head sharply while the punch is buried in the sheet.
For an interior opening, drill the required starter hole fully inside the waste area. Deburr the hole, insert the head without forcing it, and begin the cut in the direction specified by the tool maker. The Bosch GNA 2.0 manual, for example, calls for a 16 mm predrilled hole for inside cuts; that size applies to that model only.
Nibbler Maintenance and Tool Life
Sharp, correctly aligned tooling produces a better cut and places less load on the drive. Maintenance intervals and lubricants are model-specific, so use the manual rather than a general schedule.
- Disconnect the power source before cleaning, adjustment, or replacement.
- Brush chips from the cutting head, vents, and work area after use.
- Inspect the punch and die for wear, chips, cracks, looseness, and poor alignment.
- Use only the lubricant and interval stated by the manufacturer. Some tools call for regular punch-and-die lubrication, while others use different service procedures.
- Replace worn parts with the correct model-specific components. Milwaukee, for example, describes the punch and die as replaceable cutting parts on its M12 FUEL nibbler.
- Do not grind or reshape a punch or die unless the tool maker expressly permits it.
- Store the tool dry and protected from impact, with the cord, battery, or air fitting in good condition.
Common Mistakes to Avoid
- Forcing the feed: Pushing faster than the punch can cycle causes chatter, rough edges, and extra tool wear.
- Exceeding capacity: A tool rated for one thickness of mild steel may have a lower stainless-steel limit.
- Ignoring the kerf: Cutting directly on the finished dimension can make the part too small.
- Tilting the head: An incorrect angle can bind the punch, widen the cut, or damage the tooling.
- Using a starter hole that is too small: Forcing the head into the hole can damage both the sheet and tool.
- Letting chips collect under the panel: Trapped chips scratch finished surfaces and create puncture hazards.
- Continuing with dull tooling: Worn punches and dies reduce cut quality and can overload the drive.
- Skipping edge finishing: A cut that looks clean can still have sharp burrs or scallops.
Nibbler Troubleshooting
| Problem | Likely Cause | What to Do |
|---|---|---|
| Rough or heavily scalloped edge | Feed is too fast, tooling is worn, or the sheet is vibrating | Slow the feed, improve support, and inspect the punch and die with power disconnected |
| Chatter or binding | Tool is tilted, material is beyond capacity, or the cut radius is too tight | Stop immediately, verify the material and angle, and use a wider curve or different tool |
| Tool wanders off the line | Poor visibility, excessive speed, or no guide on a long straight cut | Remark the line, slow down, and use a correctly offset guide when practical |
| Tool slows or stalls | Overload, low battery, inadequate air supply, jammed chips, or worn tooling | Release the trigger, disconnect power, clear the problem safely, and check the manual before restarting |
| Finished surface gets scratched | Chips are trapped under the panel or tool | Protect the finish, clear chips often, and lift rather than slide the sheet over debris |
If the tool keeps binding, overheating, making unusual noise, or loosening its cutting head, stop using it. Follow the service instructions or have it checked by a qualified repair provider rather than continuing to force the cut.
Frequently Asked Questions
What are the disadvantages of using a nibbler?
A nibbler removes a strip of material, creates many sharp chips, and may leave a scalloped or burred edge. It is also slower than some shears on long straight cuts and is limited to the material, strength, thickness, and turning radius stated by the manufacturer.
Can you cut a straight line with a nibbler?
Yes. Mark the line clearly, support the sheet, and guide the tool at a steady speed. A correctly offset straightedge can help on a long cut, but it must not interfere with the cutting head or force the tool to tilt.
What is better for sheet metal: shears or a nibbler?
Shears are usually faster for straight or broad sweeping cuts. A nibbler is usually easier to steer through tighter curves, notches, corrugated profiles, and interior openings. The better choice depends on the material, cut shape, finish, and tool capacity.
What is the thickest metal a nibbler can cut?
There is no single maximum for all nibblers. Capacity depends on the exact model and the metal’s type and strength. Read the model’s rating for mild steel, stainless steel, aluminum, or other approved material, and never apply one material’s gauge limit to another.
Do nibblers leave burrs on sheet metal?
They can. Sharp, correctly aligned tooling may leave a controlled edge, but small burrs, sharp spots, and scallops are still possible. Inspect and deburr every cut before handling, coating, fastening, or welding the part.
Does a nibbler need a starter hole?
Only for a closed interior cut. Edge cuts can begin from the side of the sheet. For an interior opening, drill the diameter required by the manual; the correct size depends on the cutting head and model.
Can a nibbler cut corrugated metal roofing?
Some nibblers are designed for corrugated or profiled sheet and can cross raised ribs more easily than flat-sheet tools. Check that the head style and capacity match the exact roofing profile and material before cutting.
Can a nibbler cut plastic or acrylic?
Only when the manufacturer lists that material for the specific tool and cutting head. A tool intended for metal can crack, melt, grab, or chip plastic, so do not rely on a general nibbler label.
Safety Disclaimer: This article is for informational purposes only and does not replace the tool manual, workplace hazard assessment, or professional safety training. Always use the manufacturer’s capacity, setup, maintenance, and personal protective equipment instructions. Ask a qualified professional when the material, coating, tool condition, or cutting method is uncertain.
Sources
- OSHA 29 CFR 1910.133: Eye and Face Protection — supports protection from flying particles.
- OSHA: Hand and Power Tools — supports general power-tool inspection, disconnection, cord, guarding, and personal protective equipment practices.
- Bosch GNA 2.0 Operating Instructions — supports punch-and-die operation, model-specific capacity, starter-hole guidance, chip hazards, lubrication, and maintenance.
- Makita JN1601 Instruction Manual — supports material-specific cutting capacities and operating limits for one representative nibbler.
- Makita JN1601 Product Details — supports use on corrugated sheet materials and model-specific turning information.
- Milwaukee M12 FUEL Nibbler Punch and Die Set — supports replaceable punch-and-die tooling and use on thin or corrugated sheet.
Conclusion
A nibbler tool gives you controlled access to curves, notches, corrugated profiles, and interior cutouts in sheet material. Its punch-and-die action can limit distortion, but it also creates a kerf, sharp chips, and an edge that may need deburring.
Choose a model by the exact material, strength, thickness, cutting radius, and profile—not by a generic gauge label. Before cutting, secure the sheet, protect your eyes and hands, follow the manual, and practice on matching scrap. A steady feed and sharp, correctly maintained tooling will give you a cleaner part and a safer cut.


