Choosing between brazing and welding in auto body repair is not a matter of personal preference. The exact vehicle maker, model year, body material, joint design, and repair manual decide the approved method. In modern collision work, “brazing” usually means OEM-specified MIG brazing with silicon-bronze wire. Traditional torch brazing is mainly limited to detached, non-structural parts or older restoration work when the repair procedure allows it.
Quick Answer
Braze instead of weld only when the vehicle maker’s repair procedure calls for MIG brazing or when a detached, non-structural part is approved for torch brazing. Brazing lowers heat input and can limit warping and zinc-coating damage. Weld when the OEM requires fusion strength, or replace the part when sectioning is not allowed.
Key Takeaways
- Check the VIN, material type, and vehicle-specific body repair manual before choosing a joining method.
- Use MIG brazing only at joints where the vehicle maker allows or requires it.
- Do not treat torch brazing and MIG brazing as the same process; they use different equipment, joint behavior, and safety controls.
- Choose welding when the approved repair needs fusion, penetration, or structural load capacity.
- Use clean metal, the specified wire and shielding gas, a test coupon, fume control, fire protection, and restored corrosion protection.
At a Glance
| Time Required | Procedure lookup, material identification, setup, and a test joint add time before the repair; total repair time varies by panel and access. |
| Difficulty | Advanced; modern structural collision repair should be performed by a trained technician. |
| Tools Needed | OEM repair information, material identification, approved MIG-brazing or welding equipment, specified filler and gas, test coupons, PPE, local fume extraction, and fire protection. |
| Cost | Consumables may be modest, but approved equipment, training, repair information, ventilation, and corrosion-protection materials can make the full setup costly. |
What’s in This Article
- Verify the VIN and OEM Repair Procedure
- What Is Auto Body Brazing?
- Braze or Weld Decision Table
- When Should You Braze Instead of Weld?
- How Brazing Protects Thin Panels
- Can You Braze Dissimilar Metals Without Warping?
- Tools and Setup for Auto Body Brazing
- How to Braze a Clean, Strong Joint
- Common Brazing Mistakes to Avoid
- Inspection and Corrosion Protection
- When Welding Is the Better Choice
- Frequently Asked Questions
Verify the VIN and OEM Repair Procedure First
Start with the 17-character VIN, exact model year, body style, and production information. The NHTSA VIN Decoder can confirm basic vehicle details, but it does not replace the vehicle maker’s body repair manual.
Next, identify the damaged part and its material. A panel may be mild steel, high-strength steel, ultra-high-strength steel, galvanized steel, aluminum, or a mixed-material assembly. The same-looking panel can use a different material or joining method on another model year.
Read the complete vehicle-specific procedure before cutting, heating, or drilling. Confirm:
- The allowed repair area and whether sectioning is permitted.
- The required attachment method, such as squeeze-type resistance spot welding, MAG plug welding, MIG brazing, adhesive bonding, riveting, or full part replacement.
- The specified joint size, hole size, spacing, wire, shielding gas, and test method.
- Required corrosion protection, seam sealer, cavity wax, scan, calibration, and final inspection steps.
Warning: Never substitute brazing for welding—or welding for brazing—because the panel looks thin. I-CAR states that MIG brazing should not replace a weld without supporting OEM documentation.
What Is Auto Body Brazing?
The American Welding Society defines brazing as joining with a filler metal that melts above 840°F (450°C) but below the melting point of the base materials. In traditional brazing, the base metal does not melt, and the filler wets the surfaces and moves through a close-fitting joint.
Auto body work uses two related but different methods:
Traditional Torch Brazing
Traditional brazing uses a torch, a brazing filler rod, and often flux. Capillary action draws the molten filler into a close joint. It can work on detached brackets, some heat exchangers, trim pieces, and older non-structural restoration parts when the material and repair instructions allow it.
Do not assume an open flame is acceptable on a modern vehicle body. For example, Honda’s body repair guidance says not to use an open flame to heat body panels and requires technicians to follow the model-specific manual.
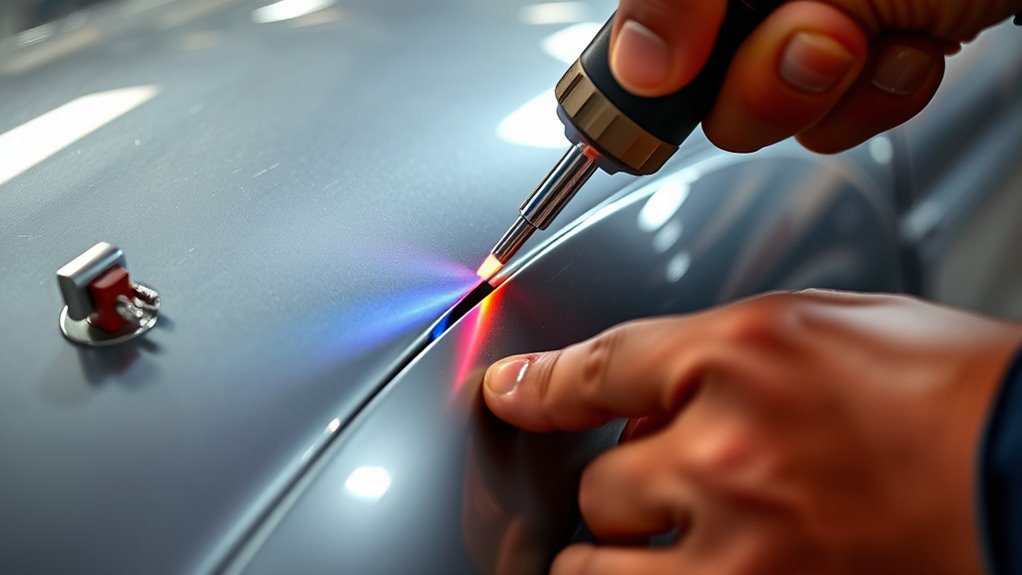
MIG Brazing in Collision Repair
MIG brazing uses a GMAW-style machine to melt silicon-bronze or another approved copper-alloy wire while limiting melting of the steel base panel. It is commonly used on specific galvanized or heat-sensitive steel joints when the vehicle maker calls for it. It does not behave exactly like a capillary torch-brazed joint.
Some shops and factories automate MIG brazing for repeatable production work. That does not make it a universal repair choice. Equipment settings, joint design, and approval remain vehicle- and procedure-specific.
Material families also matter. Do not treat modern sheet steel, aluminum, or mixed-metal assemblies like cast iron; each has different welding challenges.
Lower heat is a benefit only when the joint, filler, equipment, and procedure have been engineered for that exact repair.
Braze or Weld? Decision Table
| Repair condition | Likely direction | What decides |
| OEM procedure identifies a MIG-brazed joint | MIG braze | Use the exact wire, gas, joint geometry, and test method in the procedure. |
| Thin outer panel with no approved brazing instruction | Do not guess | Use the OEM welding, bonding, riveting, or replacement method. |
| Detached, non-structural older part approved for torch brazing | Torch braze may fit | Base metal, filler compatibility, joint clearance, service temperature, and fire safety. |
| Load-bearing, crash, suspension, seat-belt, or battery-protection structure | Weld, bond, rivet, or replace as specified | Vehicle-specific structural repair procedure; brazing is not a default option. |
| Aluminum-to-steel mixed-material joint | Specialized OEM method | Often uses isolation, adhesive, rivets, or transition parts; do not improvise a direct braze. |
| Radiator, condenser, or refrigerant line | Specialist repair or replacement | Component construction, pressure testing, refrigerant recovery rules, and manufacturer instructions. |
When Should You Braze Instead of Weld?
You should braze instead of weld when the approved repair calls for brazing and lower heat input is part of the engineered joint. Typical reasons include controlling distortion, limiting burn-through, reducing damage to nearby galvanizing, or attaching heat-sensitive steels with an OEM-specified MIG-brazed joint.
Traditional torch brazing may also suit some detached, non-structural brackets, trim parts, or older components when the base metals and filler are compatible. It may create a leak-tight joint, but a sealed joint is not automatically a structural joint.
Use extra caution around temperature-sensitive coatings and parts. MIG brazing can reduce heat damage compared with steel-wire fusion welding, but it still burns paint, e-coat, seam sealer, and some zinc near the joint. Chrome-plated trim and finished surfaces should not be treated as though brazing leaves them untouched.
- Choose MIG brazing when the vehicle-specific procedure identifies it.
- Choose traditional brazing only for an approved non-structural component and compatible joint.
- Choose welding, bonding, riveting, or replacement when the OEM requires that method.
For aluminum repairs, flux-core wire is not a general substitute for an approved MIG, TIG, rivet-bonded, or replacement process. Review the limits of flux core wire, then follow the vehicle maker’s procedure.
Warning: Do not braze a structural auto body part unless the vehicle-specific repair procedure expressly allows that method at that location.
How Brazing Protects Thin Panels
Brazing keeps the base metal below its melting point, and MIG brazing usually puts less heat into the panel than conventional steel-wire fusion welding. Lower heat can reduce warping, burn-through, and the size of the heat-affected area.
In traditional brazing, filler flows through a properly fitted joint by capillary action. In MIG brazing, the arc melts the filler wire and lays it onto the joint; wetting and joint design matter, but the process should not be described as ordinary capillary brazing.
Less heat can protect more of the original galvanized coating next to the joint. It does not remove the need to clean the work area or restore corrosion protection after the repair.
A smaller heat-affected zone may reduce unwanted changes to heat-sensitive steel, but it does not prove that the joint has the required strength. Joint design, overlap, hole size, spacing, filler transfer, and testing control performance.
Brazed joints are not simply “weaker” or “stronger” than welded joints in every case. A well-designed brazed joint can be strong, but collision repair must match the tested OEM attachment method rather than rely on a generic tensile-strength comparison.
General guidance about the maximum fillet weld size does not replace the vehicle maker’s specified plug, slot, lap, or seam geometry.
Can You Braze Dissimilar Metals Without Warping?
Brazing can join some dissimilar metals because the base materials do not have to melt together. The filler must wet both surfaces, the joint must handle service loads, and the metals must be protected from galvanic corrosion.
That does not make aluminum-to-steel brazing a routine body-shop repair. Direct aluminum-to-steel joining can form brittle intermetallic compounds and may need a coating, transition insert, adhesive, rivets, isolation layer, or another engineered process. ESAB notes that brazed coating-type aluminum-to-steel joints are generally used for sealing rather than full mechanical strength.
- Confirm the exact materials, coatings, and approved joining method.
- Use only the filler, surface treatment, and joint design specified for both metals.
- Control heat and isolate the finished joint against moisture and galvanic corrosion.
Flux can control oxidation in traditional brazing, but MIG brazing normally uses shielding gas rather than flux-coated rod. The wrong flux can contaminate the joint or create hazardous fumes.
Plasma-cut edges may also need cleaning and conditioning before joining. Choices such as plasma-cutting gas can affect edge quality, but they do not decide whether brazing is approved.
Tools and Setup for Auto Body Brazing
The correct setup depends on whether the procedure calls for MIG brazing or traditional torch brazing. Do not select a torch, wire, rod, gas, or flux from a generic chart when the vehicle maker provides a specification.
MIG-Brazing Equipment and Shielding Gas
Modern collision repair commonly uses a MIG-brazing-capable GMAW machine, often with a pulsed program, a liner and drive system suitable for soft copper-alloy wire, the specified contact tip, and the approved wire diameter.
Honda’s published guidance requires 100% argon for its MIG-brazing procedures. Other vehicles may have different equipment details, so use the body repair manual and the machine and filler manufacturer’s instructions.
Copper-silicon wire such as ERCuSi-A/CuSi3 is common for MIG brazing zinc-coated steel, but “common” does not mean universal. A TIG filler family chart is not a substitute for the MIG-brazing wire listed in the repair procedure.
Torch and Gas Setup
For a detached, approved traditional brazing job, an oxy-fuel torch must deliver controlled, even heat without melting the base metal. Use the torch type, tip, pressure, flame, filler, and flux recommended for the materials.
A neutral flame is common for many bronze-brazing tasks, but the correct flame depends on the filler system. Check regulators, hoses, flashback protection, connections, and the tip before lighting.
- Move the part to a designated hot-work area when practical.
- Keep the flame moving and heat the joint, not just the filler rod.
- Stop if the base metal begins to melt, coatings ignite, or the joint loses fit.
Note: Some OEMs prohibit open-flame heating on body panels. A torch is not a default substitute for MIG brazing.
Filler Rod Selection
Choose filler by the approved process, both base metals, joint design, service temperature, corrosion exposure, and required strength. Copper-silicon and bronze fillers may suit some steel applications, while aluminum brazing uses different fillers and surface preparation.
For traditional brazing, the filler must melt below the base materials and wet both surfaces. Joint clearance must match the filler and heating method so capillary action can work.
Remove paint, rust, oil, adhesive, seam sealer, and only the amount of factory coating required by the procedure. Do not automatically strip all galvanizing. When zinc must be removed in the immediate joint area, control dust and fumes and use an approved method; this guide to zinc coating removal provides additional background.
Use flux only when the filler system requires it. Read the safety data sheet because heated flux can irritate the eyes, skin, nose, and throat.
Shielding and Safety
Set up local exhaust ventilation close enough to capture fumes without pulling shielding gas away from a MIG-brazed joint. OSHA requires controls for welding and brazing fumes and has specific ventilation rules for indoor work on zinc-bearing materials.
Wear the eye, face, hand, body, hearing, and respiratory protection required by the hazard assessment. MIG brazing needs an appropriate welding helmet and protective clothing; torch brazing needs suitable filter goggles or a face shield as required. Ordinary safety glasses alone are not enough.
- Remove or shield flammable trim, insulation, seam sealer, sound deadener, fuel residue, and materials on both sides of the panel.
- Keep a suitable fire extinguisher ready and use a fire watch when hidden heat or sparks can start a fire.
- Follow the OEM procedure to disconnect the 12-volt battery, disable high-voltage systems, protect electronic modules, and handle airbags or other pyrotechnic devices.
- Recover refrigerant with approved equipment before heating any part of an A/C circuit; do not vent refrigerant.
NIOSH lists metal fume fever among the effects of zinc-oxide fume exposure. Good ventilation and correct respiratory protection are essential when heating galvanized steel.
Pro Tip: Make a test joint from matching metal thickness and coating before touching the vehicle. Tune technique on the coupon, then perform the destructive test required by the OEM.
How to Braze a Clean, Strong Joint
A clean, strong auto body joint starts with the correct procedure, not the torch or trigger. Use this workflow as a checklist; the vehicle maker’s steps and dimensions always take priority.
Joint Prep Basics
- Identify the vehicle and materials. Confirm the VIN, model year, panel name, steel strength or aluminum alloy, coatings, and all layers in the joint.
- Read the complete OEM procedure. Mark the approved cut, flange, hole, and attachment locations. Confirm whether MIG brazing is allowed.
- Make the vehicle safe. Follow OEM steps for the battery, high-voltage system, fuel system, refrigerant circuit, airbags, modules, glass, trim, and nearby adhesives.
- Prepare a matching test coupon. Use the same metal type, thickness, layers, coating condition, hole size, overlap, wire, and gas as the repair.
- Clean only the required area. Remove contamination to sound metal without thinning the panel or stripping more corrosion protection than necessary.
- Fit and clamp the joint. Maintain the exact overlap, gap, alignment, and access needed for the approved joint.
Traditional capillary brazing needs a clean, close-fitting gap. MIG-brazed plug, slot, lap, or seam joints use the geometry in the body repair manual instead. Do not close a specified gap or invent one.
Torch and Filler Control
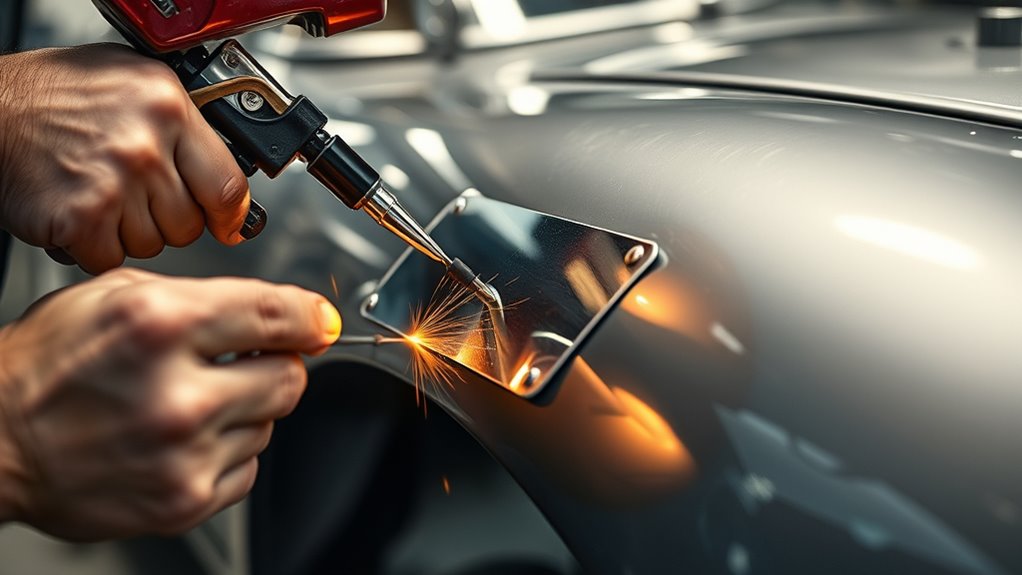
For MIG brazing, set the machine for the specified wire, diameter, gas, metal thickness, and joint. Keep heat input low enough to wet and transfer the filler without turning the repair into an uncontrolled fusion weld.
For traditional torch brazing, heat both sides of the joint evenly and touch the filler to the heated joint rather than melting it directly in the flame. Let capillary action draw the filler through the fitted seam.
Do not flood the joint with filler. Excess bronze can hide poor transfer, trap flux, increase finishing time, and make inspection harder.
Let the joint cool without movement. Do not quench unless the approved procedure specifically requires it.
Test and Inspect the Joint
Perform the specified destructive test on the coupon before brazing the vehicle. Honda/Acura guidance, for example, requires a test for each unique MIG-brazed joint and checks silicon-bronze transfer after the coupon is peeled apart.
Inspect the vehicle joint for the required bead or plug size, continuous wetting, transfer, penetration where applicable, cracks, porosity, skipped areas, burn-through, panel distortion, and damage to nearby components.
If the test coupon or vehicle joint fails, stop and correct the cause. Do not cover a questionable joint with filler, seam sealer, or body filler.
Common Brazing Mistakes to Avoid
Small process errors can weaken a brazed joint quickly. The most serious mistake is choosing brazing without an approved repair procedure.
- Using brazing because the panel is thin. Panel thickness alone does not authorize a joining method.
- Confusing MIG brazing with torch brazing. Their heat sources, filler delivery, joint design, and inspection methods differ.
- Using the wrong wire or gas. Steel wire, silicon-bronze wire, aluminum wire, argon, and argon/CO2 blends are not interchangeable.
- Skipping the test coupon. A bead that looks smooth may still have poor transfer or weak attachment.
- Brazing over rust, paint, oil, e-coat, or adhesive. Contamination blocks wetting and can create fumes or porosity.
- Removing too much zinc or leaving bare steel. Both errors reduce corrosion resistance.
- Overheating the panel. Excess heat can warp sheet metal, enlarge the heat-affected area, damage coatings, and alter heat-sensitive steel.
- Ignoring the back side of the repair. Hidden trim, foam, wiring, fuel vapor, seam sealer, and sound deadener can ignite.
Keep the torch or arc moving and use only enough filler to make the approved joint. The same contamination and fume concerns discussed in surface preparation for galvanized steel also matter during MIG brazing.
Inspection and Corrosion Protection After Brazing
After the joint passes inspection, finish only as much as the repair procedure allows. Do not grind away the bronze or reduce the joint below the specified size just to make it look flat.
Clean flux residue from traditional brazing because trapped residue can attract moisture and promote corrosion. For MIG-brazed steel, remove spatter and contamination without thinning the panel.
Restore corrosion protection on both sides of the joint. Depending on the OEM procedure, this may include epoxy primer, approved seam sealer, weld-through primer in specific resistance-spot-weld areas, topcoat, underbody coating, or cavity wax. Honda guidance specifically says not to use weld-through primer in MIG-brazed joints and directs epoxy primer over the completed exposed joint.
Reinstall heat shields, wiring retainers, foam, trim, and safety components exactly as specified. Complete any required pre- and post-repair scans, calibrations, leak tests, pressure tests, or quality-control measurements.
When Welding Is the Better Choice
Choose welding when the vehicle-specific procedure requires fusion, penetration, or a weld with defined plug, butt, seam, or spot-weld performance. Welding may be required for frame sections, crash structures, suspension mounts, seat-belt anchors, reinforcements, and other safety-critical parts—but some of these parts must be replaced rather than sectioned.
Welding is also the better choice when the filler and base metal must fuse, the joint must handle high service temperature, or brazing filler would not meet the design load. The approved process may be squeeze-type resistance spot welding, MAG welding, MIG welding, TIG welding, laser welding, or another method.
Do not assume welding is always stronger in a way that makes it safer to substitute. Too much heat, the wrong wire, poor penetration, an unapproved sectioning location, or damage to ultra-high-strength steel can make a welded repair unsafe.
Note: A clean-looking braze or weld does not prove structural strength. Procedure compliance, test results, joint geometry, and corrosion protection matter more than appearance.
Frequently Asked Questions
When should you use brazing instead of welding?
Use brazing when the vehicle-specific repair procedure calls for MIG brazing, or when an approved detached, non-structural part is suitable for traditional brazing. Lower heat can reduce warping, burn-through, and damage to nearby galvanizing, but it does not override the OEM attachment method.
At what point does brazing make more sense than welding?
Brazing makes more sense when lower heat is part of an engineered joint and the repair manual approves it. It can help on heat-sensitive or galvanized steel joints, but a technician should not choose it only because welding might warp the panel.
What is not an advantage of brazing?
Universal structural strength is not an advantage of brazing. Brazing can control heat and join selected materials, but joint strength depends on filler, overlap, wetting, load direction, service temperature, and the tested repair design.
Are brazed joints stronger than welded joints?
Not as a general rule. A well-designed brazed joint can be strong, while a poor weld can fail, but neither process is automatically stronger in every joint. In collision repair, use the OEM-tested attachment method.
Can you braze rusted auto body metal?
No. Remove rust, paint, oil, scale, and other contamination to sound metal. If corrosion has thinned or perforated the panel outside an approved repair area, replace the affected part or section as the vehicle maker directs.
Is MIG brazing the same as torch brazing?
No. MIG brazing uses an arc and continuously fed copper-alloy wire, usually with shielding gas. Traditional torch brazing heats a fitted joint and often uses rod and flux, with capillary action drawing filler through the seam.
Can you braze an automotive A/C line or radiator?
Only when the component manufacturer approves the repair and a qualified technician has recovered refrigerant, identified the alloy, and can pressure-test the finished part. Many modern aluminum/plastic radiators, condensers, and formed refrigerant lines are replaced instead of torch-repaired.
Conclusion
Brazing works best in auto body repair when it is the approved joining method, not merely the lowest-heat option. OEM-specified MIG brazing can limit distortion and preserve more galvanizing on selected steel joints. Traditional torch brazing may fit some detached, non-structural components, but it is not a general method for modern body structure.
Verify the VIN and material, read the body repair manual, protect fuel, electrical, high-voltage, airbag, and refrigerant systems, make and test a matching coupon, and restore corrosion protection after the joint is complete. Use welding, bonding, riveting, or full replacement whenever the approved procedure requires it.
Sources
- American Welding Society — What Is Brazing? — definition and 840°F (450°C) filler-metal threshold.
- I-CAR — MIG Brazing: What, Where, When, and Why? — OEM-procedure requirement and current collision-repair guidance.
- Honda Body Repair News — Welding and Sectioning Guideline Revisions — approved joining methods, shielding gas, coating preparation, and heat limits.
- OSHA 29 CFR 1910.252 — eye protection, ventilation, flux, zinc, and hot-work safety requirements.
- U.S. EPA — Regulatory Requirements for MVAC System Servicing — refrigerant servicing and technician requirements.
- NHTSA VIN Decoder — official VIN-based vehicle identification information.


