
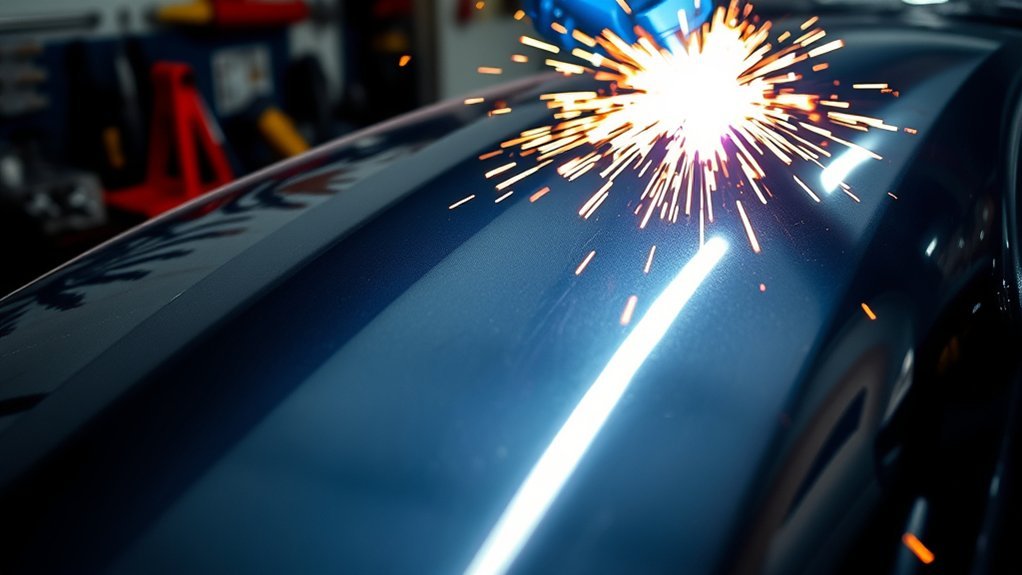
Auto body panels warp during welding because a small weld zone gets hot, expands, and then shrinks as it cools while the surrounding sheet stays cooler. On thin steel, even a few long beads can pull the panel into waves. You prevent most distortion by fitting the patch tightly, tacking in a spread-out pattern, welding short stitches, and letting the panel cool between welds.
Quick Answer
To weld body panels without warping, use clean thin sheet metal, keep the gap tight, tack the panel in place, then add short stitch welds while skipping around the seam. Let the metal cool between tacks, use copper backing when possible, and avoid grinding until the weld is cool.
Key Takeaways
- Warping comes from uneven expansion, contraction, and weld shrinkage, not just from one “bad” weld.
- Short tacks and stitch welds are safer for thin body panels than long continuous beads.
- A tight panel fit, clean metal, clamps, and copper backing reduce burn-through and distortion.
- Cooling helps, but do not shock-quench unknown or structural steel without checking the repair procedure.
- On late-model vehicles, follow the OEM repair manual before welding any structural or high-strength steel part.
At a Glance
| Time Required | 1 to 4 hours for a small patch, depending on fit-up, cooling time, and finishing |
| Difficulty | Intermediate; harder on 19-gauge and thinner sheet metal |
| Tools Needed | MIG welder, matching wire and gas, clamps, magnets, copper backing, grinder, wire brush, hammer and dolly, PPE, fire extinguisher |
| Cost | Low if you already own welding gear; higher if you need shielding gas, copper backing, or repair panels |
Warning: Welding on a vehicle can ignite paint, seam sealer, insulation, fuel vapors, undercoating, and wiring. Remove nearby combustibles, keep a fire extinguisher ready, protect your eyes and skin, and work with good ventilation. Do not weld structural, coated, AHSS, or UHSS panels unless the vehicle maker’s repair procedure allows it.
What Causes Auto Body Panel Warping During Welding?
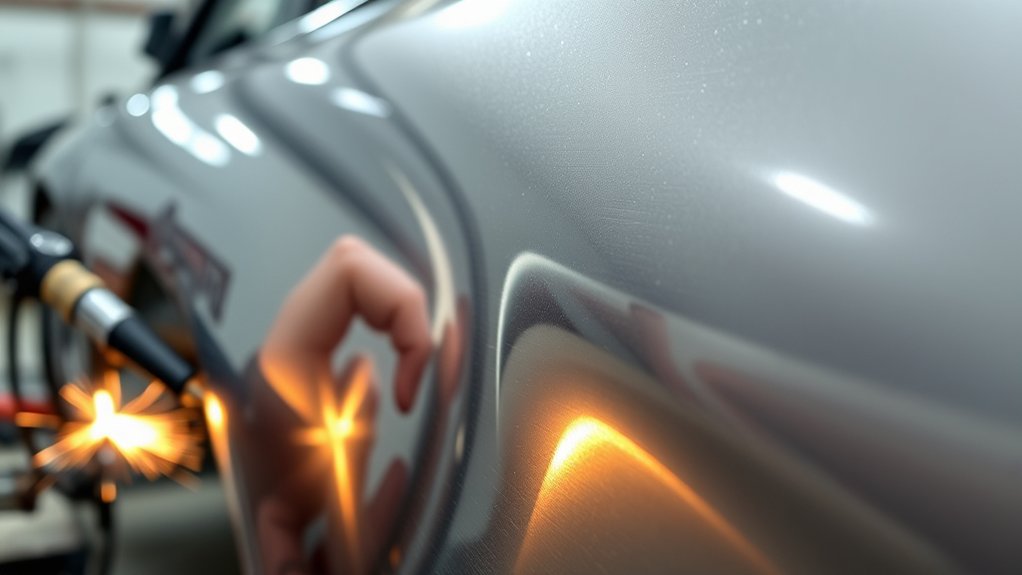
Auto body panel warping happens when the weld area expands from heat and then shrinks as it cools. The surrounding metal stays cooler and resists that movement, so the panel pulls, buckles, or forms a wavy low spot.
Thin materials, including 19-gauge steel and similar sheet metal, are especially sensitive because they have less mass to absorb heat. A long bead can put too much heat into one small area before the rest of the panel has time to cool.
The weld puddle also shrinks as it solidifies. That shrinkage pulls on the base metal beside the seam. If you keep welding in one area, the pull builds up and the panel can oil-can, ripple, or sink around the joint.
Good heat control is the main fix. Use short welds, skip around the seam, keep the panel fitted tightly, and practice on scrap before welding the vehicle. If you are learning with self-shielded flux core, test carefully first because flux-core wire can add spatter and heat on thin body panels.
Before You Weld: Check the Panel and Repair Method
Before you strike an arc, confirm what you are welding. Older mild-steel body panels are more forgiving than many modern structural parts. Some late-model vehicles use advanced high-strength steel, ultra-high-strength steel, boron steel, aluminum, adhesives, rivets, or squeeze-type resistance spot welds in specific areas.
Do not guess on structural repairs. If the panel is part of a rail, pillar, rocker, roof structure, suspension mount, or crash-load path, check the OEM repair manual before using MIG welding. Excess heat can reduce the strength of some modern steels.
For non-structural mild-steel patch work, inspect both sides of the panel. Remove paint, primer, rust, seam sealer, undercoating, sound deadener, and nearby flammable material. Clean metal welds cooler and more predictably than dirty metal.
Note: If you do not know the steel type, treat the job as a repair-procedure question first and a welding technique question second. Heat control cannot make an unapproved weld location safe.
Best Welder Setup for Thin Auto Body Panels
A properly adjusted MIG welder in short-circuit transfer is usually the easiest setup for thin mild-steel body panels. Use the machine chart as a starting point, then fine-tune on scrap from the same thickness before touching the vehicle.
- Wire size: Small wire is easier to control on thin sheet. Many body-panel jobs use small-diameter solid wire with shielding gas.
- Shielding gas: A common mild-steel MIG mix is argon and carbon dioxide. Keep drafts away from the weld area so the gas can protect the puddle.
- Voltage and wire speed: Set the machine low enough to avoid burn-through but high enough to fuse both edges. Review wire speed and voltage basics if the bead is sitting high, sputtering, or burning holes.
- Stickout: Keep stickout short and steady. Too much stickout can make the arc unstable.
- Test coupons: Weld two scrap pieces together, cool them, and check the back side for fusion before welding the panel.
Pro Tip: If the test weld burns through, do not simply move faster on the real panel. Reduce heat input, tighten the fit-up, use copper backing, and make shorter tacks.
Products Worth Considering

PRE-CUT WELDING COUPONS: 2 x 4 in mild steel plates are sized for bead practice, TIG, MIG, stick, gas welding, and small fabrication work without cutting sheet stock.

Perfect gift for any Stick Welding, MIG Welding, TIG Welding, Plasma Arc Welding, Electron Beam Welding, Laser Welding or Gas Welding you know. Men or Women. Heck, even grab one for the little boys or girls in your life.
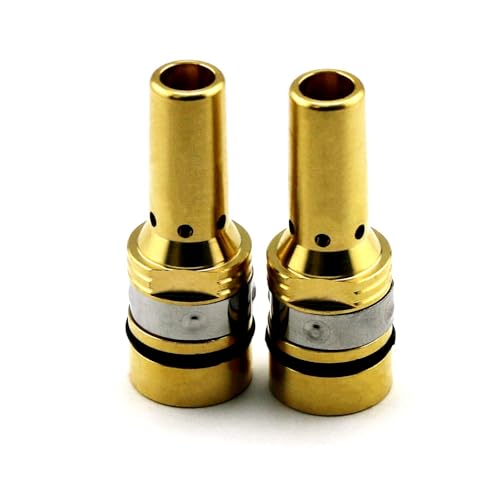
Premium quality heavy duty gas diffuser 404-26 for use with Tregaskiss MIG welding guns. Pack of 2-pcs gas diffusers.
Essential Techniques to Prevent Warping While Welding
To prevent warping while welding, focus on the whole process: fit-up, tack placement, weld length, cooling time, and grinding. A good weld pattern matters more than rushing a long seam.
Products Worth Considering
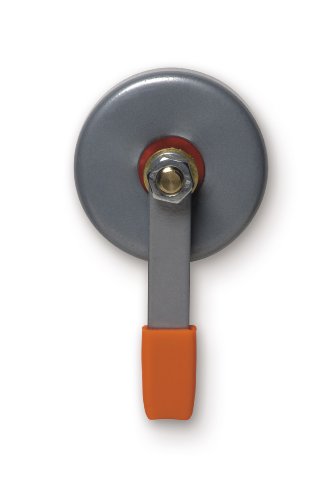
Allows you to ground your work piece with ease.
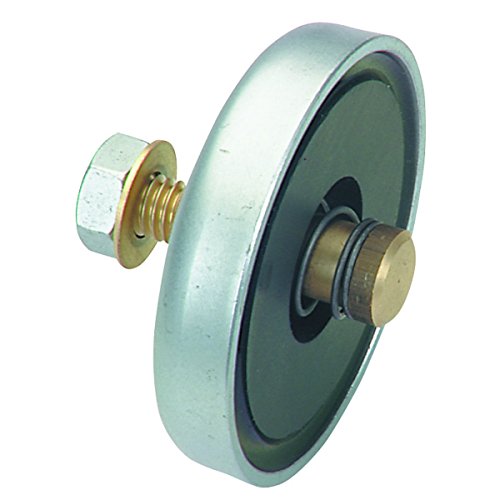
No matter where you’re welding, you can ground your weld fast with this handy magnetic welding block. A high powered magnetic base sticks to ferrous metal, making it perfect for pipe and pieces that are difficult to clamp.

Instant On/Off 300 Amp Grounding with 200 lb Magnetic Hold
Keep the Fit-Up Tight
Panel gaps make thin metal harder to weld. If the gap is too wide, you have to add more filler metal, which adds heat and shrinkage. Trim the patch slowly until it fits with a small, even gap. Use clamps, magnets, panel-holding tools, or clecos to hold the panel level.
For butt welds, aim for a consistent fit. For lap welds or plug welds, clean both mating surfaces and use weld-through primer only where the product instructions and repair procedure allow it.
Start With Spaced Tack Welds
Do not begin with a continuous bead. Place a tack, move several inches away, place another tack, and keep spreading the heat around the panel. Once the panel is held in place, fill the spaces with more tacks.
- Start at opposite ends or opposite sides of the repair.
- Let each tack cool before adding the next one nearby.
- Check panel shape often with your hand, a straightedge, or reflected light.
- Stop if the panel starts to crown, dip, or oil-can.
Use Short Stitch Welds
Use stitch welding with short welds rather than one long pass. On thin sheet metal, a stitch may be a quick tack or a short bead under 1 inch, depending on the panel thickness and machine settings. The goal is to fuse the joint without soaking the whole area with heat.
If you need more detail on this method, review stitch welding for thin metal and practice the rhythm on scrap first.
Skip Around the Panel
After each tack or short stitch, move to a different part of the seam. This spreads heat across the repair instead of building it in one spot. By the time you return to the first area, it should be cool enough to touch near the weld with a gloved hand.
Use the Back-Step Technique
The back-step technique means you weld a short section in the opposite direction of the overall seam progress. For example, you may move along the panel from left to right, but each short stitch is made from right to left. This can help balance shrinkage and control heat flow.
Support the Weld With Copper Backing
A copper spoon or copper backing bar can absorb heat and support the puddle. Weld metal usually will not fuse to copper, so it can help reduce burn-through on small gaps. Hold it tight behind the seam when you can safely reach the back side.
How to Cool Welds Effectively After Preventing Warping
Cooling welds effectively does not mean shocking every hot weld with water. It means controlling the pace so the panel never gets too hot in one area. The safest method for most thin mild-steel patch work is to weld a small amount, move away, and let the metal cool before adding more weld nearby.
Cooling Techniques Overview
- Pause between tacks: Give the panel time to cool naturally before welding close to the same spot again.
- Use compressed air carefully: A short air blast can help cool the area, but do not use it as an excuse to weld too much at once.
- Use copper backing: Copper helps pull heat out of the weld area and supports the puddle.
- Use a damp rag near the seam: Place it beside the weld zone to absorb heat from the surrounding panel, not as a harsh quench on unknown steel.
- Watch panel temperature: If the panel is too hot to touch near the repair with a gloved hand, pause longer.
Effective Cooling Products
Useful cooling aids include copper spoons, copper backing bars, compressed air, and damp cotton rags. Heat sink paste can help in some fabrication work, but keep it away from the weld joint unless the product is meant for welding and will not contaminate the seam.
A water table can help control heat during plasma cutting, but it is not a body-panel weld-cooling method. If you use plasma cutting to make a patch, clean the cut edge well before welding.
How Heat Affects Welding and Causes Warping
Heat affects welding in three main ways: it expands the base metal, melts a small weld puddle, and creates a heat-affected zone beside the bead. As the weld cools, the bead contracts. That contraction pulls on the surrounding panel.
Thin body panels show that pull quickly because they bend before thicker steel does. A frame bracket might tolerate a bead that would ruin a door skin, quarter panel, or patch panel. That is why body-panel welding is more about heat control than bead size.
Key factors that increase warping include:
- long continuous welds on thin sheet metal;
- wide panel gaps that require extra filler metal;
- dirty metal, rust, paint, or coating contamination;
- too much voltage or wire speed for the sheet thickness;
- grinding too aggressively while the weld is still hot;
- welding repeatedly in the same small area.
To minimize warping, control heat input and weld sequence. If you are comparing processes, remember that flux core welding techniques do not apply the same way to every material. Aluminum, mild steel, coated steel, and high-strength steel need different procedures.
Top Mistakes to Avoid for Successful Welding Without Warpage
Most warped panels come from a few repeat mistakes. Avoid these before you blame the welder or the patch panel.
- Running a long bead: A continuous seam puts too much heat into thin sheet metal.
- Leaving a wide gap: Gaps force you to bridge with filler, which adds heat and shrinkage.
- Grinding too soon: A hot weld plus a hot grinding disc can add more distortion.
- Welding over paint or rust: Contamination causes porosity, poor fusion, and extra heat fighting.
- Ignoring the back side: Seam sealer, insulation, wiring, and undercoating can burn behind the panel.
- Using the same settings for every panel: Test on matching scrap every time the thickness changes.
Clean metal matters. Before welding, remove paint, rust, oil, seam sealer, and coating from the weld area. If you are still building basic technique, review flux-core welding tips for beginners, then practice on scrap before moving to a visible body panel.
MIG Welding Techniques to Prevent Warping in Thin Sheet Metal
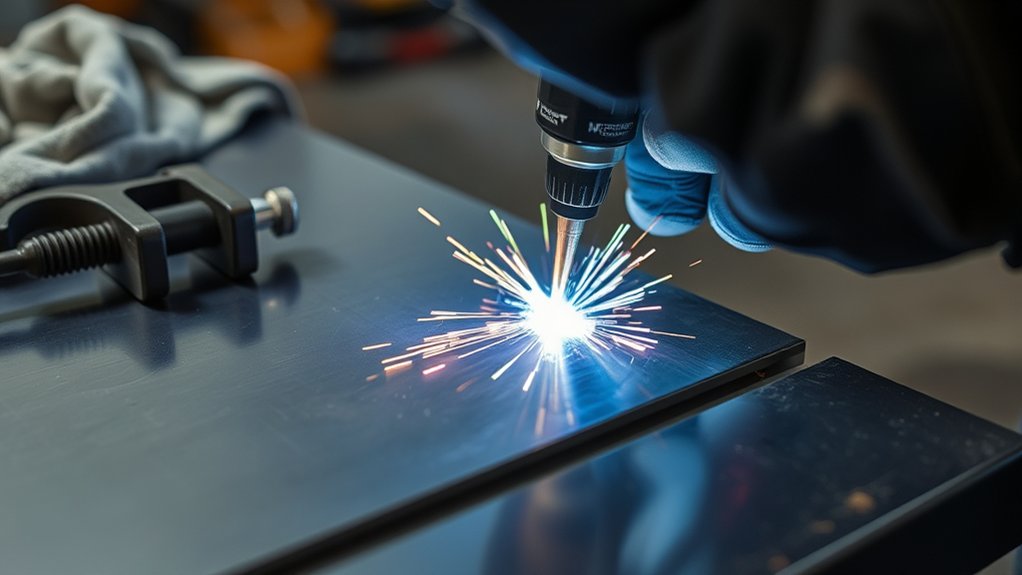
When you MIG weld thin sheet metal, your goal is a small, controlled weld with enough fusion and as little extra heat as possible. Keep the gun angle steady, keep the arc short, and avoid weaving.
- Clean the joint: Grind or sand both sides of the weld area to bright metal where possible.
- Fit and clamp: Hold the patch flush so the edges cannot lift as they heat.
- Make spaced tacks: Place tacks several inches apart, then add more tacks between them.
- Skip around: Move to a cool section after every tack or short stitch.
- Planish mild steel carefully: On non-structural mild steel, a light hammer and dolly can stretch a shrinking tack while it is still warm.
- Cool before grinding: Let the weld cool, then grind slowly in short bursts.
- Inspect both sides: Look for burn-through, pinholes, missed areas, and heat damage behind the panel.
The golden rule is simple: make the smallest sound weld that does the job, then move away before the panel stores too much heat.
How to Fix a Warped Panel After Welding
If the panel already warped, stop welding before you make it worse. Let the area cool fully, clean the weld, and identify whether the panel is high, low, or oil-canning.
- For a small high spot: Use a body hammer and dolly lightly. Work slowly and check the panel often.
- For shrinkage beside the weld: On mild steel only, planish the weld area to stretch the shrink back out.
- For oil-canning: Find the tight area causing the panel to pop. Do not keep adding weld over a stressed panel.
- For heavy warping: Consider cutting the seam back open, correcting the fit, and rewelding in a better sequence.
- For structural or high-strength panels: Do not heat-shrink or hammer aggressively unless the repair procedure allows it.
Use filler only after the metal is stable. Body filler should refine a repair, not hide a badly warped weld seam.
Troubleshooting Body Panel Welding Problems
| Problem | Likely Cause | Fix |
| Panel waves after welding | Too much heat in one area | Use shorter tacks, skip around, and cool longer between welds |
| Burn-through | Gap too wide or settings too hot | Tighten fit-up, lower heat, use copper backing, and practice on scrap |
| Weld bead sits high | Cold weld, poor angle, or wrong wire speed | Tune voltage and wire speed, clean the joint, and confirm fusion on scrap |
| Pinholes | Contamination, missed tacks, or thin edges | Clean again, add small tacks only where needed, and avoid overheating |
| Warping during grinding | Grinding too hot or too long | Use light pressure, short passes, and let the panel cool |
Frequently Asked Questions
How do you weld body panels without warping?
Fit the patch tightly, clamp it flush, tack it in several spaced locations, and then fill the seam with short stitch welds. Skip around the panel so heat does not build in one spot. Let the metal cool between welds and grind only after the weld is cool.
How do you fix a warped panel from welding?
Stop welding and let the panel cool first. For mild steel, you can lightly planish the weld with a hammer and dolly to stretch shrinkage. For larger distortion, correct the tight area before adding more weld. Do not heat-shrink or hammer structural high-strength panels unless the OEM repair procedure allows it.
How do you stop warping while welding?
Use less heat, shorter welds, and more cooling time. Make one tack or short stitch, then move to a different part of the seam. Use copper backing when possible, keep the joint clean, and avoid long beads on thin sheet metal.
What is the golden rule in welding thin body panels?
Use the least heat needed to make a sound weld. That means tight fit-up, clean metal, small tacks, short stitch welds, and patience between welds. A bigger bead is not better on thin sheet metal.
Should you cool body-panel welds with water?
Use caution. A damp rag near the weld can help control heat on mild-steel sheet metal, but shock-quenching the weld itself is not a universal rule. On unknown, coated, structural, or high-strength steel, follow the repair procedure and avoid aggressive cooling unless it is approved.
Is flux-core welding good for auto body panels?
Flux-core can work in some hands, but it is usually harder to control on thin body panels because it can create more spatter and heat. A properly set MIG welder with shielding gas is often easier for thin mild-steel body-panel repairs.
Conclusion
Avoiding auto body panel warping while welding comes down to heat control. Keep the patch fitted tightly, make small tacks, skip around the seam, and let the panel cool before adding more weld. Use copper backing when possible, grind slowly, and stop as soon as the panel starts to move. With patient technique, you can make cleaner welds with less filler, less distortion, and a smoother repair.
Sources
- OSHA 1910.252, Welding, Cutting, and Brazing General Requirements — fire prevention, PPE, eye protection, and ventilation safety guidance.
- How it cools? Studying the heat flow out of a semi-infinite slab in welding — current research on heat dissipation, residual stress, distortion, and cracking.
- Fabrication Sequence Optimization for Minimizing Distortion in Multi-Axis Additive Manufacturing — supports the role of temperature gradients and shrinkage in distortion.
- Fronius Cold Metal Transfer welding process — manufacturer information on controlled low-heat metal transfer for thin materials.




