
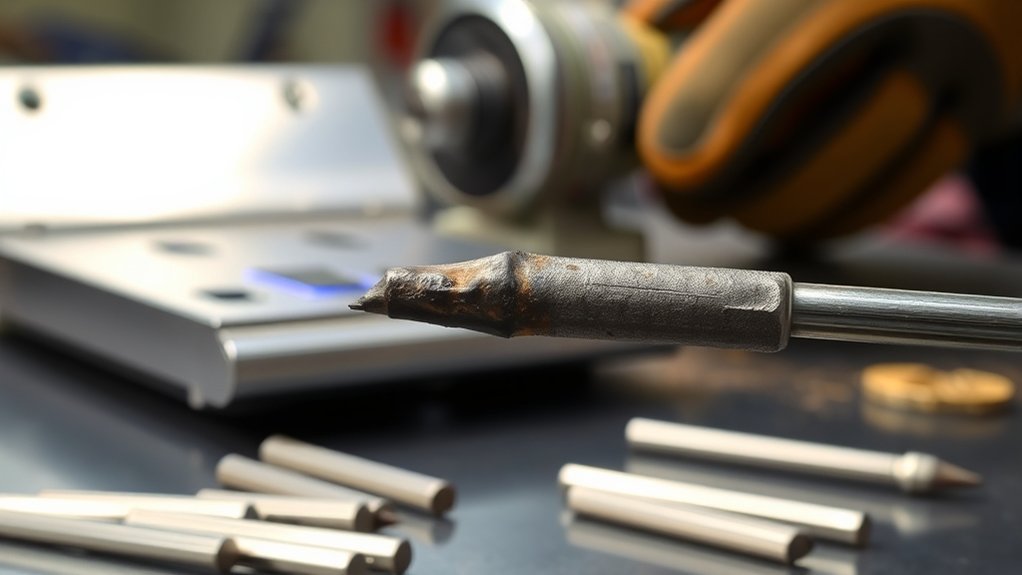
Dirty TIG tungsten can turn a steady arc into an erratic one within seconds. The problem often begins when the electrode touches the weld pool or filler rod, but poor gas coverage, dirty metal, damaged torch parts, excess heat, and careless grinding can create similar symptoms. This guide explains how to identify the real cause, restore the tungsten safely, and prevent the problem from returning.
Quick Answer
TIG tungsten contamination occurs when filler metal, base metal, oil, dirt, moisture, or oxidation affects the electrode. Stop welding, let post-flow protect the hot tip, remove all damaged material, and regrind the tungsten lengthwise. Then clean the joint and filler rod and verify shielding gas before restarting.
Key Takeaways
- Treat the tungsten as contaminated whenever it touches the puddle, filler rod, or dirty material.
- Regrind a contaminated tip on a dedicated tungsten grinder or wheel; wiping alone will not remove embedded metal.
- Grind lengthwise and match the taper, tip flat, electrode size, and amperage to the application.
- Check gas flow, leaks, torch parts, drafts, polarity, and surface preparation before blaming the electrode alone.
- Inspect the affected weld area after a dip because an unstable arc can leave inclusions, oxidation, poor fusion, or an irregular bead.
At a Glance
| Time Required | About 5–15 minutes for inspection, regrinding, cleaning, and a test arc |
| Difficulty | Beginner to intermediate |
| Tools Needed | Dedicated tungsten grinder or guarded grinding wheel, eye protection, clean gloves, lint-free wipes, approved cleaner, and flowmeter |
| Cost | Usually no added cost if the required tools are already available; replacement electrodes and damaged torch parts vary in price |
What’s in This Article
- What TIG Tungsten Contamination Means
- Common Causes of Tungsten Contamination
- Visual Symptoms of Contaminated Tungsten
- How Contaminated Tungsten Affects Weld Quality
- How Base Metal Conditions Contribute to Tungsten Contamination
- How to Fix Contaminated TIG Tungsten
- Best Practices for Handling and Maintaining Tungsten
- How Shielding Gas Prevents Tungsten Contamination
- Best Practices for Cleaning and Preparing Filler Metals
- How to Troubleshoot Equipment for Contamination Issues
- Creating a Routine to Avoid Contamination in TIG Welding
- Frequently Asked Questions
- Final Thoughts
- Sources
What TIG Tungsten Contamination Means
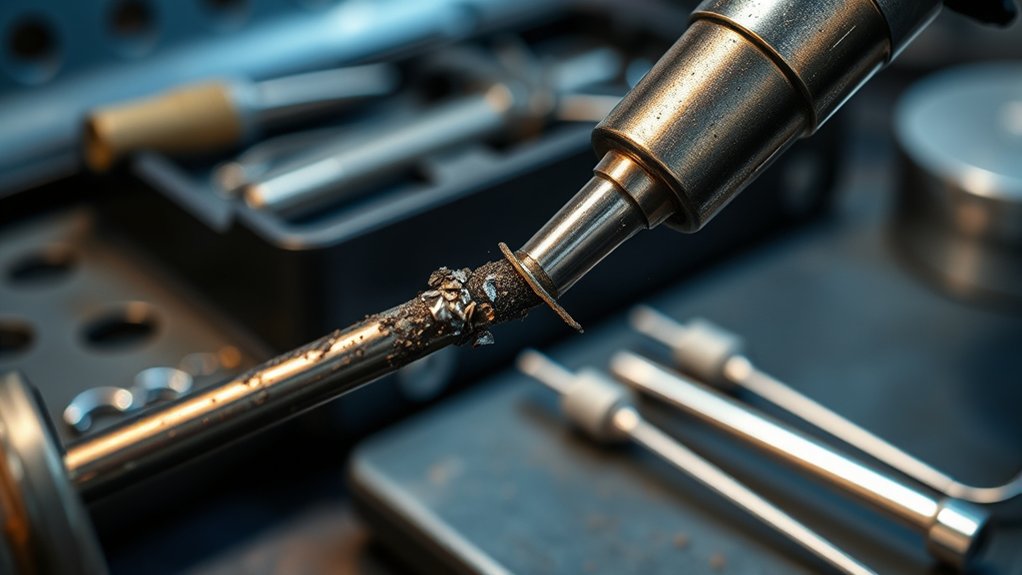
TIG tungsten contamination means unwanted material has reached or become embedded in the tungsten electrode. Common contaminants include filler metal, melted base metal, oil, grease, dust, moisture, oxide, and residue from a shared grinding wheel.
The tungsten is designed to carry the welding current without becoming part of the weld. When it touches the molten puddle or filler rod, foreign metal can stick to the tip. The arc may then spread, wander, spit, or start from more than one point.
Poor shielding can create a different but related problem. A hot tungsten exposed to air can oxidize and change color even when it never touches the puddle. That is why a discolored electrode should trigger a complete inspection rather than an automatic assumption that the tip was dipped.
Note: Contamination, oxidation, overheating, and poor gas coverage can look similar. Inspect the tip shape, gas system, torch parts, polarity, and workpiece before deciding on the cause.
To reduce the risk, keep the tungsten clean, store it in a marked container, and use grinding equipment reserved for tungsten. Choose the electrode type and diameter for the current, polarity, machine, and application. Filler selection is a separate decision; use an appropriate TIG filler rod selection chart when matching filler metal to the base material.
Common Causes of Tungsten Contamination
Tungsten contamination usually begins with direct contact, poor handling, weak surface preparation, incorrect grinding, or failed shielding. A clean electrode still needs clean filler, clean base metal, sound torch parts, and stable gas coverage.
A handheld electric tungsten sharpener can improve consistency and reduce cross-contamination when it is used only for tungsten and operated with the required guards and dust controls.
Improper Handling Techniques
Handling mistakes can transfer oil, debris, or metal directly to the electrode. Common examples include:
- Touching the tungsten to the weld pool
- Hitting the tungsten with the filler rod
- Dragging the electrode across the work during a failed start
- Grinding tungsten on a wheel used for steel, aluminum, or other metals
- Handling the prepared tip with oily gloves or bare fingers
- Using excessive current for the electrode diameter and tip geometry
- Running more stickout than the cup and gas coverage can protect
- Continuing to weld with a split, bent, mushroomed, or irregular tip
If the tungsten touches the puddle or filler rod, stop. Trying to weld through the problem usually makes the arc less predictable and can transfer more contamination into the joint.
Contaminated Work Environment
Grinding debris, cutting dust, oil mist, rust particles, and metal shavings can settle on the electrode, filler rod, torch parts, or base metal. A TIG bench located beside active grinding or plasma cutting is especially difficult to keep clean.
Fans, open doors, outdoor wind, and compressed-air blowguns can disrupt the argon envelope. A gas leak or cracked torch part may produce similar symptoms even in a clean room.
Store prepared electrodes and filler rods in dry, labeled containers. Keep the TIG station away from grinding dust and inspect the cup, gas lens, collet body, back cap, hose, and fittings whenever contamination keeps returning.
Inadequate Cleaning Procedures
Surface contamination can enter the puddle, disrupt the arc, and reach the tungsten. Watch for these preparation errors:
- Leaving oil, grease, paint, rust, scale, oxide, adhesive, or moisture near the joint
- Using filler rods that have been stored uncovered or handled with dirty gloves
- Using one wire brush on several metal types
- Cleaning aluminum with a carbon-steel brush
- Grinding the tungsten on a loaded or contaminated wheel
- Using a dirty rag that redeposits oil
- Touching the cleaned joint before welding
Use cleaning methods that suit the material. Mechanical removal may be needed for paint, scale, rust, or heavy oxide, while an approved solvent and lint-free wipe can remove oil and fingerprints.
Visual Symptoms of Contaminated Tungsten
A contaminated or poorly shielded tungsten often gives warning signs before the weld becomes unusable. None of these signs proves the cause by itself, so use them as the beginning of a diagnosis.
Electrode quality matters, but even a well-made electrode such as 2% lanthanated tungsten will perform poorly after it is dipped, overheated, ground incorrectly, or exposed to air while hot.
| What You See | Possible Cause | First Check |
|---|---|---|
| Metal blob or uneven lump on the tip | Contact with filler or the weld pool | Remove the electrode and grind or cut back past the affected area |
| Frosted, dull, gray, blue, or dark tip | Oxidation, weak post-flow, drafts, leaks, or excessive heat | Check gas flow, post-flow, seals, fittings, and torch cooling |
| Split, flared, or mushroomed point | Excess current, wrong tip geometry, wrong polarity, or poor grinding | Confirm electrode diameter, current range, polarity, and preparation |
| Arc wanders or starts from the side | Contaminated tip, radial grind marks, blunt point, magnetic arc blow, or poor gas flow | Inspect and regrind the tungsten lengthwise, then verify gas coverage |
| Black soot or a dull weld surface | Air entering the shield, dirty metal, wrong gas, or incorrect polarity | Check the complete gas path, material preparation, and machine settings |
| Spitting or small droplets | Dipped tungsten, moisture, dirty material, or unstable arc conditions | Stop, inspect the electrode, and test the setup on clean scrap |
Discoloration of the Electrode Tip
A bright electrode that turns dull or dark after the arc stops may have been exposed to air while it was still hot. Common causes include short post-flow, a leaking back cap, damaged O-rings, loose fittings, drafts, a cracked cup, excessive stickout, or a blocked gas lens.
A color change alone does not reveal the exact contaminant. Regrind the electrode if the working end is oxidized, irregular, or visibly damaged, and correct the shielding problem before welding again.
Uneven Arc Stability
A dirty or misshaped point can make the arc move away from the joint or spread over a wider area. The same behavior can result from radial grind marks, an oversized tungsten, an excessively blunt point, magnetic interference on DC, or a poor work connection.
Inspect the tip under good light. A clean, symmetrical, lengthwise-ground point should produce a more focused and repeatable arc when the remaining setup is correct.
Spitting or Unexpected Metal Droplets
Properly set TIG welding normally produces little or no spatter. Spitting, popping, or small droplets are signs to stop and inspect the electrode, material, filler, gas coverage, polarity, and current.
Warning: Do not continue welding after the tungsten touches the puddle. Stop the arc, allow the programmed post-flow to finish, and inspect both the electrode and the affected section of the weld before restarting.
How Contaminated Tungsten Affects Weld Quality
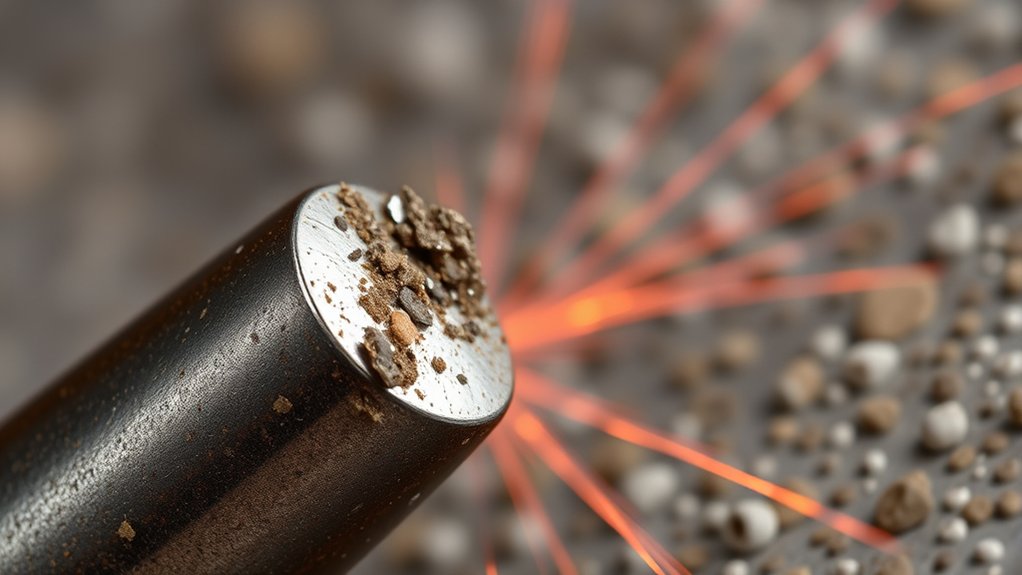
A contaminated tungsten does not automatically prove that a finished weld is weak. It does increase the risk of losing arc control and creating a defect, especially if the operator continues welding after a dip.
Possible effects include:
- Arc wandering or multiple arc-start points
- Irregular heat distribution
- Inconsistent penetration or fusion
- Embedded tungsten or foreign-metal inclusions
- Oxidation, soot, porosity, or a dull surface
- An uneven bead profile or poor tie-in at the toes
- Difficulty restarting the arc cleanly
When a dip occurs, mark the location mentally or physically. After restoring the electrode, inspect that section of the bead. A critical or code-governed weld may require removal, repair, and inspection under the applicable welding procedure rather than a visual check alone.
| Effect | What Happens | Possible Result |
|---|---|---|
| Arc instability | The arc moves, spreads, or starts from an unintended point | Reduced puddle control and inconsistent fusion |
| Uneven heat input | Energy is no longer focused consistently at the joint | Irregular penetration or bead shape |
| Foreign material | Tungsten, filler, base metal, oxide, or dirt enters the weld zone | Inclusions, porosity, oxidation, or repair work |
For stainless work, verify that the tungsten preparation, polarity, amperage, gas coverage, and material cleaning agree with the intended stainless-steel TIG settings.
A tungsten dip is a stop-and-correct event, not a defect to weld through.
How Base Metal Conditions Contribute to Tungsten Contamination
Oil, grease, paint, rust, mill scale, oxide, plating, moisture, and cutting residue can enter the puddle and disturb the arc. The problem becomes worse when the tungsten is held too close or when the puddle reacts violently beneath the tip.
Watch for these base-metal conditions:
- Oil or grease near the joint
- Paint, primer, adhesive, or coating within the heat-affected area
- Rust, scale, or embedded abrasive
- Aluminum oxide that has not been mechanically removed
- Cross-contamination from shared brushes, files, or sanding discs
- Moisture trapped in joints, castings, tubing, or porous material
- Poor fit-up that forces an unstable arc length or excessive heat
Aluminum requires special attention. AC is normally used for TIG welding aluminum because the electrode-positive portion of the cycle helps disrupt the oxide layer. Incorrect polarity, inadequate cleaning action, or an oxide-covered joint can create a contaminated-looking bead even when the tungsten has not been dipped.
Use preparation methods that fit the metal being welded. Reserve stainless-steel wire brushes for aluminum only, and do not use a brush that has touched steel, rust, or another alloy.
How to Fix Contaminated TIG Tungsten
Use the following process whenever the tungsten touches the puddle or filler rod, develops an irregular deposit, or becomes badly oxidized.
- Stop the arc immediately. Do not try to burn the contamination away.
- Keep the torch in place during post-flow. Let the programmed gas flow protect the hot electrode and weld area until the cycle ends.
- Turn off or isolate the equipment as required. Follow the welder and torch manufacturer’s instructions before removing hot parts.
- Inspect the electrode. Look for a metal blob, split point, discoloration, bending, cracks, or an irregular taper.
- Remove all affected material. Grind or cut back beyond the visible contamination. Do not leave embedded filler or base metal in the new point.
- Regrind the tungsten lengthwise. Use a dedicated tungsten grinder or clean wheel and restore the tip geometry required for the electrode diameter, current, polarity, and application.
- Inspect the torch consumables. Clean or replace a damaged cup, blocked gas lens, distorted collet, leaking back-cap seal, or contaminated collet body.
- Clean the joint and filler rod. Remove any debris created by the dip or by grinding the affected weld area.
- Inspect the weld where the dip occurred. Remove and repair visible inclusions, oxidation, lack of fusion, or other unacceptable defects.
- Run a test arc on clean scrap. Confirm that the arc starts from the center of the tip and remains stable before returning to the part.
Pro Tip: Prepare several clean electrodes before starting a critical job. When one is dipped, replace it with a prepared electrode and regrind the contaminated batch away from the active weld area.
Products Worth Considering

Common Sizes and Angles: This grinding head supports multiple electrode sizes: 0.040", 1/16", 3/32", and 1/8" (1.0mm, 1.6mm, 2.4mm, 3.2mm), and offers specific angles of 15∘, 22.5∘, and 30∘. It's designed for welding beginners, professionals, and hobbyists who want high-quality welds.

HOW TO MAINTAIN PRECISE CENTER POINT ALIGNMENT DURING GRINDING? Integrated fixed holes feature specific offset compensation calculations. This tungsten grinder head centers every electrode tip precisely on the diamond grinding wheel without manual height adjustment, enabling stable arc starting performance for professional TIG welding processes.

Common Sizes and Angles: This grinding head have 4 common sizes of tungsten electrode 1/16", 5/64", 3/32", 1/8" ( 1.6mm, 2mm, 2.4mm, 3.2mm), 6 common angled: 15°, 20°, 30°, 40°, 45°, 50°. It's suitable for welding beginners, professionals and hobbyists
Best Practices for Handling and Maintaining Tungsten
Tungsten integrity depends on preparation, storage, current control, and clean handling. Use a dedicated grinding wheel or tungsten sharpener so particles from steel, aluminum, or other metals do not become embedded in the electrode.
How to Grind TIG Tungsten Correctly
- Grind in the direction of the electrode’s length, not around its circumference.
- Use a clean diamond or aluminum-oxide wheel suitable for tungsten preparation.
- Keep the point centered and symmetrical.
- Use a taper and tip flat appropriate for the electrode diameter and welding current.
- Avoid excessive pressure that overheats, chips, or fractures the electrode.
- Do not hold the prepared point with bare or dirty fingers.
The tip angle is not one universal number. A narrow included angle produces a different arc shape and current capacity than a broad angle. Follow the torch, welder, electrode, or tungsten-grinder manufacturer’s chart for the exact application.
For many DC applications, the taper is commonly several electrode diameters long and includes a small flat at the end. Modern inverter AC equipment may also use a truncated point, while some transformer-based AC procedures use a controlled balled end. Do not form an oversized ball that exceeds the electrode diameter.
When to Replace TIG Tungsten
Regrinding is usually suitable when enough sound electrode remains. Replace the tungsten when it is:
- Too short for secure installation and proper back-cap engagement
- Cracked, deeply split, or repeatedly fracturing
- Bent enough that the point cannot be centered
- Contaminated along a long section of the shaft
- Damaged by a water leak or severe torch failure
- Mixed up with an unidentified tungsten type
- No longer able to hold a stable tip at the required current
Store electrodes in a clean, dry, labeled container. Separate them by alloy and diameter so you do not confuse color codes or install the wrong size.
Warning: Grind tungsten only on guarded equipment in a spark-safe area while wearing suitable eye and face protection. Use local dust collection or ventilation. Grinding thoriated tungsten can create thorium-containing dust, so follow the electrode safety data sheet, workplace exposure controls, hygiene procedures, and applicable respiratory-protection requirements.
How Shielding Gas Prevents Tungsten Contamination
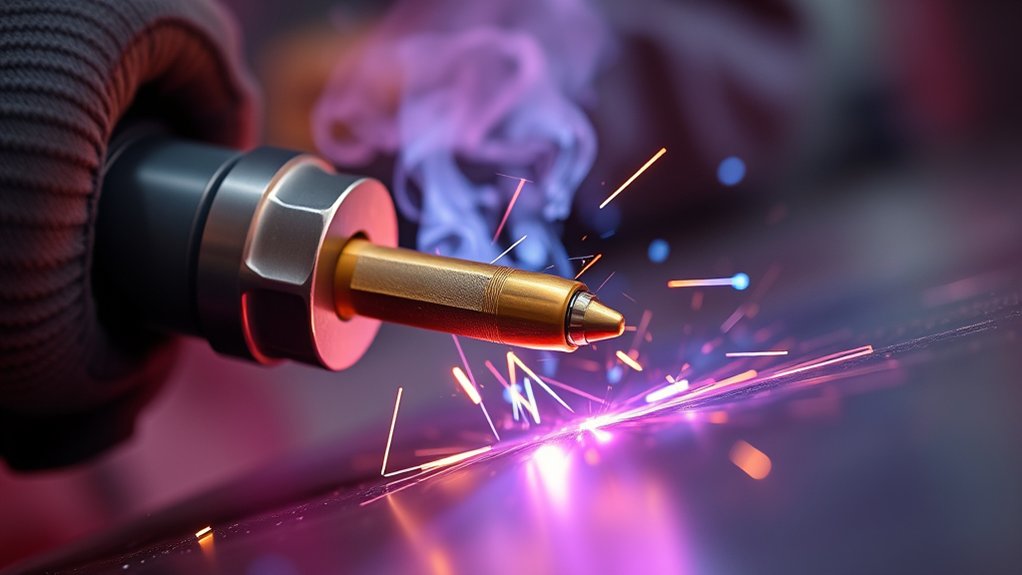
Shielding gas protects the hot tungsten and molten weld pool from oxygen, nitrogen, moisture, and airborne contamination. For many TIG applications, 100% argon is the normal starting gas. Some procedures use argon-helium blends, but reactive MIG mixtures containing carbon dioxide are not suitable for a standard tungsten arc.
A common starting flow range is about 15–20 cubic feet per hour, but the correct setting depends on the cup, gas lens, electrode stickout, joint shape, torch angle, material, and surrounding airflow. Follow the torch manufacturer’s flow chart and judge the result at the weld, not only at the regulator.
Use these checks to improve gas coverage:
- Confirm the cylinder contains the correct gas.
- Check the regulator or flowmeter for damage and correct operation.
- Inspect hoses, fittings, O-rings, and the back cap for leaks.
- Clean or replace a cracked cup or blocked gas lens.
- Keep tungsten stickout within the range the cup can shield.
- Use a gas lens when smoother coverage or additional stickout is required.
- Move fans and drafts away from the weld zone.
- Keep the torch angle moderate so the gas remains over the puddle.
- Use enough pre-flow to clear air from the torch and enough post-flow to protect the hot electrode.
Miller notes that both low and excessive flow can reduce protection because high flow may create turbulence and draw air into the gas envelope. See its guide to common TIG welding problems.
Proper TIG shielding-gas coverage also protects the tungsten after the arc stops. Keep the torch near the weld until post-flow ends rather than lifting it away immediately.
Note: More gas is not automatically better. If turning the flow higher makes the arc noisier or the weld more discolored, return to the recommended range and look for leaks, drafts, excess stickout, or damaged torch parts.
Best Practices for Cleaning and Preparing Filler Metals
Filler rods can carry oil, dust, oxide, rust, moisture, and shop residue into the shielding zone. Once contamination enters the puddle, it can disturb the arc and increase the chance of touching or fouling the tungsten.
Proper Storage Techniques
- Store filler metal in a clean, dry area.
- Use sealed, labeled tubes or containers.
- Separate rods by alloy and diameter.
- Keep rod ends off the floor and workbench.
- Do not return a dirty or unidentified rod to a clean container.
- Inspect for corrosion, dust, oil, and moisture before use.
Effective Cleaning Methods
Use a clean lint-free wipe and a cleaner approved for the metal and workplace. Acetone is commonly used to remove oil and fingerprints from many nonporous metal surfaces, but it does not remove heavy oxide, rust, scale, paint, or embedded contamination.
Use dedicated mechanical tools for each alloy. A stainless-steel brush reserved for aluminum can remove aluminum oxide without depositing carbon-steel particles. Replace dirty wipes and brushes rather than spreading residue over the joint.
Warning: Acetone and many other cleaners are highly flammable. Keep them away from sparks and hot work, provide ventilation, close and remove the container, and do not strike an arc until the liquid has evaporated and vapors have cleared. Never use chlorinated brake cleaner or another chlorinated degreaser near a welding arc.
How to Troubleshoot Equipment for Contamination Issues
Begin at the tungsten, then follow the gas path from the cylinder to the torch. Changing several settings at once makes the problem harder to isolate, so correct one likely cause and test again on clean scrap.
| Problem | Likely Causes | Corrective Action |
|---|---|---|
| Tungsten becomes dirty immediately | Puddle contact, filler contact, dirty work, wrong polarity, or wrong gas | Regrind, clean the joint, confirm polarity and gas, and shorten the arc |
| Tungsten darkens after stopping | Insufficient post-flow, leak, draft, hot electrode, or failed torch cooling | Increase post-flow as required, leak-test the system, and verify cooling |
| Arc wanders after regrinding | Radial grind marks, off-center point, blunt tip, magnetic interference, or poor work connection | Grind lengthwise, center the point, verify the work lead, and move magnetic sources |
| Gas flow looks normal but weld oxidizes | Cracked cup, blocked lens, leaking O-ring, excessive torch angle, or draft | Inspect torch consumables, reduce torch angle, and shield the work area |
| Point melts or splits | Too much current, undersized electrode, wrong polarity, or unsuitable tip geometry | Match electrode size and preparation to the current and procedure |
| Contamination returns only with filler | Dirty filler, rod leaving the shield, incorrect feed angle, or rod contacting tungsten | Clean or replace the rod and keep its hot end inside the shielding envelope |
Check these components in order:
- Tungsten type, diameter, tip geometry, and condition
- Electrode position and stickout
- Cup, gas lens, collet, collet body, back cap, and seals
- Gas type, cylinder valve, regulator, and flowmeter
- Hoses, quick-connects, fittings, and internal machine connections
- Torch angle, arc length, filler angle, and surrounding drafts
- Polarity, AC balance, current, pulse settings, and work-lead connection
- Base-metal and filler-metal cleanliness
Do not depend on a single cup-number formula for gas flow. Manufacturer charts vary by electrode diameter, cup, material, standard or gas-lens body, and gas mixture. Start with the torch guidance, then make small adjustments while watching shielding quality.
Post-flow should last long enough for the tungsten to cool without obvious oxidation. The required time rises with electrode size, amperage, weld duration, torch design, and cooling method. Avoid copying a fixed number without considering the actual setup.
Products Worth Considering

Portable & High Performance: Are you still suffering from cumbersome grinding machines? This tungsten sharpening grinder is a hand-held tool, very convenient. This set includes a Tungsten Electrode angle Sharpener and an electric rotary tool, which is light and portable, more convenient, you can grind more tungsten needles with more perfect angles faster. Help you improve welding efficiency.

The Tungsten Sharpener fits most all Rotary Tools with a 3/4-12 thread, compatible for Black and Decker, Milwaukee, Bosch Dremel and More! (***Package No Rotary Tool/No Drill Included).

【 Precision Sharpening with Multiple Angles】 Achieve flawless welds with our TIG Tungsten Sharpener, featuring 4 precise offset angles (10°, 15°, 20°, and 22.5°). Perfectly sharpen your tungsten electrodes for superior arc stability and welding performance.
Creating a Routine to Avoid Contamination in TIG Welding
A repeatable routine prevents more contamination than any single accessory. Use the same inspection sequence before each weld and after every tungsten dip.
| Action | Purpose |
|---|---|
| Clean the base metal and filler | Remove oil, oxide, moisture, and debris before they reach the puddle |
| Inspect and prepare the tungsten | Provide a centered, uncontaminated arc-starting surface |
| Inspect torch consumables | Find damaged, loose, blocked, or leaking parts |
| Verify polarity and current | Prevent overheating and incorrect oxide-cleaning behavior |
| Check shielding gas | Protect the tungsten and weld pool without turbulence |
| Control arc length and torch angle | Reduce dipping risk while keeping gas over the puddle |
| Keep the filler tip in the gas envelope | Prevent the hot rod end from oxidizing between additions |
| Allow post-flow to finish | Protect the hot tungsten and cooling weld area |
| Separate TIG work from grinding and cutting | Reduce airborne dust and cross-contamination |
Prepare several electrodes before production work, keep them in a clean holder, and place contaminated electrodes in a separate marked container. This prevents a damaged electrode from being returned to service by mistake.
Frequently Asked Questions
What Causes Tungsten Contamination?
The most direct cause is contact with the molten weld pool or filler rod. Other causes include dirty base metal, contaminated filler, shared grinding wheels, oily handling, moisture, poor shielding, wrong gas, incorrect polarity, excess heat, and damaged torch parts.
Why Does My Tungsten Keep Getting Dirty?
Repeated contamination usually means the original cause has not been corrected. Check arc length, filler position, workpiece cleanliness, torch angle, gas type, flow, leaks, drafts, polarity, electrode size, and the cup or gas lens. Test one correction at a time on clean scrap.
What Are the Three Ways of Removing the Contaminated End of a Tungsten Electrode?
The end may be ground back, cut with suitable tungsten-cutting equipment, or removed with a purpose-built electrode preparation machine. Controlled cutting or grinding is preferred over casually snapping the electrode because it provides a safer, more predictable end for reshaping. Remove all visibly affected material before forming the new tip.
How Do You Clean a TIG Tungsten?
Wipe an undamaged electrode shaft with a clean lint-free cloth and an approved cleaner if necessary. A dipped, oxidized, or misshaped tip must be ground or cut back and then reshaped on equipment reserved for tungsten. Wiping alone will not remove embedded filler or base metal.
Can Too Much Gas Flow Contaminate Tungsten?
Yes. Excessive flow can create turbulence at the cup and pull room air into the shielding envelope. Use the torch manufacturer’s recommended range, check for drafts and leaks, and avoid assuming that a higher flowmeter reading always provides better protection.
Can Contaminated Tungsten Cause Porosity?
It can contribute to the conditions that cause porosity by destabilizing the arc or introducing foreign material, but porosity also commonly comes from moisture, oil, oxide, leaks, poor shielding, or dirty filler. Inspect the complete welding setup instead of treating the electrode as the only possible cause.
How Far Should You Grind Back Contaminated Tungsten?
There is no reliable universal distance. Grind or cut back until all deposited metal, oxidation, cracks, and irregular material are gone and only sound tungsten remains. Then create a centered point with the correct taper and tip flat for the application.
Final Thoughts
Clean tungsten gives you a steadier arc, but electrode condition is only one part of the TIG system. Base-metal preparation, filler storage, torch condition, gas coverage, polarity, current, arc length, and post-flow all affect what happens at the tip.
When contamination appears, stop and correct it instead of trying to weld through the problem. Remove the affected tungsten, inspect the weld, restore the electrode with a lengthwise grind, and verify the setup on clean scrap. A few minutes of controlled preparation can prevent inclusions, oxidation, unstable fusion, and avoidable rework.
Sources
- Miller Electric — Common TIG Welding Problems — gas coverage, flow, turbulence, leaks, polarity, and contamination troubleshooting
- Miller Electric — TIG Welding Technique Guide — arc length, torch angle, filler positioning, and gas coverage
- CK Worldwide — Technical Guide for TIG Welding — tungsten tip geometry, lengthwise grinding, cup selection, and shielding-gas flow charts
- CK Worldwide — TIG Welding Explained — contaminated-tungsten recovery and common shielding settings
- Occupational Safety and Health Administration — Ventilation Standard — solvent-vapor and hot-work precautions
- Agency for Toxic Substances and Disease Registry — Toxicological Profile for Thorium — potential airborne exposure during thoriated-tungsten grinding




