Burn-through can ruin a thin stainless steel part before you have time to correct the weld pool. That problem often points you toward Gas Tungsten Arc Welding (GTAW), also called TIG welding, because it gives you tighter control over heat, arc length, and filler metal. This guide explains when you should choose GTAW, how to set it up, and what mistakes to avoid when clean, precise welds matter.
Quick Answer
Use GTAW when you need a clean, precise weld on thin metal, stainless steel, aluminum, titanium, or other high-value materials. It works best when weld quality and appearance matter more than speed. Choose MIG, stick, or flux-cored welding when you need faster production, outdoor work, or heavy deposition on thick material.
Key Takeaways
- Choose GTAW when you need precise heat control and clean weld appearance.
- Use GTAW for thin materials, stainless steel, aluminum, titanium, and detailed repairs.
- Clean the base metal, filler rod, and tungsten before you weld.
- Use DC electrode negative for steel and stainless steel, and use AC for aluminum and magnesium.
- Pick another process when speed, outdoor use, or heavy deposition matters most.
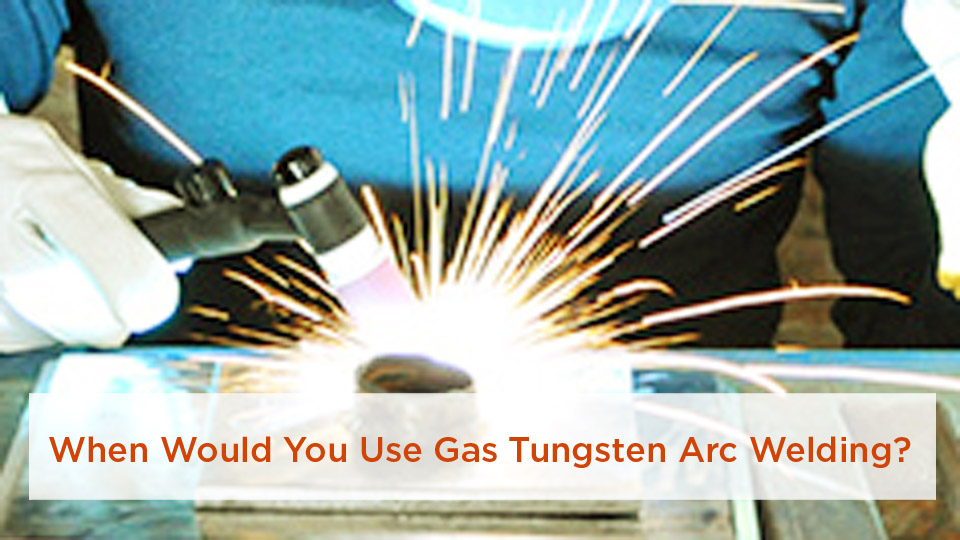
Image by rsi.edu
What’s in This Article
- What Is Gas Tungsten Arc Welding?
- Why Gas Tungsten Arc Welding Stands Out
- When to Choose Gas Tungsten Arc Welding
- How Gas Tungsten Arc Welding Compares to Other Processes
- How to Set Up Your Gas Tungsten Arc Welding Machine
- Common Setup Mistakes
- Step-by-Step Guide to Gas Tungsten Arc Welding
- Materials and Applications for Gas Tungsten Arc Welding
- How to Choose Filler Rods for Gas Tungsten Arc Welding
- Safety Considerations for Gas Tungsten Arc Welding
- Pros and Cons of Gas Tungsten Arc Welding
- Practical Tips for Better Gas Tungsten Arc Welds
- Frequently Asked Questions
What Is Gas Tungsten Arc Welding?
Gas Tungsten Arc Welding uses a non-consumable tungsten electrode to create an electric arc. That arc melts the base metal and forms a weld pool. An inert shielding gas, usually argon or helium, flows through the torch and protects the weld from air contamination.
Unlike MIG welding, GTAW does not feed wire through the gun. You often hold the torch in one hand and feed a filler rod with the other. You can also fuse thin parts without filler when the joint design allows it.
The process takes practice because small changes affect the weld quickly. Keep a steady arc length, often near 1/8 inch, and keep the tungsten clean. If you dip the tungsten into the weld pool, stop and regrind it before you continue.
What Does GTAW Mean?
GTAW stands for Gas Tungsten Arc Welding. Many welders call the same process TIG welding, which stands for Tungsten Inert Gas welding. Both names describe the same arc welding process.
Why Gas Tungsten Arc Welding Stands Out
GTAW gives you precise control over heat, arc focus, and filler metal. That control helps you weld thin material without warping it or burning through it. It also helps you create smooth welds with little spatter and no slag.
The process works on many metals, including carbon steel, stainless steel, aluminum, magnesium, copper, nickel alloys, and titanium. It performs especially well on non-ferrous metals and visible welds. Custom exhausts, food-grade stainless piping, and clean architectural work often benefit from GTAW.
GTAW can produce less smoke and spatter than many other arc welding processes. You still need eye, skin, and breathing protection. The bright arc can injure your eyes, and poor ventilation can expose you to ozone and metal fumes.
When to Choose Gas Tungsten Arc Welding
Use Gas Tungsten Arc Welding when the job rewards control more than speed. It suits high-quality welds, thin materials, non-ferrous metals, small repairs, and pipe root passes.
High-quality welds: Choose GTAW when appearance and weld integrity matter, such as aerospace parts, sanitary stainless piping, or precision fabrication. The process gives you a clean bead with excellent control over the weld pool.
Thin materials: Use GTAW on sheet metal and thin tubing because you can lower amperage and manage heat closely. That control helps reduce warping, distortion, and burn-through.
Non-ferrous metals: GTAW works well on aluminum, magnesium, copper, and titanium. AC welding helps break up aluminum oxide so you can form a cleaner weld.
Small or intricate welds: Use GTAW for detailed repairs, small brackets, bike frames, jewelry, and visible welds. The narrow arc lets you place heat exactly where you need it.
Root passes on pipe: Many pipe welders use GTAW for the root pass because it can create a smooth, controlled bead. After that, they may fill and cap the joint with stick, MIG, or flux-cored welding.
Choose another process when speed matters most. MIG and flux-cored welding often suit production work better, while stick welding handles outdoor jobs and less-than-perfect surfaces well.
How Gas Tungsten Arc Welding Compares to Other Processes
This table shows where each common process performs best.
| Process | Best For | Pros | Cons |
|---|---|---|---|
| GTAW (TIG) | Thin metals, non-ferrous metals, high-quality welds | Clean, precise, versatile | Slow, skill-intensive, costly setup |
| GMAW (MIG) | Thicker metals and production welding | Fast, easy to learn, suitable for repeat work | More spatter, less precise than GTAW |
| SMAW (Stick) | Outdoor work, dirty material, structural steel | Portable, tough, forgiving on less-clean metal | Creates slag, needs cleanup, less refined appearance |
| FCAW (Flux-Cored) | Heavy-duty work, outdoor welding, thick materials | High deposition rate, works well outdoors | Creates spatter and slag, offers less precision |
If the job needs a weld that looks clean and passes close inspection, GTAW usually makes sense. If the job needs fast welds on thick steel, another process may save time.
How to Set Up Your Gas Tungsten Arc Welding Machine
A clean, stable setup makes GTAW much easier. Check the machine, tungsten, shielding gas, polarity, amperage, and filler rod before you strike the arc.
Choose the right machine: For home shops, a small inverter-based TIG welder can handle many light and medium jobs. Choose AC/DC output if you plan to weld aluminum or magnesium. A foot pedal or fingertip control helps you adjust heat while you weld.
Select the tungsten electrode: Many welders use 2% lanthanated or ceriated tungsten for both AC and DC work. A 3/32-inch electrode handles many jobs up to about 150 amps. Grind the tungsten to a point for DC welding and follow your machine maker’s guidance for AC welding.
Pick the shielding gas: Argon works for most GTAW jobs because it gives steady coverage and starts the arc well. Helium runs hotter and can help with thicker materials, but it costs more. Many light-duty argon setups use about 15 to 20 cubic feet per hour, but cup size, draft, and joint shape can change that range.
Set polarity and amperage: Use direct current electrode negative (DCEN) for carbon steel and stainless steel. Use AC for aluminum and magnesium. As a starting point for steel, many welders use about 1 amp per 0.001 inch of material thickness, then adjust based on joint fit and weld pool response.
Prep the filler rod: Match the filler rod to the base metal. Use ER308L or ER316L for many stainless jobs, ER4043 or ER5356 for common aluminum jobs, and ER70S-2 or ER70S-6 for many carbon steel welds.
Pro tip: Grind tungsten on a clean, dedicated wheel so other metals don’t contaminate the electrode.
Common Setup Mistakes
Wrong gas flow: Too much shielding gas can create turbulence, while too little gas can cause porosity. Check the regulator, hose, torch parts, and cup size before you weld.
Dirty base metal: Oil, paint, oxide, and mill scale can weaken the weld. Clean the workpiece with the right brush, solvent, or abrasive before you start.
Incorrect tungsten size: A small tungsten can overheat at high amperage. A large tungsten can make low-amperage arc starts less stable. Match the tungsten size to your amperage range.
Step-by-Step Guide to Gas Tungsten Arc Welding
Follow these steps when you prepare and run a GTAW bead. Always match your exact settings to the metal, joint design, machine, and filler rod.
- Clean the workpiece. Remove oil, paint, oxide, and dirt. For aluminum, use a clean stainless steel brush that you reserve for aluminum only.
- Prepare the joint. Fit the parts tightly and bevel thicker edges when the joint needs more penetration.
- Set the machine. Choose the right polarity, amperage range, and gas flow for the metal and thickness. For example, 1/8-inch stainless steel may need roughly 100 to 120 amps on DCEN with argon, depending on the joint.
- Tack the parts. Make short tack welds to hold alignment. Space them so the joint stays stable as heat builds.
- Start the arc. Use high-frequency start or lift-arc if your machine supports it. Hold the torch at a steady angle and keep a short, stable arc.
- Add filler metal. Dip the filler rod into the leading edge of the weld pool. Keep the rod shielded by the gas envelope when possible.
- Control the heat. Use the foot pedal or fingertip control to reduce amperage as the part heats up. Move steadily to avoid undercut, blobs, or poor fusion.
- Inspect the weld. Let the weld cool naturally, then check for cracks, porosity, undercut, and incomplete fusion. Repair flaws before the part goes into service.
Warning: Titanium and other reactive metals need strong shielding and purge control because oxygen contamination can make the weld brittle.
Materials and Applications for Gas Tungsten Arc Welding
GTAW suits metals and jobs that need clean welds, tight heat control, and a neat finish. It also works well when the weld must pass visual or code inspection.
Stainless steel: GTAW works well for food-grade equipment, brewery tanks, medical devices, and sanitary piping. ER308L and ER316L fillers often help preserve corrosion resistance when they match the base metal.
Aluminum: GTAW can weld boat parts, bike frames, tanks, brackets, and aerospace parts. AC output helps clean oxide while the arc melts the base metal.
Titanium: GTAW can weld titanium for aerospace, motorsport, and medical uses. You need proper shielding, back purging, and clean handling to protect the hot metal from oxygen and nitrogen.
Copper and nickel alloys: GTAW can handle many marine and chemical-processing parts. Match filler metal to the alloy and joint requirements.
For home projects, GTAW can help you build stainless barbecue parts, repair aluminum equipment, or make clean brackets. For professional work, it supports demanding jobs such as aircraft components, sanitary tubing, pressure piping, and precision fabrication.
How to Choose Filler Rods for Gas Tungsten Arc Welding
The filler rod must suit the base metal and service conditions. Use this table as a starting point, then confirm the choice with the project specification or filler manufacturer.
| Material | Common Filler Options | Notes |
|---|---|---|
| Stainless Steel | ER308L, ER316L | Choose based on the stainless grade and corrosion needs. |
| Aluminum | ER4043, ER5356 | ER4043 suits many general jobs, while ER5356 can add strength in some applications. |
| Titanium | ERTi-2 | Use proper shielding and purge control. |
| Carbon Steel | ER70S-2, ER70S-6 | Use for many general-purpose steel welds. |
Do not mix filler rods by guesswork. A filler that does not match the base metal can crack, corrode, or fail under stress.
Safety Considerations for Gas Tungsten Arc Welding
GTAW creates intense light, heat, electricity, and fumes. Protect your eyes, skin, lungs, and work area before you weld.
Eye protection: Use a welding helmet with the right shade for your amperage. Many GTAW jobs use a shade range around 10 to 13, but you should follow safety guidance and your own comfort while still protecting your eyes.
Skin protection: Wear flame-resistant gloves, a welding jacket, long pants, and closed-toe boots. Arc rays can burn exposed skin even when sparks stay low.
Ventilation: GTAW can produce less visible fume than some processes, but the arc can still create ozone, nitrogen oxides, and metal fumes. Use local exhaust or work in a well-ventilated area.
Electrical safety: Inspect cables, torch parts, work clamps, and connectors before use. Keep your hands, gloves, and work area dry when possible.
Fire safety: Move flammable items away from the work area. Keep a fire extinguisher nearby, and check the area after welding for hidden sparks or hot metal.
Note: Confined spaces, coated metals, and unknown alloys can raise fume risk, so use proper ventilation and professional safety guidance.
Pros and Cons of Gas Tungsten Arc Welding
GTAW offers excellent control, but it does not fit every job. Review the strengths and limits before you choose it.
Pros
- Precision: GTAW works well for intricate joints and visible welds.
- Versatility: GTAW can weld many ferrous and non-ferrous metals.
- Clean welds: GTAW creates little spatter and leaves no slag.
- Strong welds: GTAW can produce high-integrity welds when you use the right setup and technique.
Cons
- Slow travel speed: GTAW usually takes longer than MIG or flux-cored welding.
- High skill demand: GTAW requires steady torch control and good filler technique.
- Higher setup cost: TIG welders, shielding gas, torches, and accessories can cost more than basic stick or MIG setups.
- Lower efficiency on heavy stock: Thick material may need beveling, preheat, or multiple passes.
For hobby work, the cost and learning curve can feel steep. For critical or visible welds, the extra control can justify the effort.
Practical Tips for Better Gas Tungsten Arc Welds
Small habits make a big difference with GTAW. Use these tips to improve bead shape, weld strength, and consistency.
- Practice on scrap: Test your settings and filler technique before you weld the real part.
- Keep everything clean: Clean the workpiece, tungsten, filler rod, cup, and gas lens.
- Brace your hands: Rest your torch hand when you can so the arc stays steady.
- Use a foot pedal: Adjust heat as the part warms up, especially on thin material.
- Check gas coverage: Dull, gray, or porous welds can point to poor shielding.
- Keep spare tungsten ready: Replace or regrind contaminated tungsten before it ruins the weld.
Frequently Asked Questions
What metals can you weld with GTAW?
You can weld carbon steel, stainless steel, aluminum, titanium, magnesium, copper, nickel alloys, and many other metals with GTAW. The process works especially well on thin materials and non-ferrous metals. Use the right current type, shielding gas, and filler rod for each metal.
Is GTAW better than MIG welding?
GTAW works better when you need precision, clean appearance, or control on thin and non-ferrous metals. MIG welding works better when you need speed, easier learning, and higher production on many steel jobs. The better choice depends on the metal, joint, finish requirements, and work conditions.
How do you avoid contaminating a GTAW weld?
Clean the base metal, filler rod, and tungsten before welding. Use the right shielding gas flow, check for leaks, and keep the filler rod inside the shielding gas when possible. If the tungsten touches the weld pool, stop and regrind it.
What shielding gas works best for GTAW?
Argon works best for many common GTAW jobs because it starts the arc well and shields the weld effectively. Helium can add heat for thicker metals, but it costs more and may need different settings. Critical metals such as titanium may also need trailing shields or purge gas.
Why does GTAW take longer to learn?
GTAW requires you to control torch angle, arc length, travel speed, filler rod, and heat at the same time. Small errors can contaminate the tungsten or distort the weld pool. Practice on scrap metal builds the hand control you need for clean results.
Final Thoughts on When to Use Gas Tungsten Arc Welding
Gas Tungsten Arc Welding makes the most sense when precision, quality, and control matter more than speed. Use it for thin materials, stainless steel, aluminum, titanium, detailed repairs, and welds that people will see. Before you start, clean every surface, choose the right filler, and confirm your gas coverage. Build those habits now, and your GTAW welds will look cleaner and perform better.