
An auto-darkening welding helmet lets you see the joint before welding, then darkens when its sensors detect the arc. Its electronic filter controls how much visible light reaches your eyes, while an undamaged UV/IR filter is designed to limit harmful ultraviolet and infrared radiation in both the light and dark states. Safe performance still depends on the helmet’s certification, condition, settings, power system, and approved use.
Quick Answer
An auto-darkening welding helmet uses front-facing arc sensors to trigger an electronic filter. Liquid-crystal and polarizing layers then reduce visible light from the arc to the selected shade. In a certified, undamaged filter used as directed, a separate UV/IR layer is designed to provide protection in both light and dark states.
Key Takeaways
- Arc sensors detect welding light and signal the auto-darkening filter to change from its light state to the selected welding shade.
- The electronic darkening function controls visible light; the helmet’s fixed UV/IR filtering system provides a separate layer of protection.
- Shade, sensitivity, and delay must match the welding process, amperage, position, and surrounding light.
- Wear approved safety glasses under the helmet and stop immediately if the filter flickers, fails to darken, or appears damaged.
- Use the exact inspection and test method in the helmet manual because power systems and test procedures vary by model.
At a Glance
| Time Required | About 2–3 minutes for a pre-use inspection and function check |
| Difficulty | Easy, but the manual must be followed |
| Tools Needed | Helmet manual, clean lint-free cloth, and approved replacement batteries or cover plates when needed |
| Cost | No cost for inspection; replacement batteries, plates, and filter cartridges vary by helmet |
Why Eye Protection Is Essential for Welders
Welding exposes your eyes and face to more than bright visible light. The arc can produce ultraviolet radiation, infrared radiation, sparks, spatter, hot metal, and flying particles. OSHA requires suitable eye and face protection when workers face hazards such as molten metal, flying particles, or potentially harmful light radiation.
One possible injury is photokeratitis, also called arc eye or welder’s flash. It is a painful injury to the cornea caused by ultraviolet exposure. Symptoms can be delayed, so a person may not realize the damage immediately. EyeWiki identifies welding arcs as a source of UV radiation that can cause photokeratitis.
A welding helmet is secondary eye and face protection. OSHA guidance says welding helmets and face shields should be worn over primary protection such as approved safety spectacles or goggles. Wear safety glasses with suitable side protection under the hood, even when the helmet has a large viewing area.
An auto-darkening helmet also lets you keep the hood lowered while positioning the torch, electrode, or filler rod. This can improve arc-start accuracy and reduce repeated neck movement during tack welding. Convenience does not replace proper shade selection, inspection, or other welding PPE.
Warning: If the filter fails to enter its dark state, flickers repeatedly, or has a crack, pit, light leak, or missing cover plate, stop welding immediately. Do not rely on claimed UV/IR protection to continue working through a visible-light failure.
Your helmet is only one part of a complete PPE system. Use welding gloves, flame-resistant clothing, suitable footwear, ventilation, and respiratory protection when the hazard assessment requires it. Review the basics of protective clothing for arc welding before starting a new process.
Main Parts of an Auto-Darkening Welding Helmet
The electronic lens cartridge is normally called an auto-darkening filter, or ADF. It combines several layers and controls rather than acting as a single piece of tinted plastic.
- Arc sensors: Photo sensors on the front of the ADF detect light from the welding arc.
- Control circuit: Electronic components interpret the sensor signal and switch the filter between light and dark states.
- UV/IR filter: A fixed filtering layer is designed to reduce ultraviolet and infrared radiation in both states when the filter is intact.
- Liquid-crystal layers: These layers change their optical behavior when the control circuit applies an electrical signal.
- Polarizing filters: The polarizers work with the liquid-crystal layers to control visible-light transmission.
- Inside and outside cover plates: Clear replaceable plates protect the filter cartridge from spatter, scratches, and debris.
- Power system: Depending on the model, the ADF may use replaceable batteries, sealed batteries, solar assist, solar-powered cells, or a combination.
- Helmet shell and headgear: These parts provide coverage, hold the lens in the correct position, and help protect against sparks and impact hazards within the helmet’s rating.
For one documented example, the 3M Speedglas 9100 user instructions specify three arc sensors, two lithium batteries, a shade-3 light state, adjustable dark shades, and continuous UV/IR filtering in both states. Those details apply to that product family and should not be assumed for every ADF.
How Auto-Darkening Welding Helmets Detect the Welding Arc
Arc sensors watch for the intense light pattern created when welding begins. Once the filter electronics recognize that signal, they change the liquid-crystal layers so less visible light can pass through the polarizing filters.
- You lower the hood. The light-state shade lets you see the joint, electrode, wire, or torch before striking the arc.
- The arc starts. One or more sensors detect the sudden welding light.
- The control circuit responds. It applies an electrical signal to the filter’s liquid-crystal system.
- The lens enters its dark state. Visible-light transmission drops to the selected welding shade.
- The arc stops. After the selected or programmed delay, the filter returns to its light state.
Switching time varies by product and operating temperature. As a model-specific example, 3M lists a light-to-dark switching time of 0.1 milliseconds at 23°C for its Speedglas 9100 series. A response-time claim from one helmet should not be applied to another model.
Note: The sensors need a usable view of the arc. Your hand, torch, workpiece, pipe, clamp, fixture, or a tight corner can block the signal and cause delayed switching or flickering.
Two-, three-, and four-sensor helmets are common. Additional sensors may improve the chance that at least one sensor can see a partly hidden arc, but count alone does not determine reliability. Sensor position, sensitivity range, filter quality, battery condition, and welding position also matter. Review the manual before using unfamiliar auto-darkening helmet technology.
How Auto-Darkening Filters Work in Welding Helmets
An ADF performs two related but different jobs. Its fixed filtering system limits UV and IR radiation, while its electronically controlled layers change how much visible light reaches your eyes. The visible lens appearance is therefore not the only measure of protection.
UV/IR Filter Layer
In a certified, undamaged ADF used according to its manual, the UV/IR layer is designed to work in both the light and dark states. Reputable manufacturers may also state that this protection remains during a battery or electronic failure. That statement must be confirmed for the exact filter being used.
A cracked, pitted, modified, incorrectly assembled, or counterfeit cartridge may not provide the intended protection. Inside and outside cover plates must also be installed when required by the manufacturer.
Liquid-Crystal and Polarizing Layers
The liquid-crystal and polarizing layers control visible light. When the control circuit changes the electrical state of the liquid crystals, the combined layers transmit less light and the viewing window appears darker.
This electronic change makes the arc comfortable enough to view through the selected protective shade. It does not make an unsuitable helmet safe for an unsupported process such as laser welding.
Light State and Dark State
The light state is the shade seen before and after welding. It is commonly around shade 2.5, 3, 3.5, or 4, depending on the filter. The dark state is the selected welding shade, often within a range such as 8–13 or 9–13.
Some products also provide lower-shade cutting modes, tack modes, fixed lock-in shades, or a grind mode. These features are model-specific. A helmet with a quick auto-darkening feature may be convenient for close work, but switching speed does not replace certification, correct shade selection, coverage, or inspection.
What Happens If the Battery Dies?
The answer depends on the power design. Some helmets use user-replaceable coin batteries with a solar panel that extends battery life. Others use sealed rechargeable or non-replaceable cells, and some are described by their manufacturers as solar-powered without a user-replaceable battery.
On filters whose manuals document continuous UV/IR protection, a dead battery may stop the electronic darkening function while the fixed UV/IR layer continues to filter radiation. The bright visible arc is still unsafe to view. Stop, replace or charge the approved power source as directed, test the filter, and do not resume welding until it switches correctly.
UV/IR Filters and Eye Safety
The helmet must protect against several hazards at once: radiant energy, sparks, spatter, and flying particles. No single marketing claim proves that a helmet is suitable for every welding job.
- Check the standards information: ANSI/ISEA Z87.1-2025 is the newest U.S. consensus-standard edition. OSHA’s current regulation specifically incorporates earlier editions and also permits equipment demonstrated to provide equivalent protection. Check the markings, instructions, and employer requirements for the exact helmet rather than assuming that only one printed year is acceptable.
- Use the correct shade: Match the minimum shade to the process and amperage, then use a darker shade when needed for comfortable viewing.
- Inspect the filter and shell: Replace cracked, pitted, distorted, burned, or otherwise damaged components.
- Install approved cover plates: Do not operate an ADF without the inside and outside plates required by its manufacturer.
- Keep sensors uncovered: Remove dust and spatter without using solvents or abrasive cleaners unless the manual specifically allows them.
- Wear primary eye protection: Use suitable safety spectacles or goggles beneath the helmet.
The International Safety Equipment Association announced ANSI/ISEA Z87.1-2025 in January 2026. The update addresses performance, testing, coverage, and product-marking requirements, but workplace selection must still follow the applicable OSHA rule and hazard assessment.
The electronic shade helps you see the weld. Safe eye and face protection also depends on an intact filter, correct shade, complete helmet assembly, primary eyewear, and a clear view of the arc sensors.
Choosing the Right Shade and Settings
The correct shade depends on the process, electrode size when applicable, and arc current. OSHA advises starting with a shade that is too dark to see the weld zone, then moving lighter until you can see clearly without going below the listed minimum protective shade.
| Process | Arc Current | OSHA Minimum Protective Shade |
| Shielded metal arc welding | Less than 60 amps | 7 |
| Shielded metal arc welding | 60–160 amps | 8 |
| Shielded metal arc welding | 160–250 amps | 10 |
| Shielded metal arc welding | 250–550 amps | 11 |
| Gas metal arc or flux-cored arc welding | Less than 60 amps | 7 |
| Gas metal arc or flux-cored arc welding | 60–500 amps | 10 |
| Gas tungsten arc welding | Less than 150 amps | 8 |
| Gas tungsten arc welding | 150–500 amps | 10 |
| Plasma arc welding | Less than 20 amps | 6 |
| Plasma arc welding | 20–100 amps | 8 |
| Plasma arc welding | 100–400 amps | 10 |
| Plasma arc welding | 400–800 amps | 11 |
These are minimum protective shades, not a promise that the minimum will be comfortable for every user or job. Follow the helmet manual, workplace rules, and any process-specific requirements. If the helmet does not provide the shade needed for the operation, use a different approved filter.
Products Worth Considering

True Color Clear View: A 3.64" x 1.67" viewing area with 1/1/1/1 optical clarity delivers a true color view for improved visibility and reduced eye strain.

【FASTER AUTO-DARKENING】Features high-end auto-darkening lenses with 4 premium arc sensors, switching from light to dark in 1/25000 sec. Easily adjust the shade and sensitivity of the lenses for different working environments, perfect for TIG/MIG/ARC welding. Dark state level: 4/9-13.
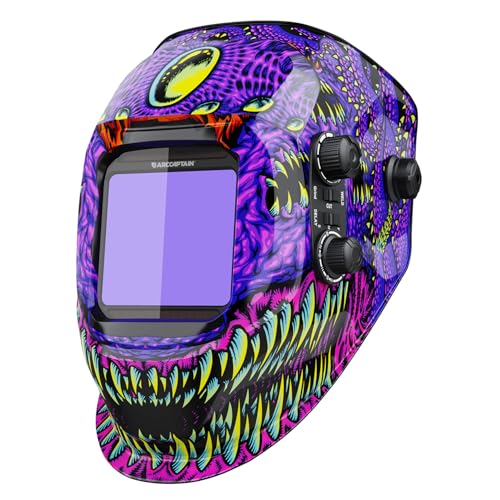
AUTO DARKENING FILTER - This welding helmet comes with high-end auto-darkening lens and 4 premium arc sensors which let you adapt to different working environments by adjusting the lens's shade and sensitivity while you are operating ARC/MIG/TIG Welding. DIN4 on light state, DIN5-9/9-13 on dark state.
Shade Control
The shade setting determines how much visible light passes through during welding. Higher shade numbers transmit less visible light. Never select a shade below the minimum because the puddle is hard to see. Improve work lighting, clean the cover plates, adjust your position, or use a helmet with better visibility instead.
Sensitivity Control
Sensitivity determines how easily the sensors trigger. Higher sensitivity can help with low-amperage TIG or a partly hidden arc. Lower sensitivity may reduce false triggering from nearby welders, strong sunlight, or flashing lights.
Do not lower sensitivity so far that the filter stops responding reliably to your own arc.
Delay Control
Delay determines how long the filter remains dark after the arc stops. A short delay can suit rapid tack welding. A longer delay may be more comfortable after high-amperage work because the puddle and base metal remain bright for a short time.
Grind Mode
Grind mode keeps the ADF in a light state or disables normal arc-triggered darkening. Do not strike an arc in grind mode. Switch back to weld mode, select the correct shade, and perform the required function check before welding.
Pro Tip: If a low-amperage TIG arc makes the filter flicker, first confirm that the helmet is rated for that amperage. Then clean the sensors, give them a clearer view of the arc, and raise sensitivity gradually.
Features to Check When Choosing an Auto-Darkening Helmet
The safest choice is not automatically the helmet with the fastest advertised switching time or largest window. Match the entire helmet to the work you actually perform.
| Feature | Why It Matters |
| Shade range | It must include the required shades for your welding and cutting processes. |
| Low-amperage TIG rating | A filter with an unsuitable minimum TIG rating may flicker or fail to detect a weak arc. |
| Sensor number and placement | Useful for pipe, out-of-position, and fixture-heavy work where one sensor may be blocked. |
| Power source | Check whether batteries are replaceable, sealed, rechargeable, solar-assisted, or not user-serviceable. |
| External or internal controls | External controls are convenient, but they must be protected from accidental changes. |
| Viewing area and color rendering | A clearer view can help you track the puddle, joint edges, and travel line without reducing shade. |
| Shell coverage and fit | The shell should cover the face and neck areas specified by the manufacturer without leaving light leaks. |
| Replacement parts | Approved cover plates, batteries, headgear, and filter cartridges should be readily available. |
| Standards and markings | Confirm the helmet’s stated standards, impact rating, filter range, approved processes, and limitations in its manual. |
Products Worth Considering

WITH LED WELDING LIGHT: This welding helmet comes equipped with a USB-powered LED light on top, offering two brightness levels. You can weld easily, even in dark environments, without worrying about not being able to see the details of the weld. It is ideal for assisting with welding in various scenarios. NOTE: Welding light comes uninstalled; easy to attach.

AUTO DARKENING FILTER - This welding helmet comes with a high-end auto-darkening lens and four premium arc sensors, allowing you to easily adapt to various working environments by adjusting the lens shade and sensitivity while welding (ARC/MIG/TIG). The lens operates at DIN4 in the light state and DIN5-9/9-13 in the dark state.

Advanced Eye Protection with Blue Light Blocking Technology: This welding helmet features cutting-edge Blue Light Blocking outer lens, shielding your eyes from harmful blue light during welding, protects your eyes by filtering out most of harmful high energy blue light rays while letting through the less harmful portion of the blue light spectrum. This ensures long-lasting eye comfort and safety, making it ideal for extended welding sessions
Enhancing Visibility With Polarization Filters
Polarizing filters work with the liquid-crystal layers to control visible light when the ADF enters its dark state. The goal is not simply to make the lens as dark as possible. You need enough contrast to see the puddle and joint while remaining at or above the required protective shade.
Visibility also depends on lens cleanliness, color rendering, viewing angle, work-area lighting, optical quality, and headgear position. Better helmet viewing quality can make it easier to follow the joint without choosing an unsafe shade.
Key Functions of Polarization Filters
- Control visible glare: They reduce the intense visible light produced by the arc.
- Create the selected dark state: They work with the liquid crystals to limit light transmission.
- Support puddle visibility: Correct light control can make the weld pool and joint line easier to distinguish.
- Reduce repeated visual adjustment: Proper shade and delay settings can improve comfort during repeated welds.
Enhancing Contrast and Clarity
Contrast helps you separate the puddle, joint edges, filler metal, and surrounding base metal. Clean cover plates and the correct shade often make a larger difference than a marketing label. Replace any cover plate that is pitted, warped, deeply scratched, or permanently hazy.
Some helmets advertise a 1/1/1/1 optical clarity rating. This four-part rating comes from the European EN 379 system and evaluates optical class, scattered light, shade consistency, and angular dependence. It can help compare ADF optics, but it does not replace ANSI/ISEA compliance, impact protection, or correct shade selection.
Minimizing Glare During Welding
- Choose the proper shade: Begin dark and move lighter only while staying at or above the minimum.
- Clean or replace cover plates: Do not look through spatter damage or deep scratches.
- Adjust sensitivity carefully: Use enough sensitivity for reliable triggering without excessive false activation.
- Control surrounding light: Sunlight, strobes, and nearby arcs can affect some sensors.
- Improve task lighting: Light the workpiece before welding instead of reducing the welding shade below a safe level.
Benefits of Auto-Darkening Helmets Over Traditional Models
Auto-darkening helmets improve convenience because the hood can remain down while you position the electrode or torch. They are especially useful for repeated tacks, awkward joints, and jobs that use more than one welding process.
- Better setup visibility: You can see the joint before striking the arc.
- Less helmet flipping: This may reduce neck fatigue during repetitive work.
- Adjustable shades: A suitable variable-range filter can support several processes.
- Steadier starts: Both hands can remain in position as the arc begins.
- Additional modes: Depending on the model, the helmet may include cut, grind, tack, sensitivity, and delay controls.
An auto-darkening helmet is not automatically safer than a passive fixed-shade helmet. Either type can provide proper protection when it has the correct shade, suitable ratings, complete cover plates, adequate shell coverage, and no damage. A passive helmet is mechanically simpler, while an ADF offers visibility and adjustment benefits but adds sensors, controls, and power components that require inspection.
How to Test an Auto-Darkening Helmet Before Welding
Inspect and test the helmet before each welding session, especially after storage, impact, moisture exposure, battery replacement, or heavy spatter. Use the exact procedure in the manufacturer’s current manual.
- Inspect the shell: Look for cracks, burn-through, deformation, loose hardware, and openings that could admit arc light or spatter.
- Inspect the ADF: Stop if the filter is cracked, pitted, delaminated, distorted, or otherwise damaged.
- Check both cover plates: Confirm that approved inside and outside plates are installed correctly and replace damaged ones.
- Clean the sensors: Use the cleaning method in the manual. Do not spray liquid directly into the electronics.
- Check the power system: Replace approved batteries when the low-battery indicator appears or controls stop responding. Follow charging or light-exposure instructions only when the manual requires them.
- Confirm the operating mode: Leave grind mode and select the correct weld or cut mode.
- Set shade, sensitivity, and delay: Match the process, amperage, position, and surrounding light.
- Perform the approved function test: Use a built-in test button or the procedure specified by the manufacturer.
- Stop after any failed test: Do not strike an arc until the fault has been corrected and the filter passes another test.
Testing methods are not universal. For example, 3M’s Speedglas 9100 instructions describe holding the ADF near a fluorescent light or aiming certain television or VCR remote controls at the sensors. Some other manuals describe a bright-light or torch-striker test. A phone flashlight, sunlight, or remote may not activate every model, so a failed improvised test does not diagnose the filter by itself.
Note: “Solar-powered” and “solar-assisted” do not always mean the same thing. Check whether your helmet has replaceable batteries, sealed cells, a charging requirement, or no user-serviceable battery.
Store the helmet in a clean, dry place away from solvents, direct impact, and extreme temperatures. A moisture-resistant and durable helmet shell may tolerate normal shop use, but it should never be stored wet, dirty, or coated with grinding dust.
Troubleshooting Auto-Darkening Helmet Problems
| Problem | Likely Cause | Safe Response |
| Lens will not darken | Grind mode, weak power source, covered sensors, incorrect mode, damaged ADF | Stop welding. Check the mode, power system, sensors, cover plates, and manual-approved test procedure. |
| Lens flickers while welding | Sensitivity too low, weak or hidden arc, blocked sensor, unsuitable low-amp TIG rating, weak battery | Stop and correct the cause. Clean the sensors, improve their view, check the TIG rating, adjust sensitivity, and service the power source. |
| Lens darkens without your arc | Nearby welding, sunlight, strobes, or sensitivity set too high | Reposition the work, shield stray light when safe, and lower sensitivity only enough to prevent false triggering. |
| Lens stays dark after welding | Long delay, high sensitivity, bright hot metal, nearby arcs, or strong ambient light | Allow the programmed delay to finish, then adjust delay or sensitivity according to the manual. |
| Poor or hazy visibility | Dirty or damaged cover plate, fogging, incorrect shade, poor work lighting, bad headgear position | Clean or replace approved plates, improve lighting and ventilation, adjust fit, and select a safe shade. |
| Helmet works intermittently | Weak battery, loose battery contact, intermittent sensor blockage, damaged controls, or temperature outside the rated range | Remove it from service until it passes inspection and a manufacturer-approved function test. |
Never work around a defective ADF by squinting, closing one eye, increasing travel speed, or selecting a lighter-than-required shade. Use only compatible replacement parts approved for the helmet.
Limits of Auto-Darkening Welding Helmets
An auto-darkening helmet is designed for specific hazards and processes. The manual determines where and how a particular model may be used.
- Laser welding: A standard arc-welding ADF is not a laser-protection filter unless it is specifically approved for the laser wavelength and task.
- Processes requiring shade 14 or higher: Many common variable-shade ADFs stop at shade 13 and are unsuitable.
- Hidden arcs: Sensors may not trigger reliably when the arc is completely blocked.
- Heavy overhead work: Some shells are not approved for heavy overhead welding or cutting because falling molten metal can enter or damage the helmet.
- Temperature limits: Electronics and liquid-crystal response can change outside the stated operating range.
- Impact hazards: The ADF, shell, cover plates, and safety glasses must have the appropriate impact protection for the task.
- Respiratory hazards: A standard welding helmet does not filter fumes or gases. Use ventilation and an appropriate respiratory-protection program when required.
- Chemical and splash hazards: Do not assume a welding helmet is approved for chemical splash, abrasive blasting, or other unrelated hazards.
Frequently Asked Questions
How does an auto-darkening helmet work?
Arc sensors detect welding light and signal the ADF electronics. Liquid-crystal and polarizing layers then reduce visible-light transmission so the lens changes from its light state to the selected welding shade. An undamaged UV/IR filtering layer is designed to work in both states.
Does an auto-darkening helmet protect before it turns dark?
Reputable manufacturers commonly design their ADFs to provide UV/IR filtering in the light and dark states. Confirm this in the manual for your exact helmet. The filter must be intact, correctly installed, and used with all required cover plates.
Why do welders get arc eye or other eye injuries?
Welders can be injured by ultraviolet and infrared radiation, intense visible light, sparks, spatter, and flying particles. Arc eye, also called photokeratitis or welder’s flash, is a painful corneal injury caused by UV exposure.
Is there a battery in an auto-darkening welding helmet?
Many models use replaceable or sealed batteries, often with solar assist. Others use a solar-powered design without a user-replaceable battery. Check the manual because “solar-powered” does not describe every helmet’s power system accurately.
What happens if the auto-darkening helmet battery dies?
The electronic filter may stop darkening or responding to controls. Some manufacturers document continued UV/IR filtering during a battery failure, but the visible arc is still unsafe to view. Stop welding, service the approved power source, and test the filter before reuse.
Why won’t my auto-darkening welding helmet stay dark?
Common causes include low sensitivity, blocked sensors, a partly hidden arc, an unsuitable low-amperage rating, weak batteries, or damaged controls. Stop welding and correct the cause instead of continuing through repeated flickering.
Can I weld while the helmet is in grind mode?
No. Grind mode normally keeps the lens in a light state or prevents normal arc-triggered darkening. Return the helmet to weld mode, choose the correct shade, and perform the required function check first.
What shade should I use for MIG, TIG, stick, or flux-core welding?
Match the shade to the process and amperage using the helmet manual, OSHA’s minimum-shade table, and workplace rules. Start darker, then move lighter only as needed without going below the minimum protective shade.
Is an auto-darkening helmet safer than a passive helmet?
Not automatically. Either can be safe when it has the correct filter shade, suitable ratings, complete cover plates, proper shell coverage, and no damage. Auto-darkening helmets mainly add setup visibility, adjustable shades, and convenience.
Can I test an auto-darkening helmet with sunlight or a phone flashlight?
Only use a light-source test if the manufacturer permits it. Different ADFs respond to different light patterns, so sunlight or a phone flashlight may not trigger a working helmet. Follow the built-in test function or the exact procedure in the manual.
Conclusion
An auto-darkening welding helmet uses arc sensors, control electronics, liquid-crystal layers, and polarizing filters to change the amount of visible light reaching your eyes. Its UV/IR filtering system performs a separate protective job, but only when the filter is undamaged, correctly assembled, and used within its stated limits.
Choose a helmet with the shade range, low-amperage rating, sensor layout, power system, coverage, and standards information required for your work. Wear safety glasses underneath it, inspect it before every session, leave grind mode before striking an arc, and stop immediately if the filter fails or flickers.
Sources
- OSHA 1910.133 — Eye and Face Protection — minimum protective shades and U.S. workplace eye-protection requirements.
- OSHA Subpart I Appendix B — guidance on wearing welding helmets over primary eye protection.
- International Safety Equipment Association — publication and scope of ANSI/ISEA Z87.1-2025.
- 3M Speedglas 9100 User Instructions — model-specific sensors, switching time, UV/IR protection, inspection, testing, and limitations.
- Lincoln Electric Auto-Darkening Helmet Manual — light and dark states, power design, sensitivity, delay, cover lenses, and troubleshooting.
- EyeWiki — Photokeratitis — medical explanation of UV-related corneal injury and welding-arc exposure.




