Corrosion Protection for Welded Automotive Joints
What’s in This Article
- Why Welded Joints Need Corrosion Protection
- Why Welded Joints Rust So Fast
- Remove Old Sealers Before Repair
- Clean and Prep the Metal Before Welding
- Use Weld-Through Primer on Overlaps
- Seal Welds and Gaps After Welding
- Apply Seam Sealer Where OEMs Allow
- Paint Exposed Welds Before Reassembly
- Add Cavity Wax to Hidden Areas
- Follow OEM Corrosion Protection Procedures
- Frequently Asked Questions
- Conclusion
Rust often starts where a repair looks finished but still has bare steel, trapped moisture, or open seams. You need corrosion protection on welded automotive joints because welding burns off coatings, exposes fresh steel, and creates crevices that hold moisture and oxygen. Remove old sealer first, then clean and prep the metal fully. Apply weld-through primer to overlap faces, use seam sealer where original equipment manufacturer (OEM) procedures allow, paint exposed welds before reassembly, and finish hidden cavities with wax.
Quick Answer
Protect welded automotive joints with a layered process. Clean the metal, apply weld-through primer where needed, weld correctly, then seal, prime, paint, and add cavity wax to hidden spaces. This helps block moisture and slows rust in seams, overlaps, and closed sections.
Key Takeaways
- Welding removes factory coatings, so bare steel needs a new corrosion barrier.
- Overlap joints rust faster because they can trap moisture and oxygen.
- Old seam sealer and undercoating must come off before cutting, grinding, or welding.
- Weld-through primer, seam sealer, paint, and cavity wax work best as a layered system.
- OEM repair procedures should guide product choice, location, thickness, and cure time.
Why Welded Joints Need Corrosion Protection
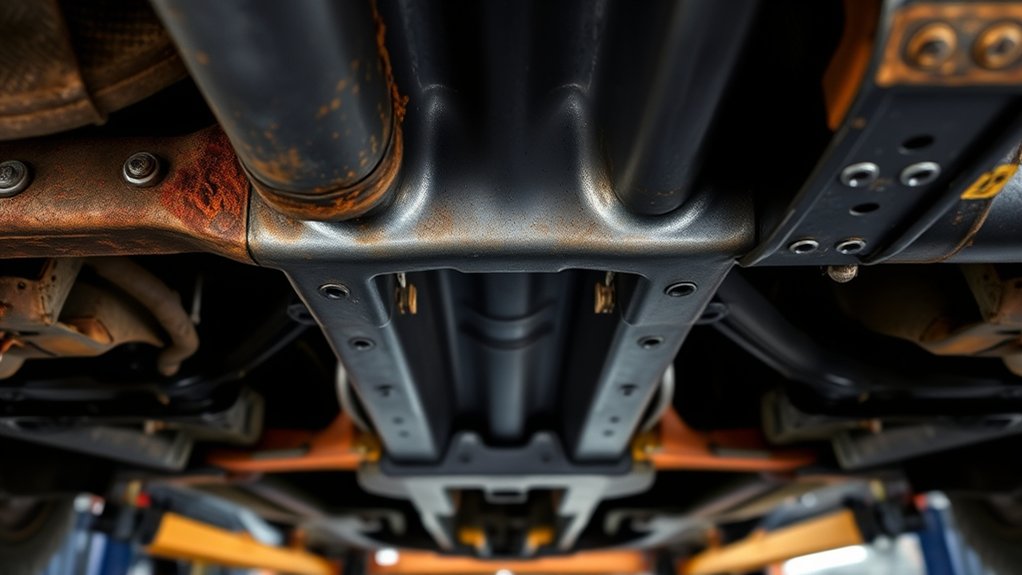
Welded joints need corrosion protection because welding exposes fresh metal surfaces that can react with moisture and oxygen. That reaction forms rust on steel. You also remove or weaken factory coatings during welding, so bare steel needs a new barrier after repair.
In automotive work, this matters because many joints overlap. Those overlaps create pockets where air and water can sit. If you leave those spaces open, corrosion can spread beyond the weld zone and weaken nearby metal.
You need weld-through primer on prepared overlap faces, then seam sealer over approved lap joints to block moisture. You also need cavity wax inside closed sections for more corrosion protection. This layered approach helps you control rust risk instead of leaving the repair exposed.
Before welding galvanized steel, you may also need to handle zinc coatings safely and correctly. Review removing zinc coating before repair work that involves galvanized panels.
Why Welded Joints Rust So Fast
You’ll see welded joints rust quickly when overlap geometry traps moisture and air against exposed metal. Welding also burns off protective coatings, which leaves bare steel or zinc-deficient areas open to oxidation. Once rust forms, it can expand and break down nearby coating layers.
Proper cleaning methods help reduce these problems. Clean metal gives your weld and coating system a stronger base.
Moisture Trapped in Overlaps
Even a clean welded overlap can rust fast when moisture stays inside the seam. The narrow gap limits drying and can create a persistent corrosion cell. You leave air and water in contact with bare steel, and that keeps the rust process active.
In automotive work, you can’t rely on a tight fit alone. Moisture trapped in overlaps can keep attacking the joint long after welding ends. You need drainage, sealing, and inspection access when the repair design allows it.
If you want durable joints, design or repair the overlap so water can’t hide and sit against the steel. That is one of the simplest ways to support preventing rust.
Coating Loss During Welding
When welding burns through paint, primer, or zinc, it strips away the coating that keeps moisture and oxygen off the steel. That leaves the joint open to fast corrosion. Galvanized steel needs extra care because heat can damage its zinc barrier near the weld area.
Bare iron then oxidizes and forms rust. Rust can expand, lift coatings, and weaken the joint over time.
| Risk | Cause | Effect |
|---|---|---|
| Burn-off | Arc heat | Exposed steel |
| Rust | Oxygen and moisture | Metal loss |
| Mitigation | Weld-through primer | Partial protection |
On overlaps, trapped air and moisture can increase rust risk. Use weld-through primer where fit-up allows, but inspect coverage with care. Missed spots and gaps can reduce protection.
Remove Old Sealers Before Repair
Before you cut or grind, locate and remove all old sealers, especially hidden ones listed in the body repair manual. These materials can block adhesion and may ignite during repair work. They can also contaminate the weld zone if you leave residue behind.
If access is limited, disassemble the joint as needed. Don’t drill random holes for access because that can weaken the structure and create new rust paths. You should also assess the structural integrity of the surrounding area before repair.
Locate Hidden Sealers
Hidden sealers can sit in tight joints and cavities, so identify and remove them before starting repair work. Check body repair manuals to map their locations. Then remove enough parts to expose each seam without damaging nearby panels.
Proper removal supports later sealing and corrosion protection. Some sealers can ignite during cutting or grinding, so deal with them before heat or sparks enter the area.
- Verify sealer locations against factory repair data.
- Open access with careful disassembly.
- Remove material cleanly to avoid residue.
- Inspect cavities for contamination before reassembly.
Remove Before Cutting
Clear the old sealer before you cut or grind. Some compounds are flammable, and others can contaminate the weld zone. You must remove sealers from every repair area that the OEM procedure identifies.
If a sealer sits behind a panel, disassemble the joint. Don’t drill random holes to reach it. That shortcut can damage structure and weaken your repair.
Clean removal keeps the weld area free of residue, which helps protect joint strength and future corrosion resistance. A disciplined method gives you a cleaner repair path.
Prevent Fire Risks
Old sealers and corrosion protection materials can ignite during welding or grinding. Remove them from the repair area before you introduce heat or sparks. If you leave seam sealers in place, you create an uncontrolled ignition path.
- Inspect the joint and map hidden sealer locations.
- Disassemble panels as needed to expose trapped material.
- Remove seam sealers and corrosion protection coatings per OEM specifications.
- Wear proper personal protective equipment (PPE) and control ignition sources.
Warning: Keep a fire watch during and after welding because hidden sealer, dust, and insulation can smolder out of sight.
Your discipline here protects you, your vehicle, and your workspace. Removing these materials before repair lowers fire risk and keeps the job safer.
Clean and Prep the Metal Before Welding
Before you weld, clean the metal thoroughly to remove rust, oil, dirt, paint, and other contaminants. These materials can weaken the joint and increase corrosion risk. Use a wire brush or grinder to strip away surface rust and paint, then degrease the area with a suitable solvent.
This gives you a clean base for the repair and helps the weld fuse with proper penetration. After prep, inspect every edge and seam for residue. Even small traces can create defects, porosity, and hidden corrosion paths.
If you leave contamination behind, you compromise both strength and durability. Follow OEM specifications for surface preparation so your process matches the required corrosion resistance and structural performance. Clean metal isn’t a luxury; it’s the foundation of a reliable weld.
You should also understand proper surface profiling when the repair includes coating or painting. A good surface profile helps coatings bond and reduces future failure risk.
Use Weld-Through Primer on Overlaps
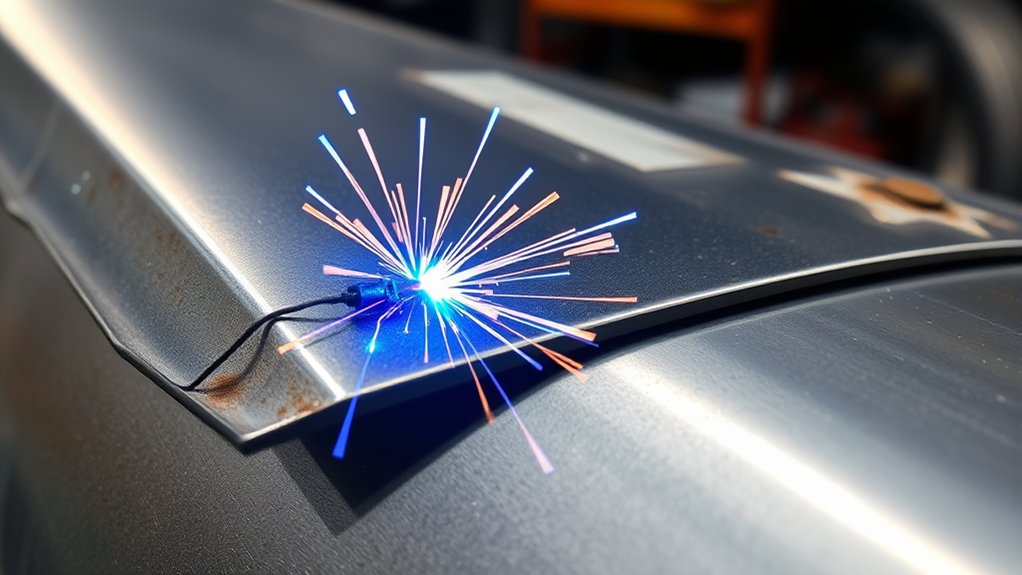
You should apply a zinc-based weld-through primer to overlap areas before welding when the OEM procedure allows it. This creates a corrosion-resistant protection layer between mating faces. It can help reduce oxidation where trapped moisture could start rust.
You need full, even coverage across the overlap. Thin or missed areas can reduce protection and affect joint integrity. You should also wear flame-resistant clothing when working in welding environments.
Products Worth Considering

A durable, zinc enhanced coating that protects all metal surfaces


High quality, fast drying surface
Zinc Protection Layer
A zinc-based weld-through primer helps protect overlap areas by placing a sacrificial barrier on the surfaces that will sit inside the joint. You gain corrosion protection by shielding bare steel from oxidation while you weld. This matters most where moisture can linger.
- Inspect zinc coverage before welding.
- Confirm the film looks continuous, not thin or patchy.
- Run test welds to check weld quality.
- Recheck the joint for rust risk after heating.
This layer is not cosmetic. It gives the hidden side of the joint a better chance against early rust.
Overlap Welding Coverage
Overlap joints are vulnerable to corrosion because they trap moisture and oxygen between the faying surfaces. Applying a weld-through primer before assembly helps protect bare steel that becomes hard to reach after clamping. Coat both mating faces when the repair procedure calls for it.
During welding, the coating can protect nearby metal from oxidation. Because coverage is hard to verify after assembly, make test welds when needed. Test welds help you confirm that the coating, fit-up, and weld settings work together.
This approach controls risk, but it does not make overlap joints perfect. When design and repair rules allow, butt joints can reduce crevice formation and make corrosion control easier.
Seal Welds and Gaps After Welding
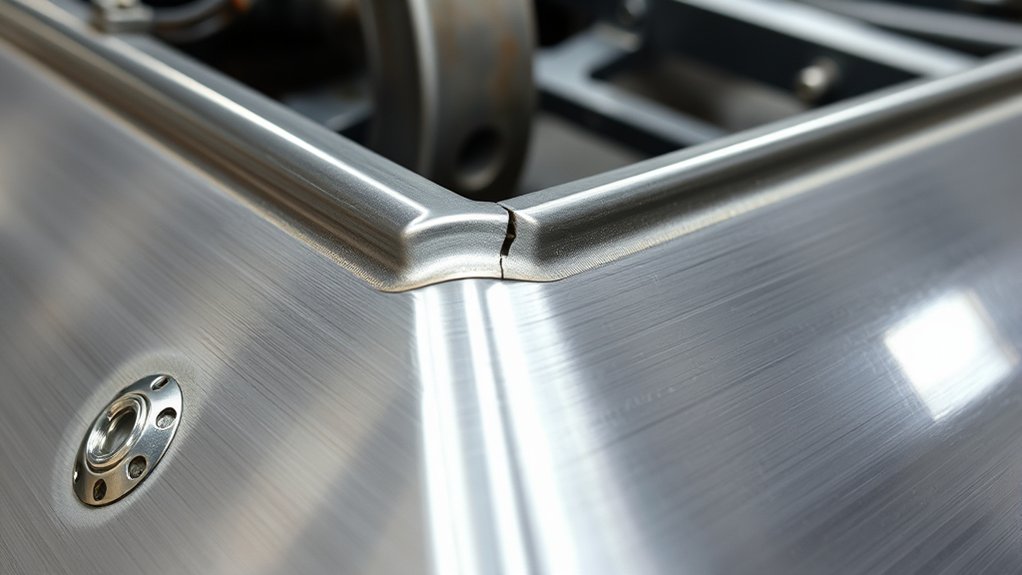
When welded joints leave seams, crevices, or overlapping sections, sealing those areas helps block moisture entry and slows corrosion. You can use approved sealing methods to protect trapped interfaces and reduce water and debris entry. The right method depends on the repair area and OEM instructions.
- Seal welds can raise stiffness, but they may shift load paths and heat behavior.
- Caulk may seal some gaps for a short time, but it does not replace proper weld repair or approved seam sealer.
- Weld-through primers can protect metal during welding, but you must apply them evenly.
- Butt welds can reduce crevice formation when the design allows them.
- Use proper safety gear to protect yourself during grinding and welding.
Note: Seam sealer protects against moisture, but it should not hide poor weld quality or untreated rust.
Products Worth Considering
SINGLE COMPONENT FORMULA: Adheres well to bare metal, primed metal and painted surfaces

J-B Weld Pro-Series Heavy Body Seam Sealer #53021 is a high-performance 2-part epoxy formulated material which has excellent corrosion resistance which stays flexible and will not shrink or crack.
![[2 Pack] Polyurethane Seam Sealer Automotive Compound Black — Paintable Auto Body Seam Sealer, Won't Shrink or Crack, Flexible Joint Filler for Bare & Painted Metal, RV Roof Sealant with Gloves, 10oz](https://m.media-amazon.com/images/I/4184QW8Um7L._SL500_.jpg)
PROFESSIONAL AUTOMOTIVE SEAM SEALER — BLACK — WON'T SHRINK OR CRACK — Polyurethane formula in black seals body panel seams, weld joints, and gaps with a durable, flexible compound. Black color blends with dark undercarriage surfaces, rocker panels, and wheel wells where visible sealant lines need to disappear.
Apply Seam Sealer Where OEMs Allow
Where OEM repair procedures permit it, apply seam sealer over properly prepared welded joints to limit moisture intrusion and reduce rust risk. Follow the maker’s specification for bead width, coverage, and cure time. Seam shape can affect corrosion protection and repair quality.
Clean, dry, and abrade the joint as required so the sealer bonds to sound metal. Don’t seal over dirt, oil, moisture, or loose rust. That can trap contamination under the sealer and cause early failure.
You shouldn’t improvise product choice or thickness. Use only approved materials and the stated process for the vehicle platform. In high-exposure zones, proper seam sealing gives you a practical defense against rust.
After installation, inspect the joint during routine service for cracks, edge lifting, or voids. Correct early failures before they spread. You should also apply the correct amperage during welding to help protect joint quality before sealing.
Paint Exposed Welds Before Reassembly
Paint any exposed welds before reassembly to create a protective barrier against rust and corrosion. You should paint exposed welds before panels go back together because bare metal can corrode quickly. Clean, degrease, and prime the weld surface first.
Good prep determines whether the coating bonds or fails. Epoxy-based coatings often work well for corrosion protection because they bond strongly and resist moisture when applied correctly. Follow the coating maker’s instructions for surface prep, dry time, and topcoat steps.
- Remove contaminants completely.
- Prime for adhesion and coverage.
- Apply paint evenly to all exposed edges.
- Inspect later for wear or corrosion.
When you paint exposed welds correctly, you extend service life and reduce hidden failure points. This step helps you protect the joint instead of leaving it open to oxidation. Better flux core welding technique can also support cleaner welds and more durable joints.
Add Cavity Wax to Hidden Areas
Once the visible welds are coated and the panels are ready to close, add cavity wax to hidden areas before trim installation. Cavity wax extends corrosion protection into seams, crevices, and internal cavities that paint can’t reach well. Apply it after refinishing, while access remains open.
A spray wand helps you drive the material into tight passages and build a more even film. Coat boxed sections, flanges, and overlaps with care. Choose a high-quality product that matches the vehicle’s materials and finishes.
Inspect the coverage carefully because missed gaps can become moisture traps. Hidden spaces need the same level of care as visible welds. Keep the work area free from combustibles to reduce fire hazards during the repair process.
Follow OEM Corrosion Protection Procedures
OEM repair procedures should guide each corrosion protection step. Vehicle makers may specify where to use weld-through primer, seam sealer, cavity wax, foam, adhesive, or coating. Follow those instructions because panel design, steel type, and crash performance can affect repair choices.
- Verify substrate exposure before coating.
- Match product type to joint geometry.
- Time each application per OEM sequence.
- Document compliance for accountability and repeatability.
- Maintain proper ventilation during coating work to reduce fume buildup.
Pro tip: Take photos before covering a repair so you can document prep, primer, seam sealer, and cavity wax placement.
Frequently Asked Questions
Should I Use Epoxy Instead of Seam Sealer on Welded Panels?
No, you shouldn’t replace seam sealer with epoxy on welded panels. You can use epoxy primer first for adhesion and corrosion resistance, then apply seam sealer for flexibility and gap filling where the OEM procedure allows it.
How Long Should Weld-Through Primer Dry Before Welding?
You should follow the primer maker’s dry time and the OEM repair procedure. Many weld-through primers need to reach a matte, touch-dry state before welding, but the exact time depends on product type, film thickness, temperature, and humidity.
Can I Weld Over Factory Undercoating Safely?
No, you shouldn’t weld over factory undercoating. Remove it fully from the repair area because it can contaminate the weld and may ignite when exposed to heat or sparks.
What’s the Best Way to Inspect Hidden Weld Corrosion?
Start with visual inspection, clean access, and probing where the repair area allows it. For deeper checks, a qualified technician may use methods such as ultrasonic testing or borescope inspection to find hidden corrosion.
Do Aluminum and Steel Welds Need Different Corrosion Protection?
Yes, aluminum and steel welds need different protection methods. Aluminum often needs compatible barrier coatings, while steel may use primers, paint, seam sealer, zinc-based products, or cavity wax based on the repair location.
Can Seam Sealer Stop Rust That Already Started?
No, seam sealer cannot stop active rust by itself. You need to remove or treat corrosion first, clean the area, and then apply approved primer, sealer, coating, or cavity wax as the repair procedure requires.
Conclusion
Corrosion protection on welded automotive joints works best as a complete system, not as one final coating. Clean the metal, protect overlap faces, weld correctly, seal approved seams, paint exposed areas, and apply cavity wax inside hidden cavities. Follow OEM procedures instead of guessing product type, thickness, or placement.
Your next step is simple: inspect every welded joint before reassembly and confirm that no bare metal, open seam, or hidden cavity remains untreated. A careful repair today helps the vehicle stay stronger, cleaner, and more resistant to rust over time.


