How to Clean a MIG Welder Safely
What’s in This Article
- Before You Begin: Clean a MIG Welder Safely
- What You’ll Need to Clean a MIG Welder
- Clean the Nozzle, Tip, and Diffuser
- Check the Liner, Cable, and Gas Hose
- Inspect Drive Rolls and Gun Connections
- Replace Worn MIG Consumables on Time
- Prevent Spatter Buildup on the Gun
- Follow a MIG Welder Maintenance Routine
- Common MIG Welder Cleaning Mistakes
- Frequently Asked Questions
- Conclusion
A dirty MIG welder can turn a simple weld into a rough, weak, and frustrating bead. Spatter, dust, worn tips, and loose fittings can hurt wire feed, gas flow, and arc stability. This guide shows you how to clean key MIG welder parts safely, build a simple maintenance routine, and avoid problems that waste time.
Quick Answer
Unplug the MIG welder, wear gloves and safety glasses, and clear dust with compressed air. Brush spatter from the nozzle, contact tip, and diffuser, then replace worn tips or egg-shaped orifices. Check the liner, cables, and gas hose for clogs, cuts, or leaks, and keep drive rolls clean and matched to the wire.
Key Takeaways
- Unplug the welder before cleaning so you reduce electrical risk.
- Clean the nozzle, contact tip, and diffuser to protect gas flow and arc stability.
- Inspect the liner, cable, gas hose, and fittings for clogs, wear, and leaks.
- Keep drive rolls clean and matched to your wire type and size.
- Replace worn consumables based on condition, not guesswork.
Before You Begin: Clean a MIG Welder Safely
Before you clean a MIG welder, unplug it from the power source to reduce electrical hazards. Let hot parts cool before you touch the gun, nozzle, or contact tip.
Put on personal protective equipment, including gloves and safety glasses, before you handle any cleaning tools. Keep your workspace clear so clutter does not block access or create trip hazards.
Use compressed air to clear dust and debris from the feeder section and liner. Short, controlled bursts help prevent wire-feed problems and keep the machine responsive.
Inspect gas hoses and fittings carefully. Apply soapy water to joints if you suspect leaks, then tighten loose connections so gas flow stays stable.
Warning: Never clean inside the welder while it stays connected to power, because stored or live electrical energy can injure you.
Work methodically and don’t rush, because safe maintenance supports your control over the equipment and your shop. Also, inspect for visible damage on the welder’s power cord before you clean the machine.
What You’ll Need to Clean a MIG Welder
Gather your cleaning tools before you start. You’ll work faster and avoid leaving the welder half-cleaned.
- Safety glasses and work gloves
- Compressed air or a clean air nozzle
- Wire brush or nozzle reamer
- Clean cloths or shop towels
- Soapy water for checking gas leaks
- Replacement contact tips, nozzles, diffusers, or liners when needed
- Anti-spatter spray or nozzle dip if you use it in your setup
Set aside about 10 to 20 minutes for a basic cleaning. A deeper check takes longer if you need to remove drive rolls, inspect the liner, or replace consumables.
Products Worth Considering

COMPATIBILITY: Designed for Lincoln Magnum 100L (K530 series) and Tweco Mini/#1 welding torches. This kit is also a direct fit for YESWELDER FLUX-135PRO Old Version/MIG-140DS PRO/YWM-160/MIG-165DS PRO/MIG-185DS PRO/MIG-205DS PRO/MIG-250PRO/MCT-520.
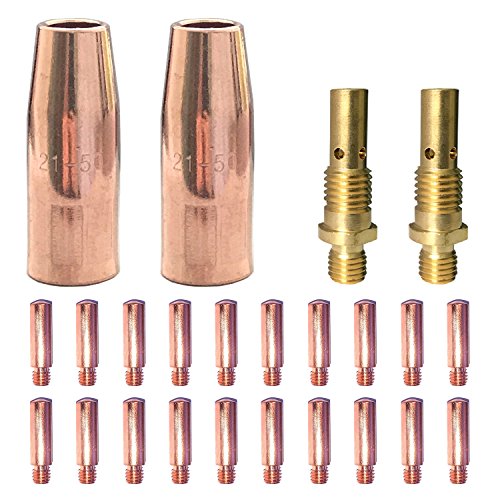
Mig Welding gun accessory 0.030" kit tip-nozzle-diffuser with contact tip,gas nozzle,gas diffuser for Lincoln Magnum 100L & Tweco Mini/#1.

Package Includes: 10 × .030" (Ø0.8mm)welding tips, 2 × nozzles, 2 × gas diffusers (with left-handed threads).
Clean the Nozzle, Tip, and Diffuser
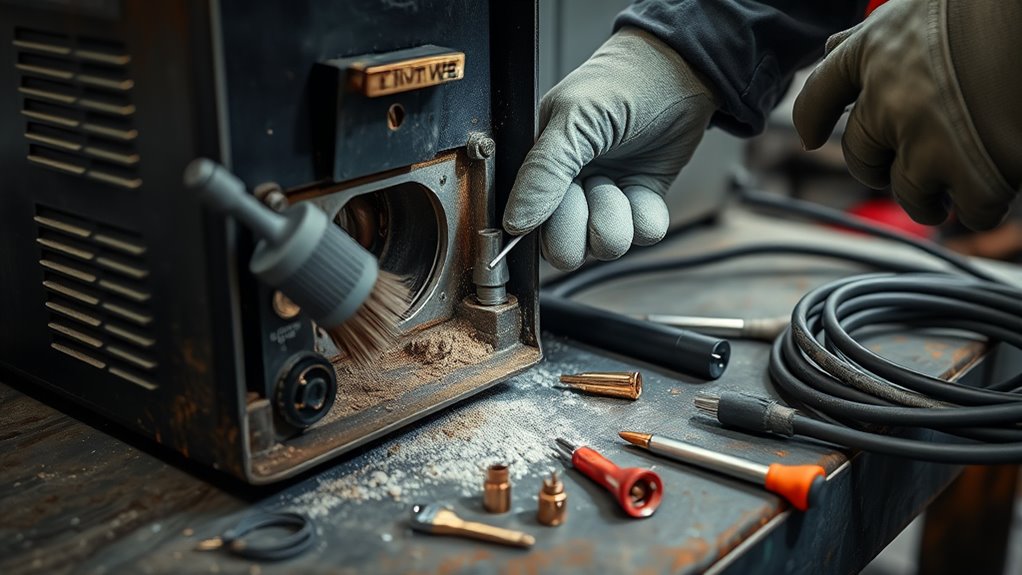
Start with the nozzle, contact tip, and diffuser, since buildup in these parts can disrupt shielding gas and wire feed. Use these steps to clean each part with care and keep weld quality high.
- Clean the nozzle with a wire brush or wire reamer to remove spatter and restore smooth shielding gas flow.
- Inspect the contact tip for wear. Replace it if the orifice looks egg-shaped or oval, so wire feed and current transfer stay accurate.
- Clear the diffuser of debris and buildup so it can spread shielding gas evenly across the arc.
After cleaning, thread the parts together firmly. Loose joints can overheat and reduce performance. Regular maintenance also helps improve weld quality and prevent defects.
You don’t need complicated procedures here. You need steady maintenance that protects your equipment and keeps you working with less interruption.
When you clean the nozzle, check the contact tip, and service the diffuser on schedule, you reduce defects. You also extend component life and keep the welder ready for reliable output.
Products Worth Considering

Gel eliminates erratic operation with a film that will not clog orifices and threads on MIG nozzles and contact tips

Easy to Use: Cleans the hot MIG nozzle on the torch. Lightweight and compact, easy to carry and manoeuvre

【SILICON FREE SAFE FORMULA】 Zero silicone, odorless, non-toxic & non-flammable raw material, eliminates weld porosity caused by silicone residue during high heat welding.
Check the Liner, Cable, and Gas Hose
Next, inspect the liner, cable, and gas hose to keep wire feed, conductivity, and shielding gas flow consistent. You’ll protect welding performance and reduce downtime with disciplined maintenance.
Check the liner for clogs or debris. A clean liner keeps wire moving freely and helps prevent burnback. Examine each cable for cuts, kinks, or wear, because damage can weaken conductivity and create safety hazards.
Route cables neatly so they don’t restrict wire feed or gas flow.
| Component | What to inspect | Why it matters |
|---|---|---|
| Liner | Debris, clogs | Stable wire feed |
| Cable | Cuts, kinks, wear | Safe conductivity |
| Gas hose | Leaks, fittings | Shielding gas flow |
| Hose fittings | Tightness, cleanliness | No interruptions |
| Routing | Obstructions | Better performance |
Test the gas hose with soapy water if you suspect leaks, and check fittings weekly for tightness. Secure connections preserve gas, keep your work clean, and let you weld with more control.
Good maintenance works with proper settings. Clean parts and correct settings help lower the risk of porosity, burnback, and unstable beads.
Inspect Drive Rolls and Gun Connections
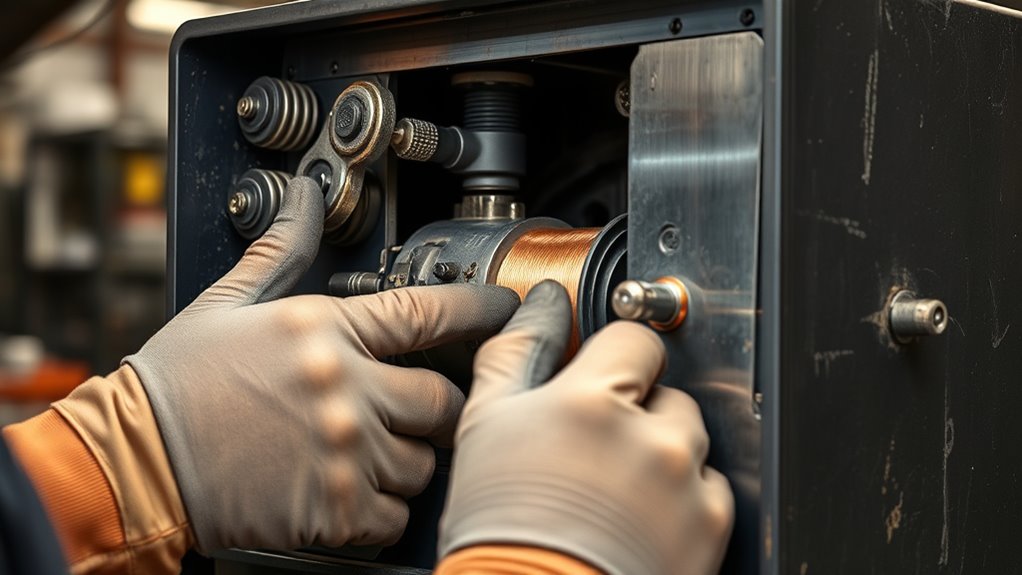
Inspect the drive rolls and gun connections to keep wire feed, conductivity, and shielding gas delivery steady. Remove the drive rolls regularly, then brush off rust, shavings, and debris that can disrupt wire feeding.
Match the groove to your wire type during reinstallation. Set tension so the wire feeds smoothly without slipping or deforming. Tight, clean drive rolls support consistent performance and reduce welding defects.
- Check drive rolls for corrosion and buildup.
- Confirm groove alignment and tension.
- Inspect gun connections, neck, and trigger leads for wear.
Use your hands and eyes to verify gun connections are secure, because loose joints can weaken electrical conductivity and gas flow. Also, keep surfaces free of zinc residues to help prevent weld contamination.
Inspect the ground lead and clamp too. Clean contact with the workpiece helps prevent arc instability and welding defects. This preventative maintenance keeps your machine efficient and gives you more control over every bead.
Replace Worn MIG Consumables on Time
Once the drive rolls and gun connections are clean and secure, turn to the consumables that guide the arc. In MIG welding, you need to inspect consumables often, especially contact tips and nozzles.
Look for wear, elongation, or buildup that can distort performance. Replace contact tips when the orifice no longer looks round or when current transfer starts to vary. That keeps the arc stable and cuts defects.
Check liners too. If they’re clogged or worn, wire feed suffers and burnback risk climbs, so replace them before they drag your setup down.
You don’t need random replacement intervals for maintenance. You need replacement based on actual condition. That approach saves money, reduces downtime, and keeps your machine ready when you are.
Good gas flow also matters for arc stability. Use this MIG welding problems and solutions guide when you need help tracking porosity, burnback, or unstable arc issues.
Anti-spatter helps on tips and nozzles, extending service life, but it does not make parts permanent. When a consumable is spent, replace it and keep the torch free from avoidable drag.
Prevent Spatter Buildup on the Gun
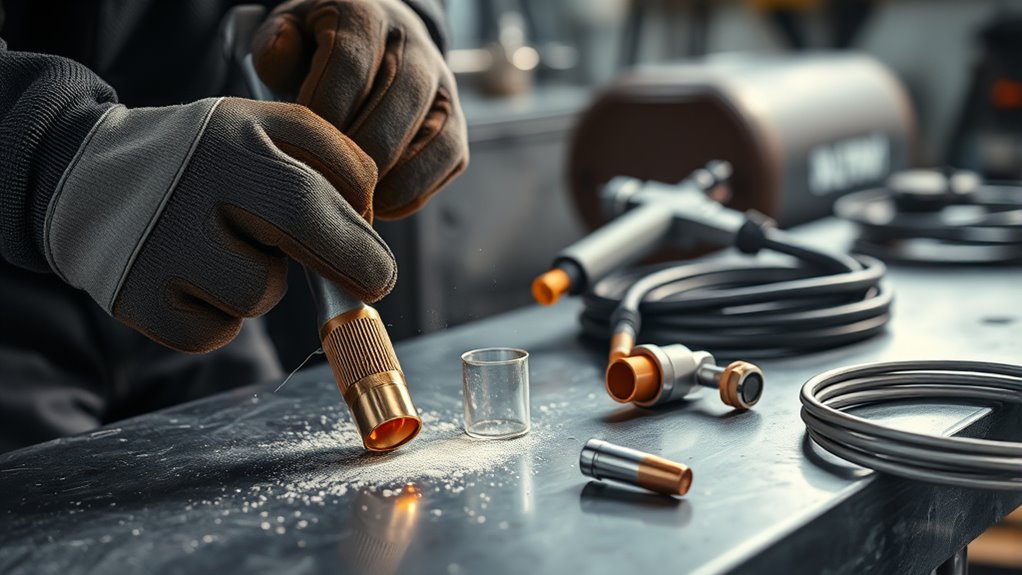
Keep the nozzle, contact tip, and diffuser clean after each welding session so spatter doesn’t block gas flow or hurt weld quality. Apply anti-spatter spray or liquid to the workpiece before welding, and use a wire brush during breaks to remove buildup from gun components.
Check the gas holes in the collet body often. Clean the MIG gun between passes to keep shielding gas flow consistent. Regular maintenance helps avoid issues such as porosity in welds, which supports stronger and more reliable joints.
Nozzle Spatter Control
To keep spatter from building up on the gun, clean the nozzle regularly with a wire brush or reamer. This helps you avoid restricted gas flow and poor weld quality.
Make nozzle cleaning part of your maintenance routine, and use these tips to stay ahead of buildup:
- Spray anti-spatter on the nozzle before you start welding.
- Clear gas holes in the collet body so gas flow stays consistent.
- Inspect the contact tip often, and clean it before spatter causes arc instability.
Between passes, brush the nozzle again, especially when you weld materials that produce more spatter. This quick cleaning protects shielding gas coverage and lets you work with more control.
Tip and Diffuser Care
Clean the contact tip and diffuser regularly so spatter doesn’t build up and restrict gas flow. A blocked diffuser can also hurt weld quality.
After each session, clean the tip with a wire brush or reamer to clear debris fast. Inspect the diffuser for clogging, wear, or damage.
A clean diffuser helps shielding gas spread evenly and supports stable arc performance. Build this check into your maintenance routine before each new job, especially when you’re welding materials that throw more spatter.
If the tip or diffuser is worn, replace it right away. That simple upkeep keeps the gun working smoothly, reduces weld defects, and lets you weld with control.
Anti-Spatter Cleaning Habits
Spatter control works best when you prevent buildup before it starts. Apply anti-spatter to the nozzle and surrounding metal before each run.
A quick nozzle dip can build a barrier that limits spatter accumulation and keeps you moving.
- Clean the nozzle several times during long welds so gas flow stays stable and clogs don’t form.
- Inspect and clean the contact tip during long runs to preserve current transfer and reduce weld defects.
- Store nozzles and consumables in original packaging so dust and physical damage don’t affect maintenance.
These habits cut downtime, protect the gun, and keep your welds consistent. When you stay disciplined, you control the process instead of letting spatter slow your work.
Pro tip: Keep spare contact tips near the welder so you can replace a worn tip before it ruins the bead.
Follow a MIG Welder Maintenance Routine
Set a daily cleaning routine that removes spatter and debris from the nozzle, contact tip, and gun. This helps you maintain steady gas flow and smooth wire feeding.
Inspect consumables often, and replace nozzles, contact tips, and the liner before wear or buildup causes defects and downtime. Check the gas hose, fittings, ground lead, and clamp for damage or looseness.
Fix any leak or poor connection right away. Regular maintenance helps prevent wire feed issues that can interrupt your welding process.
Daily Cleaning Checks
A quick daily maintenance routine helps keep your MIG welder safe and performing well. You can protect your setup by making fast checks before and after welding:
- Inspect cables for cuts, kinks, or abrasion, and keep all connections tight and clean.
- Clean the gas nozzle several times a day to remove spatter, preserve gas flow, and protect weld quality.
- Check the contact tip and ground clamp, then clean both so current transfers efficiently and the arc stays stable.
After you finish, purge the gas system by pressing the gun trigger to relieve pressure. That simple step reduces stress on hoses and fittings.
When you stay disciplined, you keep control, cut downtime, and help your equipment work with you, not against you.
Inspect Consumables Often
Check consumables often during your MIG welder maintenance routine. Worn contact tips, nozzles, and diffusers can quickly harm arc stability and gas coverage.
Inspect consumables before each job and again during long runs. Look for elongation, spatter buildup, or rough edges.
Replace contact tips before they lose their orifice shape. This keeps current transfer accurate and reduces wire whip.
Keep the nozzle and gas diffuser clean so gas flow stays even and shielding remains effective. Also check the liner for debris that can disrupt wire feeding, cause burnback, and slow production.
If O-rings look dry or damaged, lubricate them with silicone to help preserve the seal. This maintenance keeps your machine responsive, efficient, and ready to work.
Protect Cables and Gas
After you’ve handled consumables, keep the rest of the welding circuit in shape by protecting the cables and gas delivery system.
Route cables straight, not in tight coils, so they don’t kink, restrict wire feed, or disturb gas flow. Inspect hoses, fittings, and connections before each shift.
Loose hardware can leak gas and weaken weld quality. Use soapy water at joints to spot leaks, then tighten anything that bubbles.
Clean the ground lead and clamp regularly so they grip the workpiece firmly and carry current efficiently.
- Straighten and support cables.
- Check gas hoses with soapy water.
- Clean and secure the ground clamp.
Build this maintenance routine into your cleanup process. Your machine stays safer, more reliable, and ready to weld with less downtime.
Common MIG Welder Cleaning Mistakes
Small cleaning mistakes can cause large welding problems. Avoid these habits if you want steadier feed, cleaner gas coverage, and fewer interruptions.
- Don’t blow debris deeper into the liner with uncontrolled air pressure.
- Don’t reuse a badly worn contact tip because it can cause unstable current transfer.
- Don’t overtighten small torch parts because you can damage threads.
- Don’t ignore the ground clamp because poor contact can mimic machine failure.
- Don’t store consumables loose where dust, oil, or damage can affect performance.
If the welder still feeds poorly after cleaning, check wire type, drive roll tension, liner condition, and gas flow before you assume the machine has failed.
Frequently Asked Questions
How often should you clean a MIG welder?
Clean the nozzle, contact tip, and gun after each welding session. Check cables, gas hoses, drive rolls, and fittings before regular use or during long jobs.
What is the fastest way to clean MIG welder spatter?
Use a wire brush or nozzle reamer to remove spatter from the nozzle and tip. Apply anti-spatter before welding if your setup allows it, but still inspect the parts after use.
When should you replace a MIG contact tip?
Replace the contact tip when the hole looks oval, rough, or enlarged. You should also replace it if the arc becomes unstable after you clean the gun and check the wire feed.
Can a dirty liner cause MIG wire feed problems?
Yes, debris inside the liner can slow or block wire movement. A clogged or worn liner can also increase burnback, birdnesting, and uneven feeding.
Should you use compressed air inside a MIG welder?
You can use controlled compressed air to clear dust from the feeder area and liner. Keep the welder unplugged, wear eye protection, and avoid forcing debris into sensitive parts.
Conclusion
Clean MIG welder parts help the arc stay steady, the wire feed smoothly, and the shielding gas protect the weld. Start with the nozzle, contact tip, diffuser, liner, cables, drive rolls, and gas hose.
Replace worn consumables before they cause defects or downtime. Build the same quick checks into every welding session, and your welder will stay safer, cleaner, and easier to control.


