A bend test can show weld problems that a normal surface check may miss. It bends the welded specimen under controlled force so you can judge weld soundness, ductility, cracks, fusion, and overall quality. To perform a bend test on your welds, inspect and clean the specimen, prepare the edges, secure it in a guided bend test jig, and bend it to the required angle. After bending, check the surface for cracks or defects, especially any opening larger than 1/8 inch when your test code uses that limit.
Quick Answer
To bend test a weld, prepare a clean test coupon, round sharp edges, and place it in a guided bend jig. Bend the specimen to the required angle, often 180 degrees, then inspect the stretched surface for cracks, lack of fusion, porosity, or tearing. Your weld passes only if the visible defects stay within the limits set by your welding code or test procedure.
Key Takeaways
- Clean and inspect the weld specimen before testing so surface defects don’t distort your result.
- Use the correct guided bend jig because freehand bending can create unreliable results.
- Check the applicable welding code before you decide whether a crack size passes or fails.
- Look for cracks, lack of fusion, incomplete penetration, porosity, and poor ductility after bending.
- Document each defect with its location and size so you can improve your welding procedure.
Preparing Your Weld Specimen for a Successful Bend Test
Start with a full visual inspection. Look for surface defects, rough edges, undercut, overlap, or irregular weld shape that could affect your test results.
Next, clean the weld surface to remove dirt, oil, slag, paint, and oxidation. Smooth rough edges so the specimen bends evenly during the test.
Confirm that the edges have a rounded radius that matches your test procedure. A radius up to 3mm often helps reduce stress concentration, but you should follow the code or specification for your material.
Also check that your preparation aligns with the maximum fillet weld size requirements for the joint you want to qualify. Follow the filler metal and base material rules, which may include heat treatment, thickness limits, or special handling.
Careful preparation gives you a fair test. It also helps you avoid blaming the weld when poor specimen prep caused the failure.
Products Worth Considering

[DEBURRING TOOL KIT] Includes 11 BS1010 blades made of M2 High-Speed Steel (HSS). Each blade is tempered to HRC 62–67 for industrial-grade wear resistance. These M2 blades maintain a sharp cutting edge up to 80% longer than standard carbon steel when processing stainless steel, aluminum, and hard metals.
Complete Depth Gauge with Pipe Deburring Tool Kit: The tubing chamfer tool set includes 1 deburring tools and 1 depth gauge tool, offering everything you need for smooth pipe preparation. Ideal for copper, PEX, CPVC, and PERT pipes, it’s perfect for both domestic and plumbing applications

SKU#515-0626
Before You Begin the Bend Test
Check your Welding Procedure Specification (WPS), test standard, and acceptance criteria before you start. Different codes can use different specimen sizes, bend types, mandrel sizes, and defect limits.
You should also confirm the test orientation. A face bend, root bend, or side bend can reveal different weld problems.
- Use a clean, properly cut weld specimen.
- Use a guided bend jig or approved bend test machine.
- Wear eye protection, gloves, and other required personal protective equipment.
- Keep measuring tools ready for crack length, width, and depth.
- Record the specimen ID, material, welding process, and test direction.
Warning: Bend testing can release stored force, so keep your hands clear of pinch points and follow your machine safety rules.
How to Conduct a Bend Test: A Simple Step-by-Step Guide
Plan enough time to prepare, bend, inspect, and document the specimen. A simple shop test may take about 15 to 30 minutes after the specimen has been cut and cleaned.
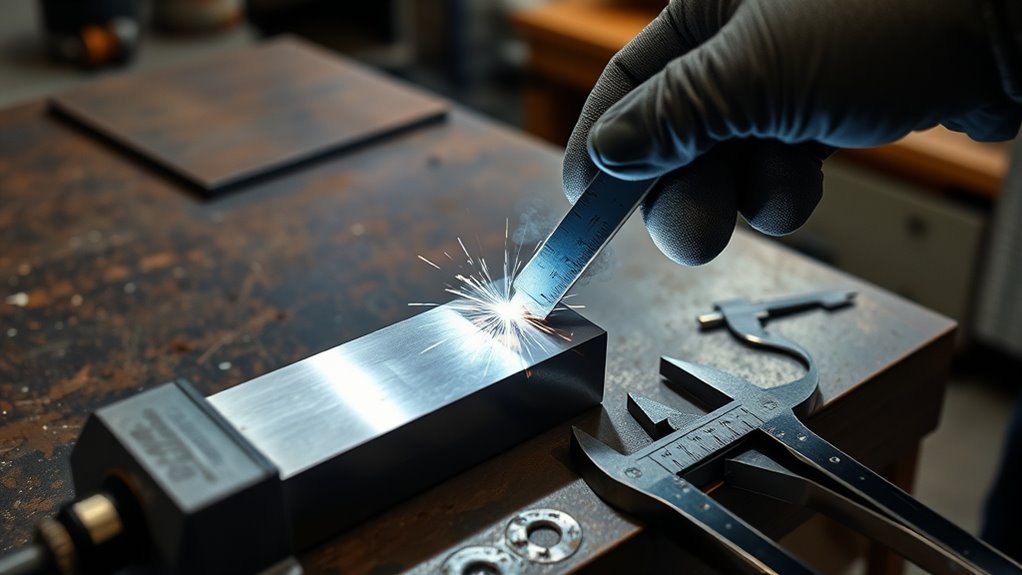
- Confirm the specimen requirements. Check the required thickness, width, edge radius, bend direction, and acceptance limits from your test procedure.
- Inspect and clean the specimen. Remove slag, oil, paint, and sharp burrs before you place the specimen in the jig.
- Select the correct bend jig. Use a guided bend test jig or machine, such as a wraparound or plunger-type bender.
- Position the specimen securely. Place the weld in the correct orientation for a face, root, or side bend.
- Apply steady force. Bend the specimen to the required angle, often 180 degrees, without sudden impact.
- Inspect the bent surface. Look for cracks, tearing, lack of fusion, incomplete penetration, and other open defects.
- Measure and record defects. Note each flaw, its size, its location, and whether it meets your acceptance criteria.
Select an appropriate guided bend test jig to apply controlled forces, ensuring your specimen is securely positioned for accurate results.
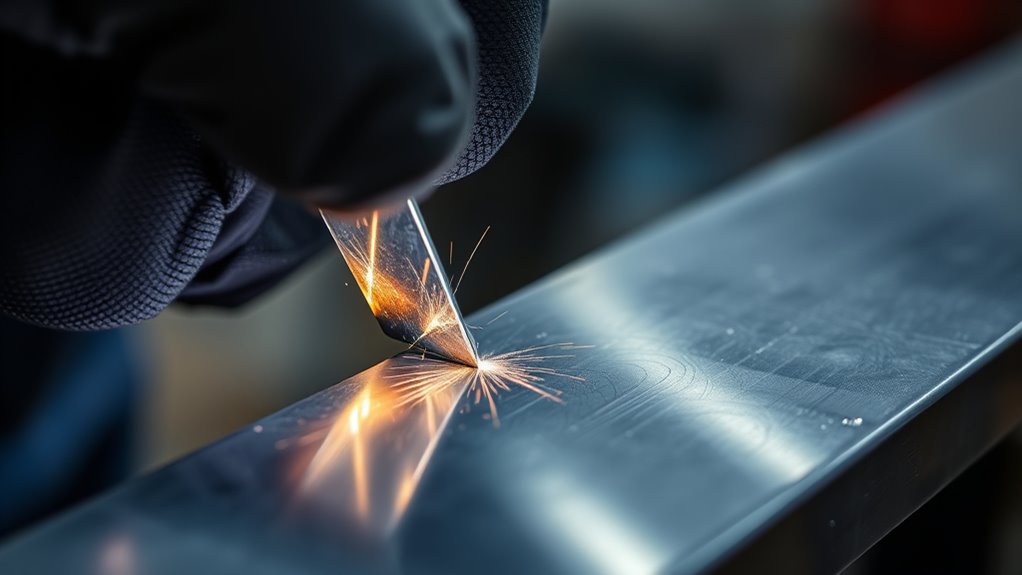
After bending, perform a careful visual inspection for cracks or defects. Many weld qualification tests use 1/8 inch as a common surface crack limit, but your exact pass or fail rule must come from the governing code.
This assessment helps you evaluate the ductility and soundness of the weld. It also helps reveal whether porosity can compromise weld integrity.
Document your findings in detail. Good records help you judge the weld procedure, improve your technique, and support compliance with quality standards.
Why Bend Testing Is Crucial for Weld Quality?
Strong welds need more than a clean surface. Bend testing helps you judge whether a welded joint can stretch and bend without opening up.
This mechanical test checks the ductility and soundness of welded joints. It can reveal internal defects, such as lack of fusion, incomplete penetration, and cracks, that may not appear during a basic visual inspection.
Codes such as ASME Section IX, AWS welding standards, and ISO welder qualification standards often use bend testing for procedure or welder qualification. The exact rule depends on the material, joint type, and code that governs your work.
A successful bend test suggests that the weld can handle bending strain without unacceptable failure. Regular bend tests also support consistent production quality and safer welded structures.
Good welding settings matter before you ever reach the test bench. Understanding stick welding amperage can help you improve fusion, reduce defects, and build more reliable joints.
How to Interpret Results: Defects to Look For
When you interpret bend test results, focus on common defects like cracks, lack of fusion, incomplete penetration, and porosity. Check the stretched face of the bend because that area shows the most strain.
Measure any crack that approaches the limit in your test procedure. Also assess the overall ductility by looking at elongation, necking, and tearing in the weld area.
A thorough review helps you judge the weld’s integrity under stress. You should also confirm that the welding setup had proper gas coverage because poor shielding can lead to porosity.
Common Defects Observed
During a bend test, inspect for cracks on the outer surface of the bent specimen. Cracks beyond the allowed limit usually show poor ductility, poor fusion, or a welding procedure issue.
Watch for lack of root fusion, where the weld fails to fully join with the base material at the root. This defect can weaken the joint and often appears during root bend testing.
Also look for signs of porosity, which appear as small holes or voids. Porosity can come from contamination, poor shielding gas coverage, moisture, or poor welding technique.
Excessive deformation, tearing, or uneven bending can point to poor ductility or wrong welding parameters. Record every defect so you can trace the cause and improve the next weld.
Measuring Crack Dimensions
A careful check of crack dimensions helps you judge the welded joint after the bend test. Start with a visual inspection under good lighting.
When you find a crack, measure its dimensions, including length, width, and depth when possible. Use suitable measuring tools and record the results clearly.
Compare each measurement with your test code or project specification. Common failure points include lack of root fusion, incomplete penetration, and defects near the weld toe.
Evaluating Material Ductility
Ductility means the material can stretch before it breaks. A sound weld should bend without wide cracks, tearing, or brittle failure.
During your visual inspection, watch for cracks that exceed the allowed size. Larger defects can suggest inadequate ductility in the welded specimen.
Face, root, and side bends each show different parts of the weld. Using the correct orientation gives you a more complete view of weld integrity.
Essential Tips for Passing Your Weld Bend Test
To pass your weld bend test, follow the Welding Procedure Specification (WPS) closely. Control important settings such as voltage, amperage, travel speed, heat input, and shielding gas flow.
Before the bend test, inspect your weld for surface flaws, undercut, overlap, excessive reinforcement, and contamination. Clean the metal well because dirty surfaces can cause porosity, poor fusion, and weak welds.
Round sharp corners of the specimen to the required radius before testing. This step helps reduce stress concentration during bending.
Keep your travel speed and heat input consistent during welding. Uniform welding technique helps create more even properties across the weld and heat-affected zone.
Also make sure the metal is properly cleaned before welding. Use a reliable testing machine, such as a Hydraulic Wrap-Around Bender, to improve repeatability and accuracy.
Pro tip: Run a practice coupon with the same settings before the official test so you can catch problems early.
Common Mistakes to Avoid When Preparing for a Bend Test
Small preparation mistakes can ruin a bend test. The most common problems include wrong specimen size, poor edge preparation, dirty metal, and missing documentation.
Make sure your specimens match the required dimensions. Also keep the edge radius within the limit set by your procedure or code.
Maintaining proper arc length during welding can also improve weld quality before testing. Poor arc control can create defects that show up during the bend test.
Specimen Size Errors
Wrong specimen dimensions can lead to unreliable bend test results. Confirm the required thickness, width, length, and bend orientation before cutting the coupon.
A specimen cut too small may fail for reasons unrelated to weld quality. A specimen cut too large may not fit the jig or bend correctly.
Also check for sharp corners. Rounded edges help prevent stress concentrations that can skew the result.
Follow the specific bending conditions in the applicable welding standard or project procedure. Before testing, inspect the sample for surface defects that could weaken the bend.
Improper Edge Radius
An improper edge radius can create false failures. Sharp edges concentrate stress and may crack before the weld has a fair chance to bend.
Always verify that your specimen dimensions meet the required standard. Different alloys and welding codes may set unique edge radius requirements.
Inspect and calibrate your cutting and grinding tools often. Consistent edge preparation helps you produce reliable bend test results.
What to Do If Your Weld Fails a Bend Test
A failed bend test gives you useful feedback. Don’t only mark the result as failed, trace the defect back to its likely cause.
If you see lack of fusion, review amperage, travel speed, joint preparation, and electrode angle. If you see porosity, check surface cleaning, shielding gas coverage, moisture, and gas flow rate.
Run another practice weld after you adjust the likely cause. Keep notes on each change so you can see what improves the result.
Frequently Asked Questions
How to Do a Weld Bend Test?
To perform a weld bend test, prepare and clean your specimen, secure it in a guided bend jig, and bend it to the required angle. Inspect the bent surface for cracks, lack of fusion, porosity, or tearing, then compare the defects with your test standard.
How to Perform a Bending Test?
To perform a bending test, use the correct test equipment, specimen size, and bend radius for your material. Apply steady force, follow safety rules, and document the result with clear defect measurements.
What Is the Bend Test for Welded Joints?
The bend test for welded joints checks weld quality by bending a prepared specimen under controlled conditions. It helps you judge ductility, fusion, penetration, and resistance to cracking.
What Are the Three Types of Bend Tests?
The three common bend tests are face bend, root bend, and side bend tests. Each one stresses a different part of the weld so you can identify defects in the weld face, weld root, or full weld thickness.
Does a Small Crack Mean the Weld Failed?
A small crack does not always mean automatic failure. You must compare its size and location with the acceptance rules in your welding code, procedure, or project specification.
Conclusion
A bend test helps you confirm whether your weld has enough ductility and soundness to handle bending stress. Prepare the specimen carefully, use the correct jig, and judge defects against the right standard.
Your next step is to review your Welding Procedure Specification before you test the next coupon. With clean preparation, steady technique, and clear records, each bend test can help you build stronger and more reliable welds.


